
Lightroom Mobile is the perfect app if you want to edit your RAW images while on the go. It can easily manage your library of RAW files imported from your computer or capture them directly in the Lightroom Camera. Although Lightroom Mobile can work with RAW files, the means of actually getting them into the app may be confusing. Luckily there are a few easy ways to get access to your RAW files in Lightroom Mobile.
Can Lightroom Mobile Edit RAW Files?
Yes, Lightroom Mobile can import and edit RAW and DNG files in the app. However, since many mobile devices cannot store RAW files directly, you may need to upload your RAW files to cloud storage and choose to Import From Files in Lightroom Mobile.
Once your images are imported into Lightroom, the editing process is the same as any other file type. Simply click on it to access the editing module and begin editing!
Below is a list of compatible file formats in Lightroom & Lightroom Mobile:
- RAW
- DNG
- TIFF
- PNG
- JPEG
- HEIF/HEIC
- PSD/PSB
- CMYK Files
Now that you know that you can work with RAW files in Lightroom Mobile, getting them into the app may be challenging. Luckily there are a few easy ways to do it.
3 Ways To Import RAW Files Into Lightroom Mobile
1. Sync Your Lightroom CC Library
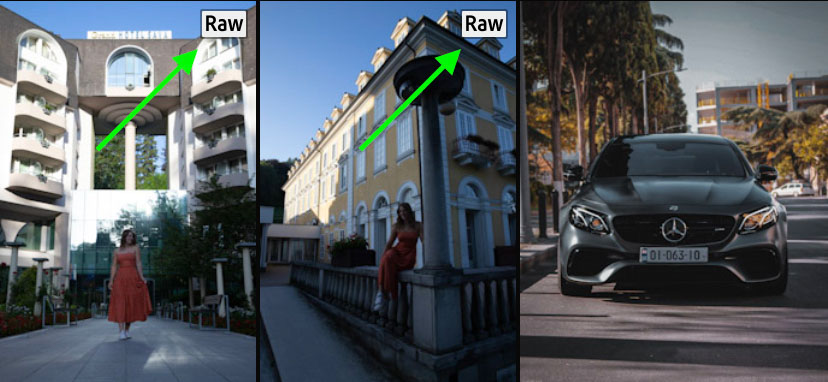
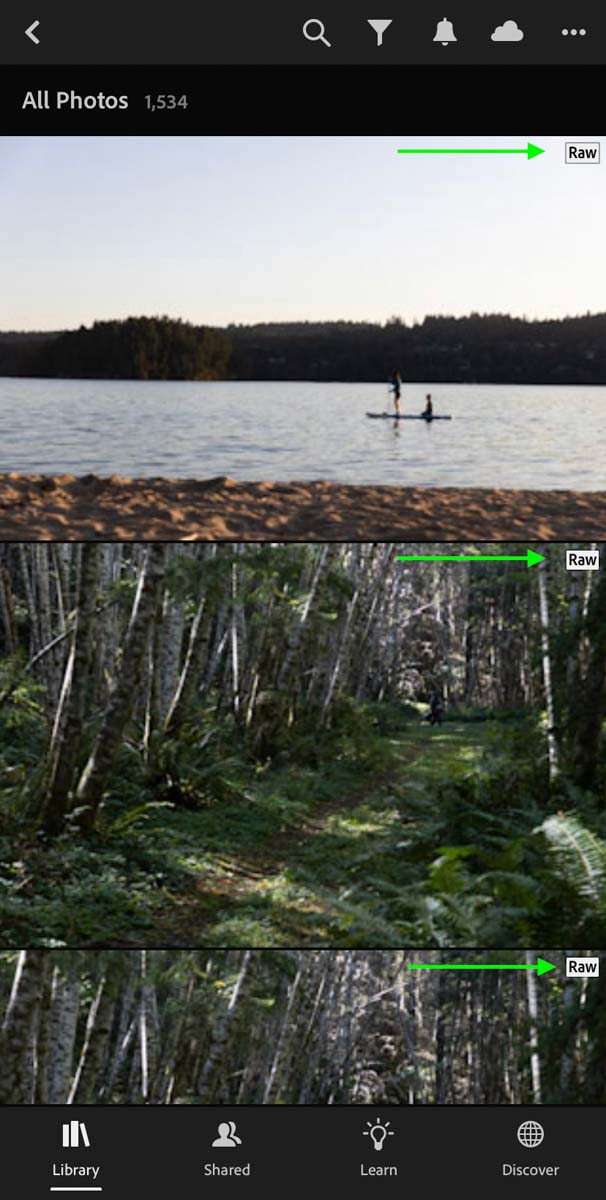
If you are a Creative Cloud subscriber, syncing your library between Lightroom CC and Lightroom Mobile is the easiest option. All you need to do is upload to your computer, then wait for them to sync over to Lightroom Mobile. Once a file is synced, you will see a “RAW” icon in the upper corner of any RAW file in your Lightroom Mobile library.
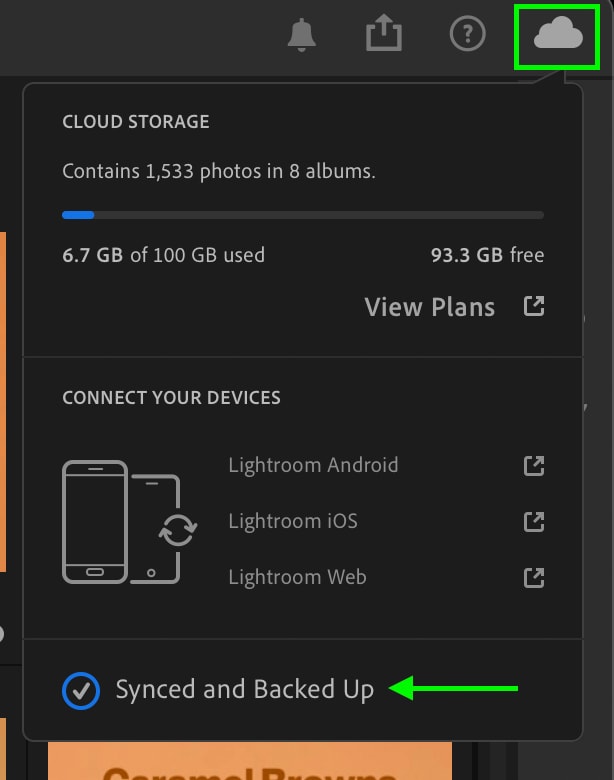
Your libraries should sync automatically once a new file is uploaded. However, you can double-check this by clicking on the cloud icon in the upper corner. If everything is good to go, you will see “Synced and Backed Up.” If not, there will be an option here to enable syncing manually.
With this method, all of your RAW files are uploaded to your cloud storage with Adobe. This storage is how Lightroom CC and Lightroom Mobile can perfectly mirror each other. The issue, however, is that you are limited to a certain amount of cloud storage. Depending on your plan, you may have as little as 10GB, which will quickly fill up with large RAW files. So if you intend to use this method regularly, be sure to upgrade your cloud storage.
2. Import RAW Images From Files On Your Mobile Device
If you don’t want to pay more for cloud storage or aren’t a Creative Cloud subscriber, you can use this method to import RAW files. Using a cloud storage provider such as Google Drive or Dropbox, you can access your RAW files from your phone to add to Lightroom Mobile.
First, you need to upload your photos to your cloud storage provider of choice. In my case, I will upload a few RAW images to Dropbox.
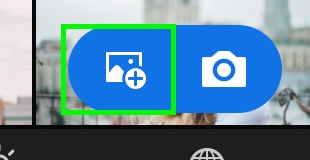
Then in Lightroom Mobile, I will import my files by clicking the add image icon and selecting “Import From Files.”
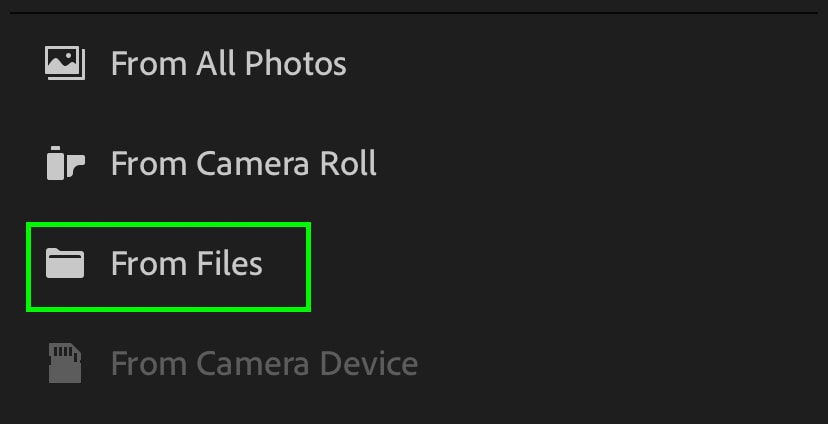
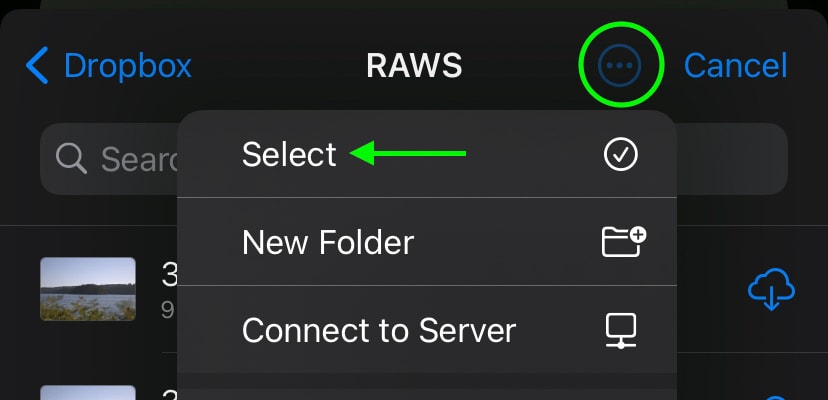
Here you can locate the app that you have your images stored and navigate to your image folder. It’s worth noting that you will need to have your cloud storage app imported on your phone for this to work. In this case, I have already downloaded Dropbox on my phone and signed in.
After locating your files, click on the three dots icon and choose “Select.” Now you can click between all of the RAW files you want to use in Lightroom Mobile.
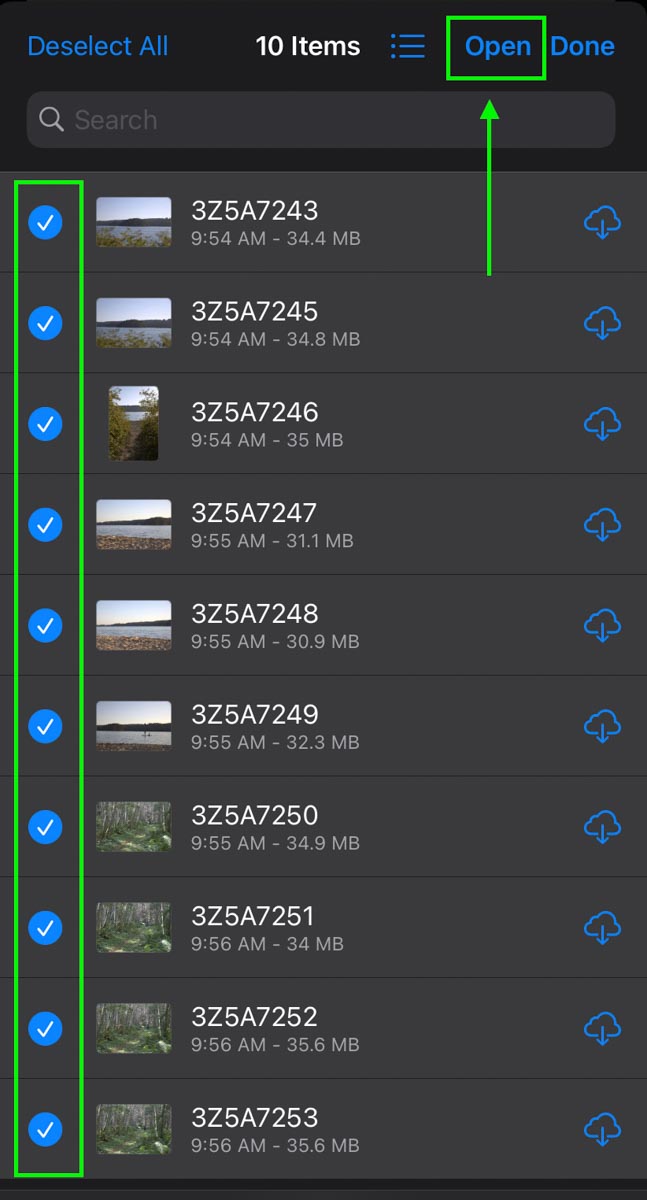
Clicking “Import,” all of your RAW files will now be added to your Lightroom Mobile library. These images will automatically sync with Lightroom CC if you are a Creative Cloud Subscriber. If you are using the free version of Lightroom mobile, this serves as a cheeky workaround to work with RAW images.
3. Capture DNG Photos With Lightroom Camera
Although not technically a RAW file, DNG files are a pretty close equivalent, and you can capture them inside of Lightroom Mobile! This way, you don’t have to import anything. Instead, you can just take photos and start editing!
A DNG file is a generic version of a RAW file that more devices can easily read. It still leaves your image uncompressed, so there’s more file information to work with while editing. Better yet, since it’s a generic format, any phone can capture it.
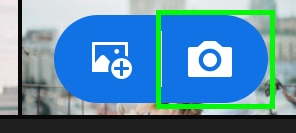
To access Lightroom Camera, click on the camera icon in the bottom corner.
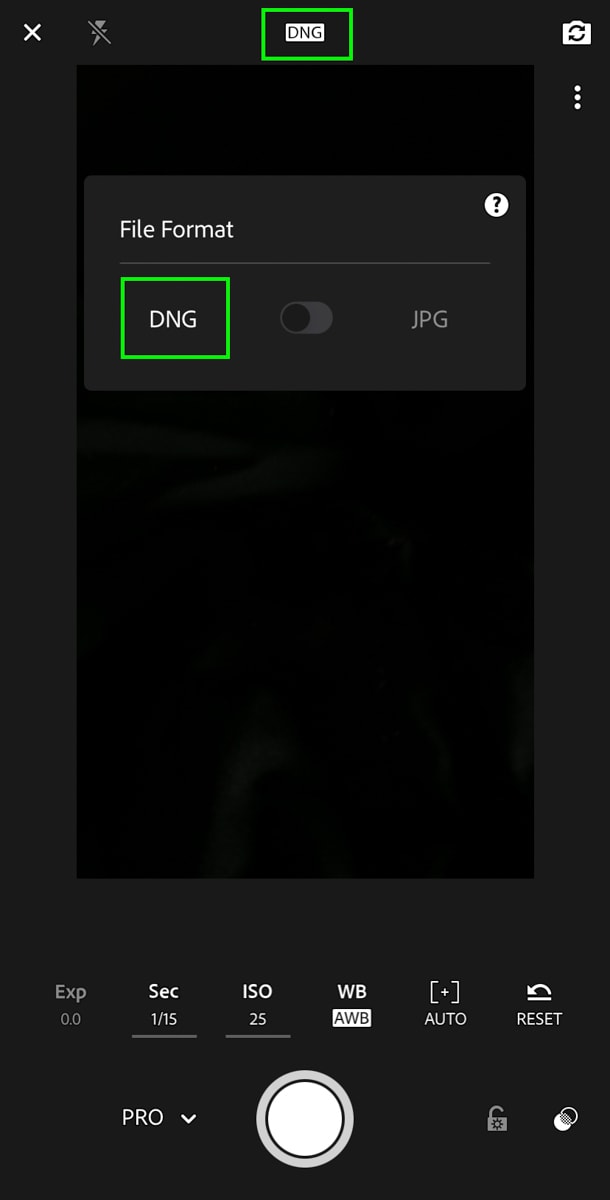
In the format option, set the file type to DNG.
Now you can begin capturing images from your phone that will automatically save as DNG files in the Lightroom Mobile library. I explain more on how to use the Lightroom Camera in this post.
Although this isn’t the same as a RAW file from your camera, it’s a great feature to know about while you’re capturing photos. At least it will save you the hassle of importing!
After all of your RAW files are imported in Lightroom Mobile, you can begin editing them as you would with any other photo. The difference, however, is that you gain more control and versatility while editing the RAW files. To help you master all of the editing tools available in Lightroom Mobile, check out this complete guide to using Lightroom Mobile.
Happy Editing,
Brendan 🙂


