
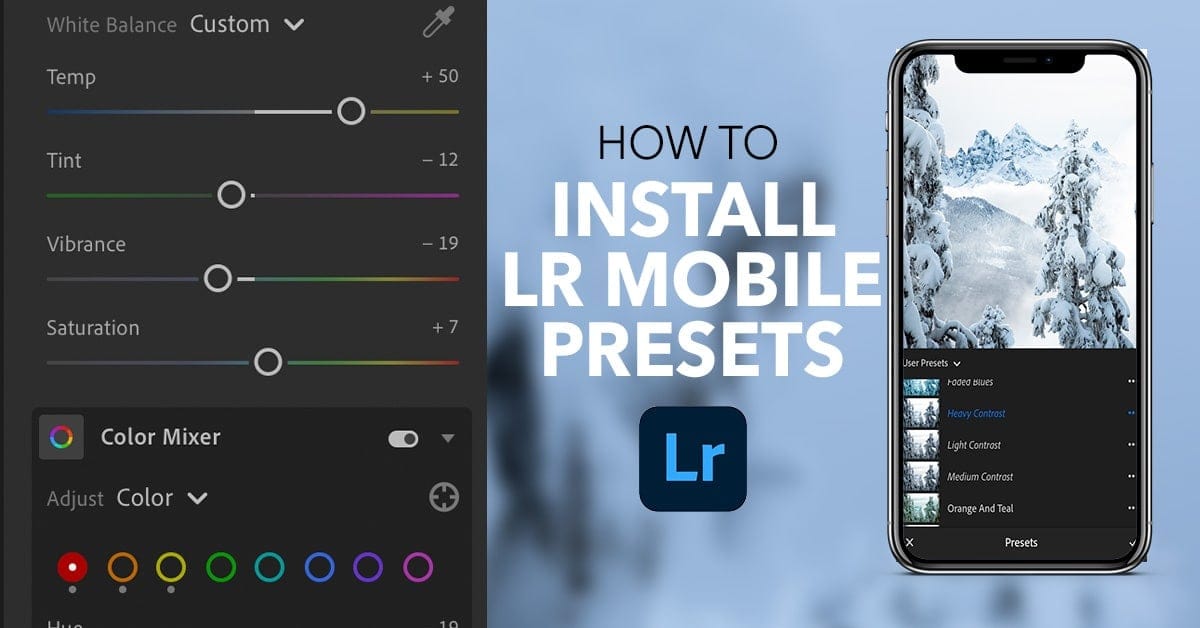

Presets are a great way to speed up your workflow. However, if you often edit photos on your phone, you will need to know how to install presets in Lightroom mobile. Once you have a library of presets, you can edit and upload images quickly.
To start things off, let’s first discuss how to install Lightroom Presets without a desktop. Afterward, we’ll discuss a slightly easier option if you have already subscribed to the Creative Cloud and have a few presets you want to sync between Lightroom CC and Mobile.
Video Tutorial
How To Install Presets In Lightroom Mobile
Step 1: Unzip Your Preset File Using iZip (Optional)
If you’ve purchased a preset pack, it will be in a ZIP file. On some mobile devices, you cannot unzip files without an app. Luckily there are a few great free apps for both iOS and Android.
I recommend using iZip, a completely free app that allows you to save the extracted presets to a specific location. You can download iZip for both iOS and Android here.

Note: This method is best if you’re only using the free version of Lightroom Mobile and don’t have access to the desktop app.
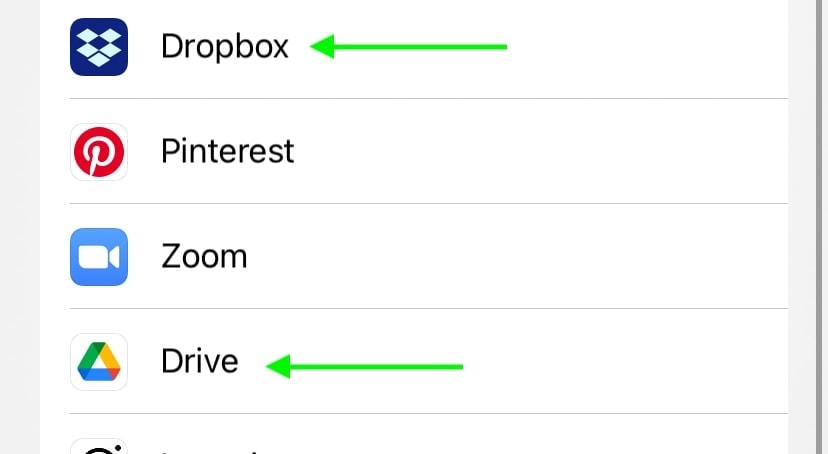
After you unzip your file, you’ll have access to all the DNG files inside. Since most people can’t directly save these to the camera roll, you’ll need to use a cloud storage option. There are several free options out there, but the ones I like to use are Dropbox or Google Drive.
Step 2: Open Lightroom Mobile & Import The DNG Files
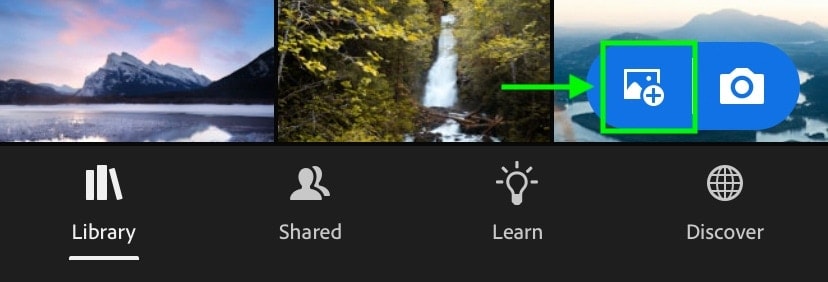
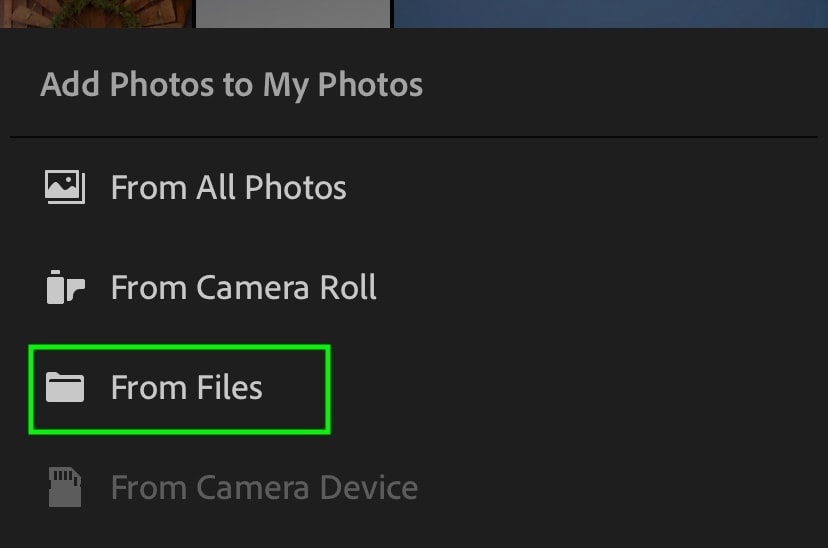
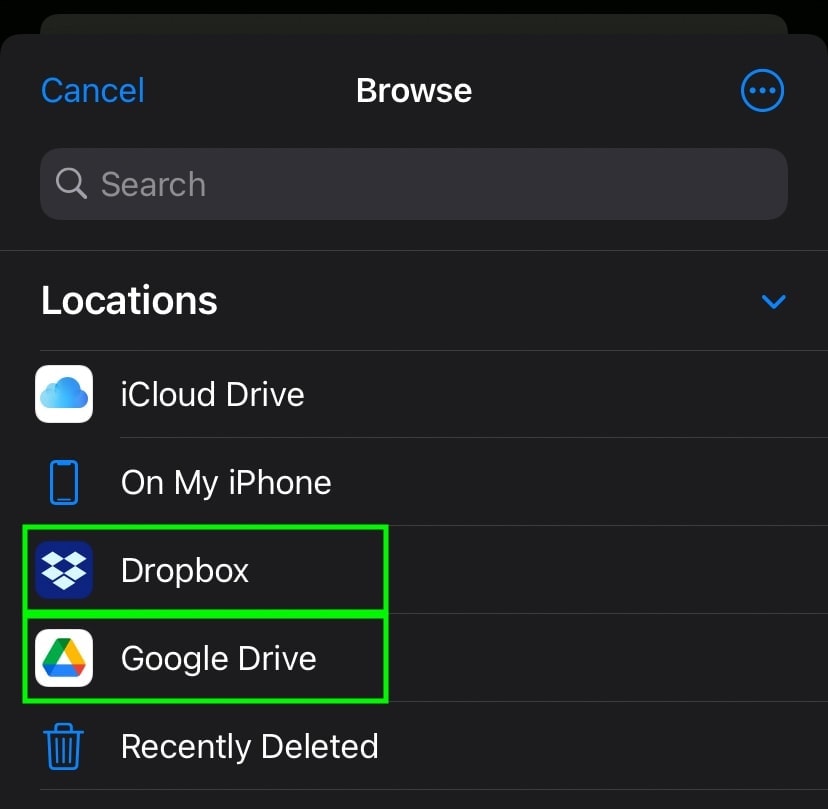
While in the Library Module in Lightroom Mobile, select the Add Photos button. Since the presets are being kept in cloud storage, select the From Files option. This allows you to import photos from locations other than your camera roll.
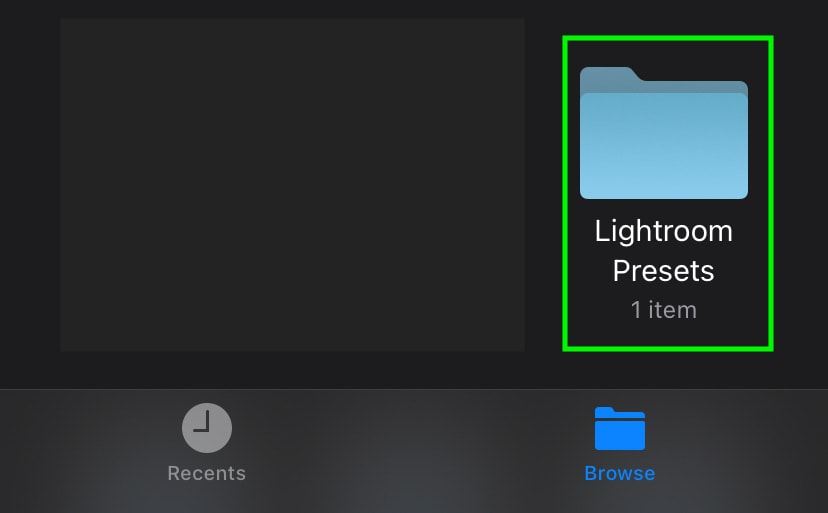
Under the locations tab, select the app you’ve saved your presets to. This will only work if your cloud storage app is installed on your device. Browse through your saved files and locate the folder where you saved the Lightroom Mobile presets.
If you want to import multiple photos, click on the three dots at the top of the window and choose Select. Now, you can import all of your LR Mobile presets at once.

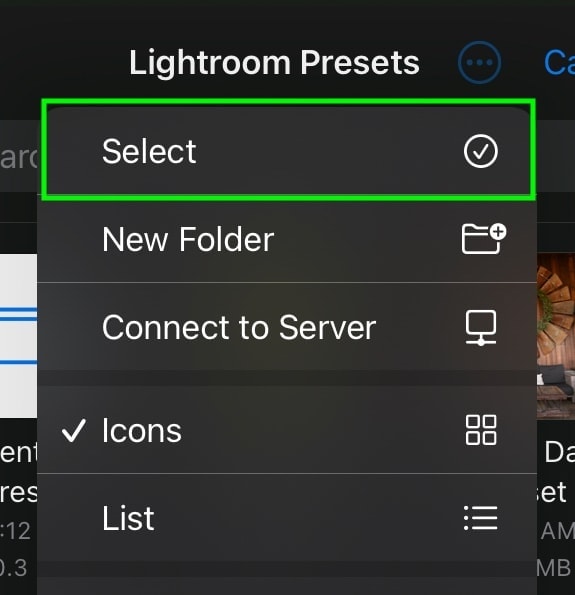
Note: This may vary slightly depending on your device or the cloud storage option you use. However, most smartphones and tablets will provide some way to select multiple presets for import.
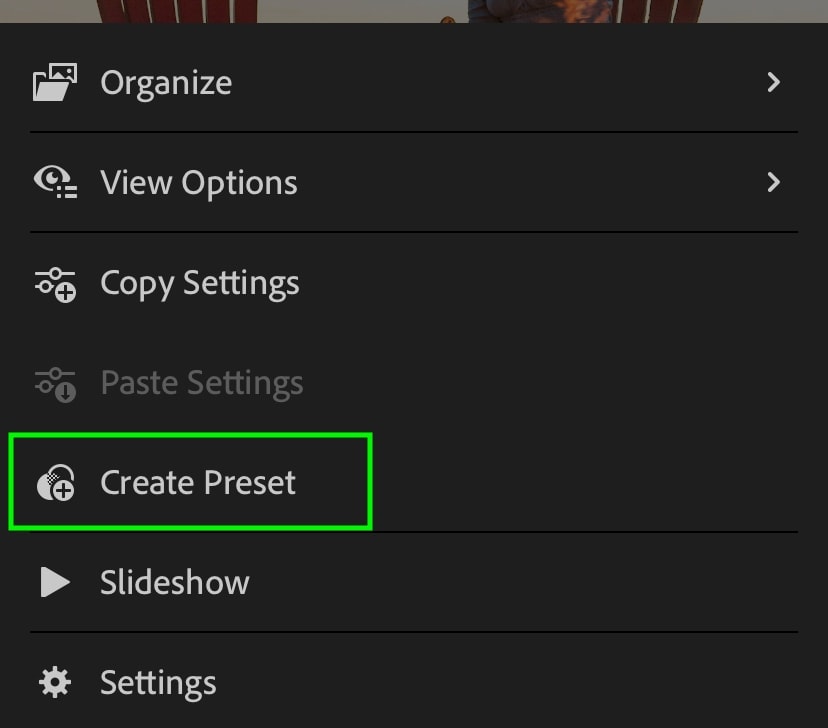
Step 3: Open A Preset Image, Click The Three Dots, And Select Create Preset
With all your preset DNG files imported, select one to open it in the Edit Module.

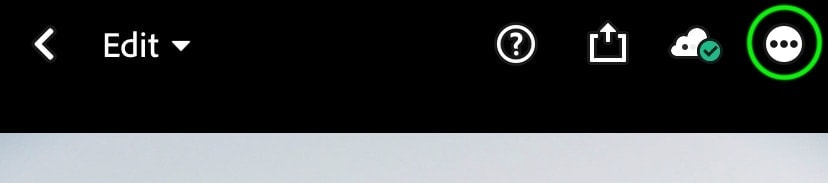
Since the presets will already be applied to these files, you can save these adjustments as a new preset to use later. Looking to the upper right corner, click on the icon with the three dots. In the new window that appears, select Create Preset.
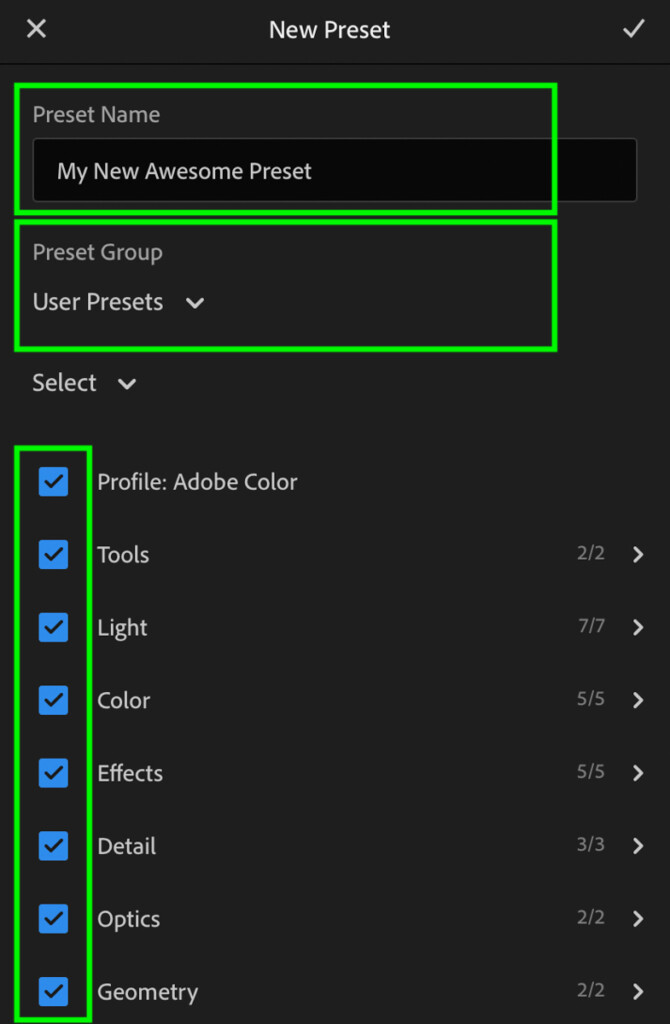
You can create a preset name, select where to group it, and what adjustments you want to include. Once you’re happy, click the checkmark in the upper corner to save your preset.
You’ll have to repeat these steps with all of the DNG presets you want to install.
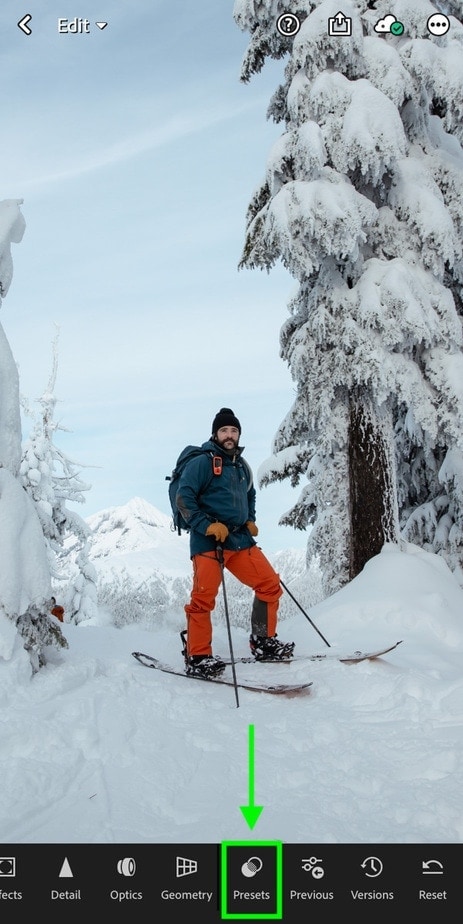
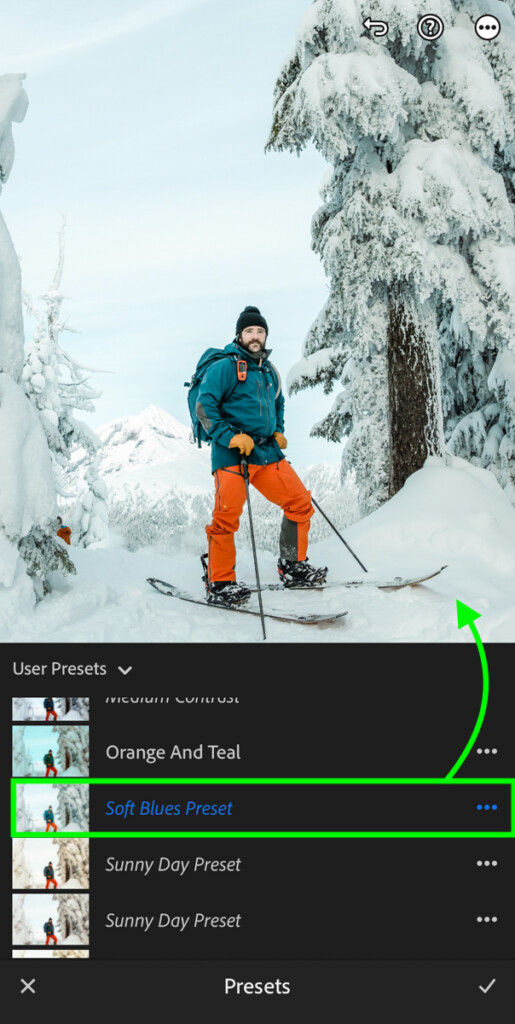
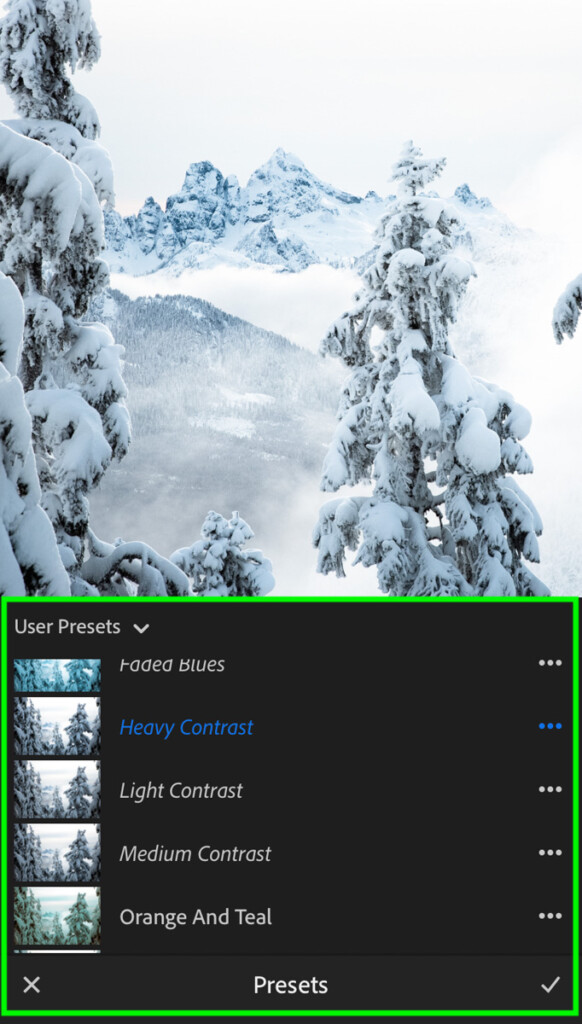
Step 4: Select An Image, Then Go To Presets > User Presets
Now that all your Lightroom Mobile presets are installed, select a photo you want to edit, then click on Presets in the toolbar. Here, you’ll find all your installed presets, including the ones you just saved under User Presets.
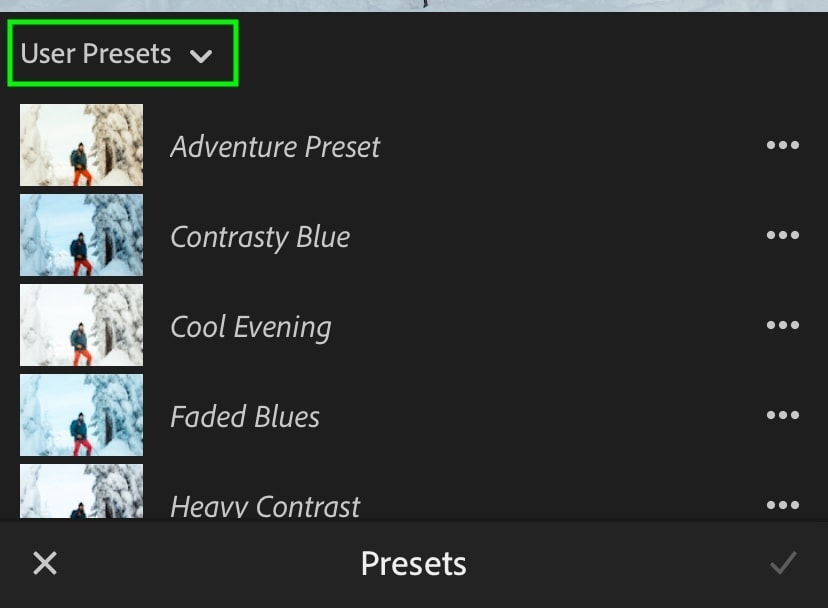
To apply one to a photo, just click on it. Once you’re happy with the preset, hit the checkmark to commit to your changes.
How To Sync Lightroom Mobile With Lightroom Desktop
Step 1: In Lightroom CC, Go To File > Import Profiles & Presets
Note: If you are not subscribed to one of Adobe’s plans, this option will not work for you. With something like the Photography Plan, for example, you get more tools in Lightroom Mobile and access to Lightroom and Photoshop on a desktop.
Once you have new presets on your desktop, open Lightroom and go to File > Import Profiles & Presets.
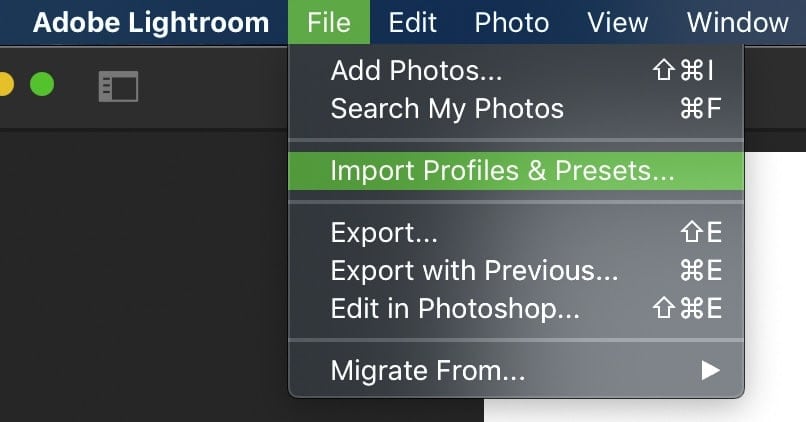
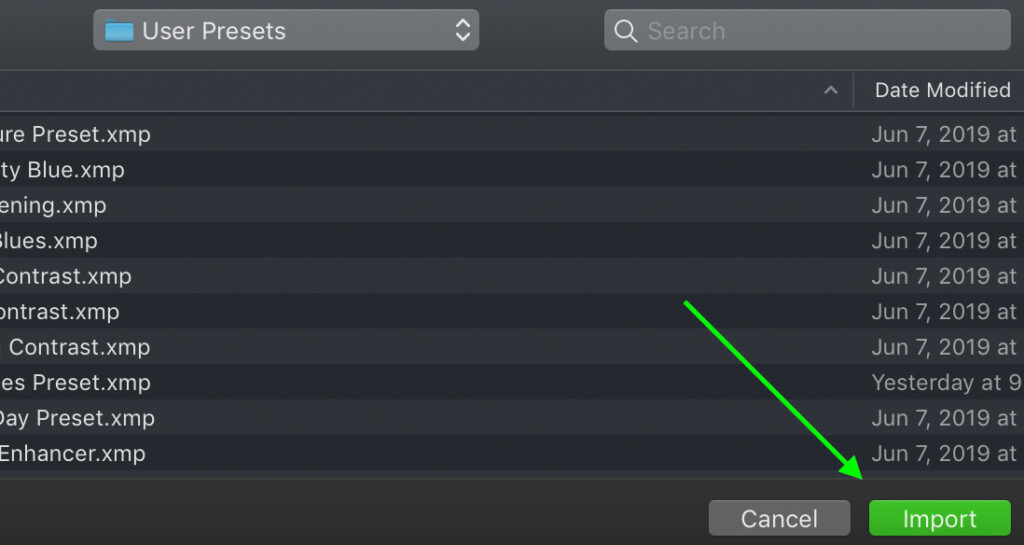
Navigate to the presets saved on your computer and import them into Lightroom CC. When you’re working on the desktop, preset files will be XMP files.
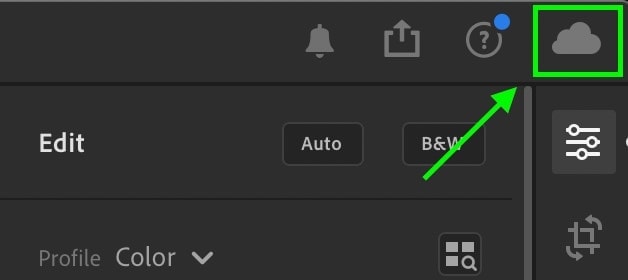
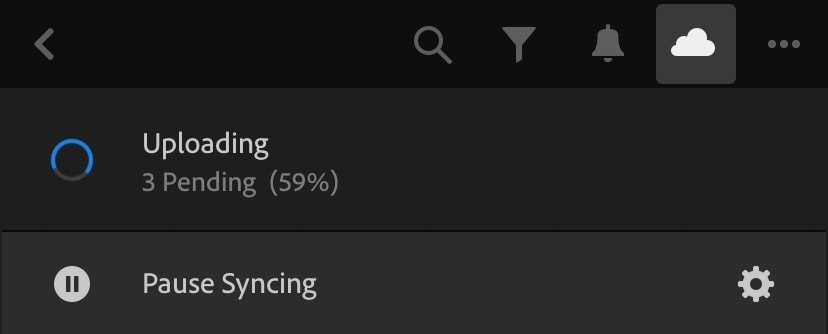
Step 2: Click The Cloud Icon And Enable Syncing
By default, Lightroom CC will sync to other cloud-based Adobe Applications, such as Lightroom Mobile. However, if you had paused it in the past, you’ll want to enable it again. Click on the cloud icon in the upper right corner of Lightroom CC to make sure syncing is enabled.
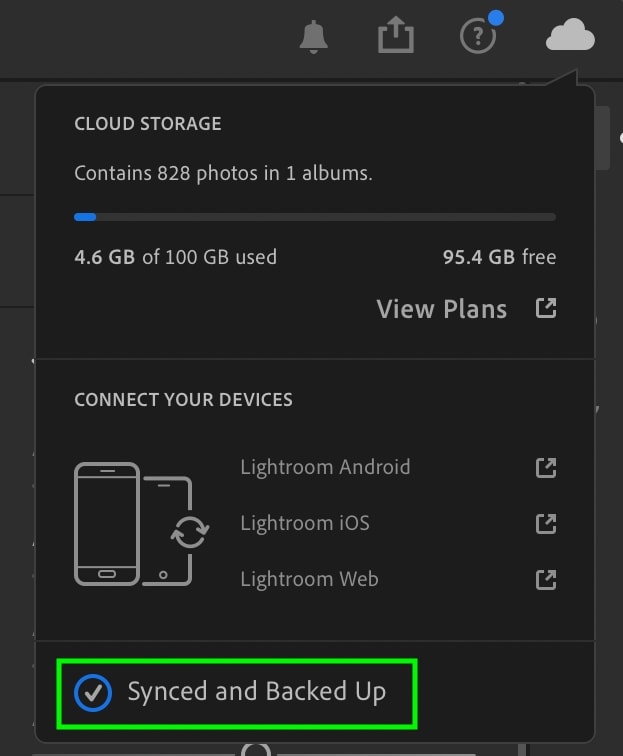
Step 3: Click The Cloud Icon In Lightroom Mobile
Open the Lightroom Mobile app on your phone or tablet. The cloud icon will appear at the top of your screen. Click on it to reveal the syncing options.

After ensuring that Lightroom Mobile has syncing enabled, you can wait for the syncing to finish.
Once it’s complete, all your profiles and presets from Lightroom CC will be saved to Lightroom Mobile and accessible through the presets panel.
Can You Use Lightroom Mobile Presets On Desktop?
By syncing the two apps, you can use any Lightroom Mobile presets in Lightroom CC. Once synced, all your mobile presets will appear on the desktop and can be used right away. This is only available to those subscribed to one of the Adobe Creative Cloud plans that feature Lightroom.
If you’re already subscribed to the Adobe Creative Cloud (with something like the Photography Plan), having the option to sync is convenient. You can explore more of Adobe’s Photo Editing Plans HERE.
Now, if you’re new to editing photos in Lightroom Mobile, make sure to check out my previous tutorial on how to get the orange and teal look to help you get more creative.
Happy Editing,
– Brendan 🙂
