

The Orange And Teal Photo Effect
One of the most popular photo editing effects is the orange and teal look, but how do people make their photos look like that? Without the need for fancy presets or spending any money, you can learn how to add the orange and teal look to your photos, fast, with the help of Lightroom Mobile. This app makes it easy to edit your photos on the go and apply impactful adjustments in less time. With the simple workflow outlined in this tutorial, you’ll be able to get an orange and teal look in your photos in no time.
To get an orange and teal look to your photo, follow these steps:
- Select the “Color” option, then click on the “Mix” tool.
- Change the Hue of the yellow color range to be more orange.
- Increase the Saturation of the orange color range.
- Open the “Grading” tool.
- Change the Shadows to Orange
- Change the Midtones to Yellow
- Shift the Highlights to Cyan
- Your Orange And Teal Effect Is Complete!
Creating this photo effect is super easy to do. With the help of the color mix and grading tools in Lightroom Mobile, you can quickly favor those orange and teal hues. In this post, you’ll learn not only how to apply an orange and teal look to your photos but how to save your work as a preset to speed up the process in the future! Let’s get started.
How To Edit Photos With An Orange And Teal Look In Lightroom Mobile
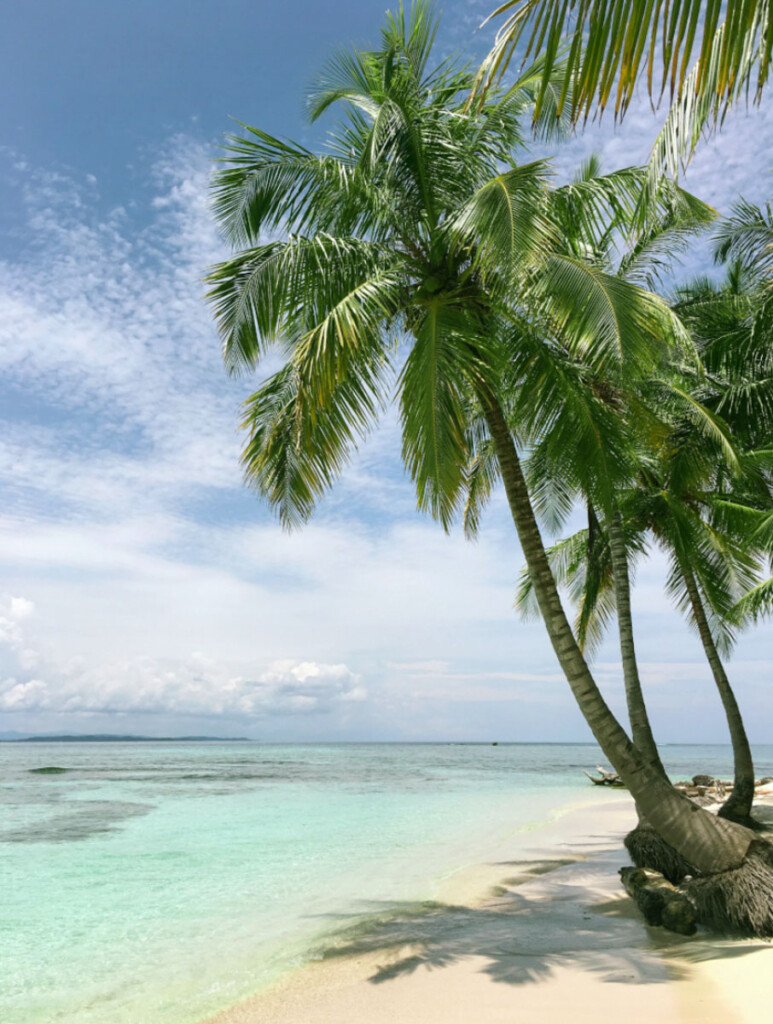
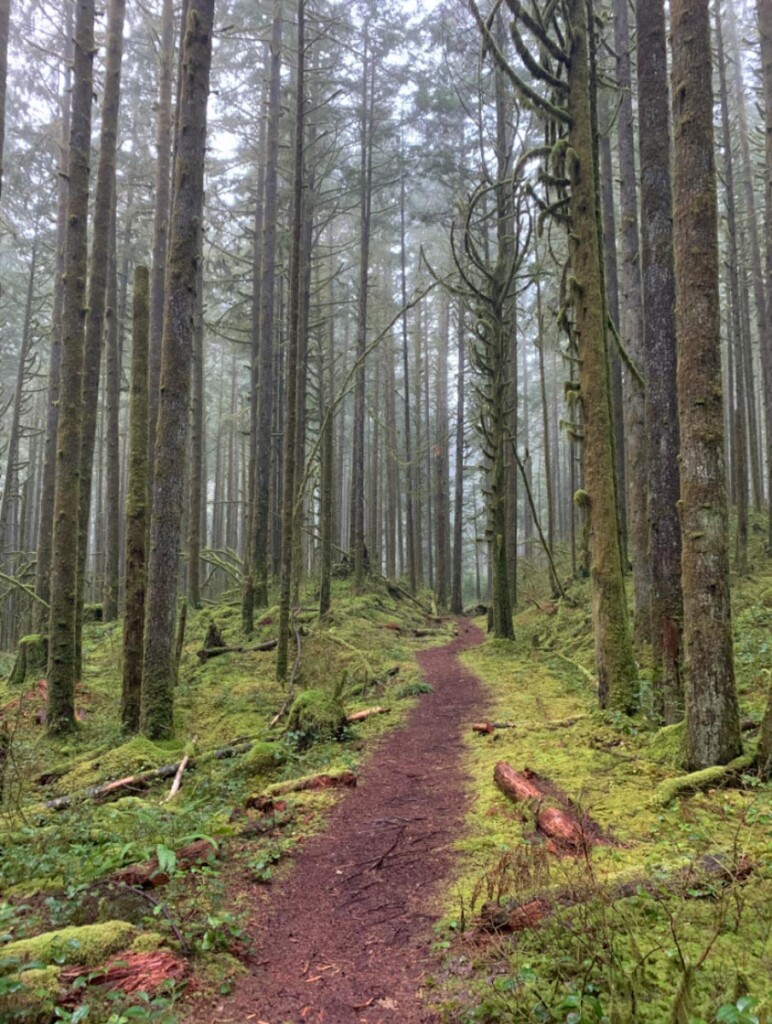
This effect looks best with images that already have significant yellow, green, and blue hues. Since all of these colors can be altered to turn into orange or teal, it’s important you have these colors in your picture.
A photo that wouldn’t work well for this effect would be something like a contrasty photo of green leaves. Since there’s predominantly one color, it would be nearly impossible to get the dueling color tones that you’re looking for.
Instead, make sure your photo has a wider variety of colors to work with. Typically any photo that contains some foreground elements, with the sky visible in the background, will work well for the orange and teal look.
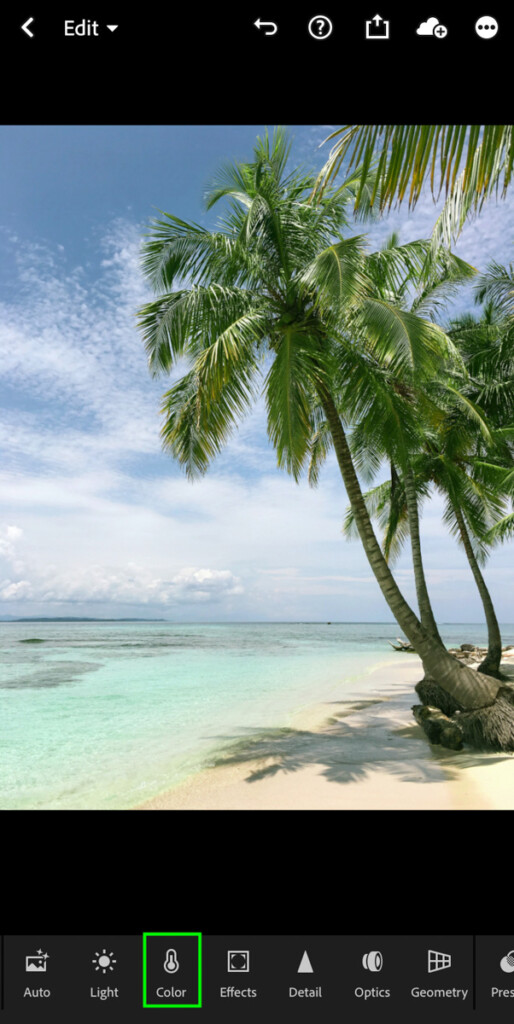
Once you have a photo chosen, go ahead and open it in Lightroom Mobile.
– Accessing Your Color Adjustments
In the Edit module, tap on the “Color” tool to open all of your color-related adjustments.
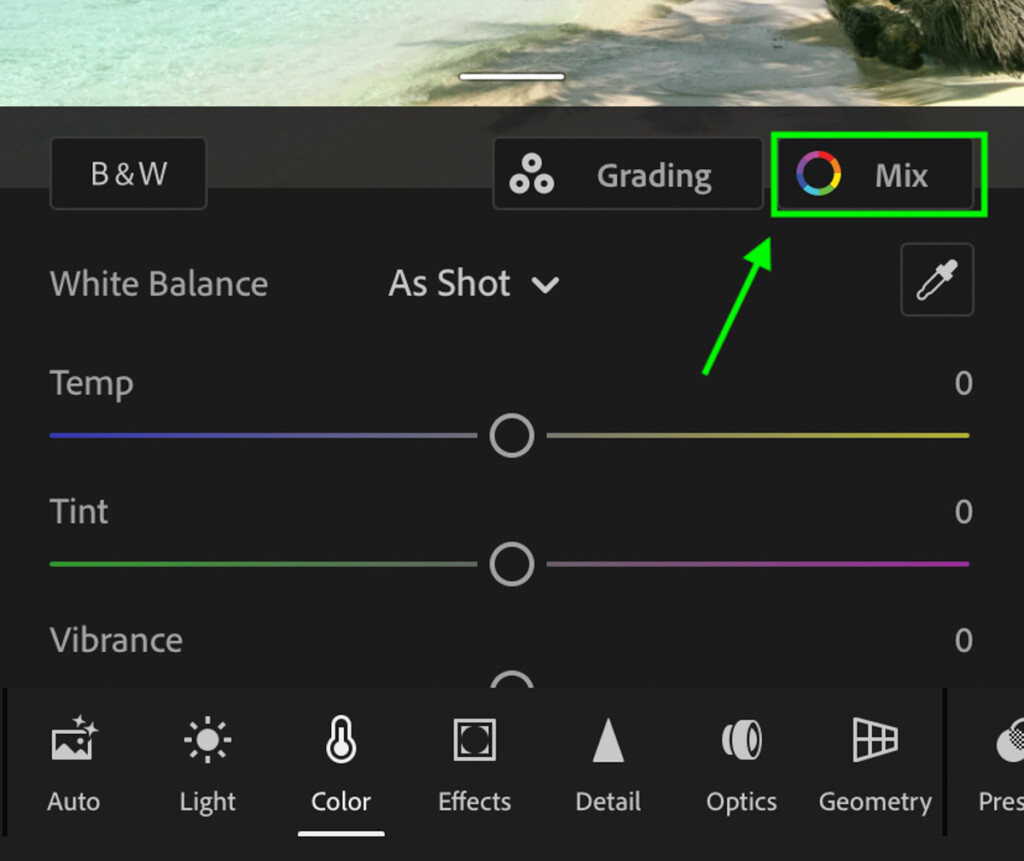
Within this panel, you’ll have access to a variety of basic adjustments such as white balance, tint, and saturation. Since you need something more specific than that, tap on the “Mix” button found in the top right of the color panel.
If you’re familiar with the HSL adjustments found in Lightroom for desktop, then the mix option will be very similar. This tool breaks down all the color ranges in your photo to provide a simple way to change and adjust colors. I share an in-depth guide to this tool and how to change colors in Lightroom mobile in this post.
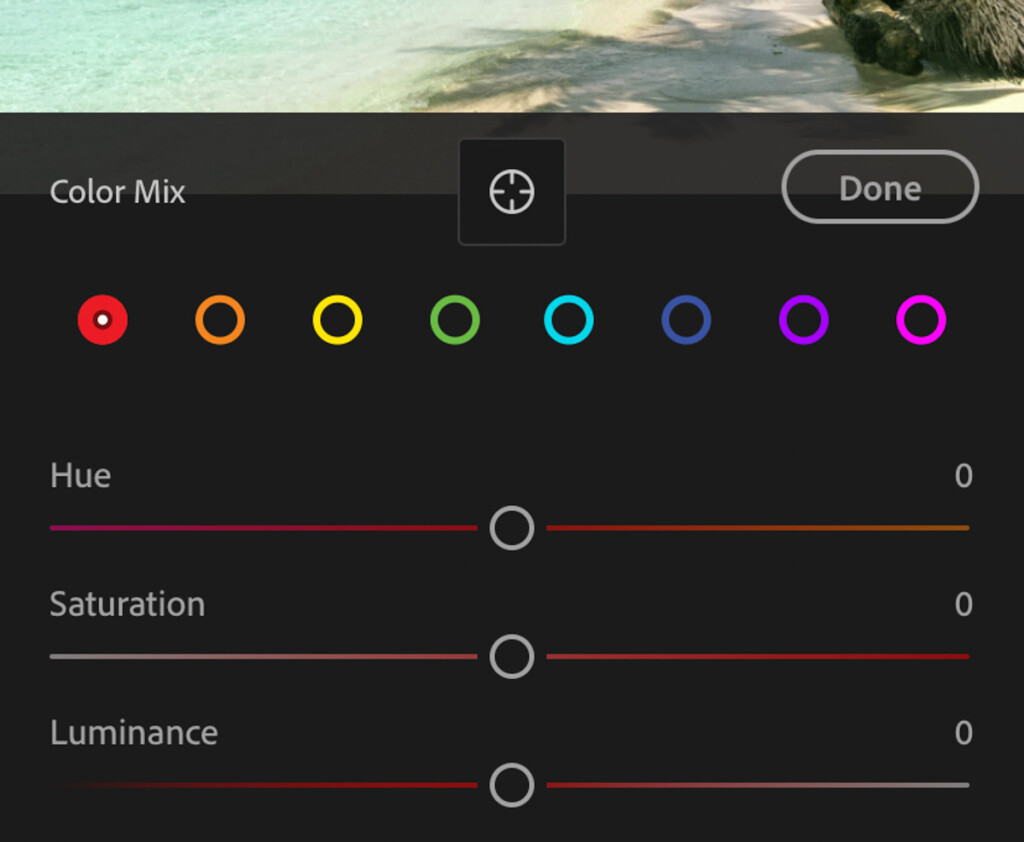
– Using The Color Mix Adjustment
Since you want to apply an orange and teal look, that means you only have to work in a few color ranges. In particular, the orange, yellow, blue, and cyan options.
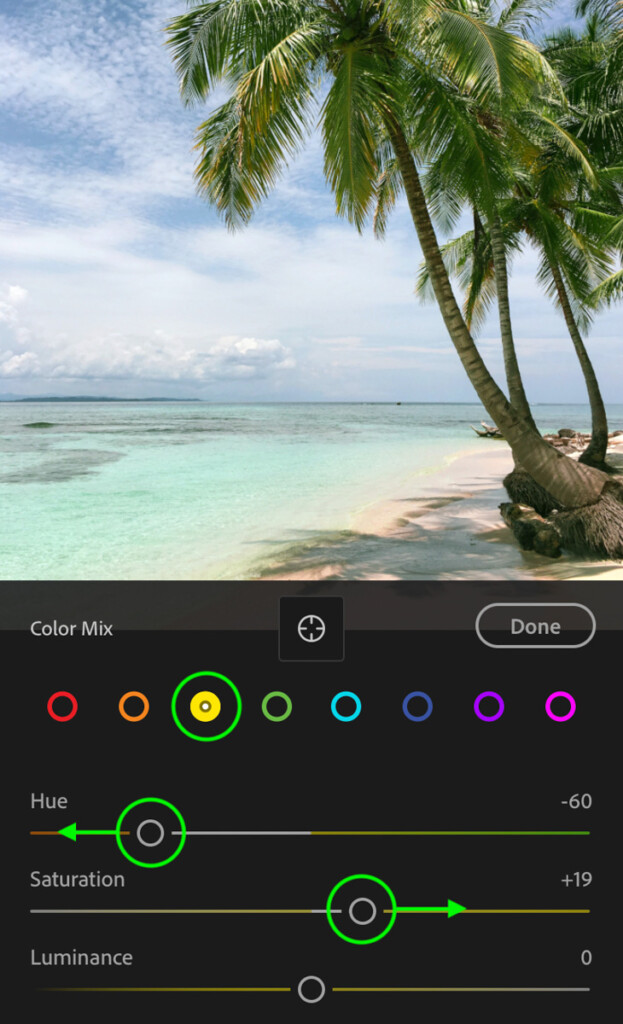
To start, tap on the yellow color range and shift the hue slider to the left. This will change all your yellows to favor a more orange hue.
Then make sure to increase the saturation of your yellows to your liking.
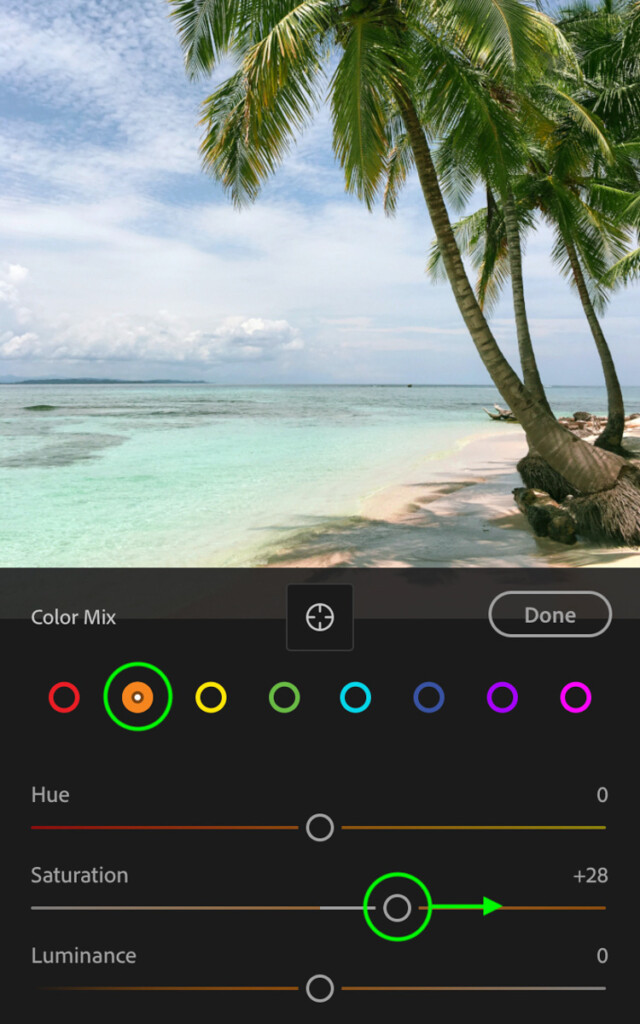
Next, tap on the orange color range and increase the saturation slider. Since orange is already the color you want, you don’t need to alter the hue. However, increasing the saturation will make it pop more in your photo!
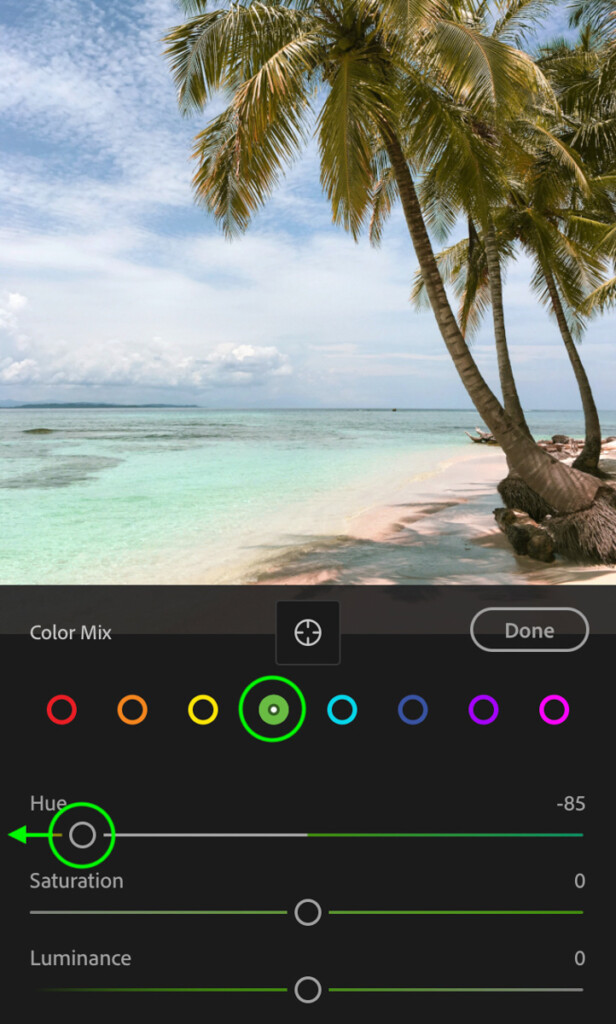
For a final option, you can go into the green color range and shift the hue slider to the left as well. That will change your greens into yellow, which can further enhance the orange appearance.
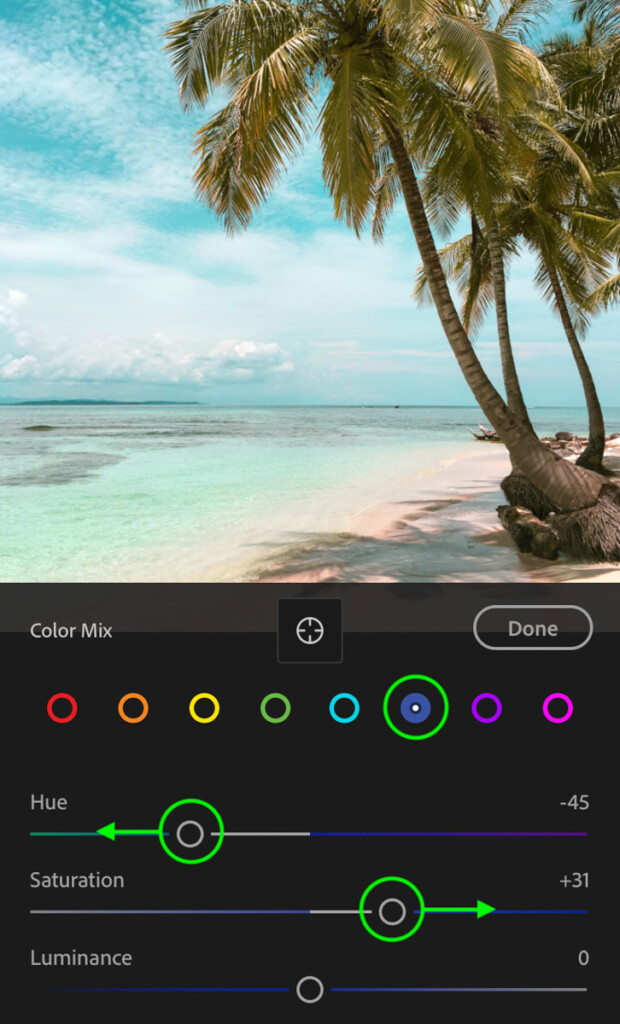
Now that the oranges are taken care of let’s start working with the blues. Tap on the blue color range and shift the hue slider to the left to favor a cyan color. This is the starting point required for getting the teal look in your pictures.
Depending on how strong you want the effect to be, try increasing the blues saturation to make the teal color more noticeable.
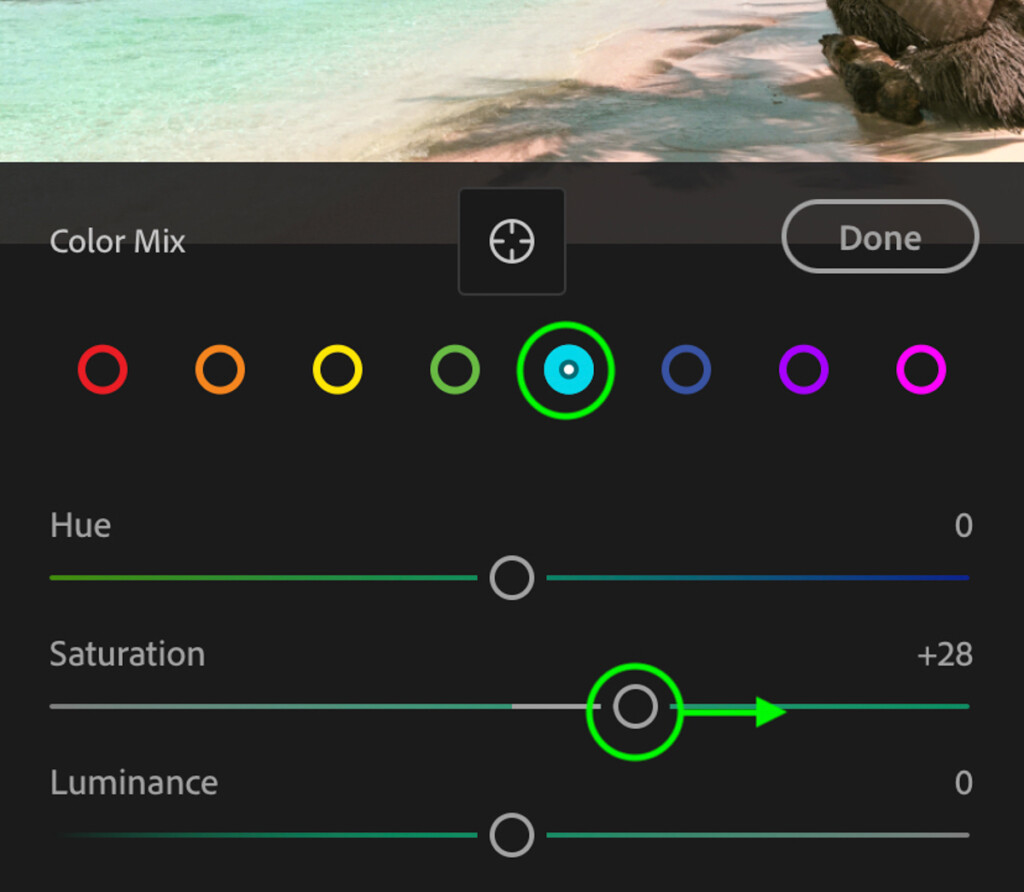
To top it all off, tap on the cyan color range and boost up the saturation to your liking. Just like before, since cyan is already the color you want, there’s no point in changing the hue. However, boosting the saturation will make it pop more and help enhance the orange and teal effect.
– Applying Color Grading To Finalize The Effect
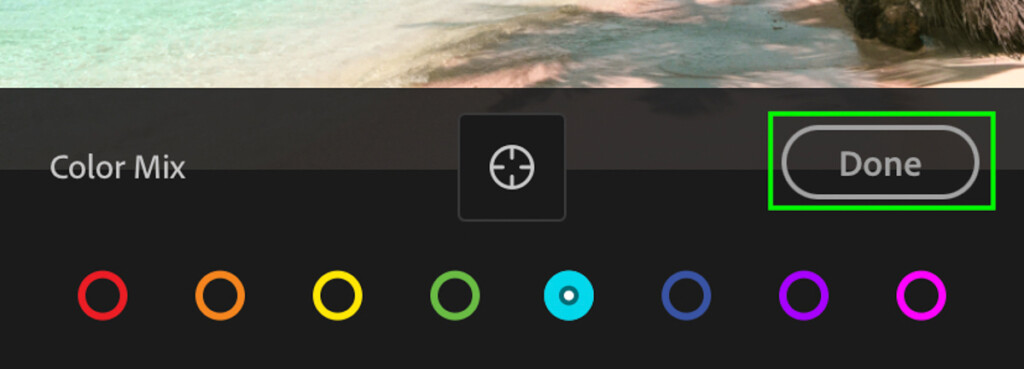
To exit out of the Color Mix panel, tap on done in the top corner.
Back in your regular color adjustment panel, select the “Grading” option.

The Color Grading panel lets you apply specific hues to the shadows, mid-tones, or highlights of your photo. The beauty of this tool is that you don’t need any specific colors in your image to apply a certain hue. Instead, it overlays the color to your selected exposure range, allowing you to make a ton of great color adjustments.
For the orange and teal look, this is one of the best tools for the job!
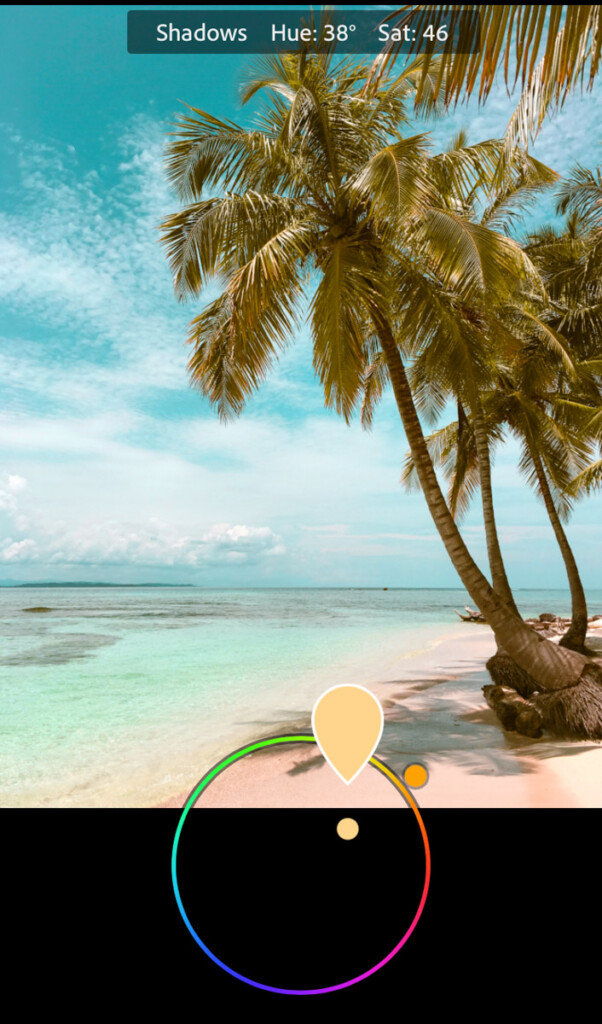
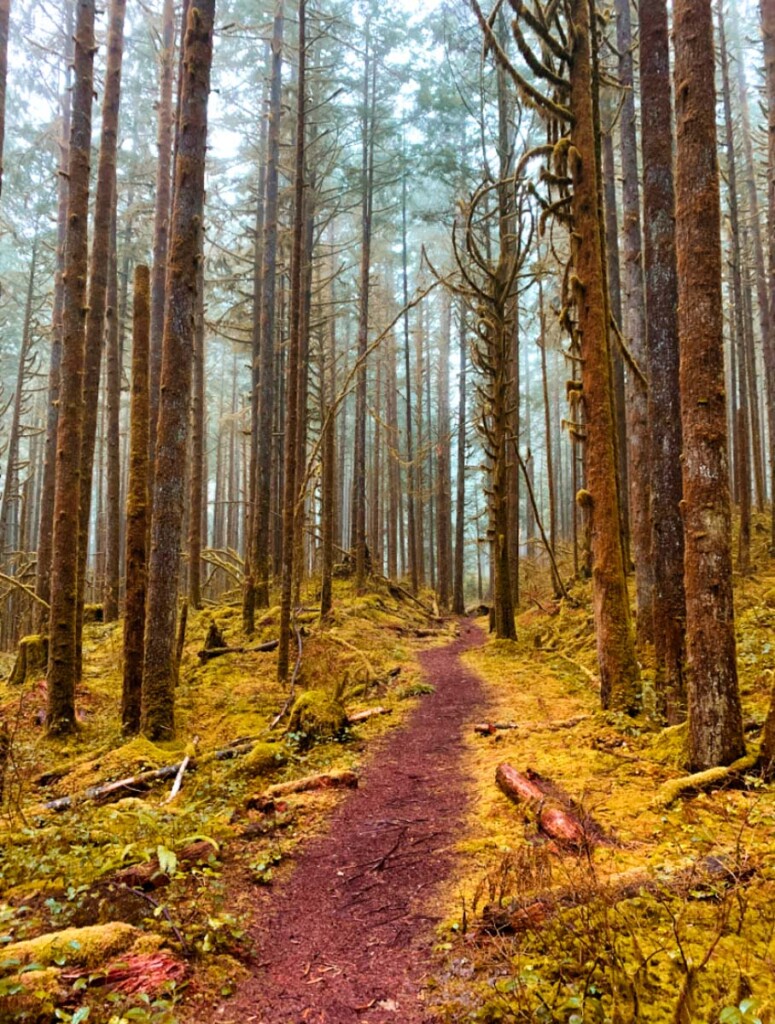
Starting with your shadows color wheel, tap and hold to adjust the color. Move your finger along the color wheel and select a deep orange color. To make the color more saturated, drag your finger closer to the outer edge of the color wheel.
![]()
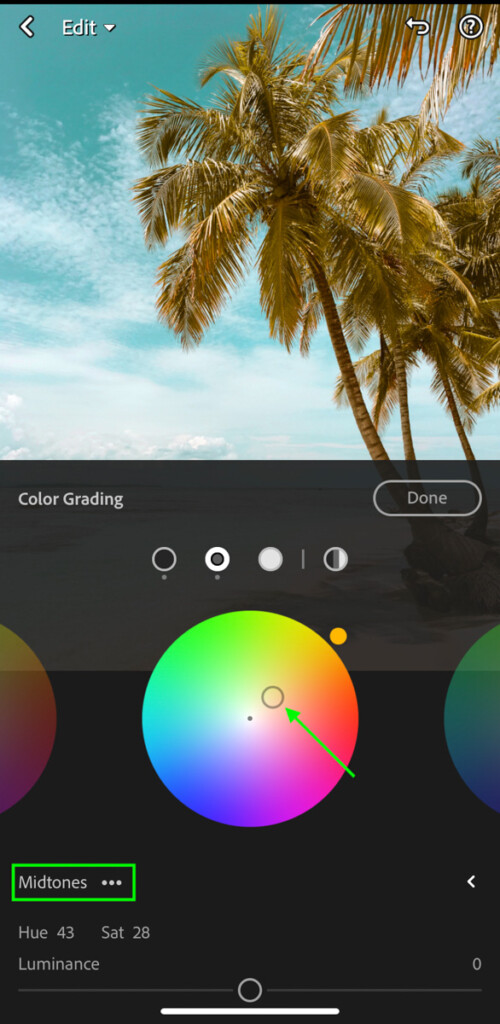
Moving to the mid-tones color wheel, set the color to be light orange or yellow color. This helps to further build upon the heavy orange look throughout the image.
Finally, with the highlights color wheel, select a cyan or light blue color to enhance the teal tones in your image. Now the orange and teal look is nearly complete!
![]()
– Final Adjustments With The White Balance Slider
Depending on your image, you might find that your photo appears too orange. Rather than going through and redoing all of your work, the white balance slider is here to save the day.
To lessen your orange hues’ intensity, shift the white balance to favor a more blue tone. That means you’ll need to move this slider to the left.
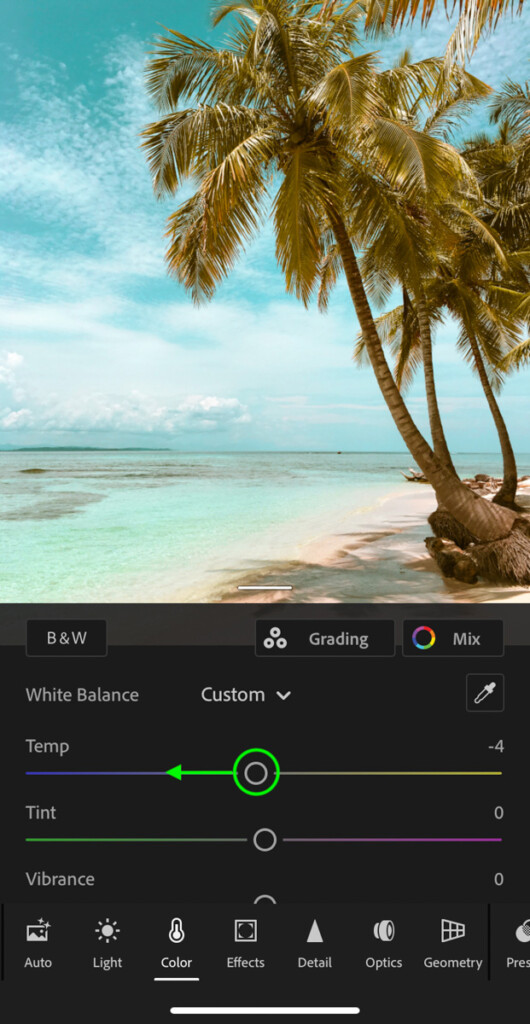
In most cases, just a slight adjustment will help to balance things out. This is one of the fastest ways to refine the orange and teal look you’ve just created without needing to go back on your previous edits.
If the opposite is happening and your photo appears too blue/teal, then try warming up the white balance instead. This will serve the same purpose but begins to favor the orange hues a little more.
Now you’ve learned how to add an orange and teal look to your photos with Lightroom Mobile! If you’re happy, then it’s time to save your photo and call it a day. However, if you want to apply this look to other photos, it’s a good idea to save your work as a new preset.
![]()
Create Your Own Orange And Teal Lightroom Preset
A preset is a saved sequence of adjustments that you can apply to more photos in the future. In terms of this orange and teal look, a preset allows you to recreate this effect over and over with the tap of a button. Creating a new lightroom mobile preset is easy and will save you a ton of time in the future. So let’s create a new orange and teal preset for Lightroom with the adjustments you’ve just created.
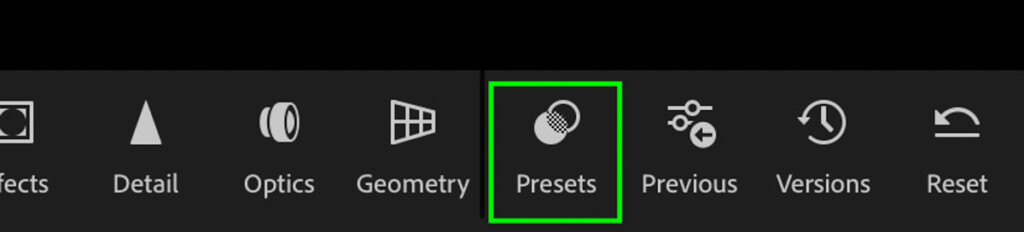
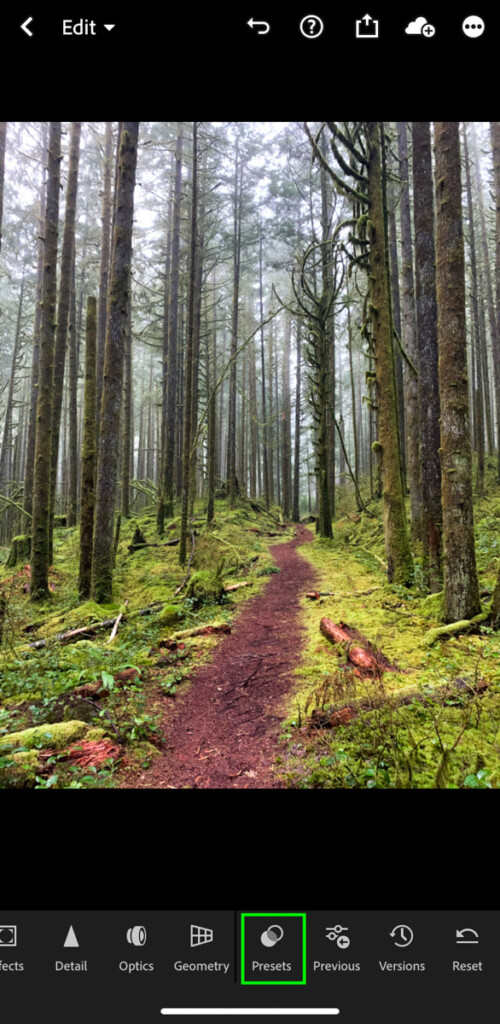
First, click on the “Presets” button found in your bottom toolbar.
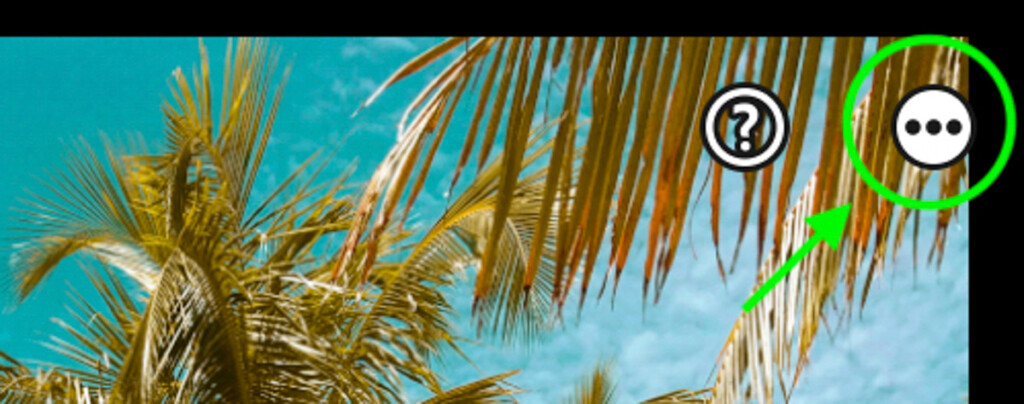
Then click on the white circle with the three dots found in the upper corner of your screen.
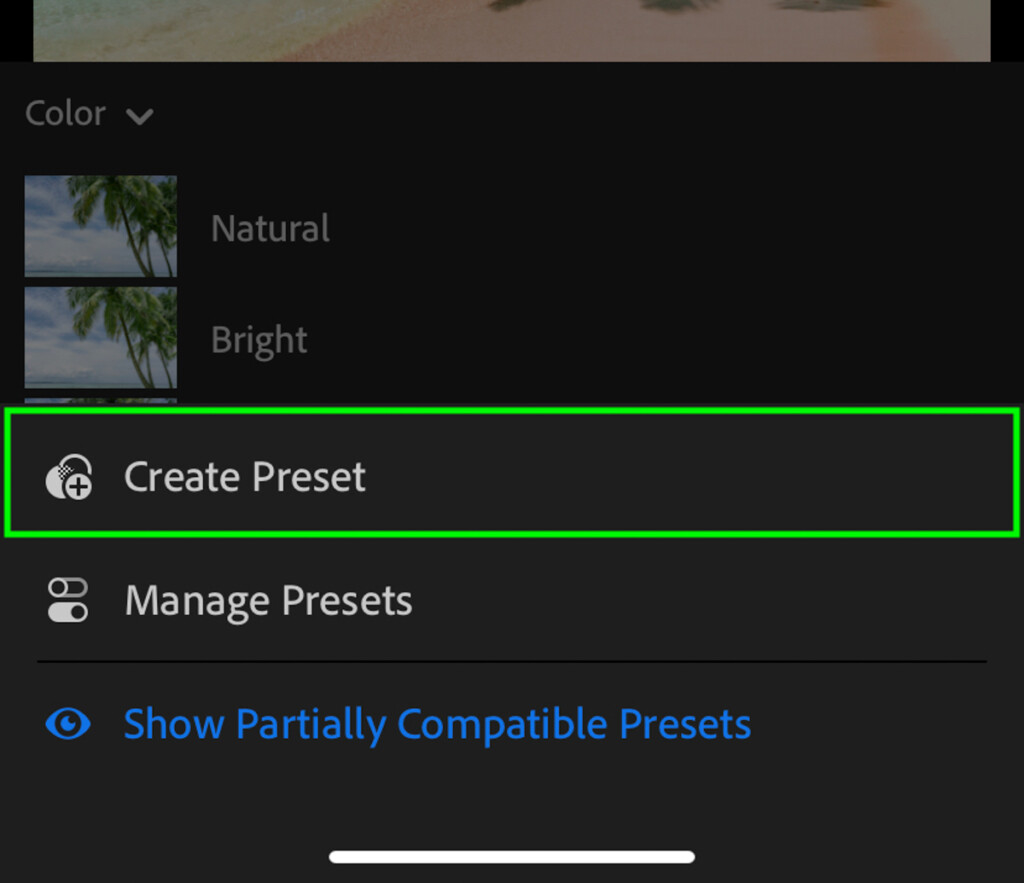
From the options that appear, click on “Create Preset.”
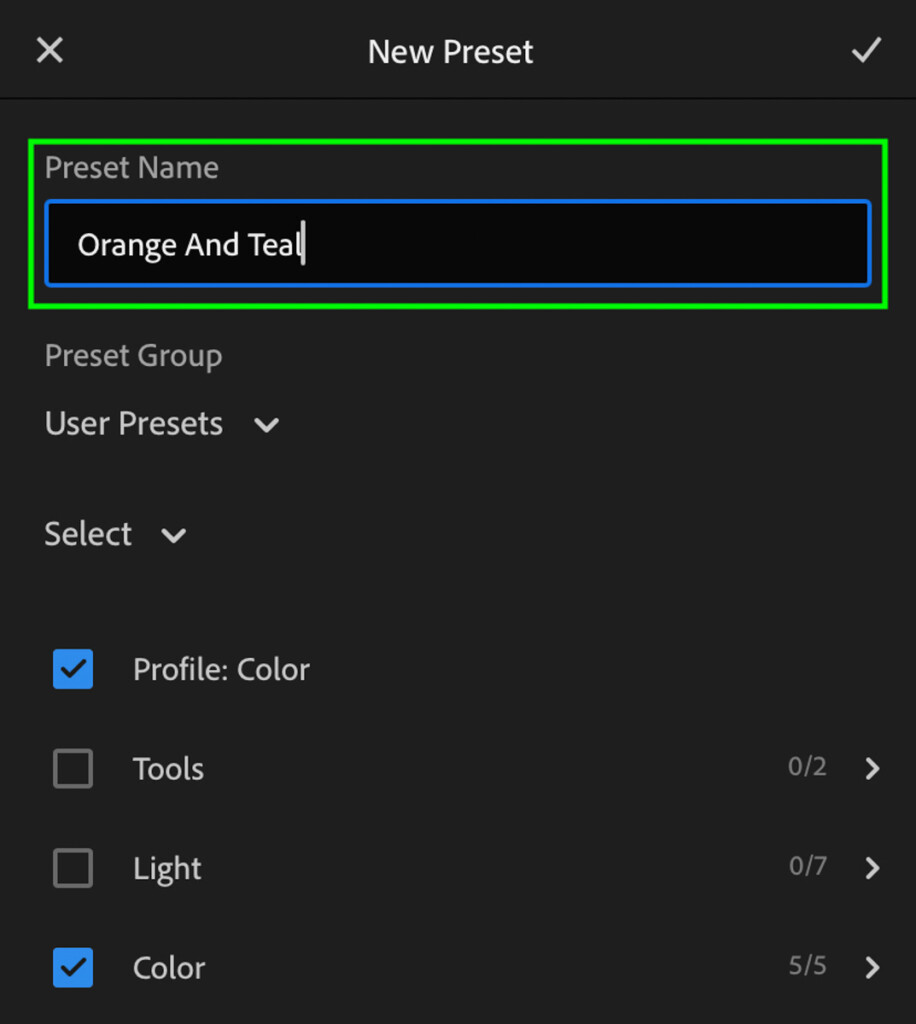
The new preset panel will open, where you get to pick what adjustments are saved in your orange and teal preset. Since the only adjustments you made for this effect were Color adjustments, that’s the only option you need to save for this preset.

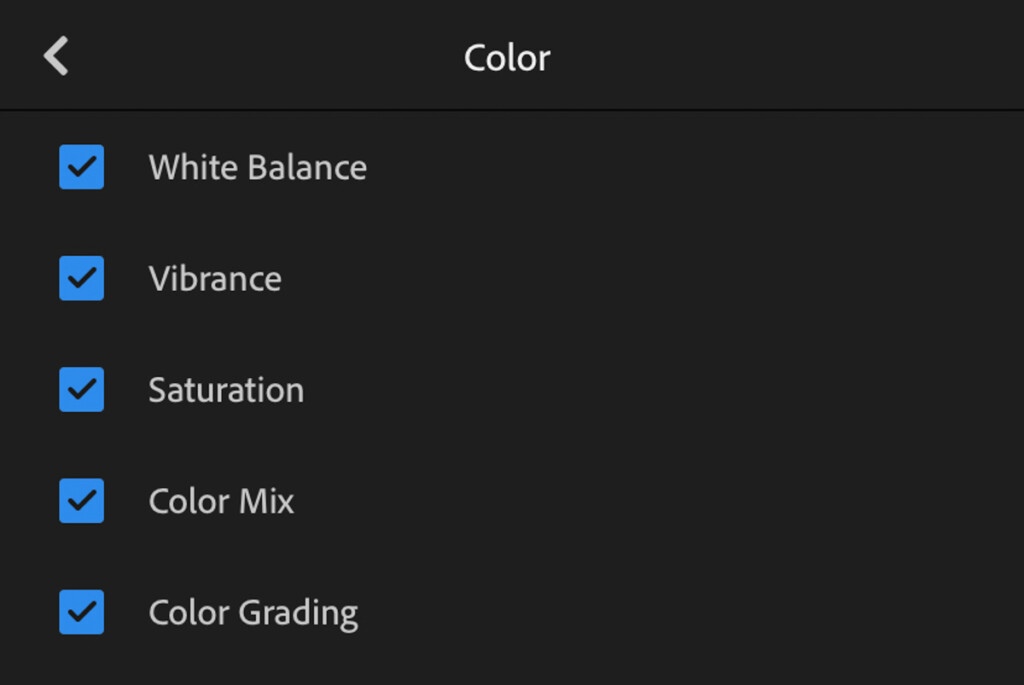
However, you can refine which of the color options you save by tapping on the arrow on the outside of your screen. This will open up the specific color options that you may or may not want to include in your preset.
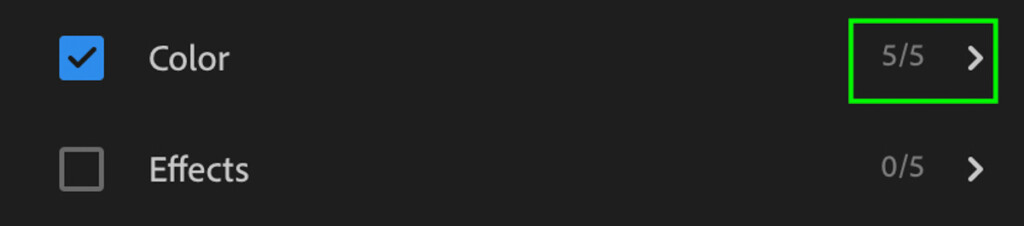
For me, I’ll leave all 5 options saved.
Next, it’s time to add a name to your preset. I’ll keep it simple and call mine “orange and teal.”
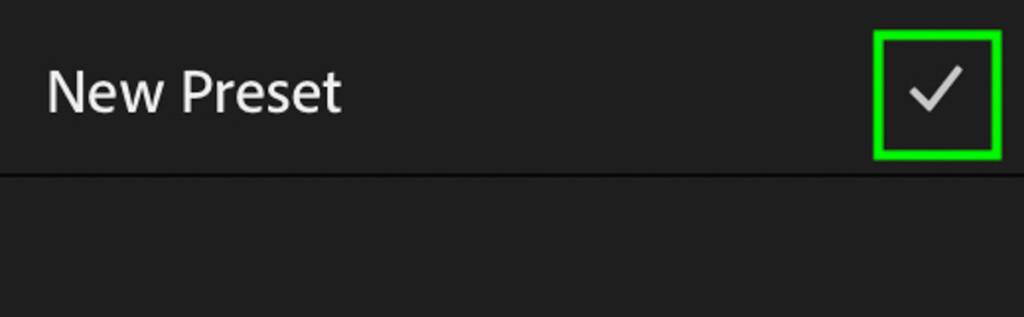
Once you’re done, hit the checkmark found in the top corner of your screen.
Now you’ve made your very own orange and teal preset for Lightroom. Even though it was created in Lightroom mobile, it will automatically sync with Lightroom Classic to make it available on desktop as well. Assuming you’re using one of the Photography Plans from Adobe, of course.
Ah, the beauty of cloud storage and editing software!
Applying Your New Preset To Other Photos
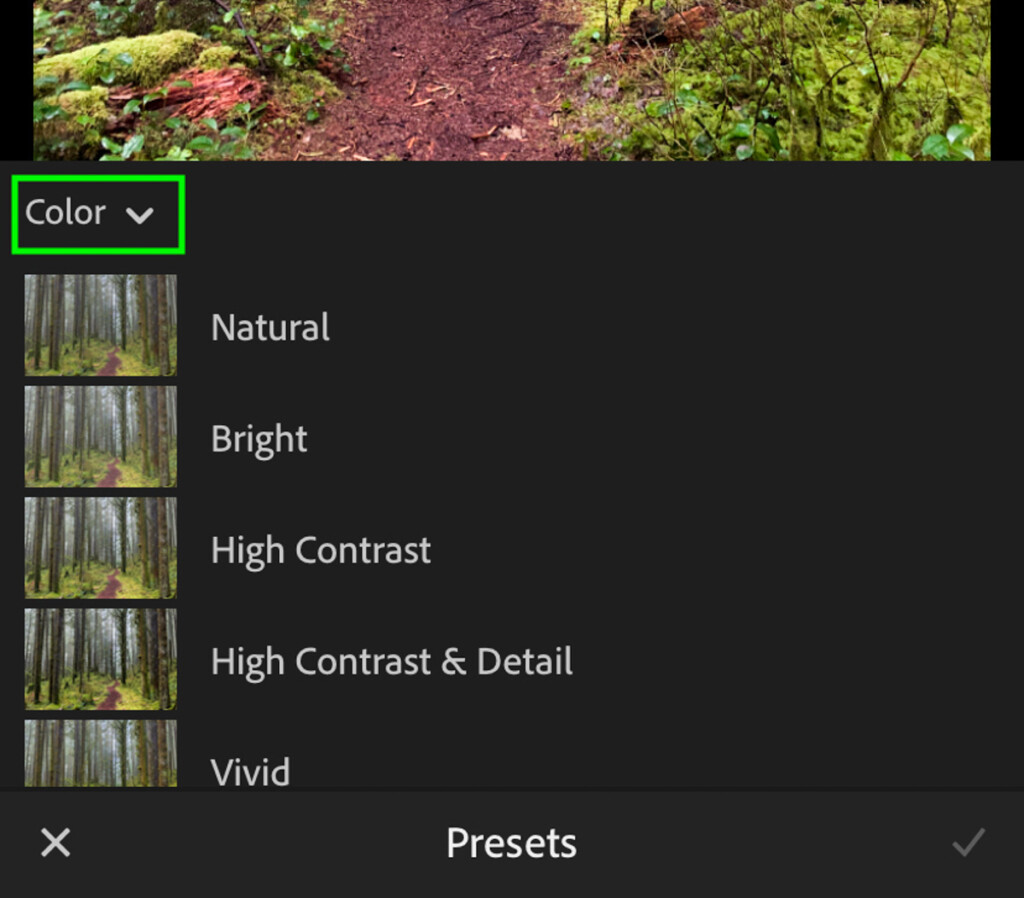
To apply your orange and teal preset to other images, open your desired photo and click on the “Presets” option.
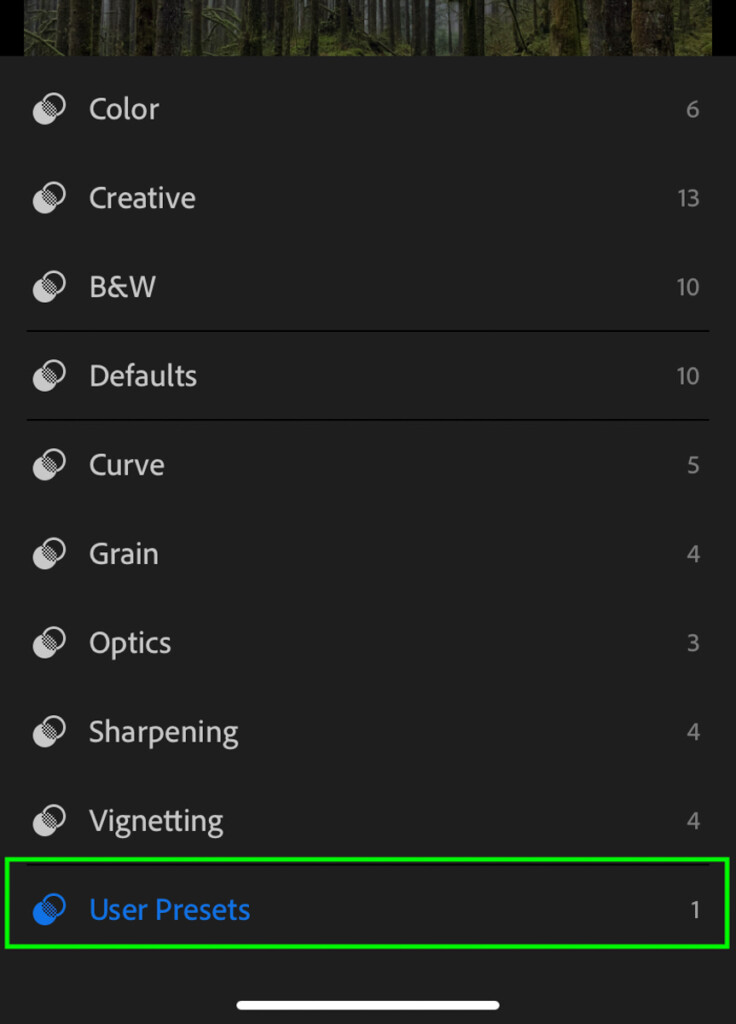
If you don’t immediately see your new preset, tap on the drop-down preset menu, and select “User Presets.” This is where all your presets are saved by default.
Now just tap on your orange and teal preset to apply the color effects to your photo.
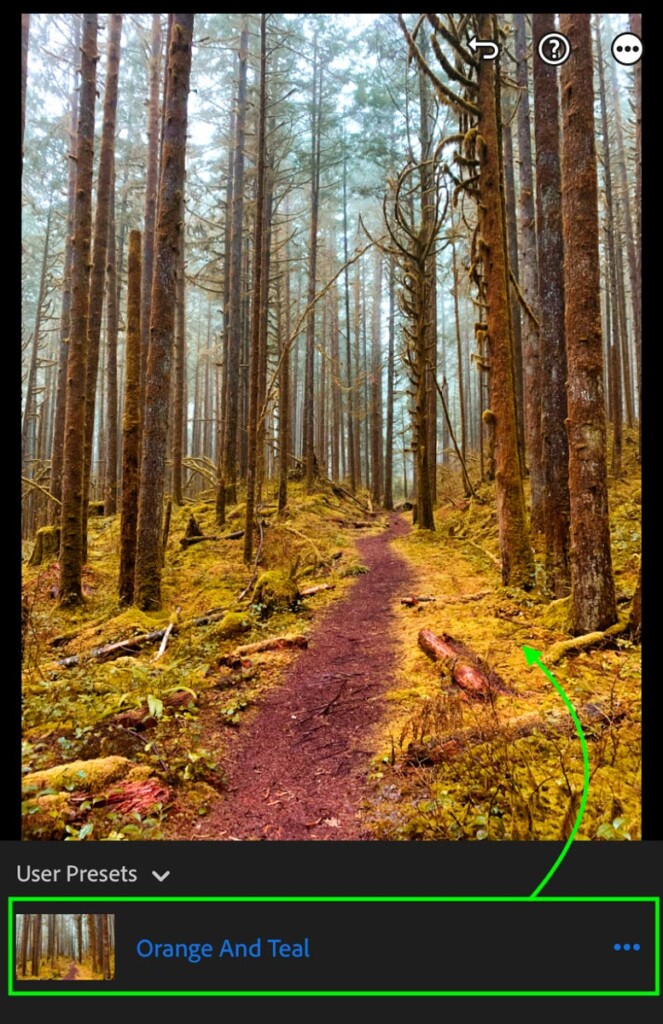
With just one click, a preset helps to skip over all your hard work from before and cut right to the chase. Now you can create an orange and teal look in seconds.
Score!
So that’s how to make the orange and teal look in Lightroom mobile, plus save it as a preset to use later on. Whenever you create a specific color effect that you love, saving it as a preset is an easy option for speeding up the process later on.
After all, why do the hard work more than once?
Happy editing!
– Brendan 🙂


