
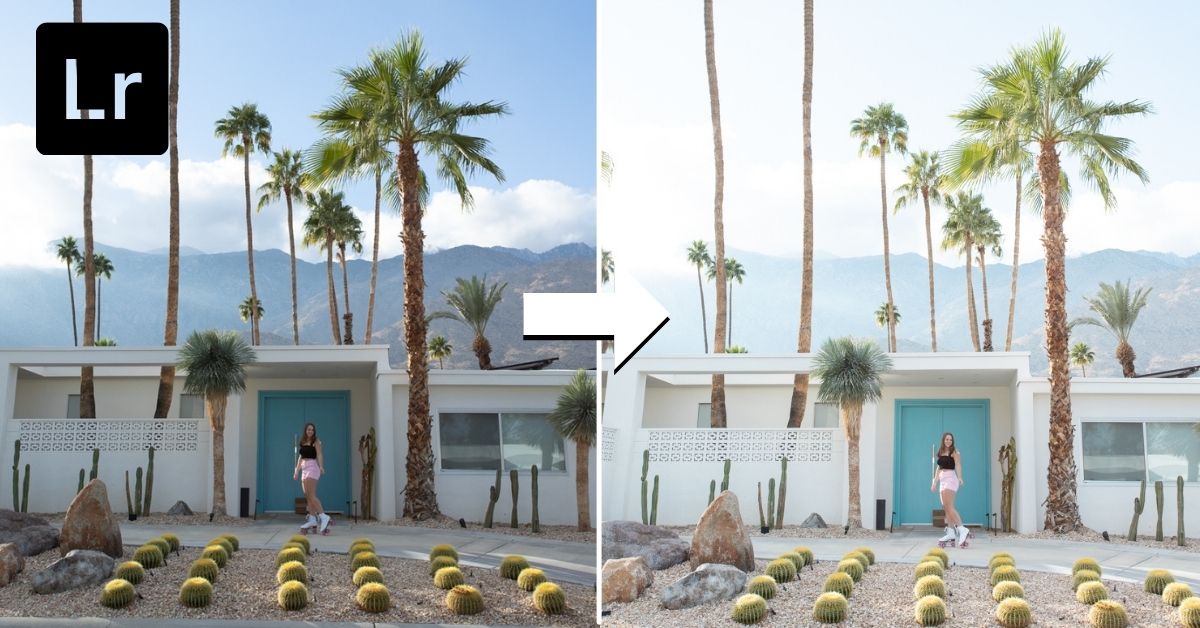

You can easily create the light and airy editing style in Lightroom with a simple 10-step workflow. This editing style works wonders for all types of photography and guarantees a stunning social media feed. From weddings, portraits, landscapes, and more, these steps will help to liven up any photo in seconds. To start things off, let’s learn how to create this editing style in Adobe Lightroom Classic.
To edit the light and airy look in Lightroom, follow these steps:
- Increase the exposure slider.
- Bring up the shadows slider.
- Boost the highlights and whites sliders.
- Bring down the blacks slider.
- Increase the clarity.
- Shift the white balance to a more blue hue.
- Lift the shadows in the Tone Curve.
- Lower the darks in the Tone Curve.
- Desaturate any dominant colors using HSL.
- Boost the luminance of dominant colors in HSL.
Now, you can do these steps in both Lightroom Classic and Lightroom Mobile, so you can create this effect just about anywhere. Let’s start things off by creating this editing style in Lightroom Classic.
How To Edit The Light & Airy Look in Lightroom
Step 1: Increase The Exposure Slider
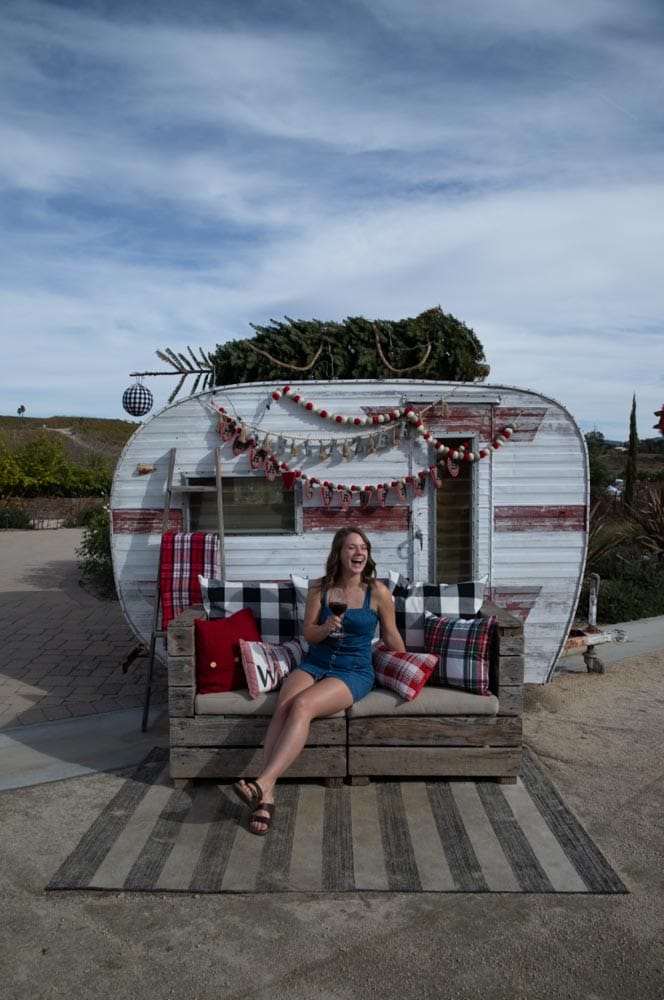
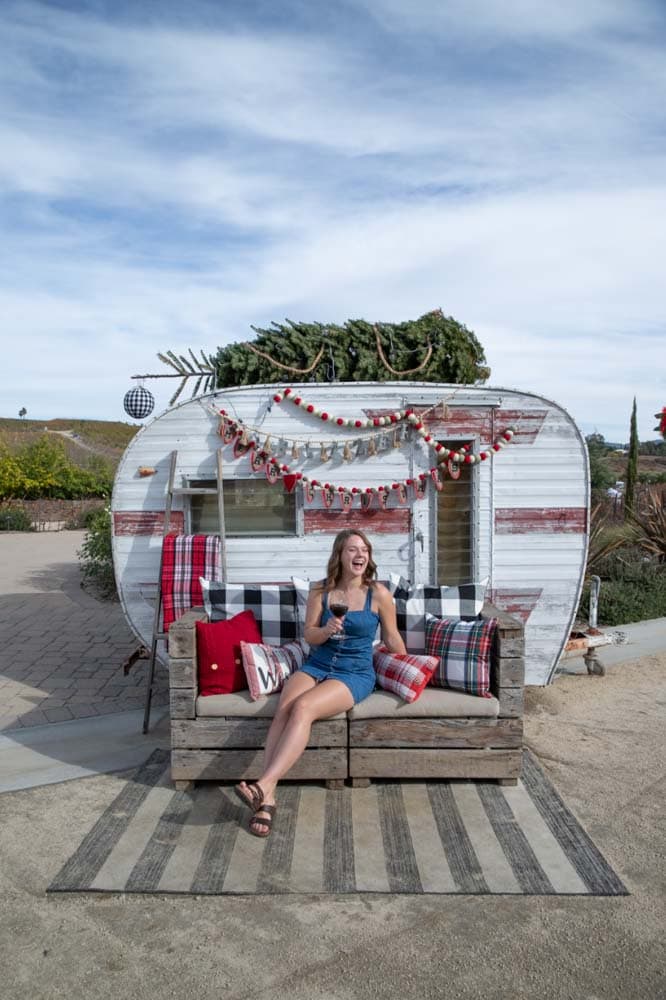
This first step only applies to photos that are a little bit darker to begin with. In this example, my image is slightly underexposed, so it needs to be brightened. Using the exposure slider, I can quickly boost the overall brightness of my photo.
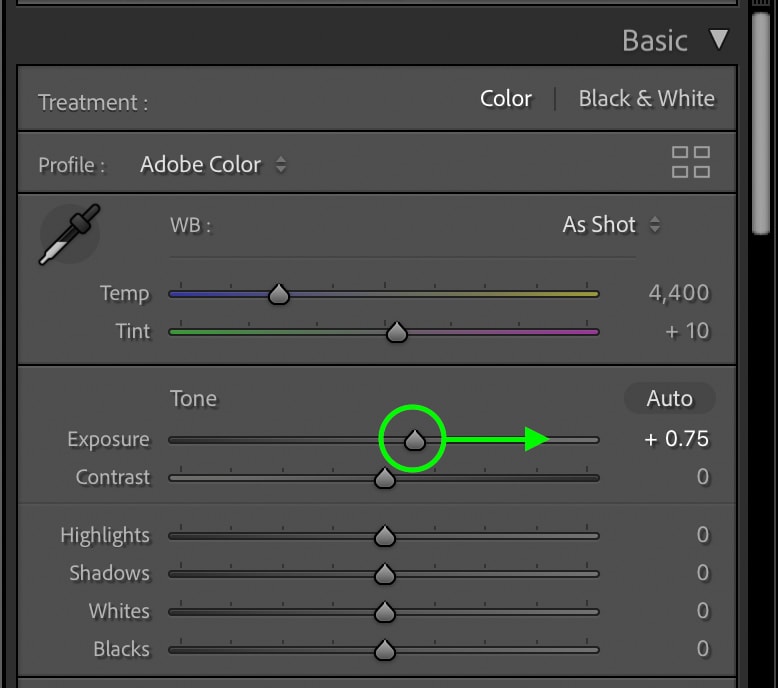
For you, the goal should be to create a slightly brighter version of your photo without going as far as blowing out your highlights. A slight adjustment here will do just the trick!
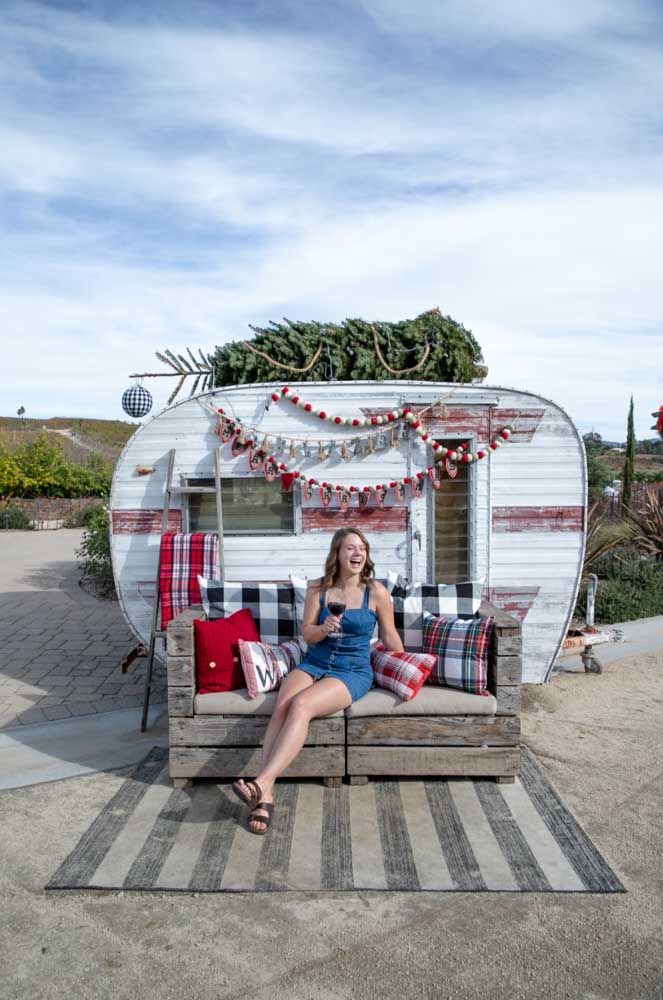
Here’s how your image should look after this adjustment. Slightly brighter than before, but nothing too drastic.

Step 2: Lift The Shadows Slider
A huge part of the light and airy editing style is an overall low-contrast feel. By lifting the shadows in your photo, you will remove a lot of the black in the photo. This really helps to make your photo feel “lighter.”
Just below the exposure slider, you will see a “Shadows” slider. Move this slider to the right to lift (aka brighten) your shadows. Be careful not to go overboard with this, or your image will appear over-edited. Instead, lift the shadows to a point where there is still some contrast, but significantly less than before.
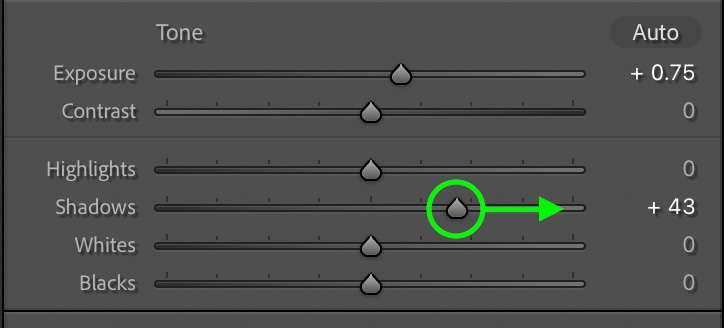
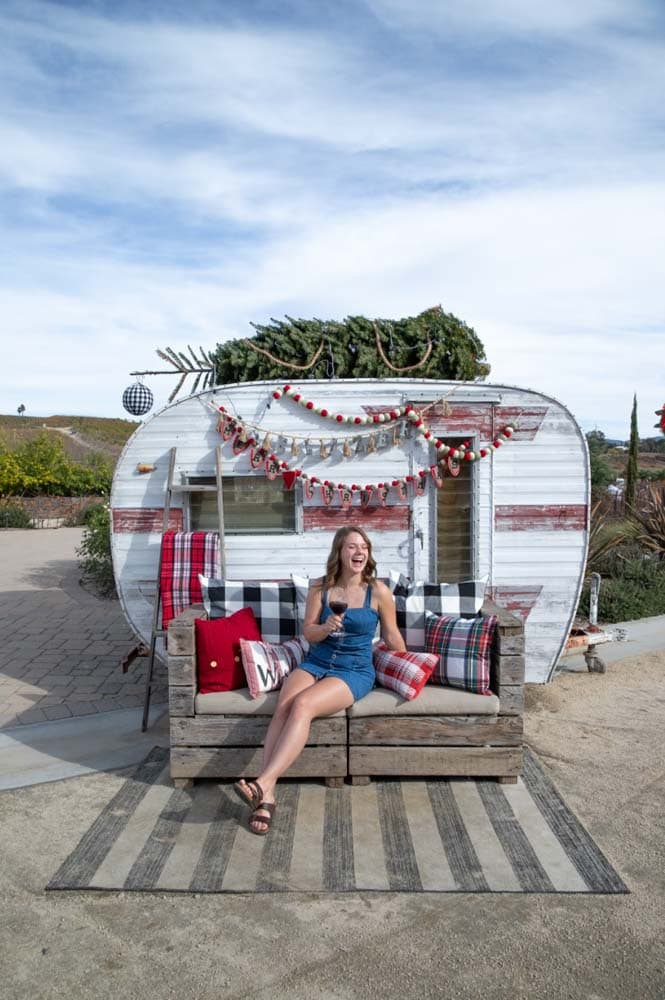
Here’s how the image looks after lifting the shadows:
Step 3: Boost The Whites And Highlights
To make the photo feel even brighter, boost the whites and highlights sliders by moving them to the right. This will increase the brightness of all the brightest exposures in your photo. Of course, depending on how bright your whites and highlights are to begin with, the amount you increase will vary. In my example, the sky is already quite bright, so a slight adjustment here will do.
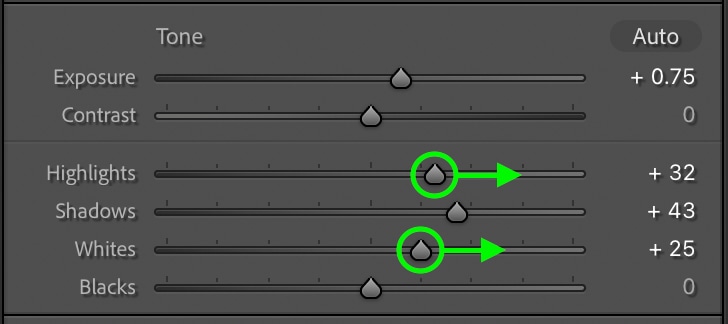
Now the photo has a slightly more bright appearance than before.
Step 4: Bring Down The Blacks Slider
At this point, your image will look a little bit too washed out. To add a bit more life into the picture, you need to add back some contrast. Rather than using the contrast slider, adjusting the blacks slider will target only the darkest parts of your photo. This way, your highlights remain at the right level of brightness while you control the darker areas.
Moving the blacks slider to the left will help add back some life to your photo. To retain that light and airy feel, however, you will want to be sparing with this.

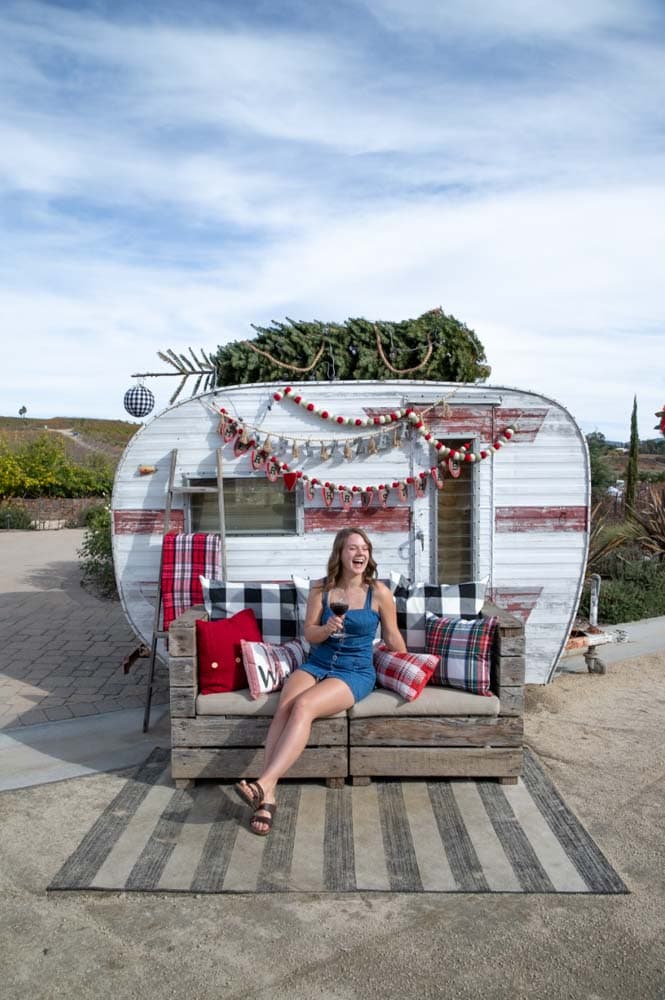
Now the image looks a bit less washed out.
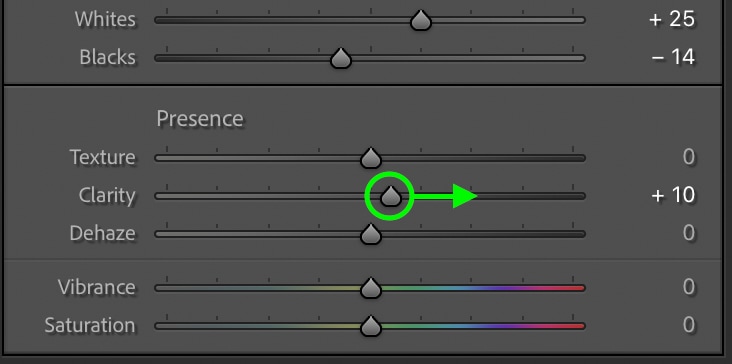
Step 5: Slightly Increase The Clarity Slider
Next, go to the clarity slider and increase it slightly. This adjustment will make the details in your photo pop a little more and helps to create a crisp edit.
Step 6: Adjust The White Balance To Favor A Bluer Hue
The last adjustment you’ll make in the basics panel is with the white balance. A more blue color temperature will make your photo look white and help to create a clean appearance.
To adjust this, click on the white balance slider and move it left to add a bit of blue to the photo. If your image already has a good white balance, only a slight adjustment is needed.
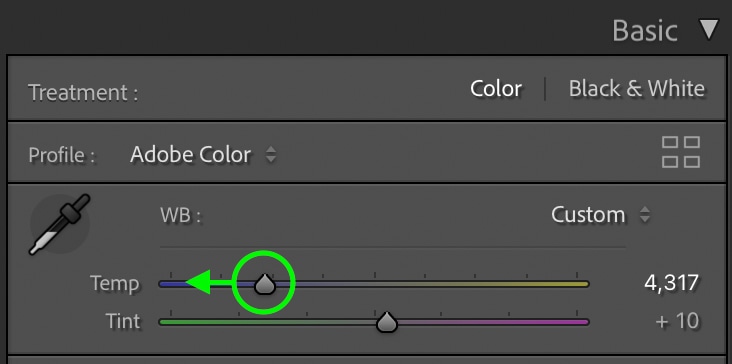
This time the image is left with a more cool and white feel than before:
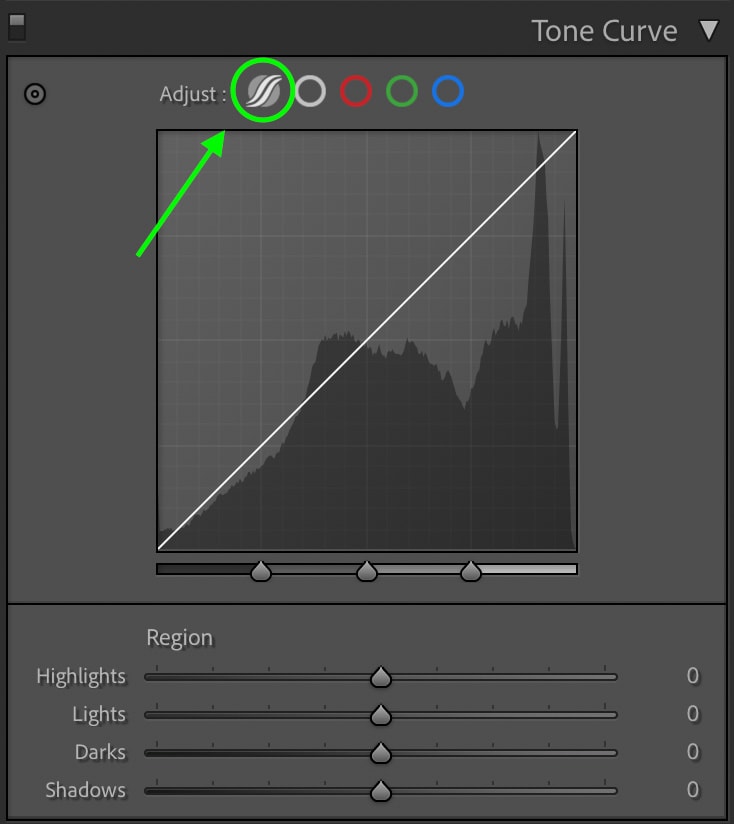
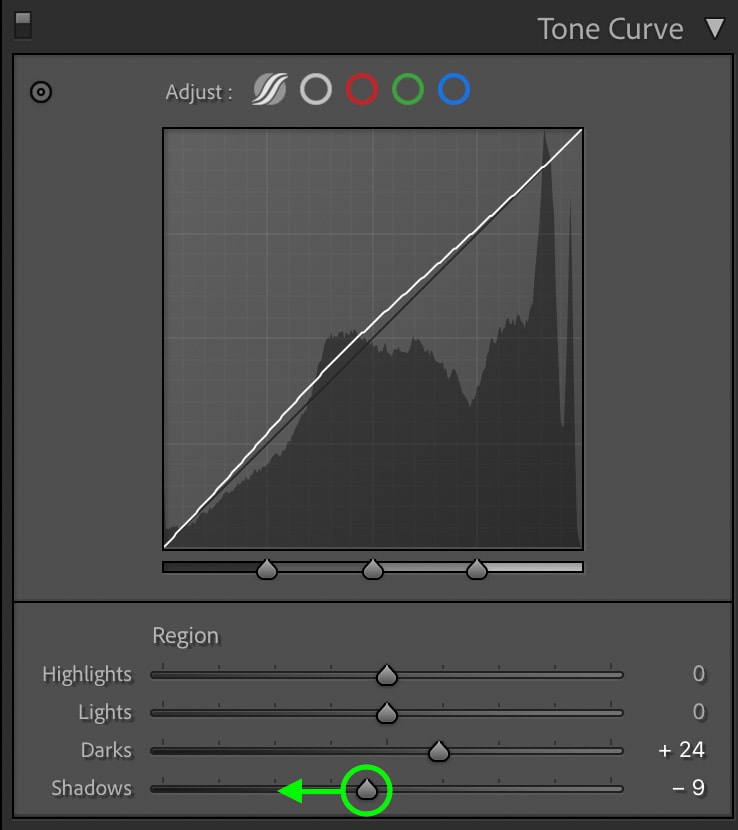
Step 7: Lift The Darks In The Tone Curve
Now it’s time to move on to the Tone Curve. This is one of the best exposure and contrast tools in Lightroom to stylize your images with. To make life easy, make sure you use the Region Curve by clicking on the Region Curve icon. If you want to learn how to use the Tone Curve manually, check out this post.
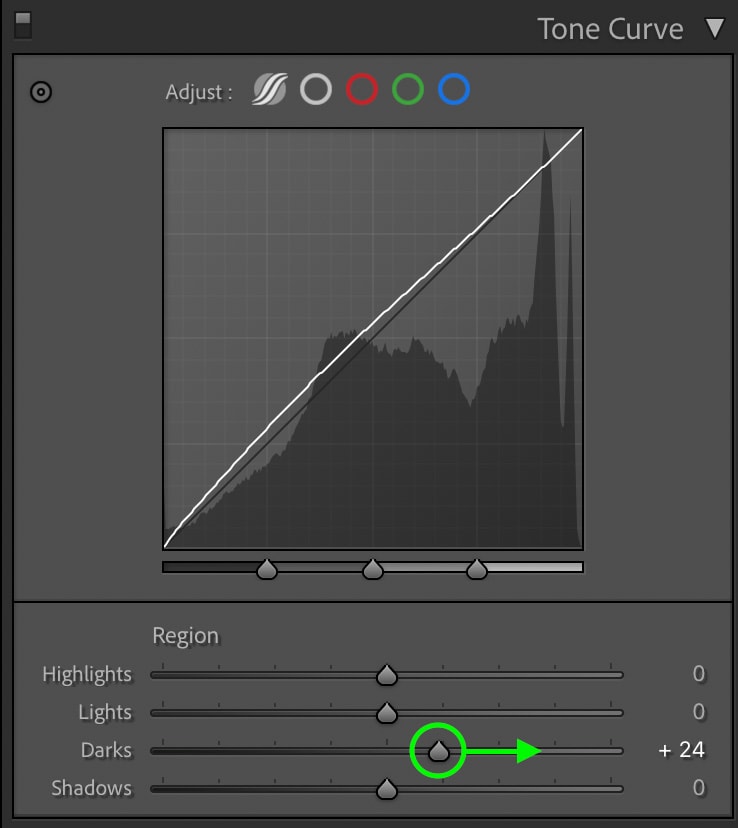
Going to the darks slider, move it to the right to brighten the shadows in your photo further. This allows for some added adjustments to refine the light and airy look.
Step 8: Bring Down The Shadows In The Tone Curve
Like before, you need to counteract the lack of contrast to prevent the photo from looking washed out. Going to the shadows slider, bring that down slightly to add back a hint of contrast. If you’re already happy with the level of contrast in your photo, you can skip this step.
Now the light and airy look is really coming together, but let’s take it one step further with the help of the HSL adjustment.
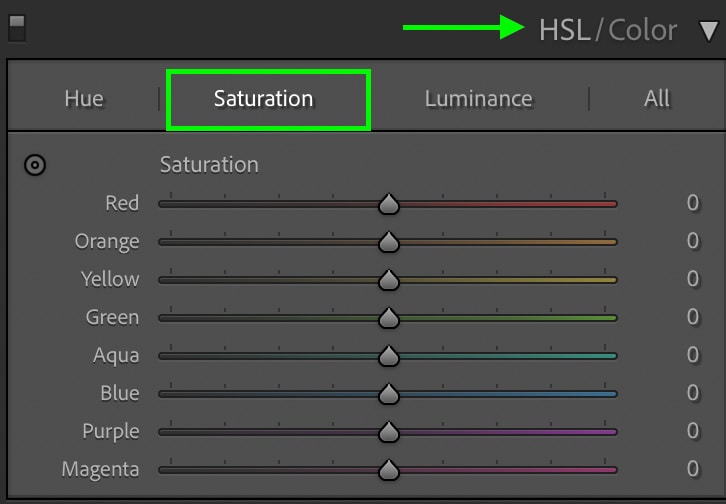
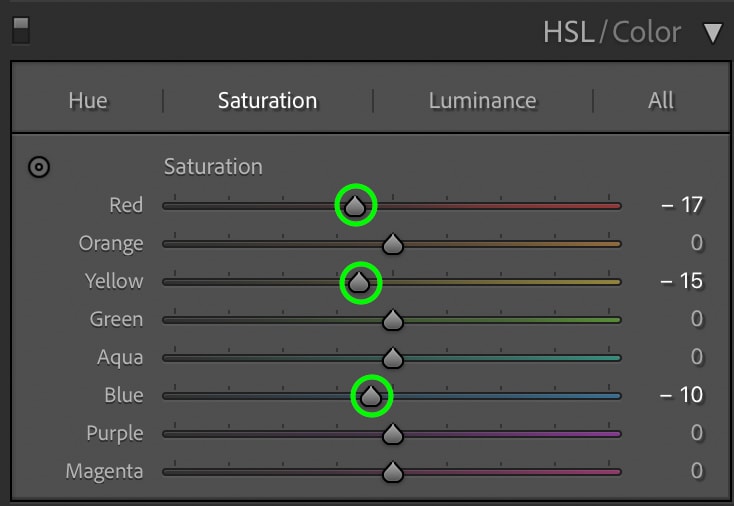
Step 9: Desaturate Any Dominant Colors In Your Photo Using HSL
Going to the HSL adjustment, click on the Saturation option.
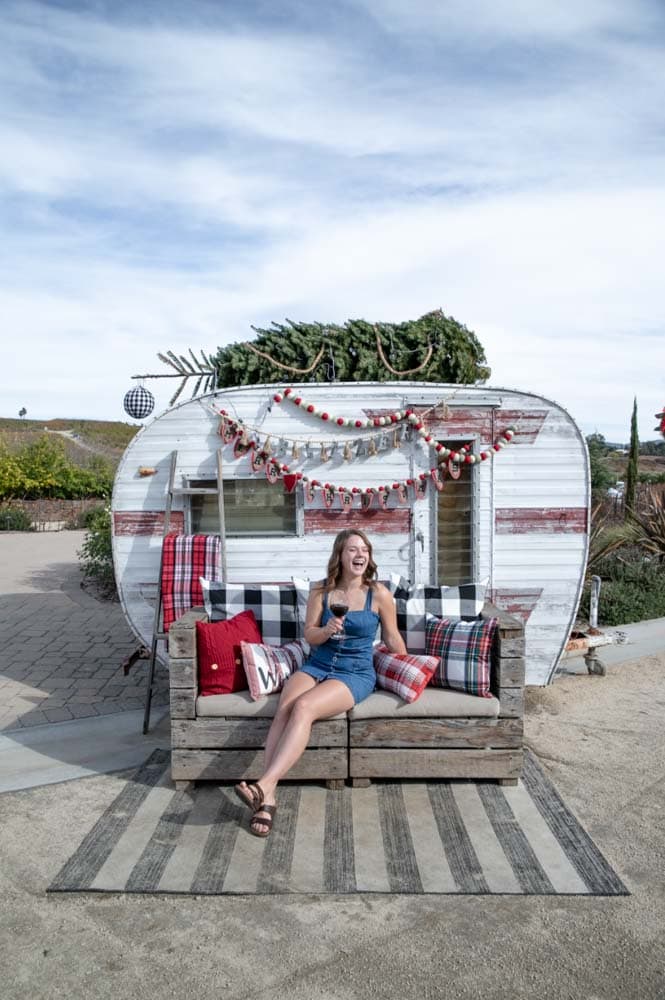
Looking at your photo, identify any dominant colors. In my image, that is blue, yellow, and red. So that means I will desaturate those two color hues. You don’t want to go as far as making these colors appear grey, but rather just dull down the vibrance of these colors. This will help to make your overall image feel a bit softer.
Step 10: Boost The Luminance Of Dominant Colors In Your Photo Using HSL
Next, click on the Luminance adjustment within the HSL and boost the luminance of the colors you just desaturated. In my example, that is the blue yellow, and red color channels.
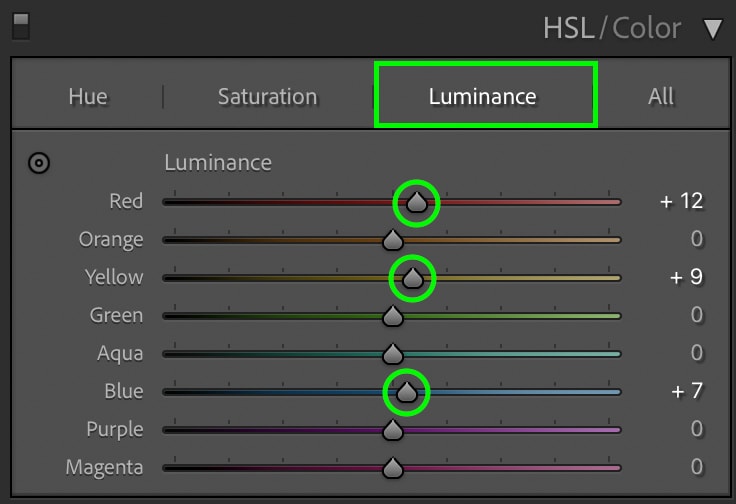
Increasing the luminance will make certain colors appear brighter and help to enhance the light and airy look. You can also experiment with lowering the luminance of other color ranges as well. This can often create some pretty neat effects to finish off your edit!
The Result
With ten easy steps, you can now create the light and airy editing style in Lightroom. Since each step is just adjusting a slider or two, the whole process can be done relatively quickly once you get the hang of it. With that said, the absolute fastest way of creating this effect is with the help of Lightroom presets. Rather than messing about with all these sliders, you can apply this look with one click. Let’s break down some of the best light and airy presets available right now!
3 Best Light & Airy Editing Presets For Lightroom & Lightroom Mobile
Below are some of the best light and airy preset collections for Lightroom and Lightroom Mobile.
1. Light & Airy Preset Pack By Brendan Williams
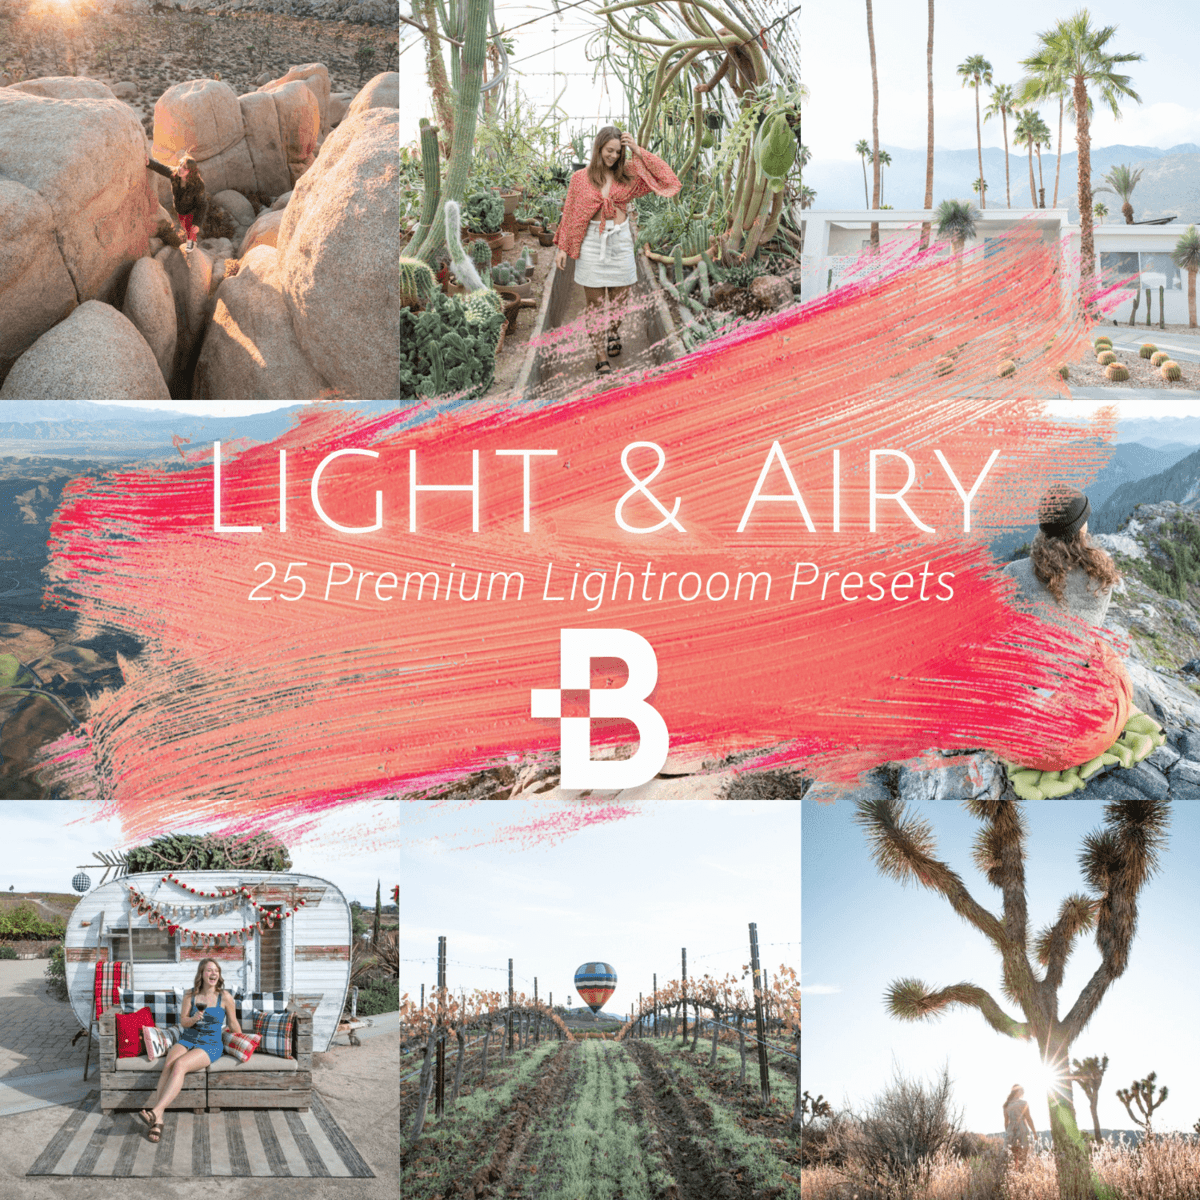
This preset pack comes with 25 light and airy presets for Lightroom Desktop & Mobile, as well as installation instructions to help get you started. I developed these presets over the years, working as a photographer for various social media influencers. These presets take what you learned throughout this post and condense them into a single click. Better yet, they offer a ton of variety in looks, so you can always find the perfect one for your image. This is a preset pack I use and love, and I know you will too!
2. Airy Preset Pack By Flourish Presets

This preset pack comes with 20 light and airy presets for Lightroom Mobile and Lightroom Desktop. With one click, you can soften shadows, brighten highlights, and even add soft glows to your photos. This preset pack is perfect for portraits and will make batch editing your photo sessions easier than ever. I like this preset pack because it adds a nice green hue to a lot of images, giving them an earthy, natural feel. It offers a clean and timeless editing style perfect for any portfolio or social media feed!
3. Light & Airy Preset Pack By Flourish Presets

Another great preset pack for this editing style is the Light & Airy Preset Pack by Flourish Presets. Unlike the Airy preset pack mentioned above, this one keeps a less colorful look and doesn’t add the same earthy tones. Instead, it focuses primarily on making your images look brighter, whiter, and lighter! This preset pack comes with 13 light and airy looks for both Lightroom Desktop and Lightroom Mobile. Although there are fewer presets in this pack, they still provide an excellent option for quickly creating this editing style.
Of these three presets, this is the preset pack I would recommend above all. It has the most bang for your buck with 25 high-quality Lightroom Mobile and Lightroom desktop presets. Regardless of which option you choose, each one will allow you to edit light and airy photos in Lightroom in far less time than doing it manually. If you’d like to learn how to put your new skills to use and create your own presets, you can learn how here.
Happy Editing!
Brendan 🙂
