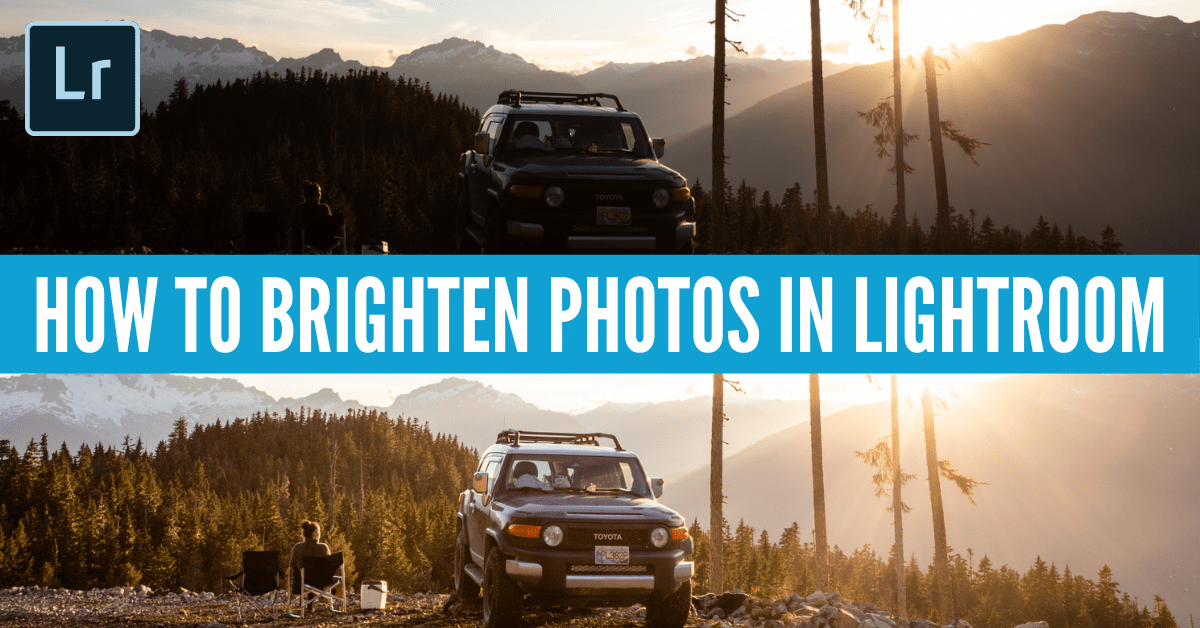

How To Brighten A Photo In Lightroom
If you were shooting in a dark environment or your camera settings weren’t quite right, there are luckily some easy tools to help brighten a photo in Lightroom. With these tools, you can quickly brighten the dark areas of a photo while keeping all the important details in other exposure ranges. In this tutorial, you’ll learn the easy 5 step process for making a photo brighter in Lightroom.
To brighten your photos in Lightroom, start by increasing the Darks and Shadows sliders to soften the shadows. Then decrease the Whites and Highlights to bring back details in brighter areas. To balance out the brightness further, adjust the exposure slider until you’ve found the desired brightness. Lastly, use the Tone Curve to add back contrast and make your photo come to life.
Although you may want to use the exposure slider to brighten your photo, there are some reasons why you shouldn’t do that. Later in this post, I’ll share why brightening each exposure range individually offers better results than only using the exposure slider.
But for now, let’s get into the step-by-step of brightening a photo in Lightroom!
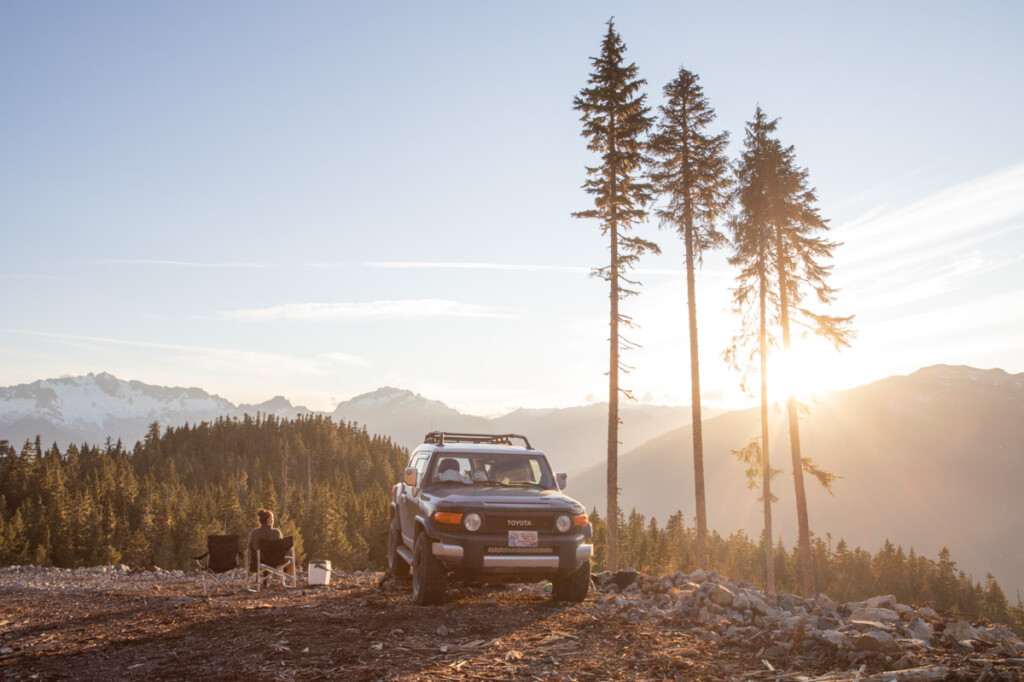
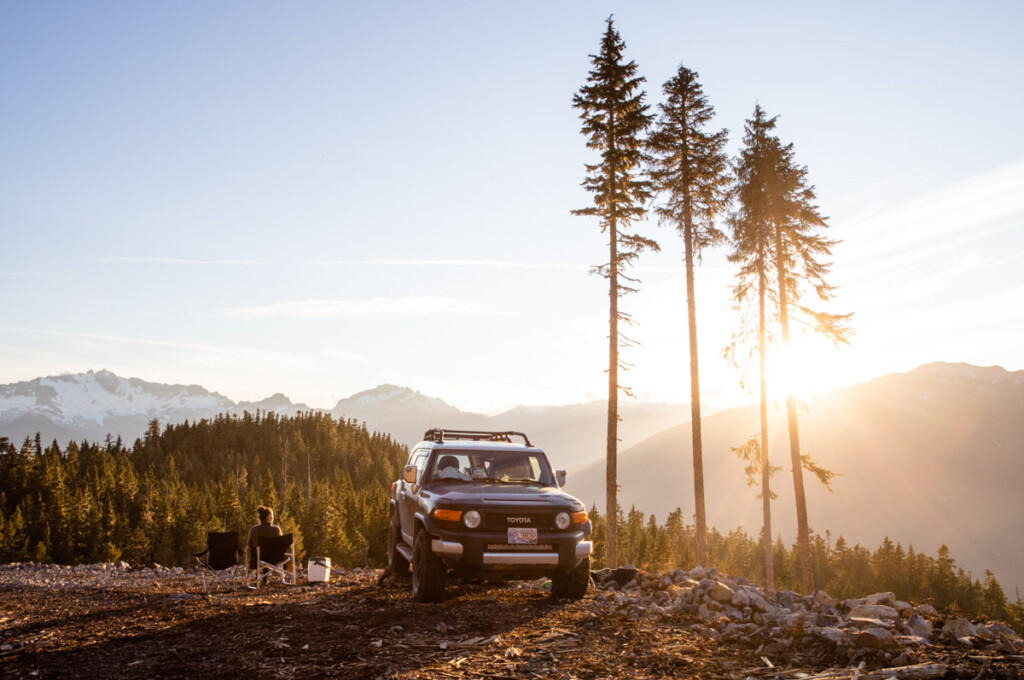
The photo used in this example has extremely dark shadows since the camera settings accounted for the sky. After these 5 steps, you’ll be able to see more details in the shadows without losing anything from the highlights.

Step 1: Lift The Blacks & Shadows Sliders
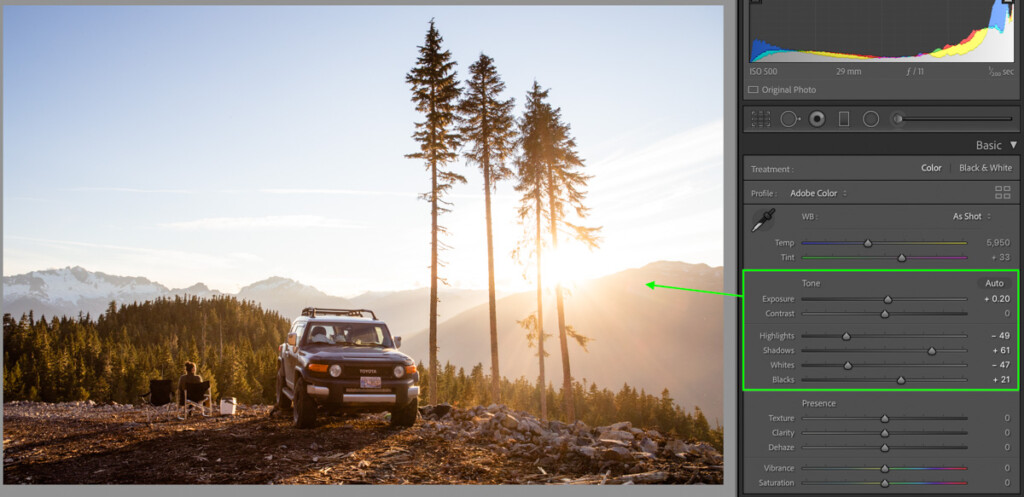
Within the Develop Module, you’ll first start within the Basic Panel. Here is where you’ll find all the most basic image adjustments such as white balance, vibrance, and of course, exposure (aka brightness).
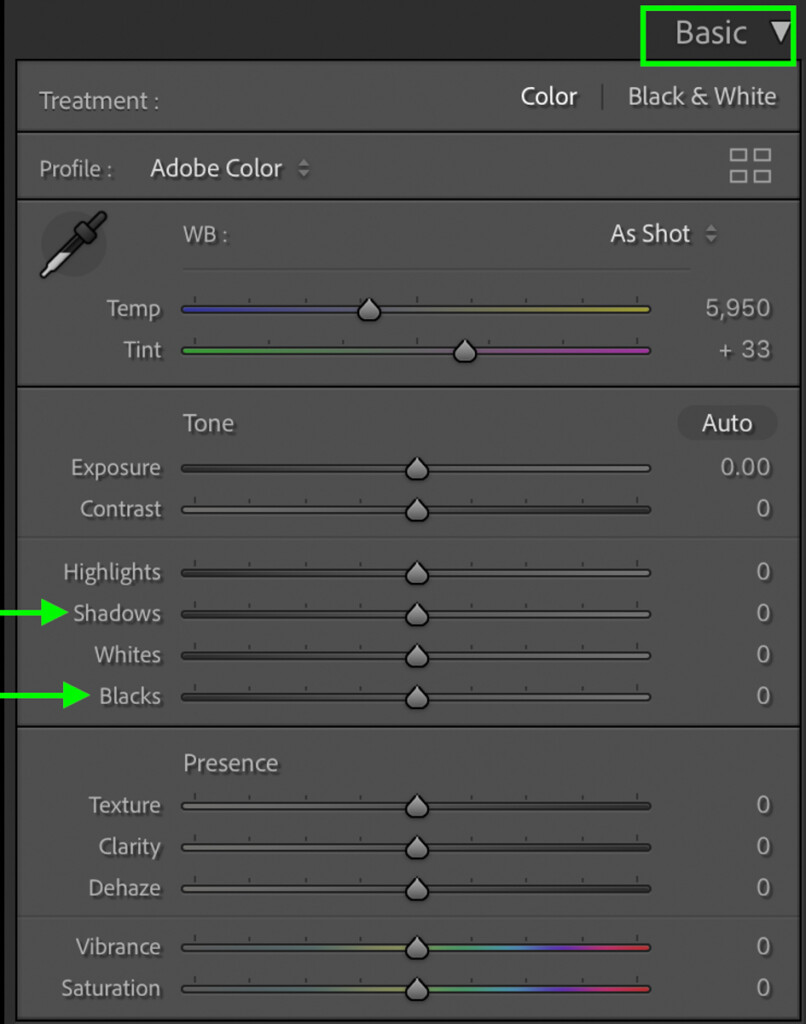
The first two sliders to adjust will be the Blacks and Shadows sliders. These control how bright the dark areas of your photo appear.
Since you want to brighten your image, drag these sliders right to brighten the shadows in your image.
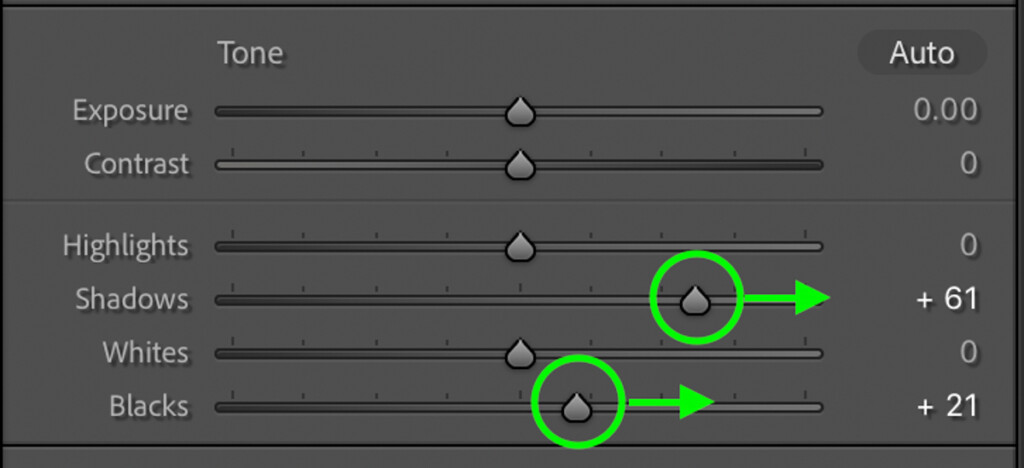
There isn’t any perfect setting to use as it varies for every image. With that said, the goal is to bring back some details that weren’t easily visible in the original photo.
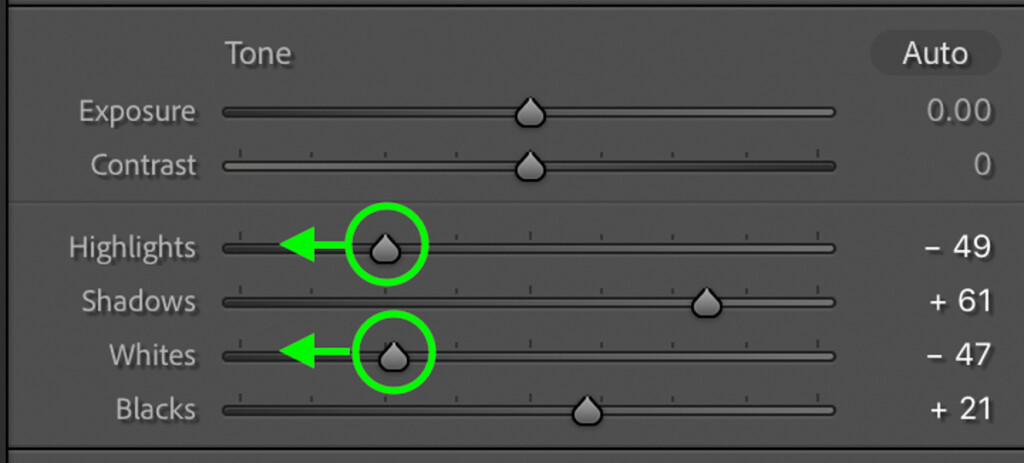
Step 2: Lower The Whites & Highlights Sliders
Now that the shadows have been brightened let’s make sure you have as much detail as possible in the highlights. This can be done by darkening the Whites and Highlights sliders.

The Whites And Highlights control the brightness of the highlights in your image. If your photo is overexposed, these sliders can be extremely useful. In this case, they help make sure you have the most details visible in your photo.
Move each of these sliders to the left to darken the highlights and bring back more information from the photo’s bright areas.
Now you can see far more details between the shadows and highlights than what you could before. This is a great starting point when brightening an image in Lightroom.
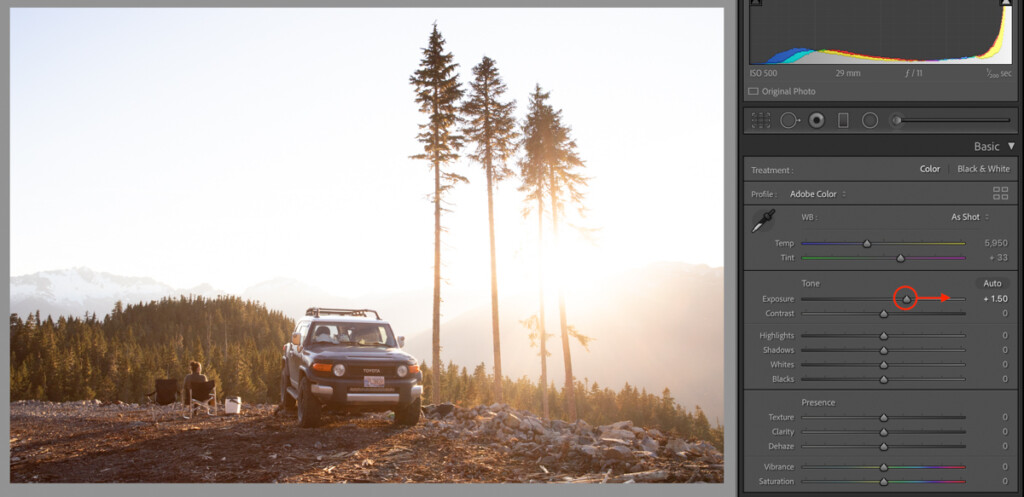
Step 3: Adjust The Exposure Slider To Balance The Brightness
After adjusting the shadows and highlights sliders, your photo may appear a little too dark still. In that case, you can use the exposure slider to solve this issue.
Clicking on the exposure slider at the top of the Basic Panel, move it right to brighten, or left to darken.
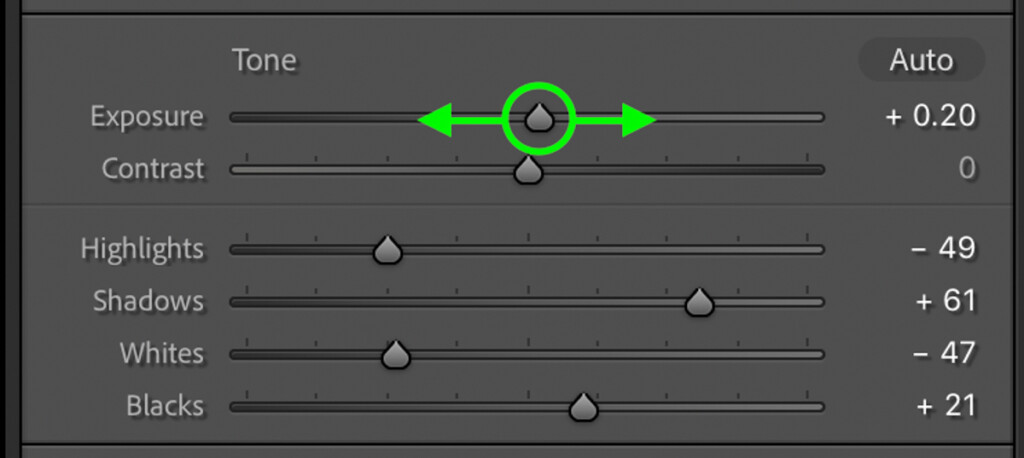
Since you’ve already done the bulk of the brightening in the previous steps, you should only have to adjust this slider slightly. The exposure slider brightens all the exposure ranges equally, making everything brighter at once. That way, you lift the base of all your brightening adjustments going forward.
Step 4: Add Back Contrast With The Tone Curve
After the exposure slider, your photo looks much brighter than it did before. The problem is that it likely looks a little bit “flat” and boring. That’s because there isn’t much contrast left in the photo. Luckily you can selectively add back contrast with the Tone Curve.
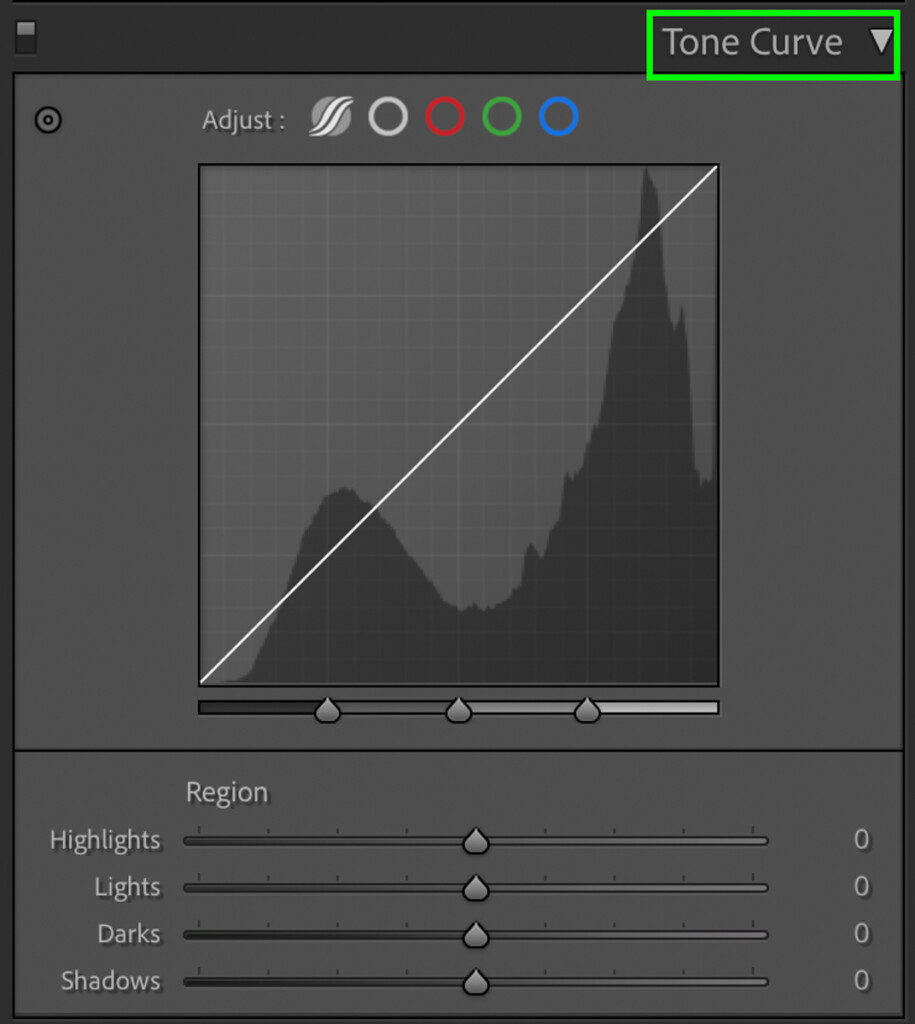
The Tone Curve can be found directly below the Basic Panel.
To make life easy, make sure you’re working with the Region Curve. This breaks down the curve into four manageable sliders rather than having to deal with anchor points. With that said, if you want to learn how to use anchor points with the Tone Curve, click here.
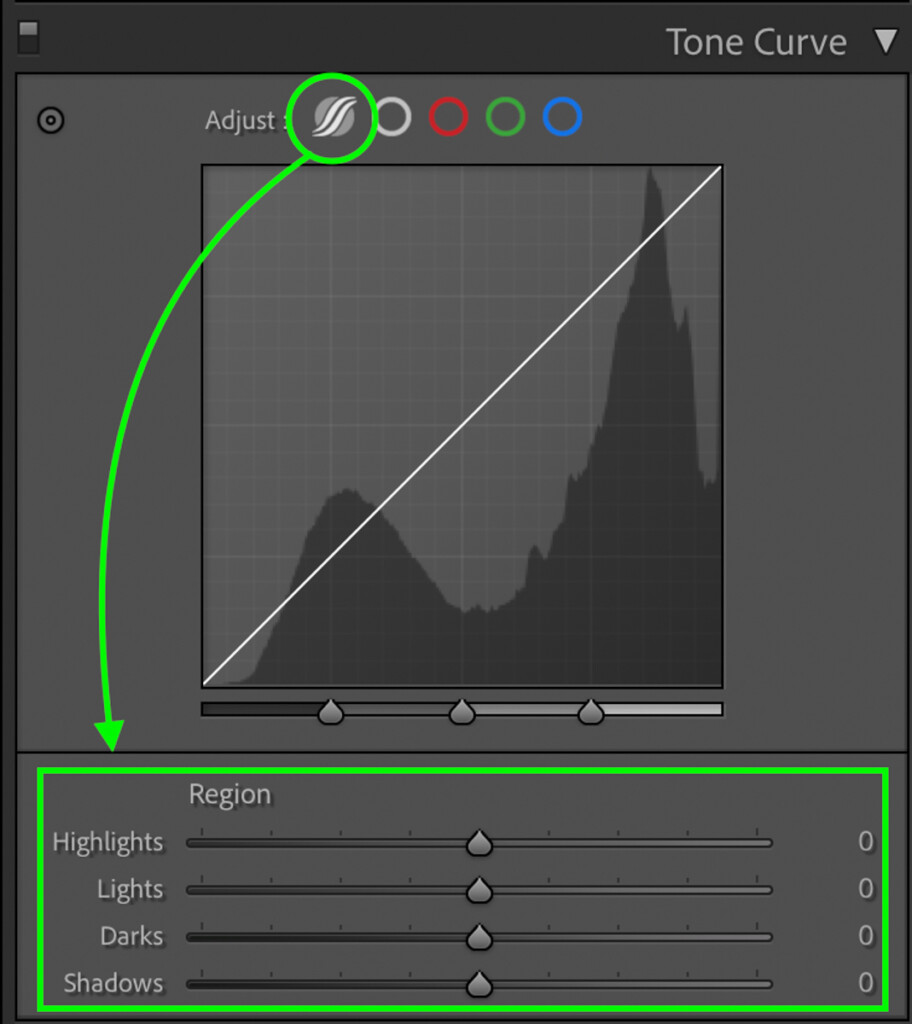
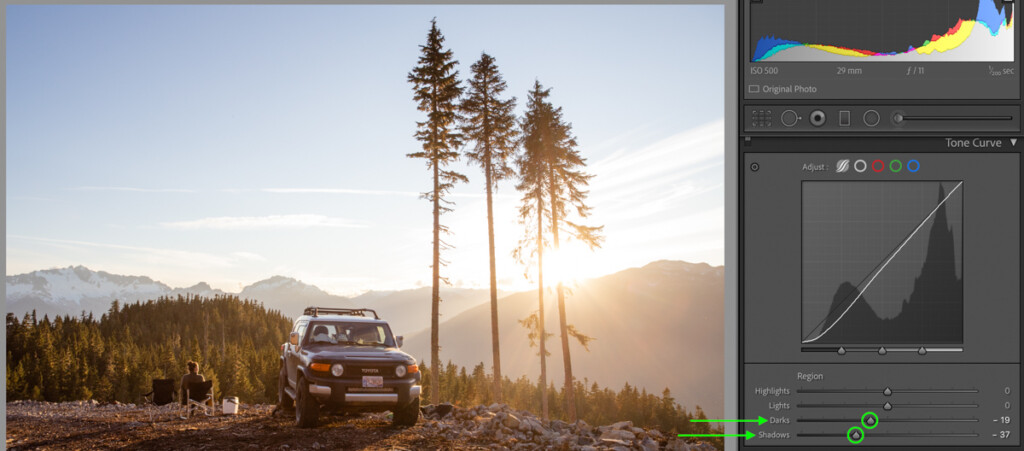
Since you want to add back contrast, you need to darken the shadows and brighten the highlights.
Starting with the Darks and Shadows sliders, decrease them slightly to darken the image’s shadowy areas. Just a small adjustment will do since it makes the shadows come to life while keeping most details.
Next, increase the Whites and Highlights sliders to make the brighter areas of the photo pop a little more. Once again, you’ll only need to make a small adjustment here. Just enough to enhance the brighter areas without making them look over-edited.
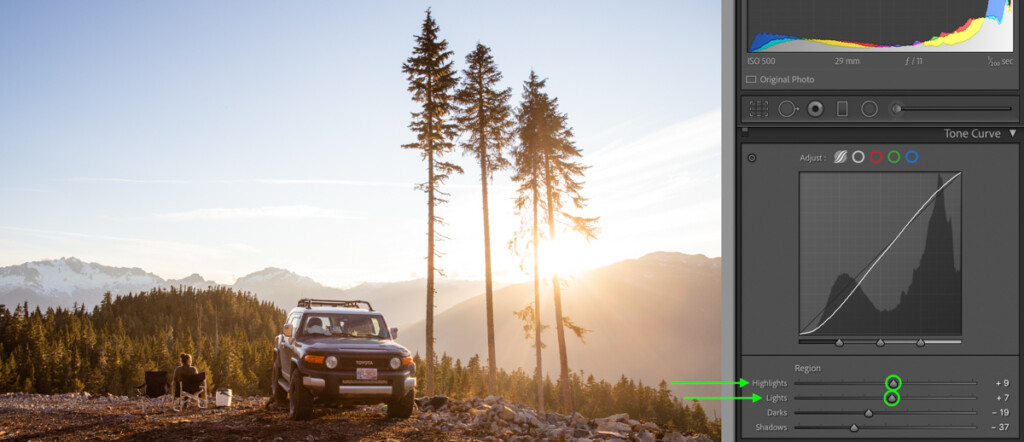
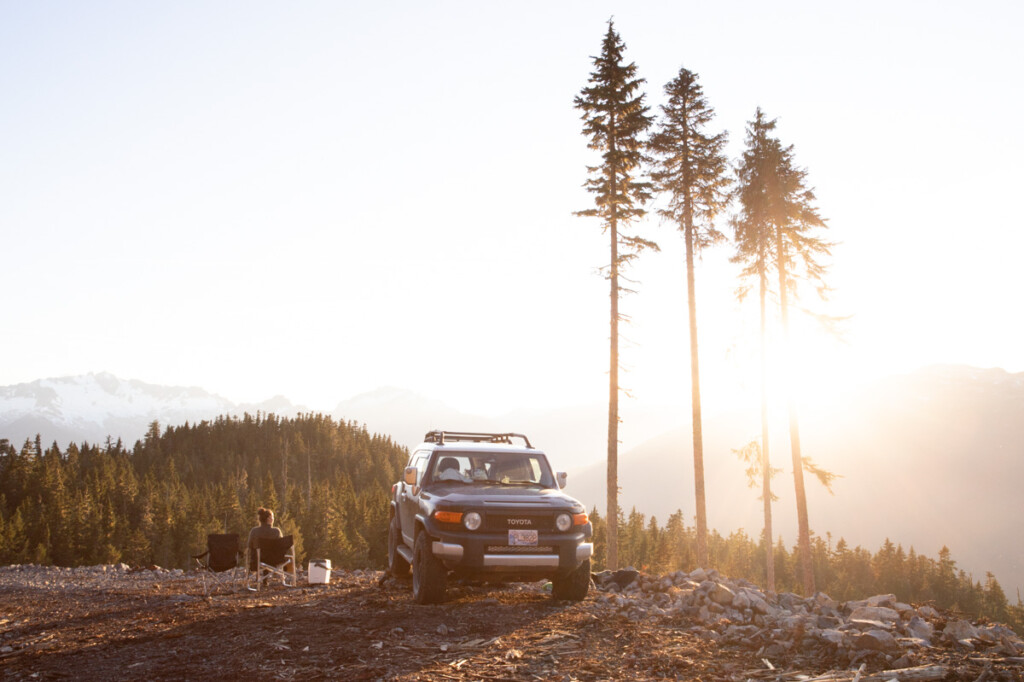
Now you’ve added some contrast back into the photo, and the photo is looking a lot brighter than it did originally! Let’s go into the final step and take these brightening adjustments in Lightroom one step further.

Step 5: Selectively Brighten Using Luminance In The HSL Panel
Within the HSL Panel is an option called Luminance. This setting lets you edit individual colors’ brightness and can work wonders for selectively brightening a photo.
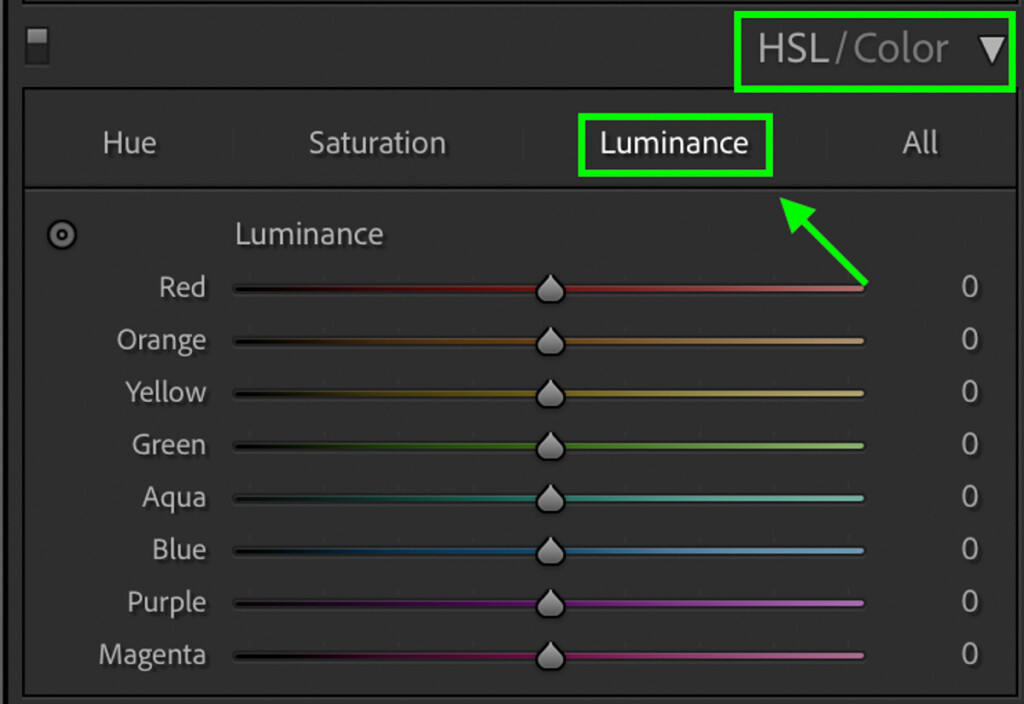
For example, you could increase the blues luminance value to brighten the sky or the luminance of the yellow to brighten a sunset.
The way this tool works is simple. By adjusting a particular color range, you can either brighten or darken that specific color.
Depending on the colors in a particular image, some sliders may prove more useful than others. The best way to do things is by experimenting with each slider and seeing its effects on your image.
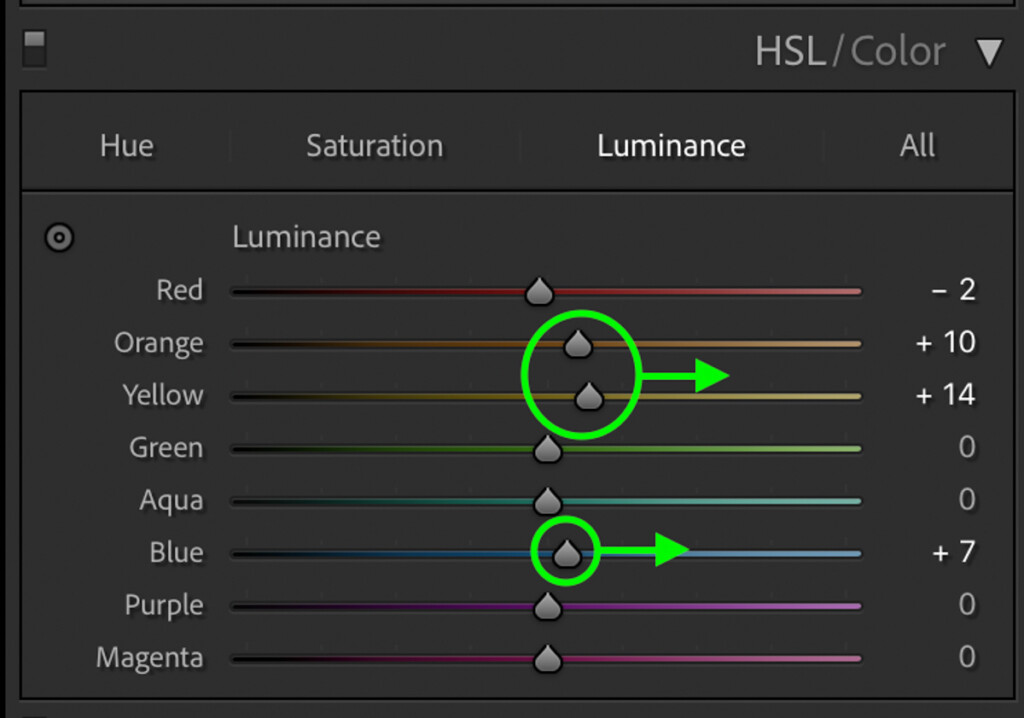
In this case, I’ve used multiple luminance sliders to brighten the sunset, the sky, and parts of the foreground without any selective adjustments!
Now the brightening adjustments in Lightroom are complete, and there are way more details visible than in the original photo.
Success!
Why Not Only Move The Exposure Slider To Brighten A Photo?
So you may be wondering why I didn’t suggest only using the exposure slider to brighten an image in Lightroom. After all, it does brighten everything at once, so wouldn’t it be easier?
The problem with only using the exposure slider to brighten a photo is that you end up with over-brightened areas. Since it applies a general exposure increase, you’ll start to lose details in the already bright areas of your photo. In the case of this image, that means parts of the clouds and the sky begin to lose information.
By the time the exposure is bright enough to see the shadows in the photo properly, the mid-tones and highlights don’t look good anymore. That’s why it’s so valuable to use the darks, shadows, whites, and highlights sliders to adjust exposure ranges selectively.
After all, some parts need more brightening than others. So using a general brightness adjustment as your only tool just doesn’t offer the best results.
To give you a comparison, here’s what the same photo looks like when only brightening with the exposure slider:
Now here’s a version using the selective brightening adjustments we used in this tutorial:
There’s clearly a big difference in how those images look, and the second one has a far more balanced and professional feel.
Now you know how to make a photo brighter in Lightroom using a tried and true 5 step process. This technique works for any image and guarantees a clean and professional result every time. Since you have the most control of your brightening adjustments this way, it’s the clear strategy for your photo brightening needs!
Happy Editing,
Brendan 🙂


