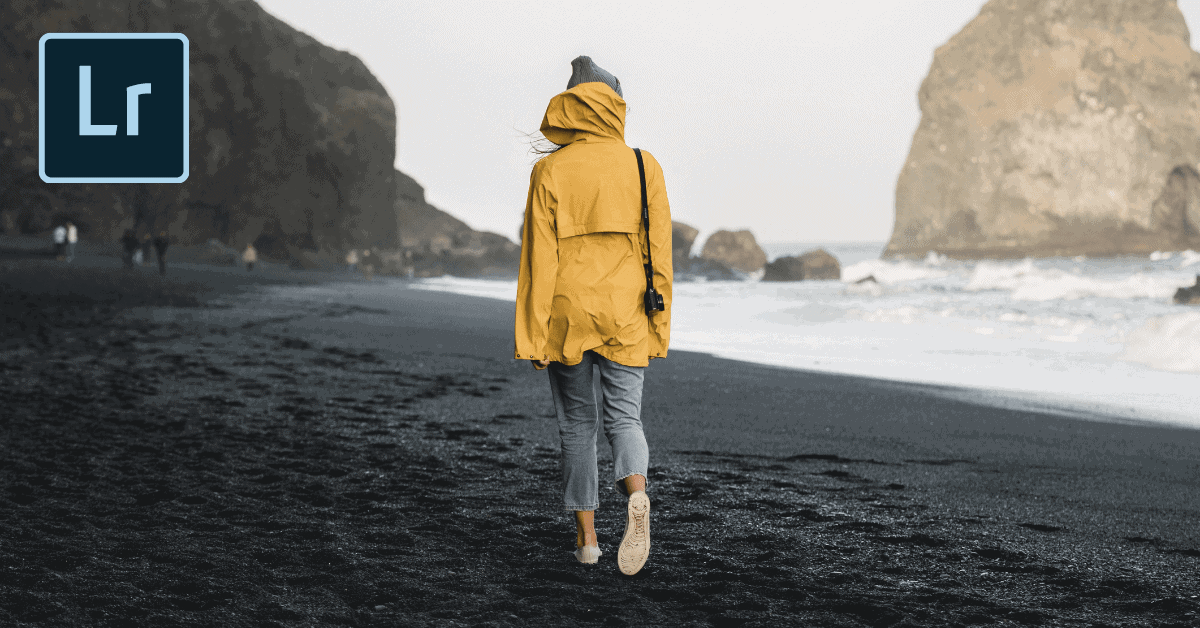

How To Edit Muted Tones In Lightroom
Muted colors in your photo editing can be the perfect way to stylize an image, and with the help of Lightroom, it can be done with a few simple sliders. Unlike other styles of photo editing, muted tones give your image a softer and more desaturated look. This ends up looking especially good with portrait photos or as stylized images for your Instagram feed.
To get muted tones in Lightroom, start by lifting the shadows using the Tone Curve to soften the image. Next, use the HSL adjustment to target and desaturate the most dominant colors in your photo. Once those colors are desaturated, increase each one’s luminance value to make them come to life. Now you’re left with muted tones in your edit!
With that said, there’s a fine balance between muting the colors in your photo and just making it look grey and flat. In this tutorial, you’ll not only learn how to edit muted tones in Lightroom but how to make your photos pop with muted tones.
What Are Muted Tones?
Muted tones are a more desaturated and grey-looking version of the colors in your photo. These colors tend to look more dulled down, favoring light grey hues to subdue the overall saturation. These types of tones work well to stylize a photo edit, especially with portrait photography.
You can mute or dull down any color you want in an image by desaturating it; however, this technique works best when altering the most dominant colors in a photo—things such as a blue sky or the green leaves on a tree.
Since muted tones are created completely with color adjustments, the tools you need to use are relatively straightforward. In Lightroom, the HSL (Hue, Saturation, Luminance) Tool allows you to target any color in your photo and dull it down. The advantage is you can make this style of edit with just a few sliders.
Editing Muted Tones In Lightroom – Step By Step
Now let’s walk through a step-by-step process of editing muted tones in Lightroom. With only 5 steps, you can create this effect with any photo, all without any selective adjustments.
If you’re new to the tools in Lightroom, you can brush up your knowledge in this post on how to edit photos in Lightroom.
Now let’s edit some muted tones!
Step 1: Correct The Brightness
Before you actually do any of the creative edits for this effect, let’s start with the basics and brighten the photo! If you’re working with a RAW photo straight out of camera, you’ll want to adjust the Highlights, Whites, Shadows, and Blacks sliders.
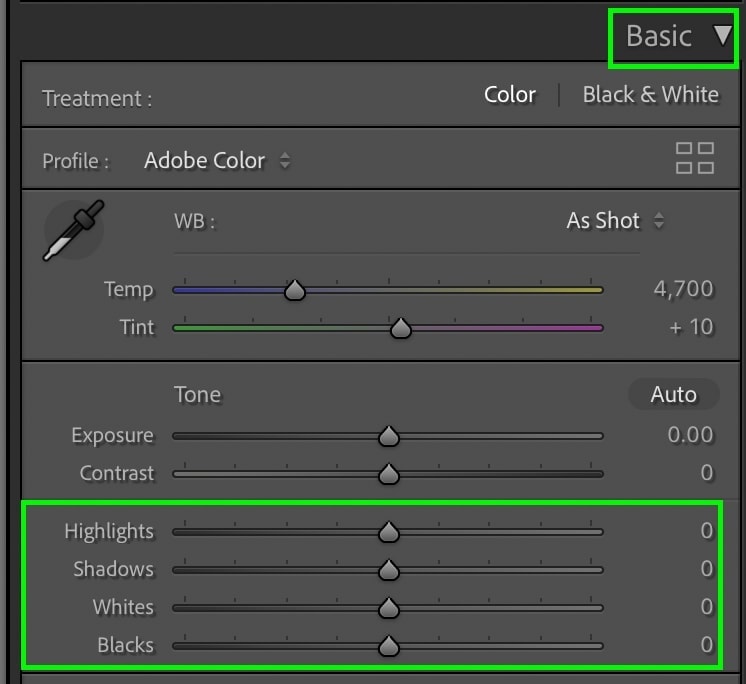
This way, you can better control the brightness of your photo by each exposure range. Every photo will need a slightly different adjustment depending on the starting brightness.
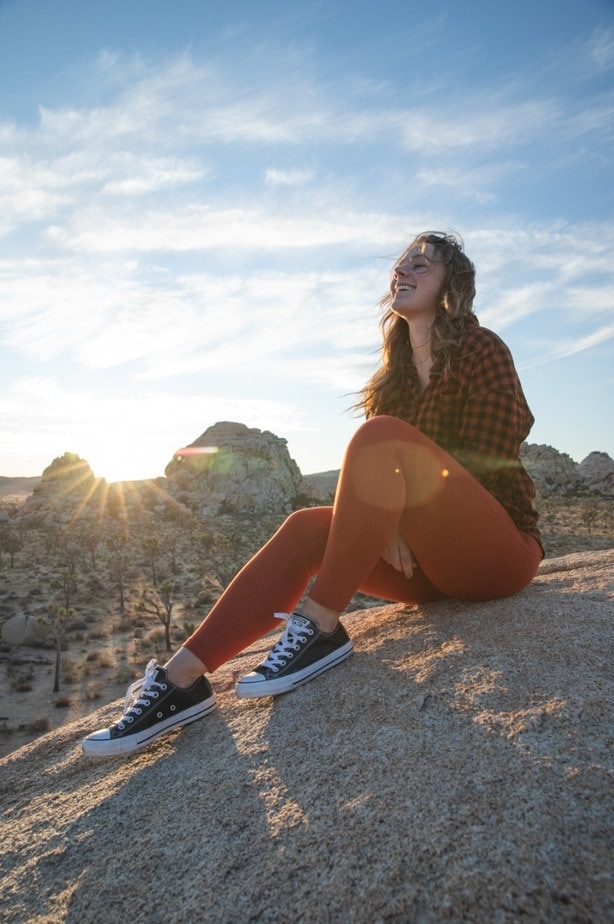
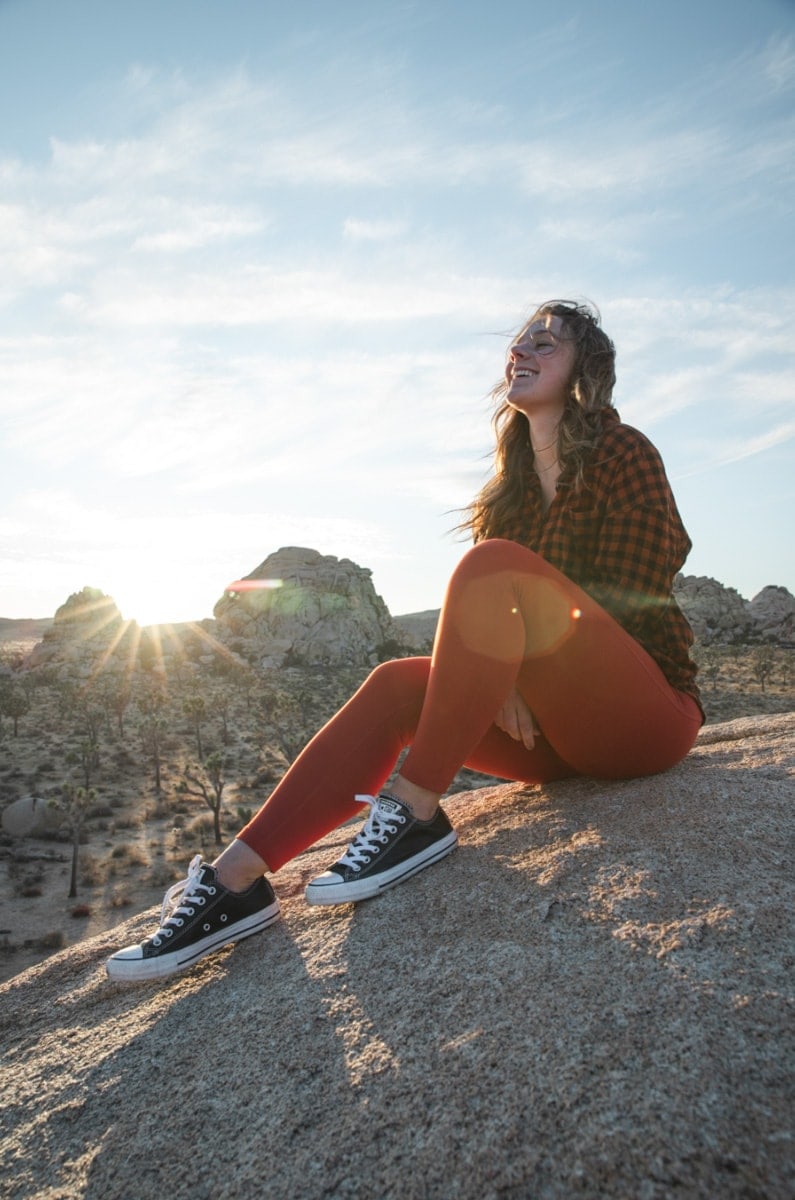
In my example image, the photo has some dark shadows and bright highlights. That means you can lift the shadows and bring down the highlights to help balance things out.
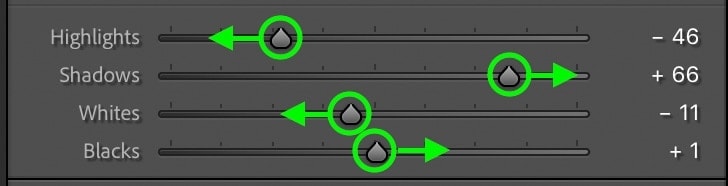
To ensure the image doesn’t start looking washed out, I’ll leave the Blacks relatively untouched.

If you’re still in need of brightening, you can boost the exposure slider to brighten every part of your photo at once.
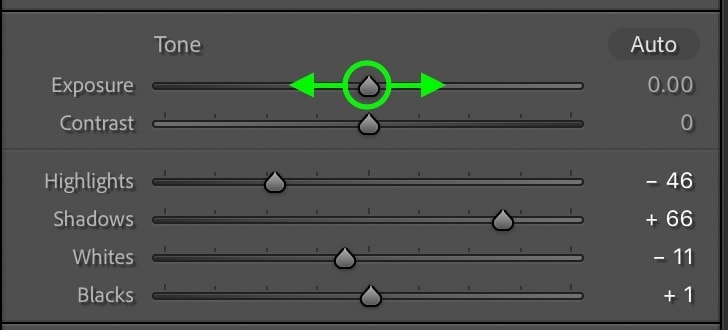
Now you’re left with a more balanced exposure, and you’re ready to start adding some muted tones!

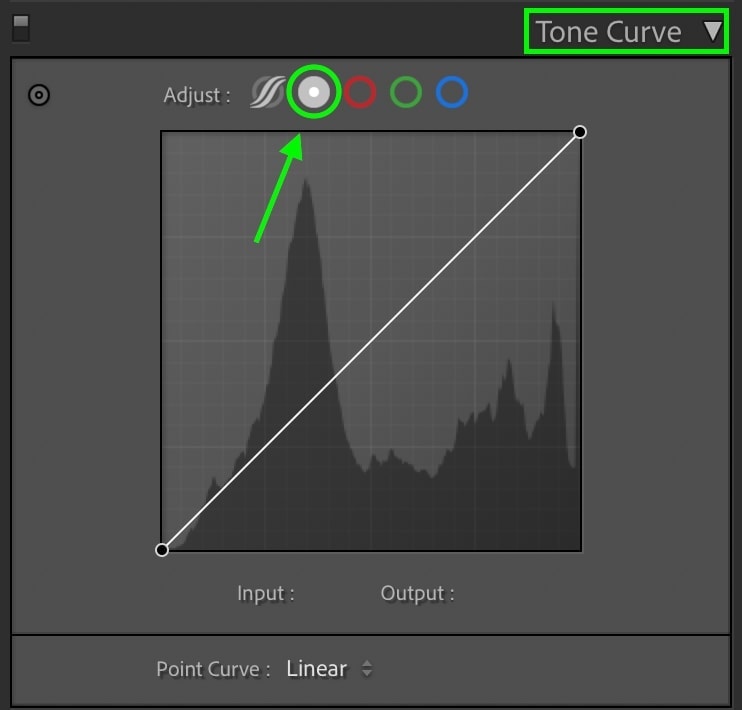
Step 2: Soften The Shadows Using The Tone Curve
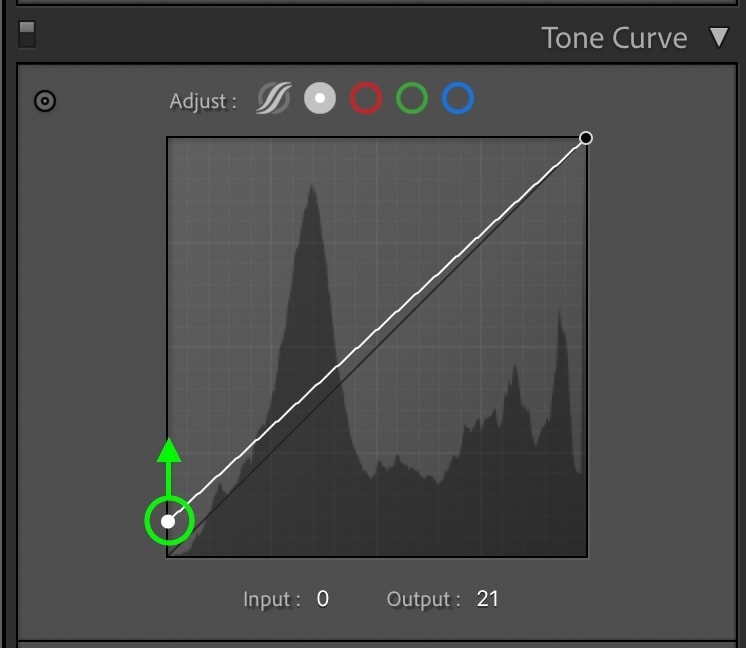
Using the Tone Curve, you can add some creative contrast effects to help accent the muted colors in later steps. A great way to do this is by adding a matte look to your photo. This technique works by lifting the base of your shadows to dull down all of the colors and contrast.
Start by changing the Tone Curve type to “Point Curve.” This option lets you add anchor points along the curve manually, offering better control over your adjustments.
To lift your shadows’ base, click on the bottom corner of the curve and drag upwards. This will make your photo look more “flat,” so be sparing with the adjustment.
Once you’re happy with your new base, add back a little bit of contrast. Clicking on the shadows and dragging down, add a second anchor point in the mid-tones and drag it up.
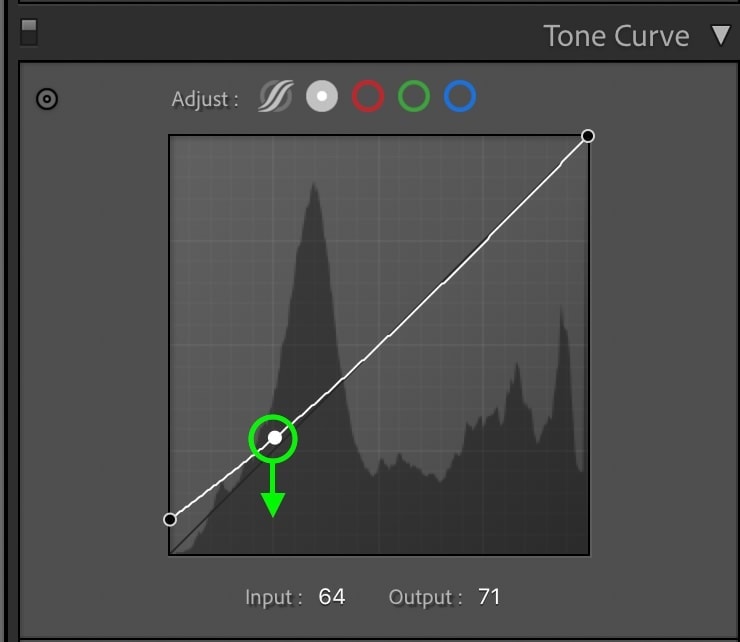
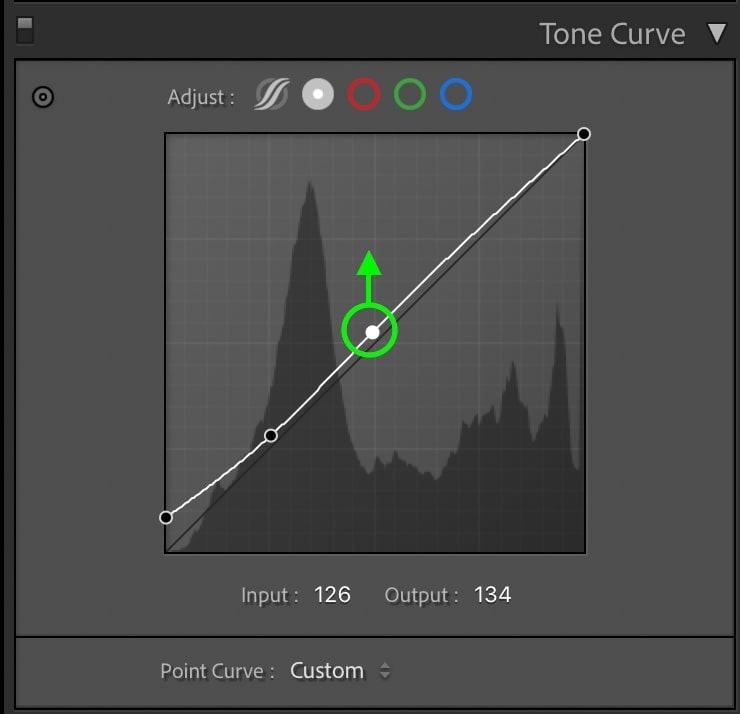
Now you’re left with a matte look without making your photo look completely washed out.
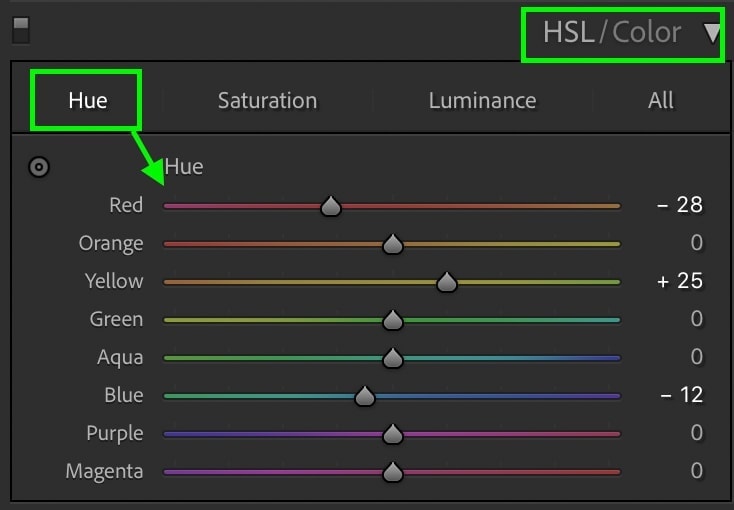
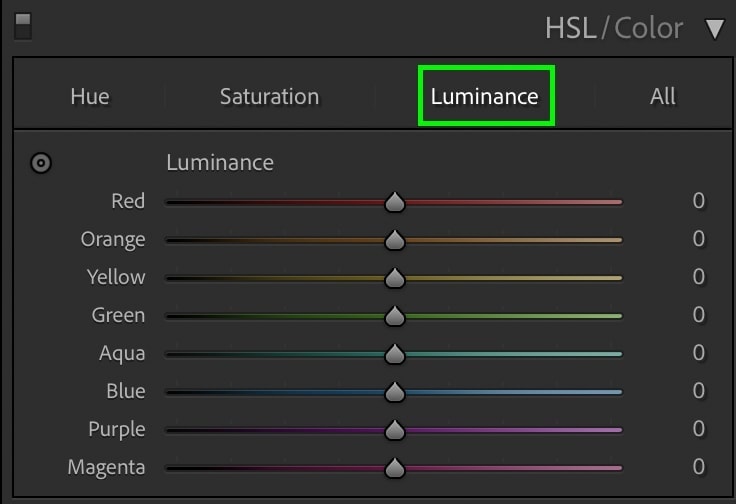
Step 3: Desaturate Colors Selectively With HSL
Scrolling down to the HSL adjustment, start things off by adjusting the hue of your colors as needed. Although this won’t help to mute your photos, it will help to stylize your edit a bit more.
Once you’re happy with the hues, click on the Saturation option.
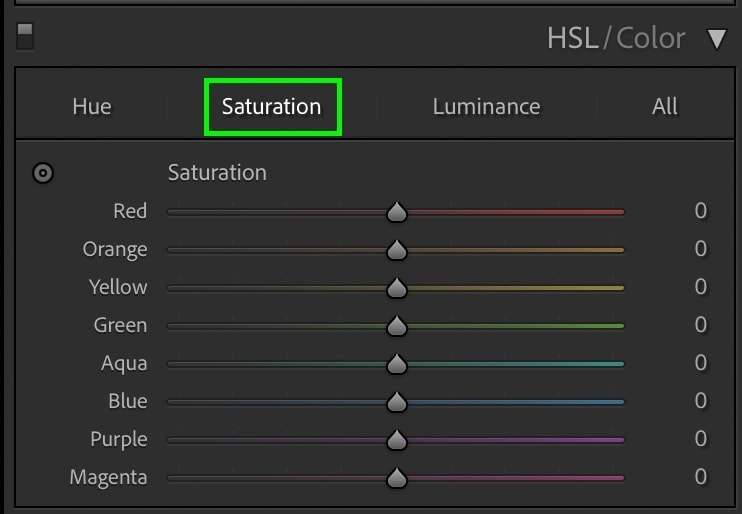
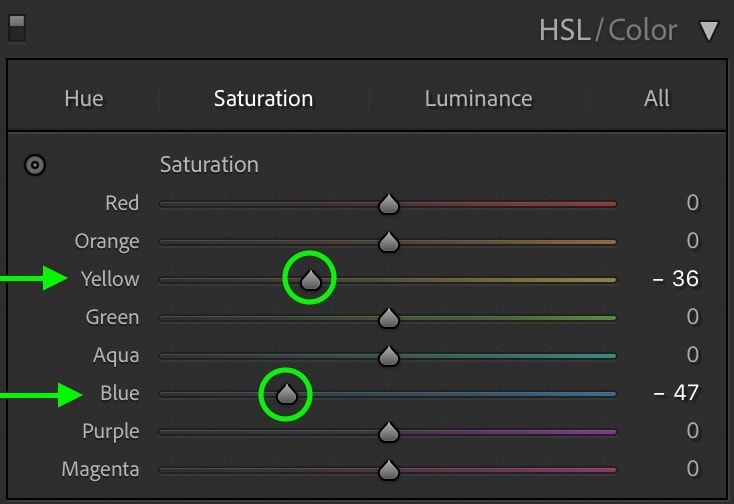
For muted tones that still pop, you want to desaturate the most dominant colors in your photo while leaving less significant ones untouched. For example, in my image, the main colors are yellow (the sunlight) and blue (the sky). The less significant (but still notable) colors are the red of her pants.
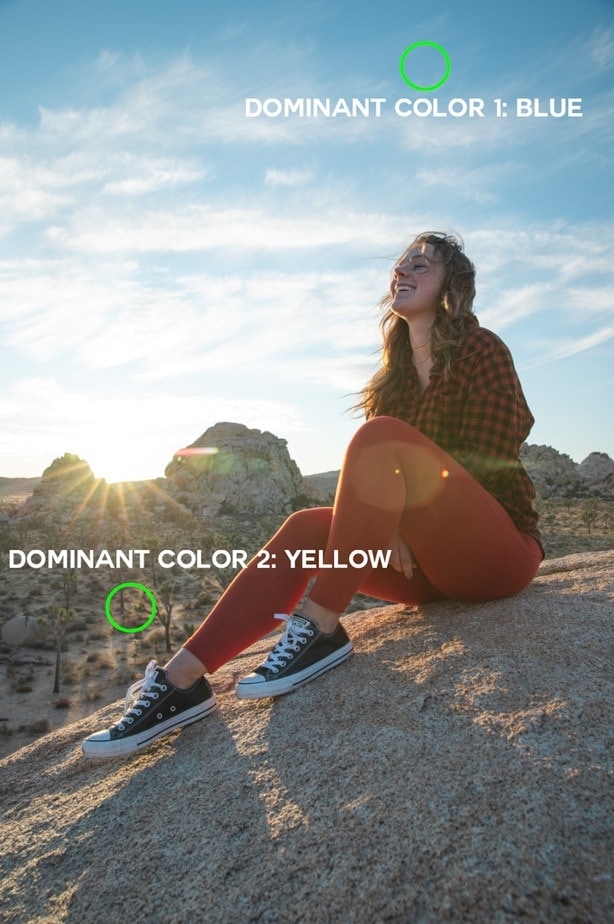
That means I’ll desaturate the blue and yellow hues but leave the red mostly untouched. By dragging down the yellow and blue sliders, I can quickly desaturate those colors.
Make sure to identify which colors are the most dominant in your photo, and make your adjustments accordingly.
After desaturating those main colors, it mutes the colors and dulls down the photo significantly. The problem now is that the photo feels a little too grey and boring. Luckily you can use the luminance adjustment to solve this problem!
Step 4: Brighten Desaturated Colors With Luminance
First, start by clicking on the Luminance adjustment in the HSL panel.
Rather than changing the saturation like before, the luminance setting changes the brightness of your colors. By targeting the previously desaturated colors, you can help make them pop by increasing their luminance value.
In this example, I’ll increase the luminance of the blue and yellow sliders. That’s because those are the most dominant colors in my image and are what I desaturated in the previous step.
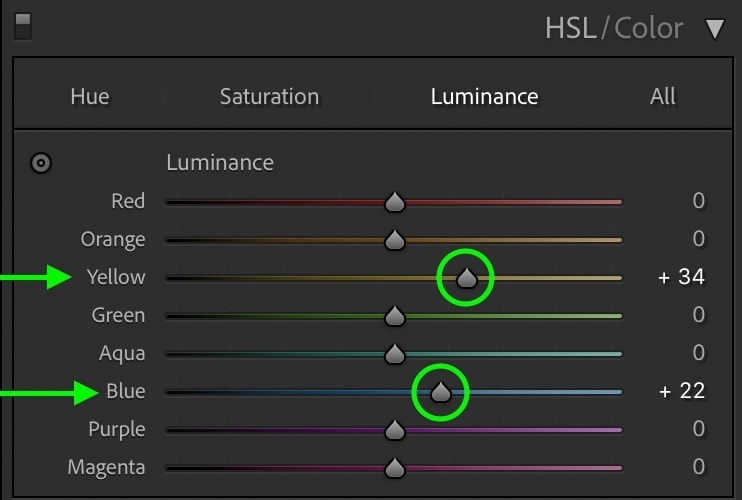
For your image, increase the luminance value of whichever colors you desaturated in the previous step.
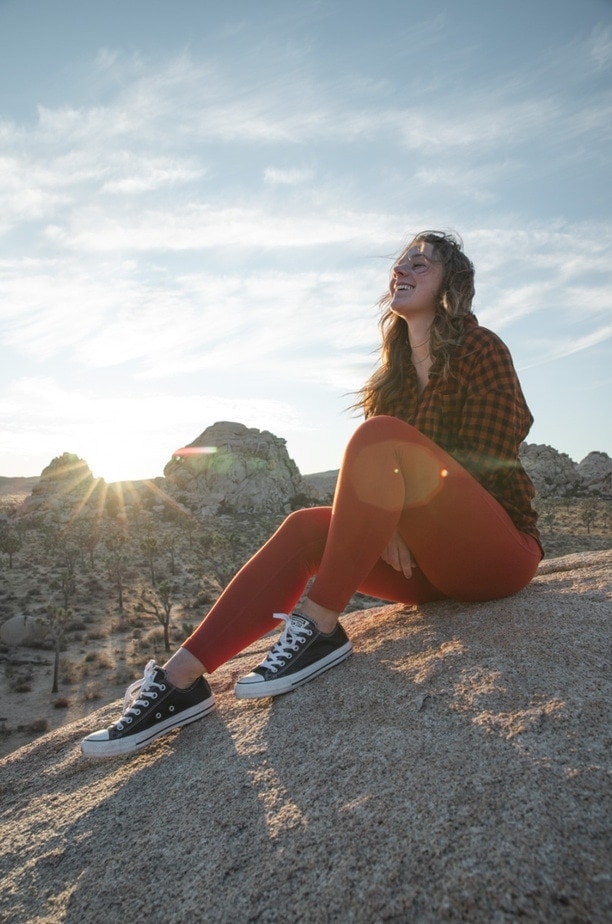
At this point, you have successfully muted the colors of your photo, but things are still looking a little flat. To help make those muted colors pop, let’s add some more contrast.

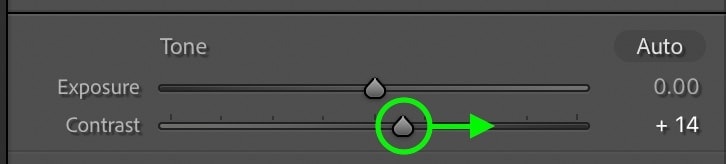
Step 5: Add Contrast
For this final step, you don’t have to do anything fancy; just a simple increase of the contrast slider will get the job done!
Scroll up to the Basic panel and select the contrast slider.
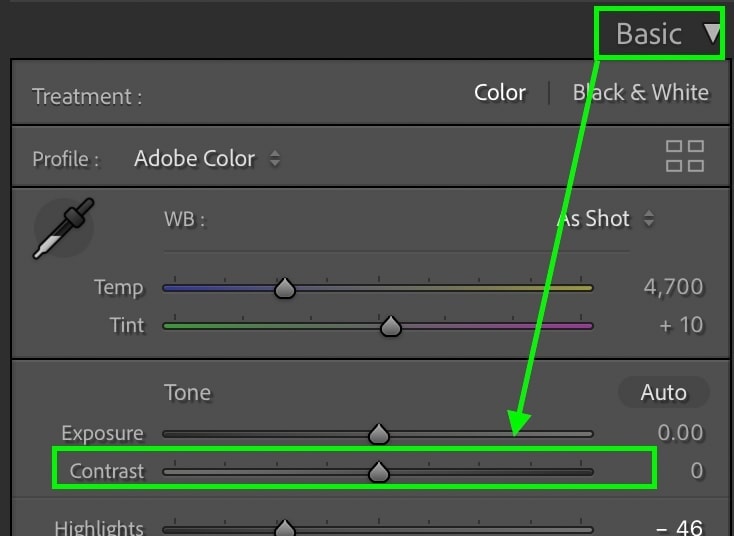
Increase the contrast by moving the slider right and experiment with different settings to see which looks best. This adjustment helps to darken some of the shadows and make your overall image pop a little more.
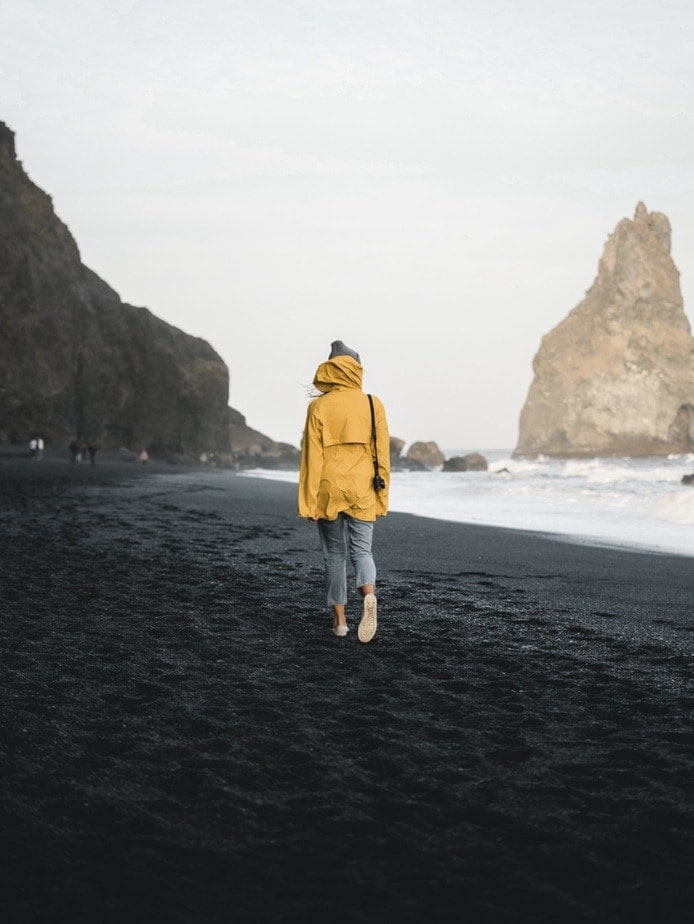
The Result
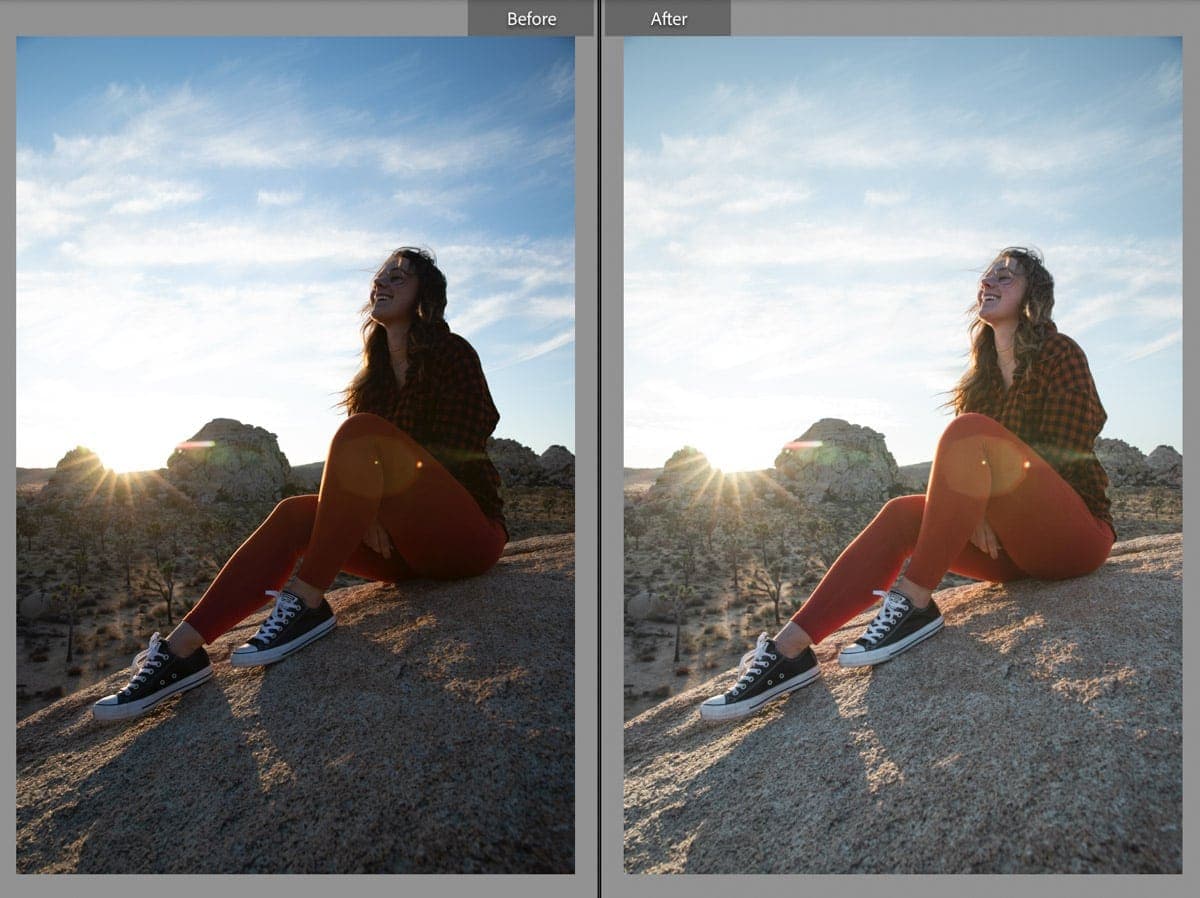
With 5 easy steps, you’re left with beautiful muted tones in Lightroom, all done with just a few sliders. The HSL adjustment is the real hero of this editing effect since it controls exactly how your colors look. By favoring bright desaturated hues in your most dominant colors, you can easily make your image look muted with just a few sliders.
With that said, without the proper brightening adjustments, to begin with, the muted colors won’t look at good as they could. That’s why the brightness and color adjustment duo is the ultimate solution to editing muted tones in Lightroom!
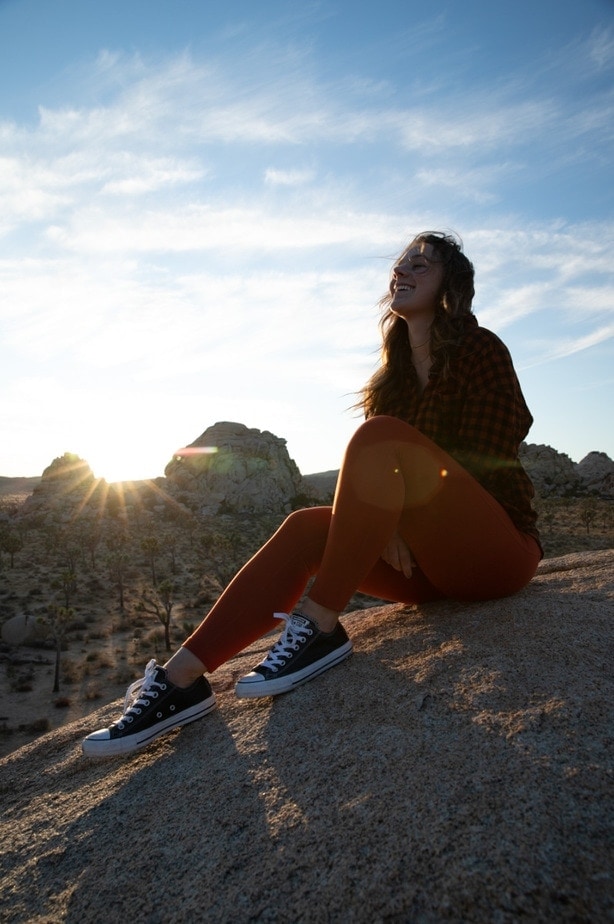
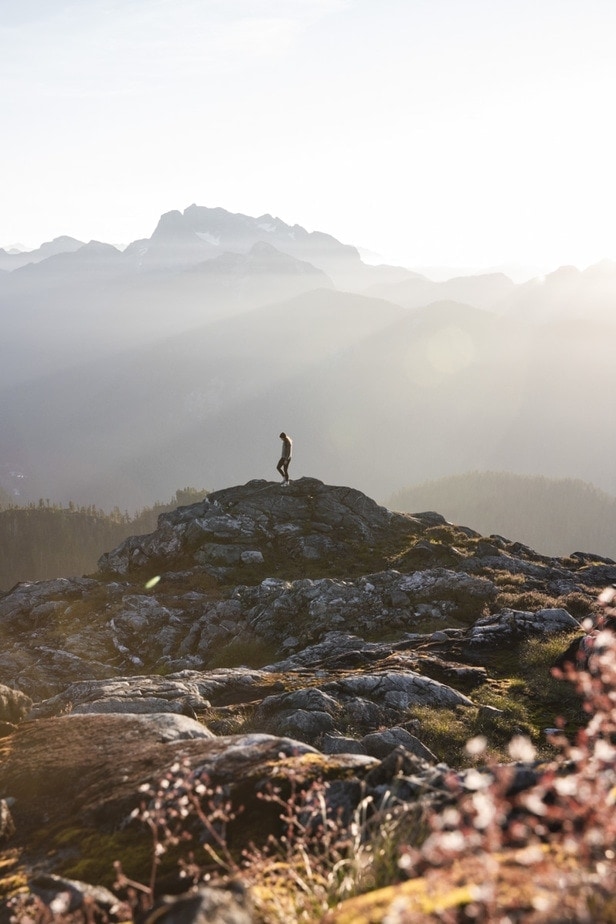
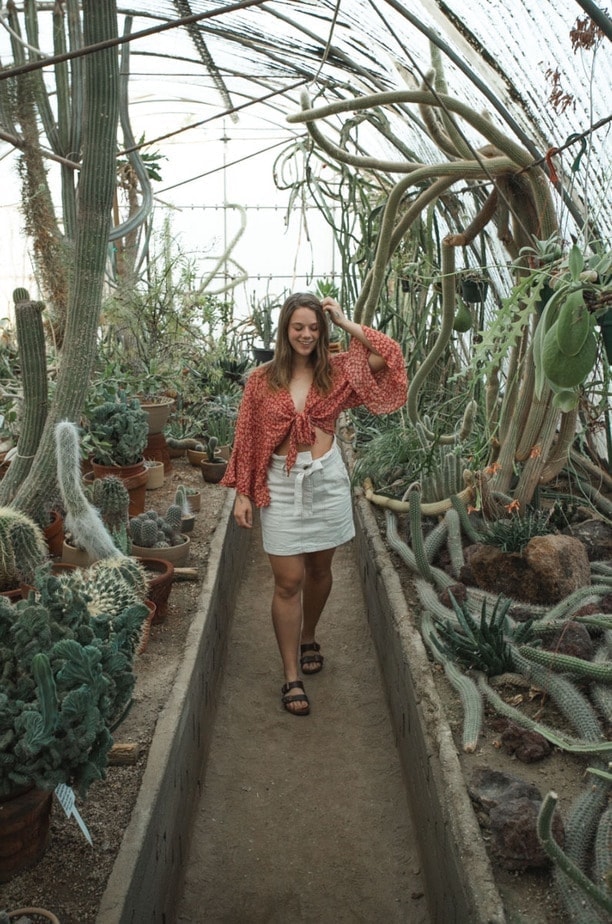
Here are a few more examples of images with muted tones following the same steps outlined in this tutorial:
This photo editing technique looks amazing for portrait photography and even better if you want a stylized Instagram feed. You can create so many amazing editing styles in Lightroom, and it’s a ton of fun to experiment with different options. To help get you going on some other great photo editing styles in Lightroom, check out some of these other recent tutorials below:
- How To Edit Brown Earthy Tones In Lightroom
- How To Make Photos Look Soft & Dreamy In Lightroom
- How To Edit Sunset Photos In Lightroom
- How To Make Your Photos Look Like Film In Lightroom
Happy Editing!
Brendan 🙂


