


The Best Ways To Share Photos With Clients
If you’ve tried to send a photo to someone through social media or email, you’ve likely noticed that they don’t deliver in the same high-res quality as the originals. To make matters worse, there’s often a limit to how many photos you can share at once. After you’ve finished a shoot and need to deliver your photos to the client, what’s the best way to share them? Luckily there are a variety of free photo-sharing apps that are perfect for photographers.
The best ways to share photos with clients is by using:
Let’s dive into each of these programs and discuss the advantages (and disadvantages) to each.
What To Look For In A File Sharing Programs
Before you choose a file-sharing program to use, you want to consider how you’ll be using it. Depending on the file types, size of files, and volume of images, different options may work better than others. Here are a few things to look for in photo-sharing applications.
– Storage
The most important option to look at is storage. Every photo-sharing website has different storage options depending on your needs. When you want to share high-resolution images with a client, it won’t take long to rack up a serious amount of space. For example, if you were to deliver 1000 JPEG photos averaging 20MB each, the entire batch would be 20GB! With some programs, this might exceed the free version’s capabilities, while others may require you to break the batch into multiple file transfers.
Before you decide to use one program or another, make sure to consider how many files you need to send. That way, you don’t end up exceeding the limits of the free versions without realizing it!
– Will File Transfers Expire?
Certain photo-sharing programs set an expiration date on when your transfer can be downloaded. This time frame is often 7 – 14 days after the file has been sent. When your file transfers can expire, your client must be on top of downloading them. If it’s left too long, the transfer will expire, and you’ll have to resend everything. This can be a huge time suck if you need to send multiple transfers for a second or third time. When working with clients, it’s nice to give them the freedom to download files at their leisure. Whether they want to download the day of or a month later, it makes no difference to you!
– Professional Galleries
If you’re sending photos to friends and family, this isn’t as big of a deal. When you’re working with photography clients, using a gallery type photo-sharing program is a great way to add a professional look to your business. With galleries, clients get a link to access a gallery set of all their images that look a lot like a portfolio website. It’s more pleasing to look at compared to a standard .ZIP download on your computer and is sure to leave a positive impression on whoever you work with.
6 Best Free Ways To Send High-Resolution Photos
Now let’s talk about each photo-sharing application individually to help you decide which one is best for you.
1. WeTransfer
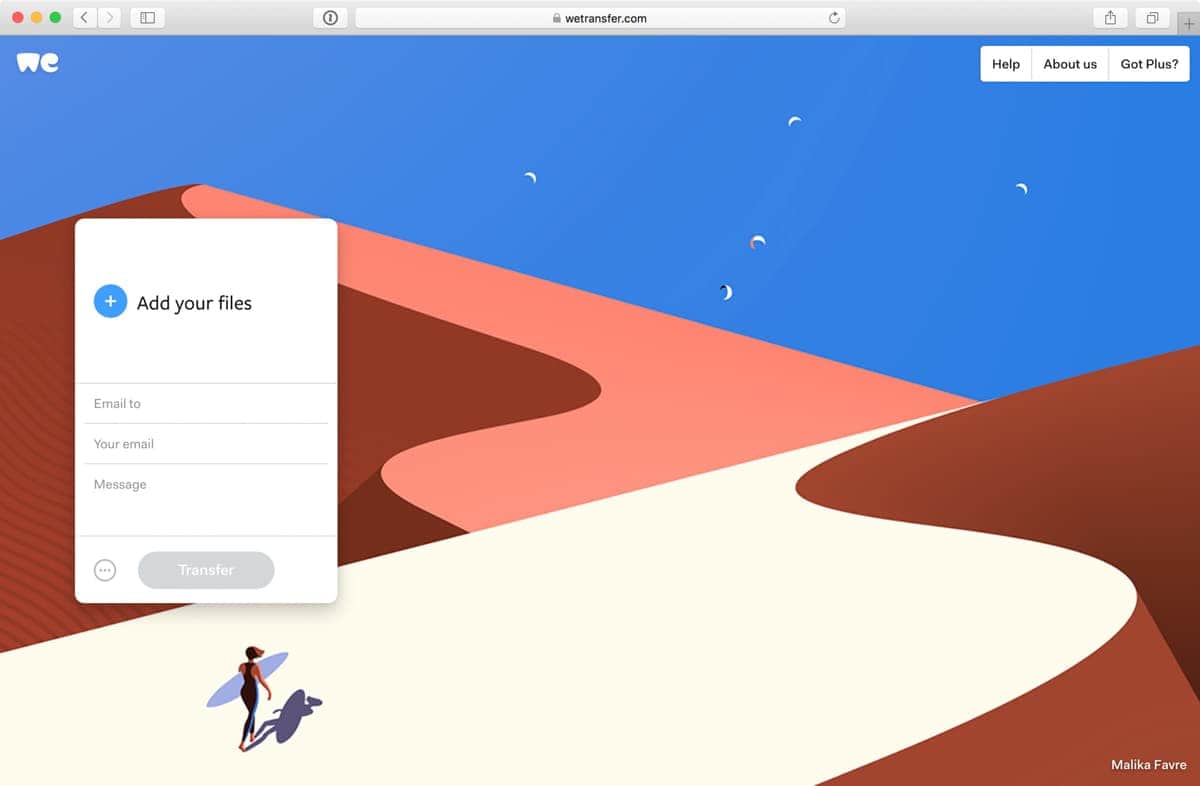
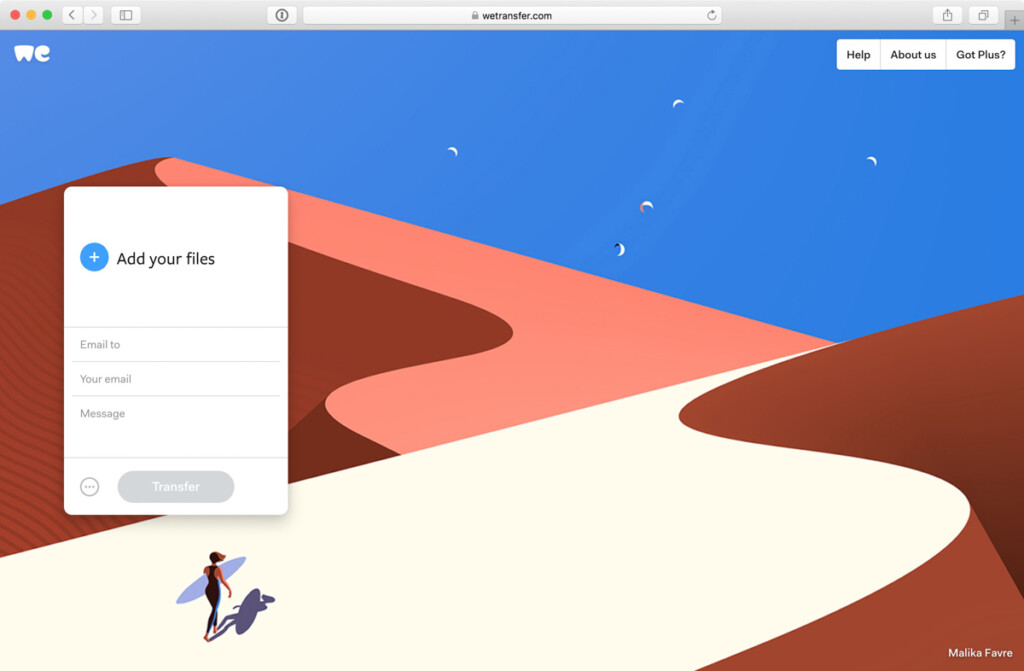
WeTransfer is one of the simplest and most effective file-sharing services out there. It’s totally free, and you don’t need to make an account to get started. To make a transfer, all you need is to type in your client’s email address, your email address, attach your files, and you’re good to go.
On the receiving end of WeTransfer, your client will get an email notifying them that a WeTransfer has been made. There will be a list of all the file names included in the transfer, and an option to download the files. Once download, all of the images will be found in a WeTransfer folder directly on their computer. If you’re looking for a fast and effective way to send high-resolution photos to your clients, this is a fast and free way to do it.
The downside to Wetransfer is that the free transfer limit maxes out at 2GB. That means if you have 6GB of photos to send off, you’d need to break it up into 3 different transfers. Since there’s no limit to how many individual transfers you can make, it’s a forever free file sharing option if you can work around the 2GB sharing limit.
How WeTransfer Works:
Once on the Wetransfer website, type in your client’s email, your email address, and a custom message to go along with the photos. This could be a thank you for your business type message or something to let them know more transfers are on their way.
Next, drag and drop your files into the Wetransfer window or click “Add Your Files” to select them for your computer. Once your files have been attached, just hit send, and your transfer will begin processing!


Once the transfer is complete, your client will receive an email with your custom message and files attached. All they need to do is click the download button to save your transfer directly to the computer. Easy as pie.
2. Google Drive
Google Drive is one of the most versatile photo-sharing platforms because it’s directly linked to your Gmail account. This platform lets you upload any image file you need and is easy to organize into different sets of folders. Google Drive is a cloud storage system that organizes and stores all your photos online. All of your folders or individual files are easily made sharable and can include multiple editors to single folders. If you’re working with someone on a client project, you can both contribute to the same folder from different computers without any worry. Once everything’s good to go, that folder can be shared directly with your client via email or a direct link.
Using a cloud service is extremely handy for photo sharing because you can organize everything like your computer. It’s far easier to keep track of all your folders and who has access to them. Rather than sending individual file transfers that are nearly impossible to keep track of, a cloud service like Google Drive keeps your photos consolidated.
Although Google Drive may seem like the ultimate photo sharing solution, it does have a limit of 15GB of storage with the free version. This is a fair amount of room to send over multiple batches of photos to a client with, but space disappears. If you’re hard-pressed to stick with the free version, you’ll need to actively delete old folders from your drive as you go. As long as your client has saved the folder to their computer, you deleting it on your end won’t affect anything.
How Google Drive Works:
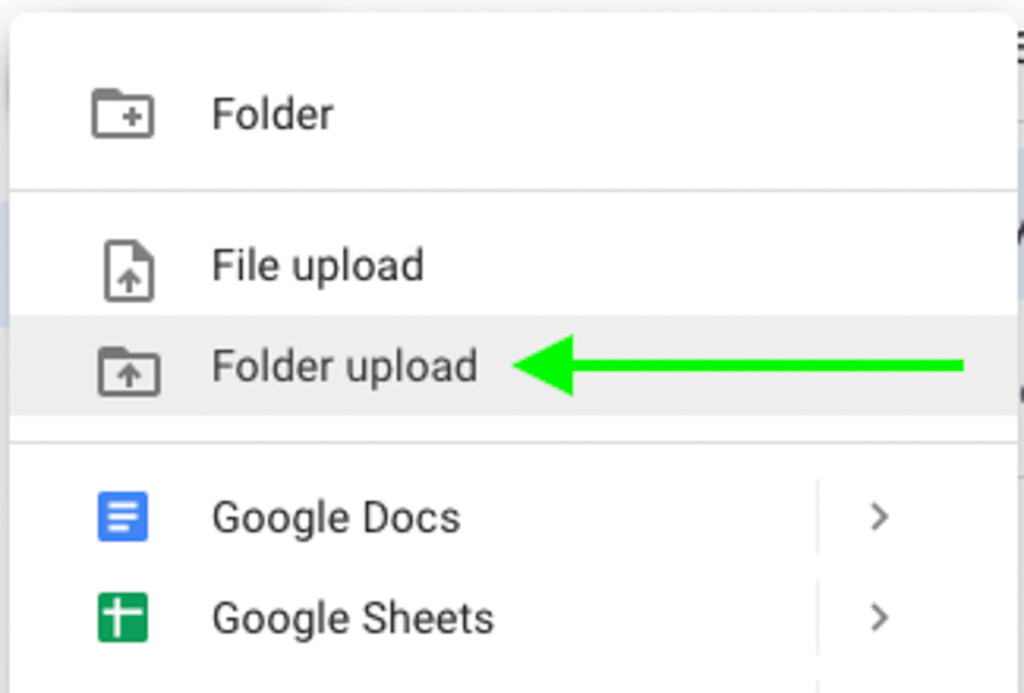
Once on your Google Drive, click on the “New” button on the top left of your screen. Select “folder upload” to select the folder with all your images inside from your computer. After the folder is finished uploading, it will appear in your drive.

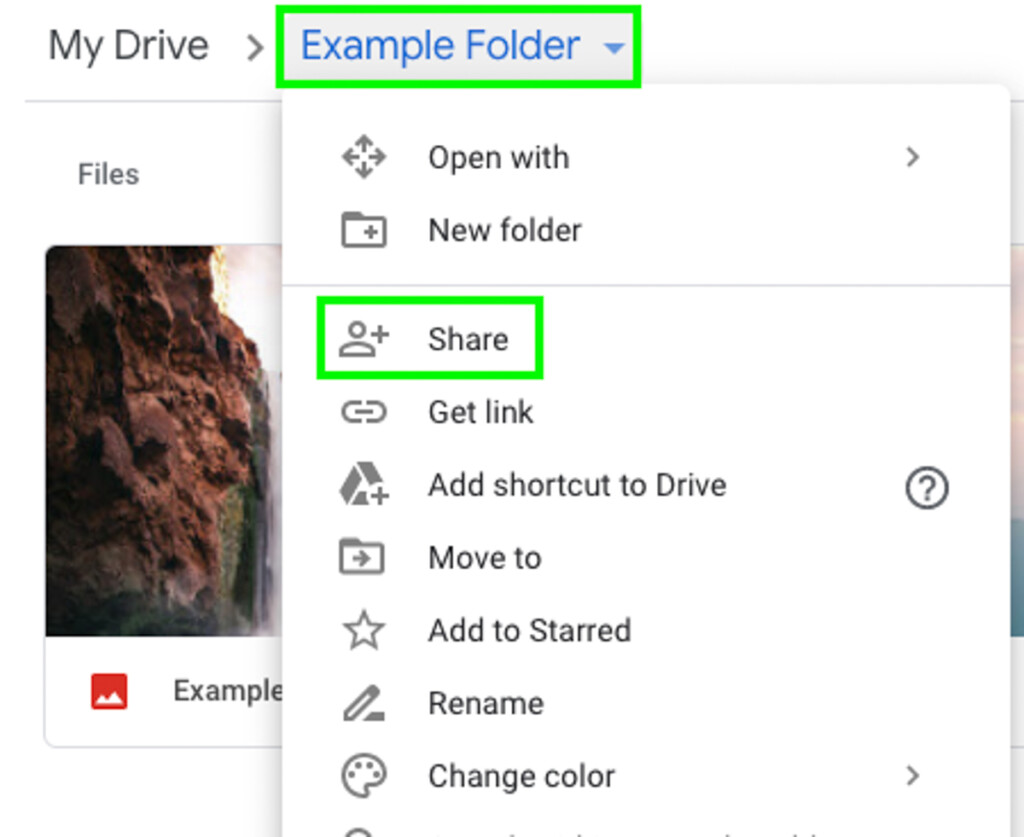
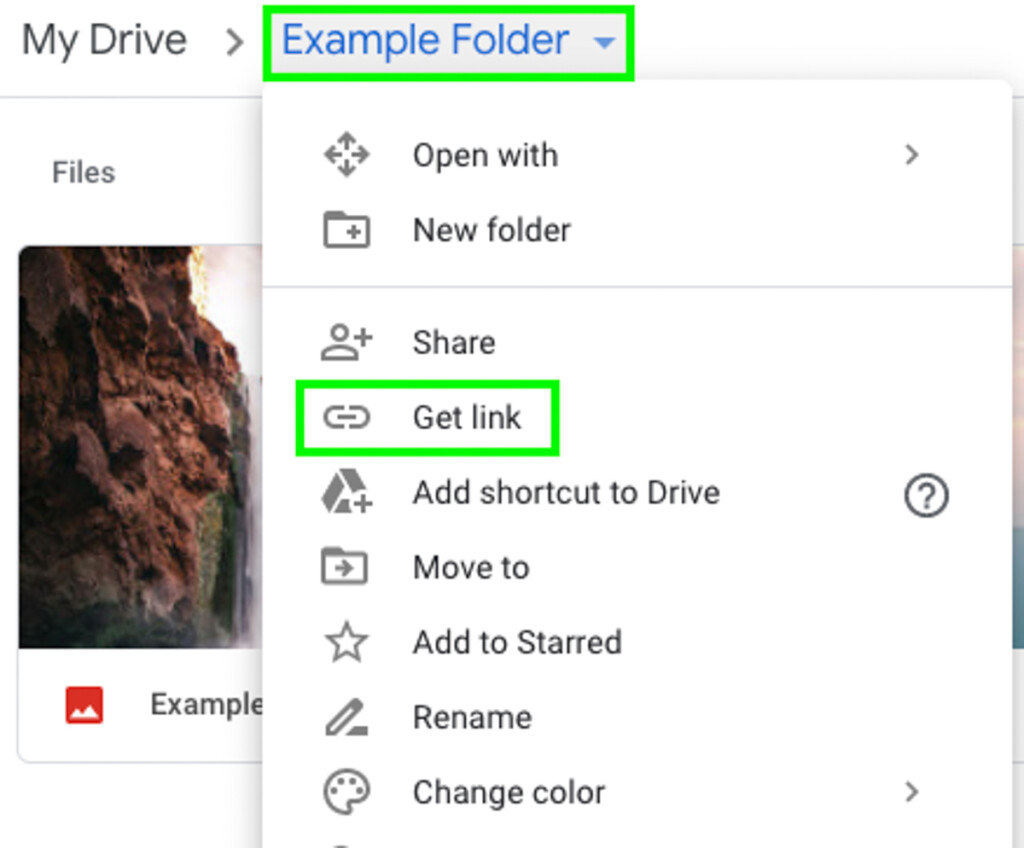
Double click on the newly uploaded folder and click the drop-down arrow beside the folder name. Click the “Share” option to share the folder with a client.
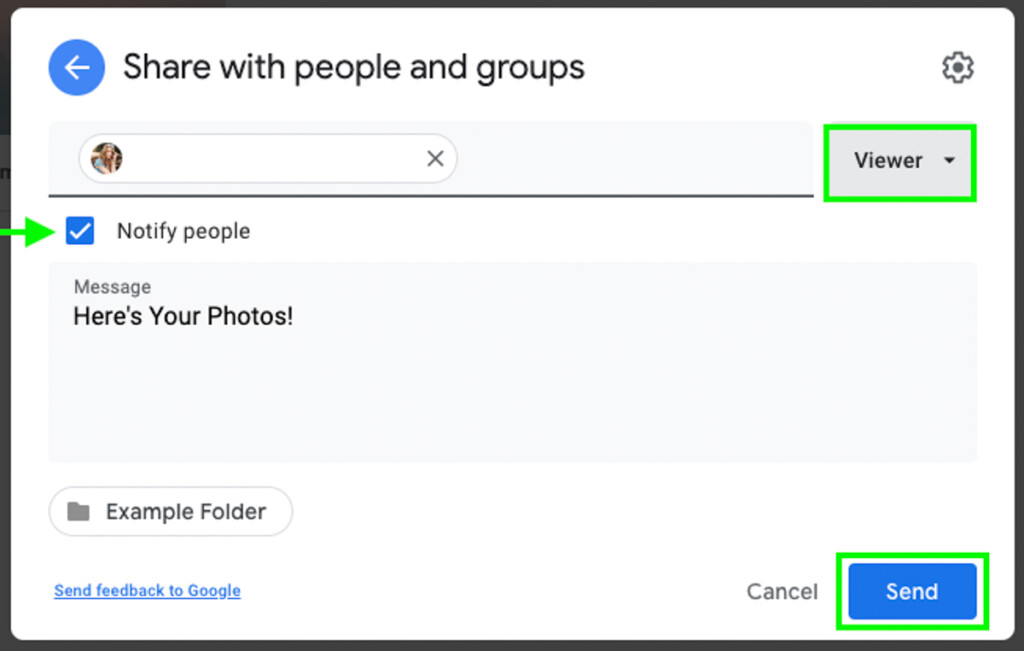
A new window will appear prompting you to add your client’s email. Once this is filled out, you’ll be able to change the accessibility options between the editor or viewer. If you want to give them access to make changes to the folder, set them to the editor. If you only want them to have viewing and download access, set them to the viewer.
Next, add a short message detailing what’s inside the folder and be sure to leave the “Notify People” option checked off. This way, they’ll get a notification that they have access to the folder without you needing to tell them yourself.
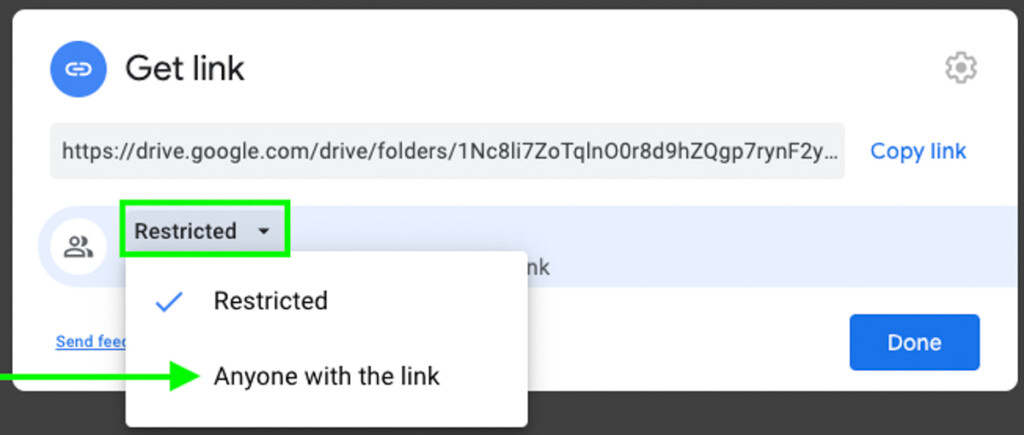
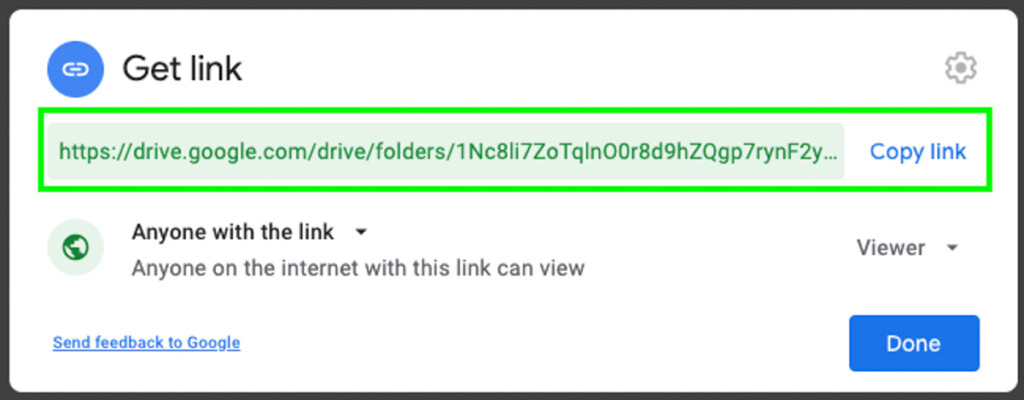
Alternatively, you can create a shareable link by clicking on the drop-down menu beside the folder name and selecting “Get Link.” Change the link type from restricted to “Anyone With The Link,” then copy the link above. Anyone who clicks this link will have access to your folder, making it easy to share via text or social media.
3. Smash

Smash is another fantastic photo-sharing site to share photos to your clients. It doesn’t have any transfer limit size with the free version, so you can send over even your largest files with one transfer. Like most direct file sharing sites, Smash files have an expiry of 14-days after you send the images.
This is one of the easiest to use file-sharing sites since it’s so simple. No extra buttons or confusing layouts. Just a sleek drag and drop layout that lets you transfer high-resolution photos without an issue.
The one caveat to Smash is that file transfers over 2GB get throttled and lose priority. This means that the transfer speed will be significantly slower after you exceed that limit. If you don’t mind waiting a little while for your files to go through, Smash is an incredible, free way to share photos with clients.
How Smash Works:
Go to the Smash Website and drag and drop your files directly into the browser window. The files will automatically begin uploading, and you’ll be prompted to add the contact details for the transfer.
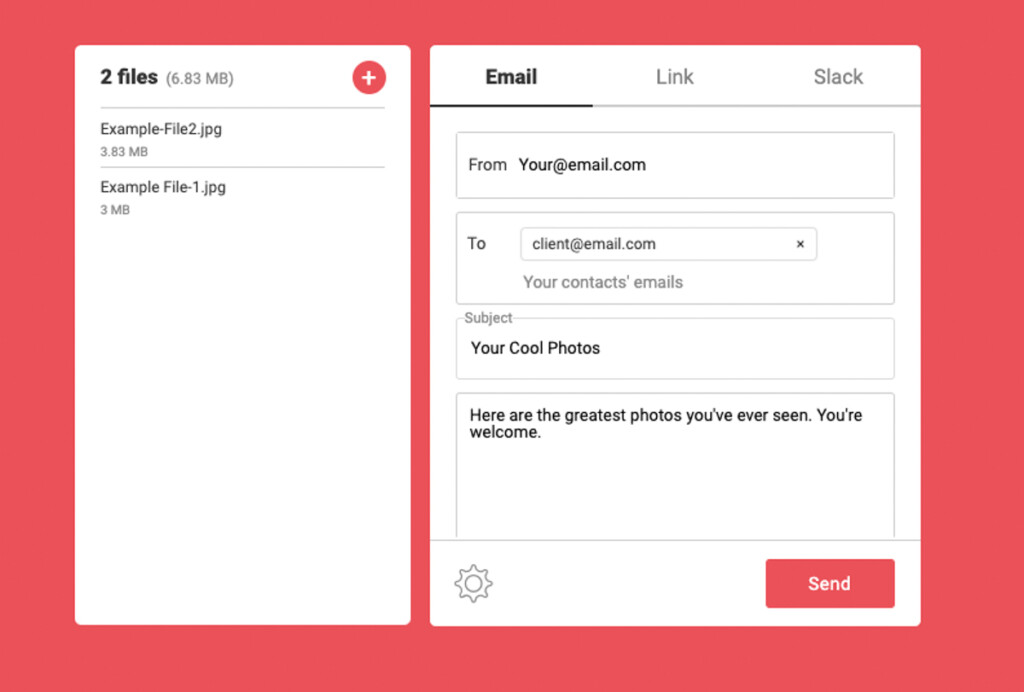
You can choose between email, link, or slack notifications, depending on the format you’d like to share through. If you aren’t sure, email is always a safe bet. Enter your client’s email info and add any other relevant information to the message box. Once complete, click send to begin your transfer!
After the transfer is complete, your client will receive an email notification and a download link to access the files.
4. Dropbox
Like Google Drive, Dropbox offers cloud storage and flexible ways to share files and folders with your clients. If you don’t have a Gmail account, Dropbox may be a preferred storage option for you. This program allows you to upload, store, share, and transfer files directly through the program. The free account only has 2GB of free storage but does include file transfer capabilities up to 100MB per transfer. If you are looking to send a handful of photos to a client, this is a valid option to use.
Although it doesn’t have the greatest storage capacity in the free version, it does offer offline editing that’s extremely useful. With the Dropbox app downloaded to your computer, you can save files to your Dropbox while you’re offline. Once you’re back online, Dropbox will automatically upload and back up your files to the cloud. That’s one of the main reasons I love Dropbox and use it myself for photo storage and delivery.
How Dropbox Works:
After you’ve created a Dropbox account, click the “New Shared Folder” button on the right side of your screen. Type in the email information and message you’d like to send to your client, then choose their accessibility options. Once complete, click “Share.”


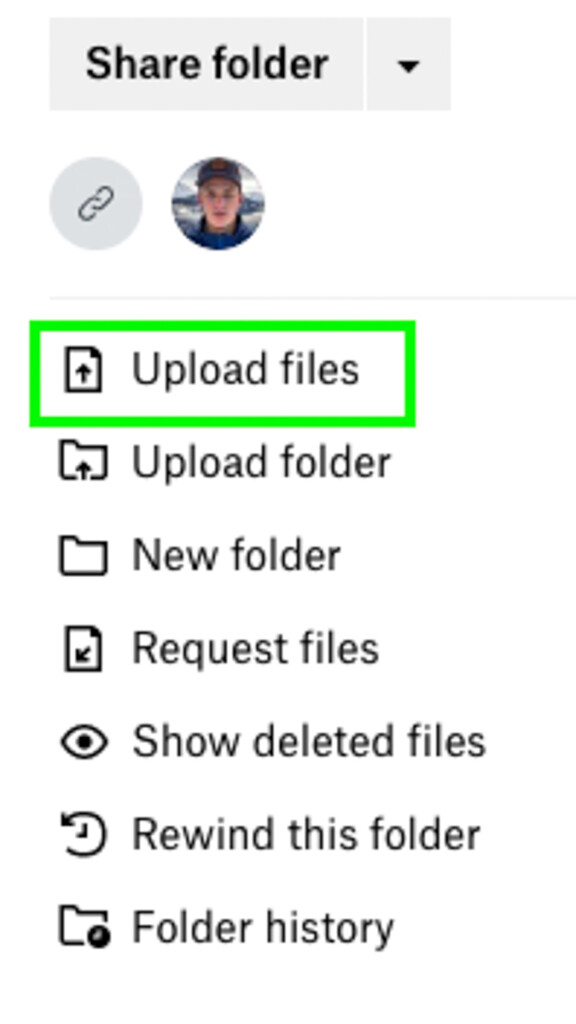
Open the new shared folder and select “Upload Files” on the right of your screen. Select all the images you’d like to add to the shared folder and click ok.
Once all your photos have been added, the folder can be accessed directly from you or your client’s Dropbox profile. If your client doesn’t have a Dropbox account, they’ll get access via a Dropbox link in their email.
If you’d rather create a shareable link to the folder, click on the link icon beside your profile image to share the folder. Click on “Copy Link” at the bottom of the new window and begin sharing away!


5. Pixieset
Pixieset is a perfect option for any photographer wanting to make a professional presentation for their image delivery. With Pixieset, you can upload images and create client-specific galleries that look fantastic on both desktop and mobile devices. With these galleries, your clients can create selects, download, or share images from the gallery. Since everything is in one place, it’s very easy to keep on top of individual projects on Pixieset.
The free version of this photo-sharing program lets you upload and share around 1000 photos (or up to 3GB) in an unlimited number of galleries. For many photographers, this is more than enough to get started with. If you continuously purge old galleries, you can make the 1000 photo limit last quite a while. There’s no credit card required for the free version of Pixieset, so it’s absolutely free, forever.
The downside to Pixieset is that it may be a little over the top if you only need to send a few photos to a client. Even though your images look fantastic in their galleries, it may not be necessary for all transfers you make.
How Pixieset Works:
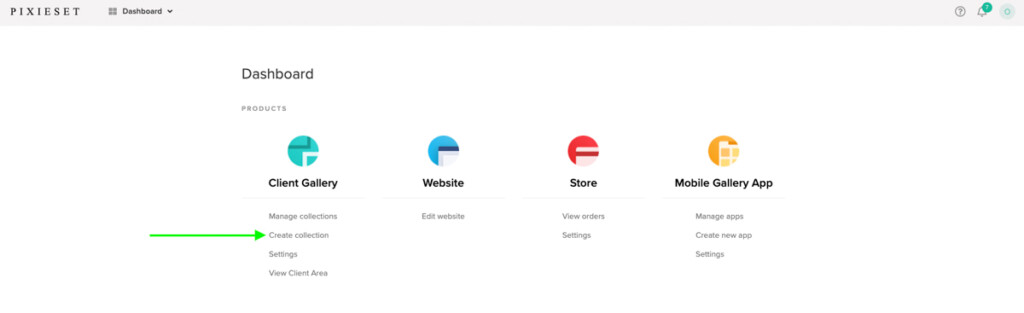
After you’ve created a Pixieset account, select “Create Collection” under the Client Gallery column in your dashboard.
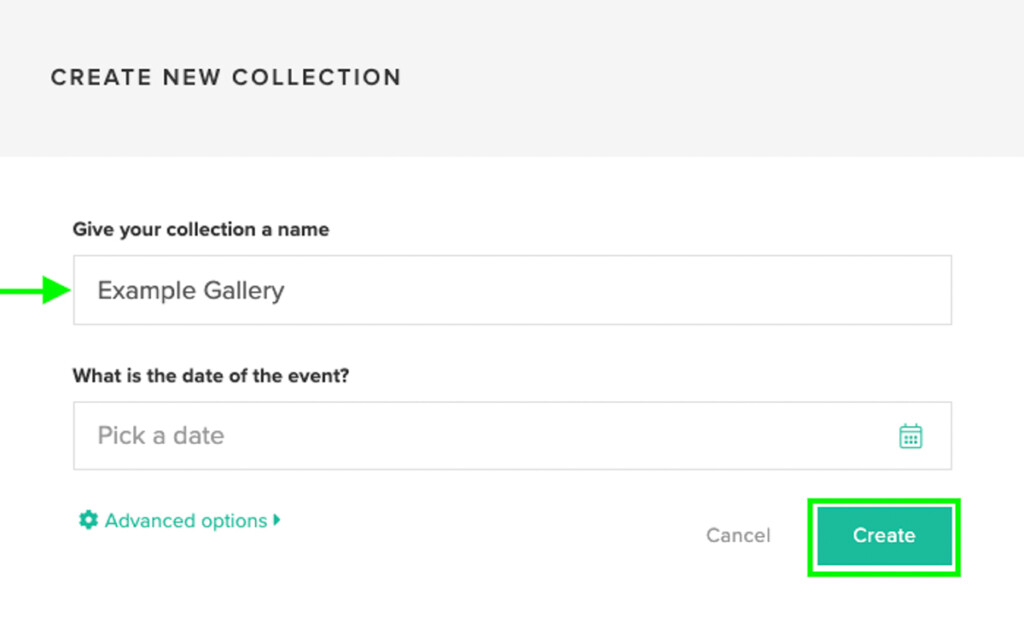
Give the collection a name and include a date if applicable to the shoot, then click “Create.”
Once the collection is created, click the “Add Photos” button and select your computer files to upload. These could be the original versions of the images or the final edits, but just remember you only have 3GB of space with the free version. Once everything’s uploading, click the “Publish” button found in the bottom left corner of the screen.


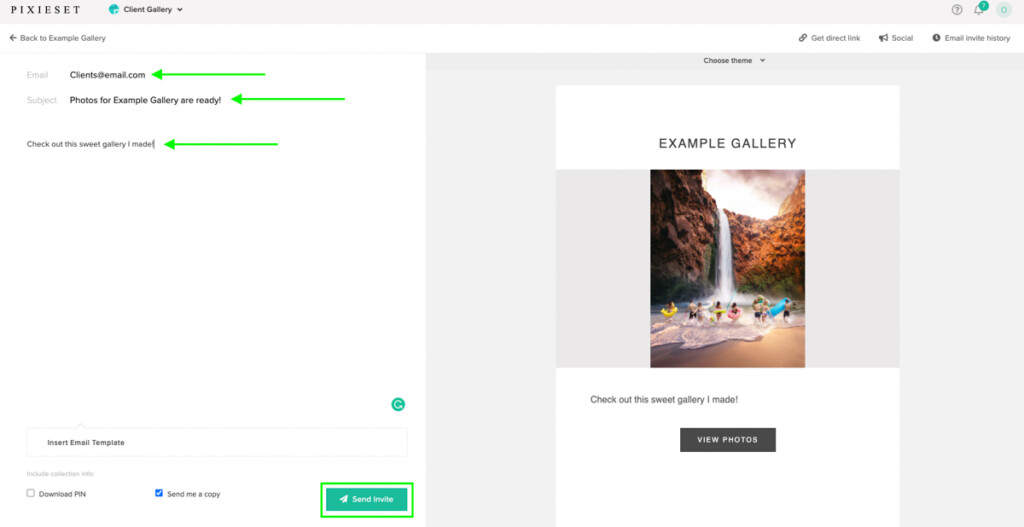
Next, you’ll be prompted to create an email notification to send to your client. Here you can add their email, a subject line, and a custom message before sending it. After you’re happy with the email, click “Send Invite” to notify your client of the gallery.
If you’d prefer to send a link version of the photos, click the “Get Direct Link” option on the top right of your screen before sending the email notification. Here you’ll get access to a direct link of the gallery with a 4-digit PIN code for your client to access the images.

6. Shootproof
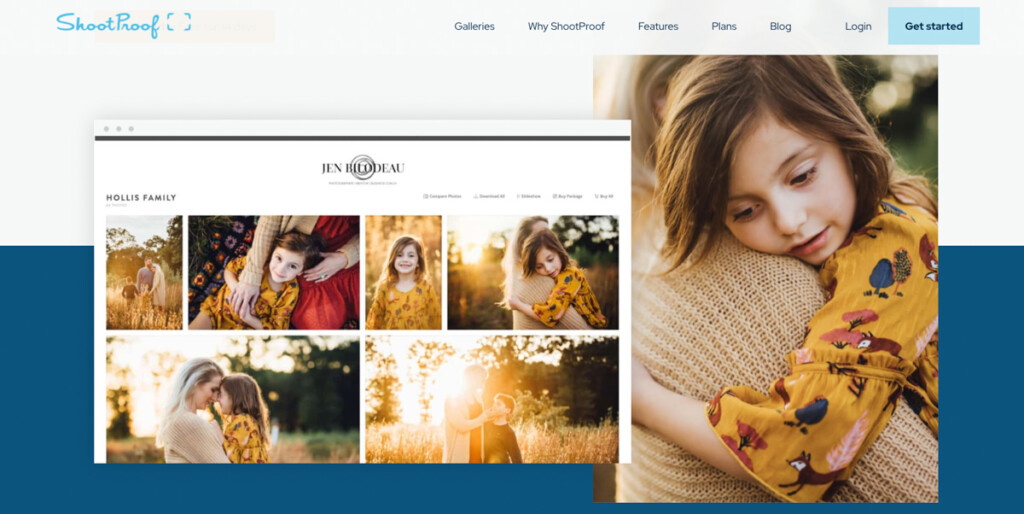
Shootproof is an alternative to Pixieset that works in very similar ways. This photo-sharing site creates custom galleries of your photos to deliver and share with your clients. In terms of the overall layout, it’s extremely intuitive to use and makes the entire process simple. If you’re worried about clients downloading images without your permission, you can automatically add a watermark over all the gallery photos. With so many customizable gallery features, Shootproof offers a great way to share photos with clients in a professional manner.
The downside to Shootproof is that it’s only free for a 14-day trial. After that, it’s a fully paid program, which isn’t ideal.
How Shootproof Works:
From your dashboard, go to Photos > Galleries and then select “New Gallery.” Next, give your gallery a name, select a date, and choose a gallery preset (if you already have one). Then click “Create Gallery.”


From here, upload your images to the gallery and select the upload settings to have a watermark or not.


After everything is uploaded, go to “Share Gallery” to choose between email or direct link sharing. By sharing via email, Shootproof helps you create a customized email to send to your client. If you prefer the link version, a direct link will be created that you can share anywhere online.


Whichever option you choose, you’ll have successfully shared your photos in just a few clicks.
Which Platform Is The Easiest Photo Sharing Site?
The easiest photo-sharing websites are WeTransfer and Smash. Both of these services provide free file transfers via email and allow you to share high-resolution photos with ease. Since you don’t need an account or have to deal with folder structures, there are no easier photo sharing options online.
I love these programs because they will transfer your files quickly, without all the unnecessary parts like creating galleries or organizing folders like with other sites. Smash and WeTransfer keep it to the point and get the job done without all the fluff. Just drag and drop your photos and send them to your client in under a minute.
Although both sites are comparable in usability, Smash offers a little more since it has unlimited file transfer sizes. Even with the free version, you could still transfer a 20GB file. WeTransfer, on the other hand, will cap you at 2GB. With that said, it’s important to keep in mind that the transfer speeds on Smash slow significantly after the 2GB threshold. This is their way of strongly encouraging you do upgrade to a paid plan, although it’s not totally necessary.
There are many great ways to share photos with clients that won’t cost you a penny. Depending on how many extra bells and whistles you want to go along with your files (like galleries and branded emails), the right program for you will vary. Regardless of your needs, any of these 6 photo-sharing programs are fantastic options.
– Brendan 🙂
