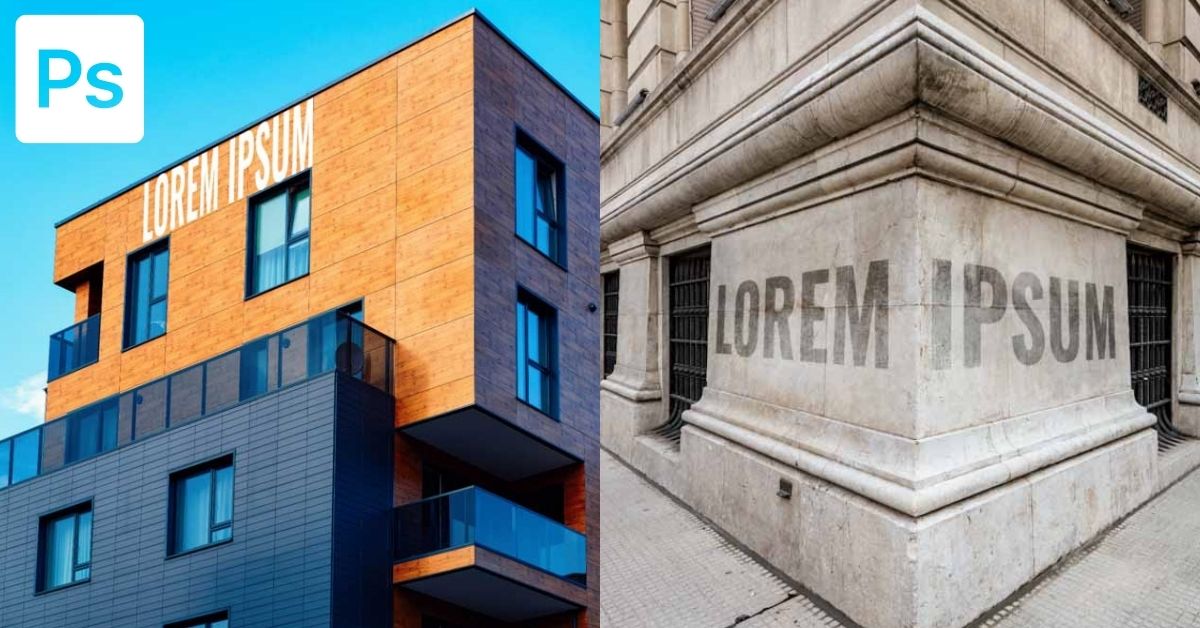

Creating perspective text in Photoshop makes your text appear like it’s placed against a wall or at an angle in your projects. For creative graphics design effects or to blend text into natural features in your photos, it’s helpful to know how to perspective warp text in Photoshop.
In this tutorial, you’ll learn how to create this text effect against objects, as well as how to use a vanishing point. So, let’s get started!
How To Perspective Warp Text In Photoshop
Step 1: Activate The Type Tool (T) And Add Text
To do this, first, enter your text anywhere in your document by selecting the Type Tool in the toolbar (T). Then, write the text you would like in your chosen font, font size, and color.

Step 2: Right-Click On The Text Layer And Select Convert To Shape
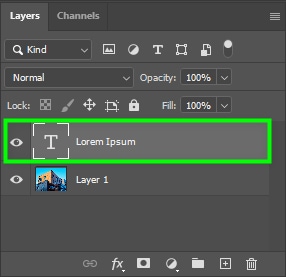
Next, go to the Layers Panel, right-click (Win) or control + click (Mac) the text layer, and choose Convert To Shape. Note that after you convert text to a shape, you won’t be able to edit the text to fix up typos or change any words.

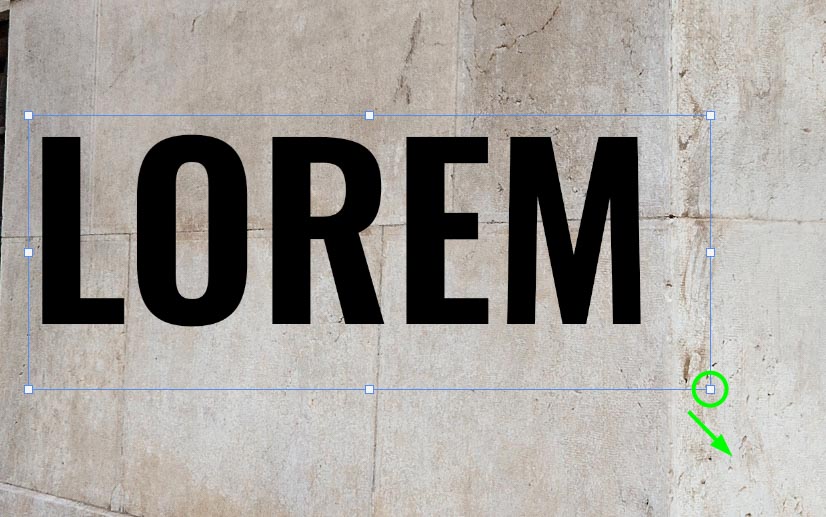
Step 3: Select The Transform Tool Using Control/Command + T
Once the text is converted to a shape, press V on your keyboard to enable the Move Tool and move your text to the position you want it to be (if it’s not already). Then, press Control + T (Win) or Command + T (Mac) to enable the Free Transform Tool.
Step 4: Press Shift + Control/Command And Drag The Corner Anchor Points
To change the angle of your text, keep the Free Transform Tool active and click the handle located on the side of the text you want to modify. Then, hold Shift + Control (Win) or Shift + Command (Mac) and drag the letters to the position you want.
In my case, I clicked the handle on the left side of my text while dragging it inward. Then, I dragged the handle on the bottom left side of the text outward.
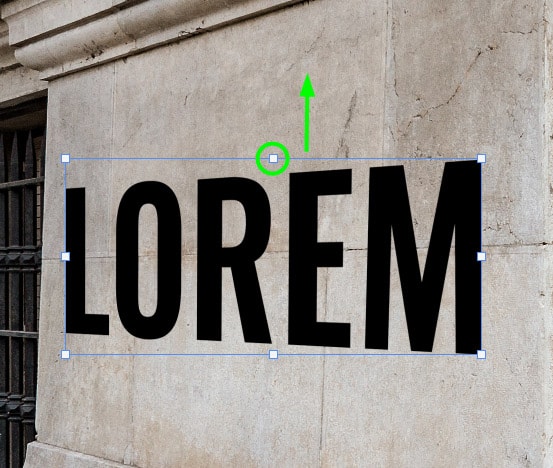
After distorting your text, you can also resize it. To do this, keep the Free Transform Tool active (Control + T or Command + T) and drag any of the handles of the text up or down (without pressing any other keys on your keyboard).
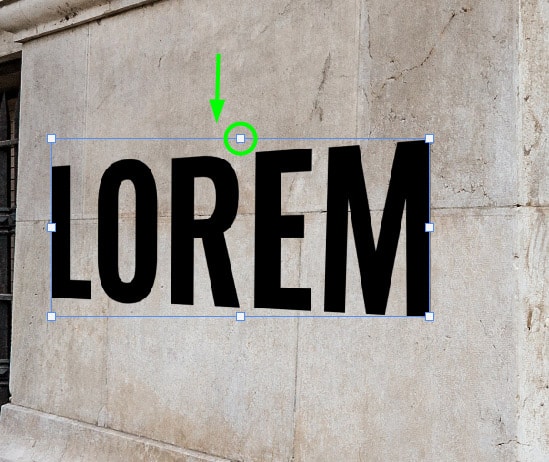
Step 5: Change The Blend Mode And Opacity (Optional)
After creating your perspective text, it’s a good idea to change its appearance to match the image it’s placed on and to look less artificial. You can play around with the text opacity and blending modes to do this.
Notice how my text looked like it was printed on the wall after changing its blending mode. You could also experiment with blend if to get a similar result.


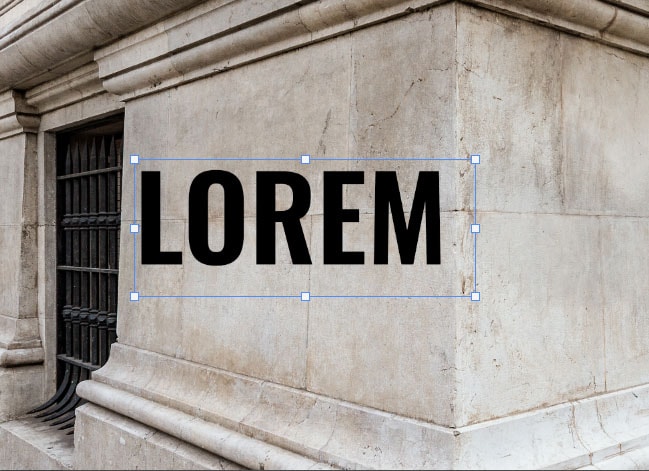
How To Add Text To A Vanishing Point In Photoshop
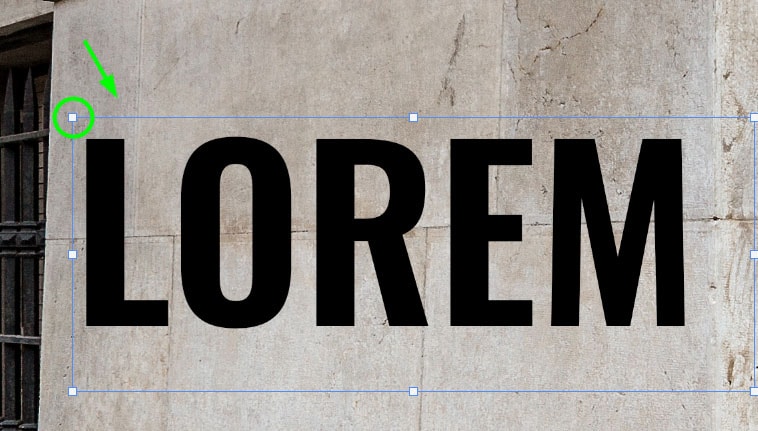
Step 1: Add Text To The Image Using The Type Tool (T)
First, bring your image to Photoshop. Then, grab the Type Tool (T) and type your text anywhere on the image. You won’t be able to edit your text after this, so make sure there are no typos.

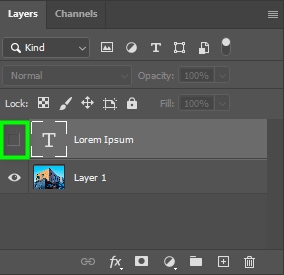
Step 2: Hold Control/Command And Click The Text Layer
Next, go to the Layers Panel and hold Control (Win) or Command (Mac) while clicking the text layer. This will select your text.

Step 3: Copy The Layer And Turn The Visibility Off
Keep the text layer selected, and then click Control + C (Win) or Command + C (Mac) to copy the text. After that, click the eye icon on the text layer to turn it off. You will still see a selection around the text area.
To deselect the text, hit Control +D (Win) or Command + D (Mac).

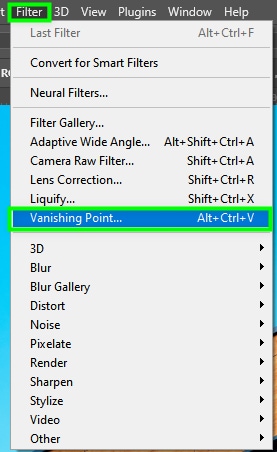
Step 4: Add A New Layer And Go To Filter > Vanishing Point
Next, create a new layer on top of the image layer by selecting it. After that, click the plus sign icon at the bottom of the Layers panel.
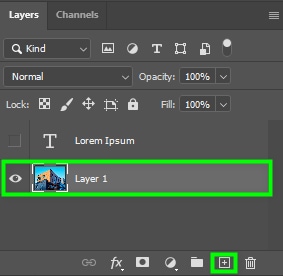
Next, select the new layer. Then, go up to Filter > Vanishing Point or press Alt + Control + V (Win) or Option + Command + V (Mac).
Step 5: Click On The Create Plane Tool And Make A Grid
From the Vanishing Point dialog box, make sure the Create Plane Tool is active.
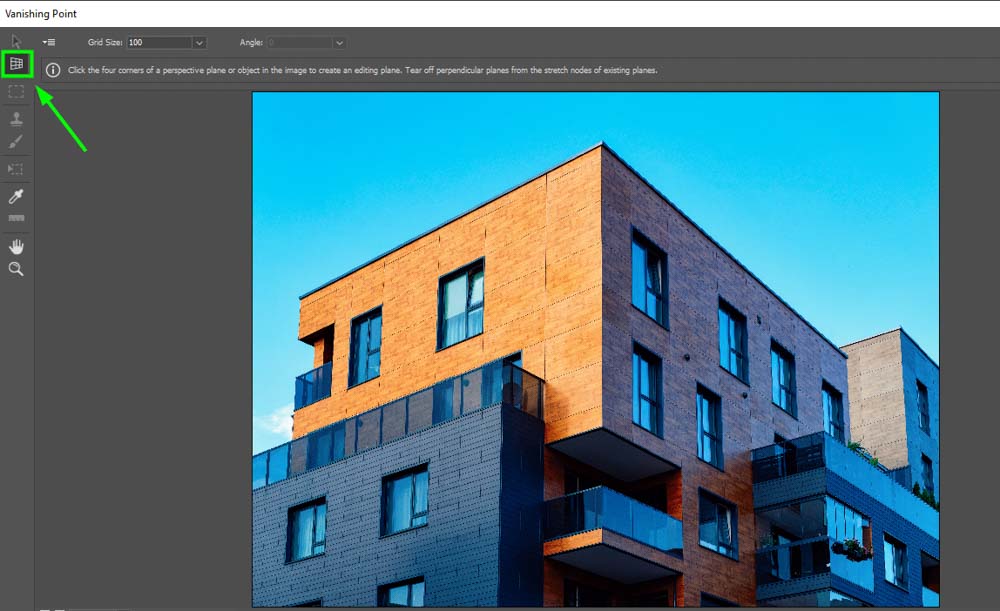
Then, grab your cursor and click the four corners of the desired area. In my case, I wanted to put my text on the sunny side of the building, so I selected that area. When you’re done making your selection, you will notice a grid will appear within it.

Step 6: Press Control/Command + V To Paste The Text
When this happens, press Control + V (Win) or Command + V (Mac) to bring back the text you copied. Photoshop will paste it on the same spot you wrote it. Once your text appears, drag it into the selected area and it will warp to fit into the grid.


Step 7: Use The Transform Tool To Warp The Text Into Position
If it doesn’t fit the area nicely, as happened in my case, press Control +T (Win) or Command + T (Mac) to enable the Free Transform Tool.
Then, you can press any of the handles around your text inward or outward to rescale it. Drag it down to increase the text or drag it up to decrease it. You can also move the handles to the left or right to make the text broader or smaller.

When you are happy with the text size and position, click OK to close the Vanishing Point dialog box. Then, you can go back to the workspace, where you can edit your text by adding effects to it — such as changing the blend mode — or save it the way it is.


The vanishing point method works better with larger pieces of text, while the transform method mentioned earlier works best for individual words.
Whether for photography or graphic design, there is a lot to remember in Photoshop. If you’ve been scouring the internet for tutorials, save yourself some time by downloading my free Photoshop Blueprint ebook revealing 6 essential tips to master Photoshop. In this ebook, you’ll learn a handful of actionable tips you can begin using right away, regardless of your experience. Just click here to sign up and get free access or click the button below!


