
The Move Tool in Photoshop is one of the most fundamental tools that you truly can’t live without in the program. Although it seems quite basic on the surface, there are a handful of lesser-known ways you can use and take advantage of this tool to streamline your projects.
So here you’ll get an in-depth look at how to use the Move Tool so you don’t miss any of its helpful uses!
How To Use The Move Tool In Photoshop
Step 1: Activate The Move Tool (V) From The Toolbar
First, select the Move Tool from the Toolbar by clicking on the icon or press M to activate it.

Step 2: Select And Drag A Layer To Move It
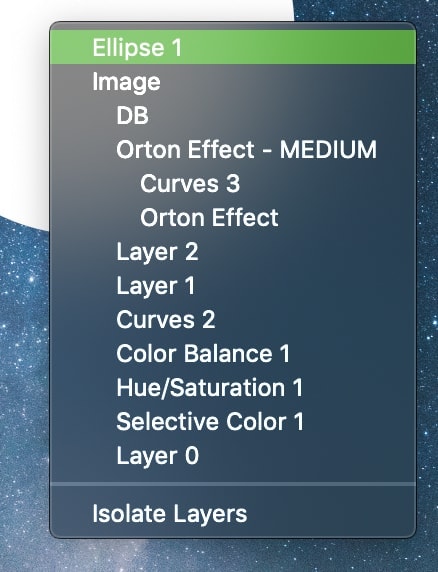
Next, select a layer by clicking on it in the Layers Panel, then click and drag the layer on the canvas to move it to a new position.
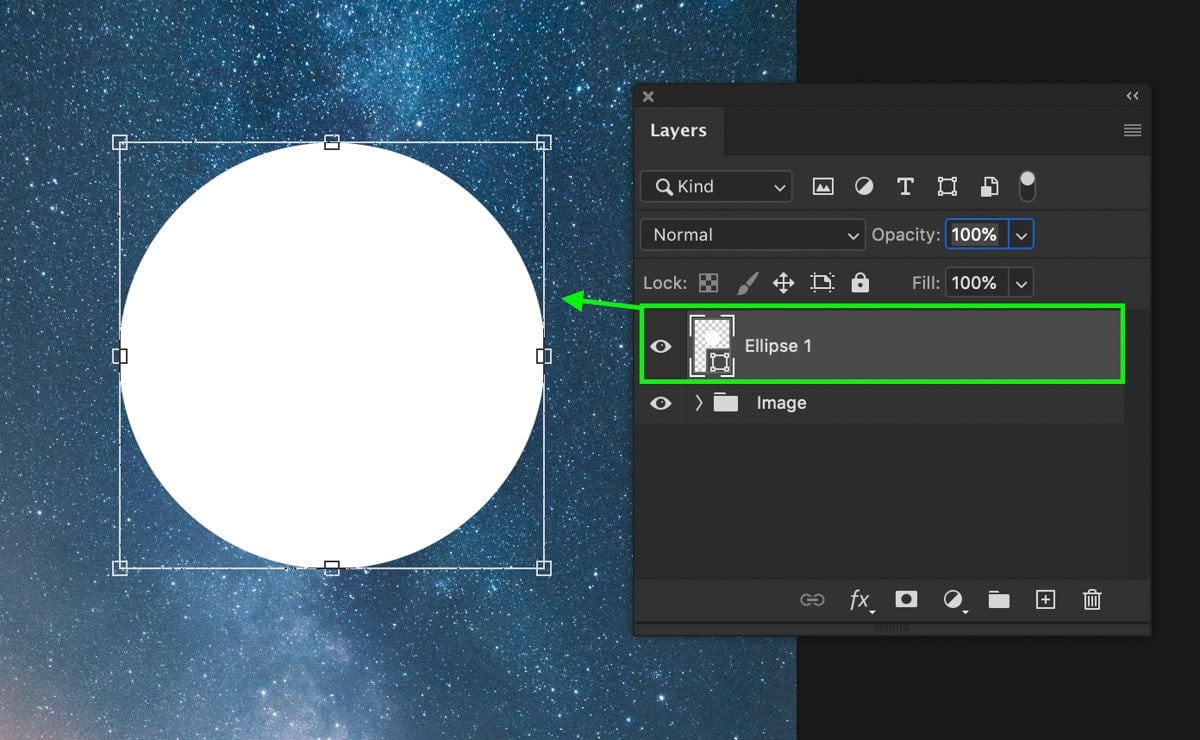
Alternatively, enable Auto-Select to skip the need to select the object in the Layers Panel. To enable auto-select, enable the Auto-Select option in the Options Bar while the Move Tool is active. Once that’s done, you can click on anything in your canvas to start moving it around.

Step 3: Use The Transform Controls To Resize The Layer (Optional)
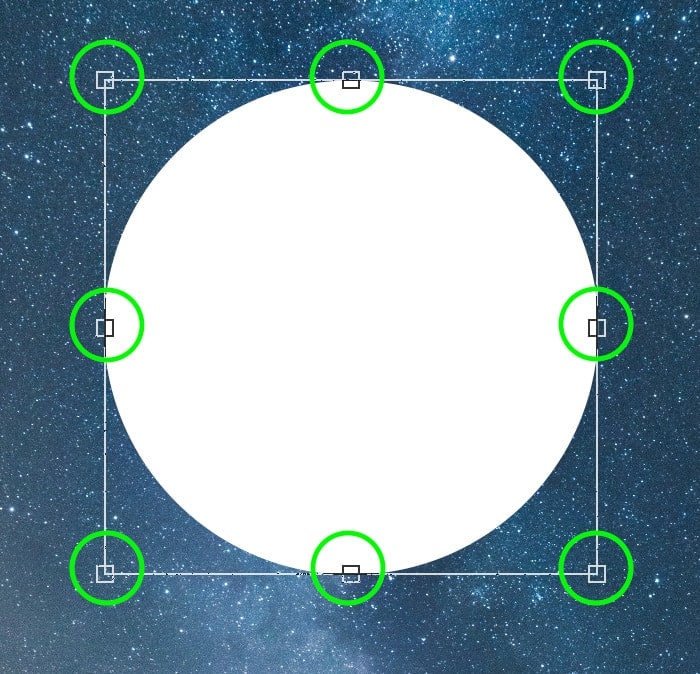
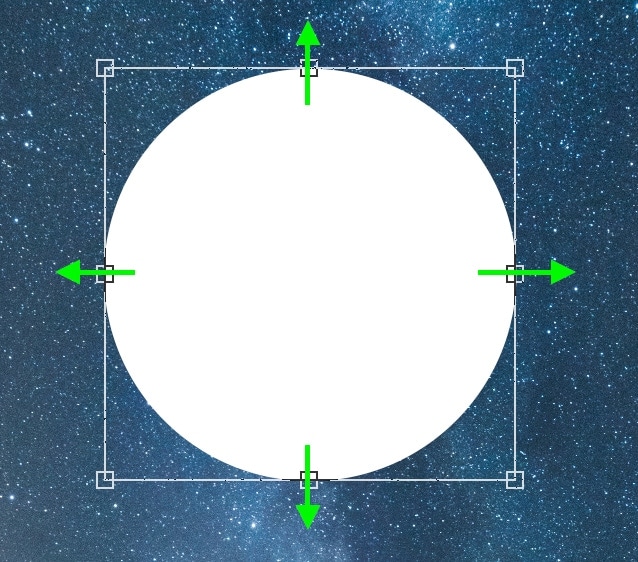
Besides moving a layer from point A to B, the Move Tool in Photoshop can scale your layers. Before you can do this, you need to make sure the Show Transform Controls option is selected. This option is found in the Options Bar while the Move Tool is active.

With the transform controls selected, any selected layer will have a box around it with eight anchor points. These anchor points can be clicked and dragged to scale the size of the layer.
If you click and drag on any of the anchor points, your layer will change size. Depending on which anchor point is clicked, the layer will scale up or down from that position.
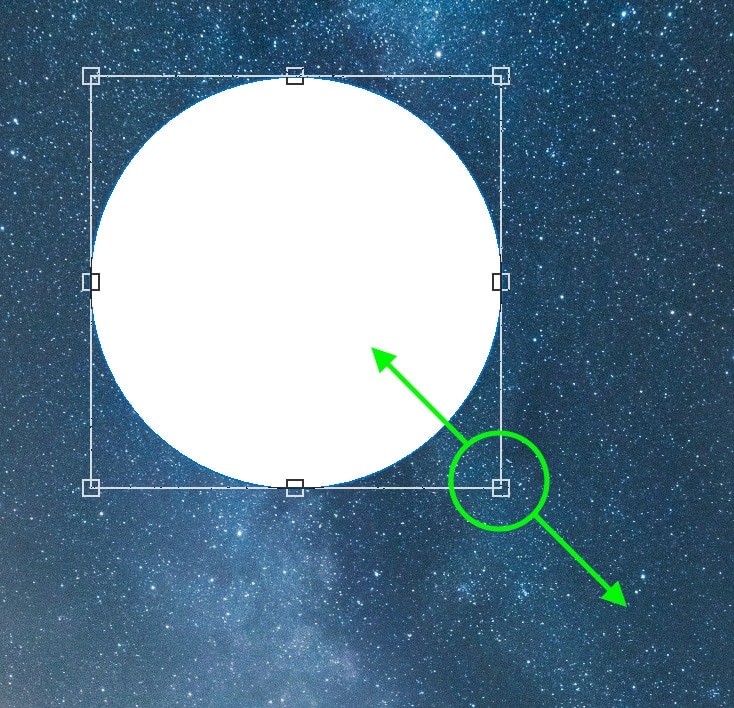
Once happy with your scaling adjustments, make sure to click the checkmark in the Options Bar or press Enter to commit to the changes.
Step 4: Aligning Layers Using The Alignment Tools
The easiest way to align a layer is to the canvas as a whole. This means that your layer will align itself according to the width and height of your entire image.
To do this, first, click on the three dots found in the Options Bar. If you don’t see this bar, make sure your Move Tool is selected.

This will bring up additional alignment options that will likely be greyed out at first. That is until you change the Align To option to Canvas.
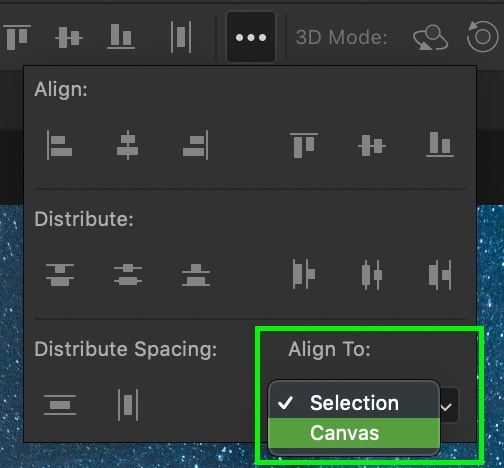
Now, you can pick any of the alignment options to align your layer with.
Alternatively, after you’ve created a selection, you can use it as a guide to align your layers. To do this, leave the Align To option set to Selection. Now, your alignment options will align your layer according to the shape and size of the active selection.
Move Tool Shortcuts & Additional Tips
1. Toggling The Move Tool
The Move Tool in Photoshop is usually only used for a quick repositioning adjustment. So, there’s a way to toggle the Move Tool while using any other tool in Photoshop.
Just hold the Control (Win) or Command (Mac) key to quickly bring up the Move Tool. Now, you can reposition a layer and go back to your adjustments with one simple shortcut.
2. Duplicate And Move Layers
If you need to duplicate a layer and reposition it simultaneously, there’s another easy shortcut for that.
Just hold the Alt (Win) or Option (Mac) key and click and drag the layer on your canvas. This will duplicate your layer and allow you to reposition it. Best of all, the original layer remains untouched.
3. Right-Click Method For Selecting New Layers To Reposition
Rather than choosing a layer to move from the Layers Panel, you can right-click on your canvas to select layers. With your Move Tool active, right-click on your canvas and choose from any of your layers.
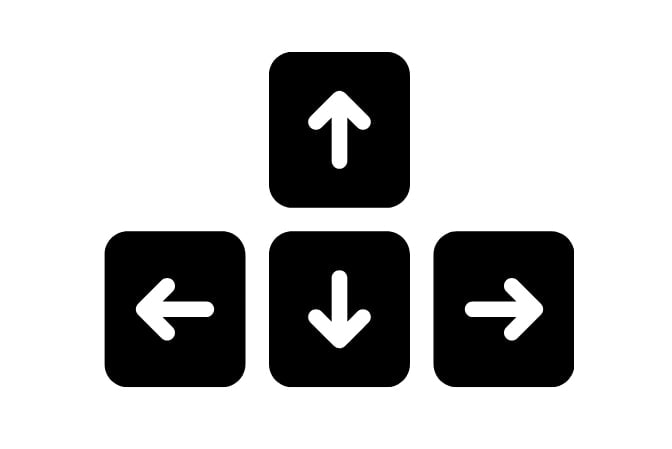
4. Nudging Layers For Subtle Adjustments
Not every repositioning adjustment needs to be that noticeable. Maybe you just need your layer a few pixels over to the left. While using a mouse, these small adjustments are extremely challenging.
With any layer selected by the Move Tool, use the arrow keys to nudge your layer in any direction. This is an easy trick to really refine a layer’s positioning.
So, that’s everything you need to know about how to use the Move Tool in Photoshop. There’s a lot more to this tool than what first meets the eye. Although some may dismiss the Move Tool as only good for one job, it has a variety of great uses. Best of all, it’s very intuitive once you learn the basics and is a simple tool for any beginner to master.
– Brendan 🙂


