

Photoshop allows you to manipulate text in several ways, and tilting text is one of them. If you are looking for easy, quick, and efficient ways to tilt or slant your text, you are in the right place. I will show you three ways to tilt text in Photoshop in a few simple steps.
Option 1: Tilt Your Text With Free Transform
For this first option, you will basically skew your text to give it a tilt. This is the simplest and quickest way to tilt your text.
The main advantage of this method is that you don’t need to rasterize the text layer for the slanted effect to work since the effect is applied to the text layer itself. So any time you want to edit your text, you can just enable the Type Tool (T) and edit the text as you like, such as by changing the font.
While this method has advantages, there are some drawbacks too. For example, it can be challenging to determine the exact angle at which the text is slanted, which can lead to undesired outcomes. Option 2 shows a more precise way to tilt your text.
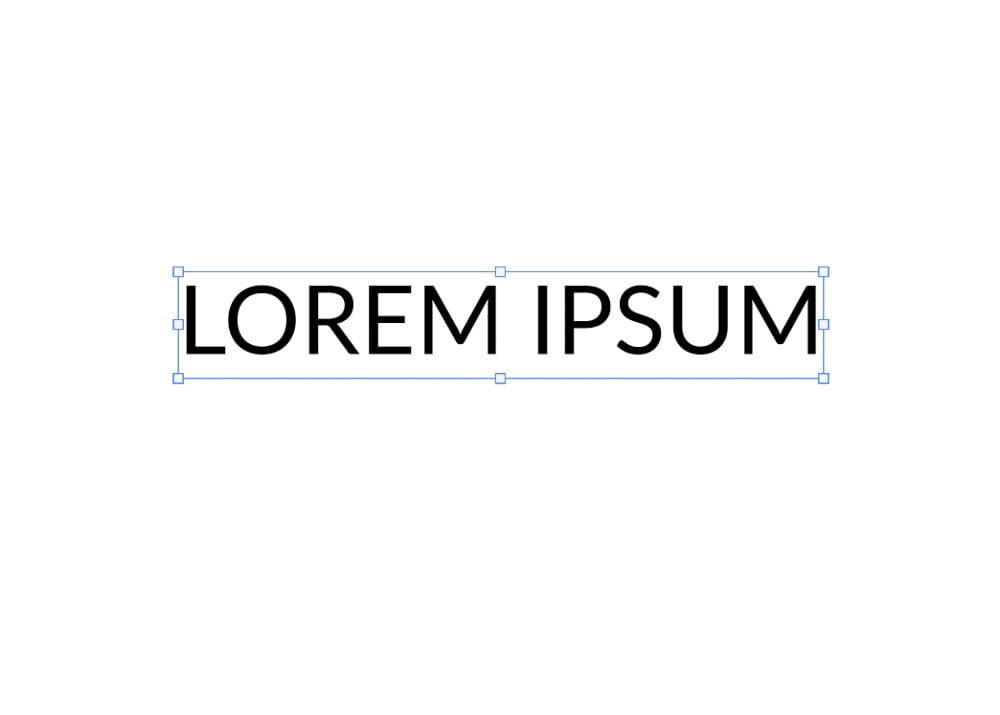
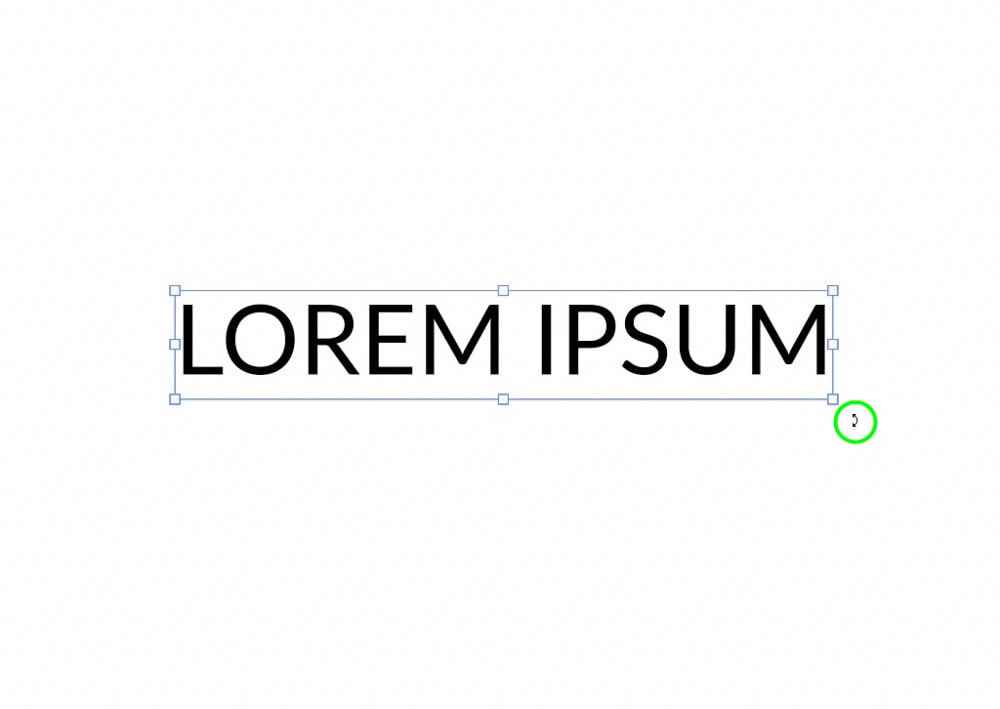
Step 1: Create Your Text
First, create your text. To do this, enable the Type Tool (T) from the Toolbar.

Then, write any text you want on the canvas.

Step 2: Enable The Free Transform Tool And The Skew Function
Now, enable the Free Transform Tool by pressing Control + T (Win) or Command + T (Mac). Alternatively, go to Edit > Free Transform.
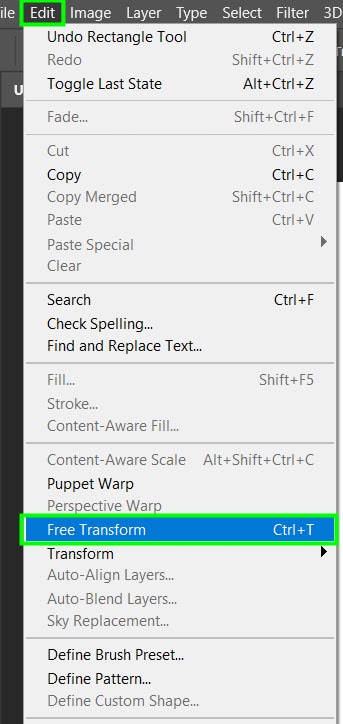
This will generate a bounding box around your text, as seen below.
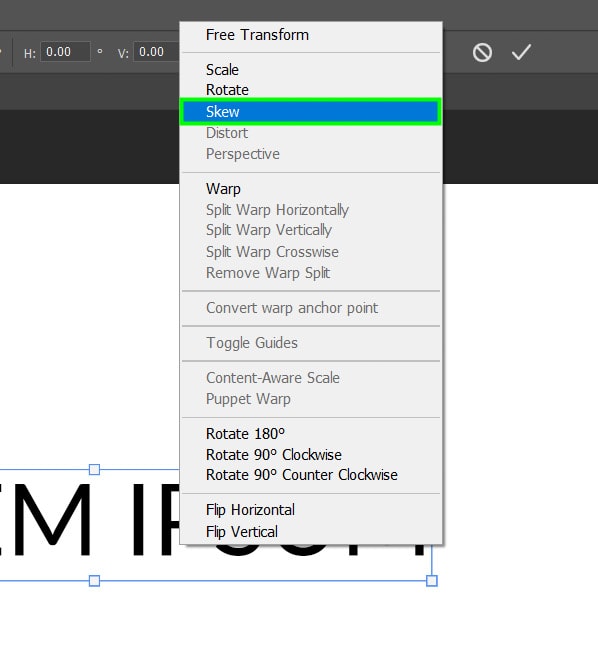
Now, right-click the text and choose Skew.
Step 3: Move The Anchor Points To Tilt The Text
Next, click the middle anchor point in the text box. It can be either the anchor point on the left side or the one on the right side of the bounding box.
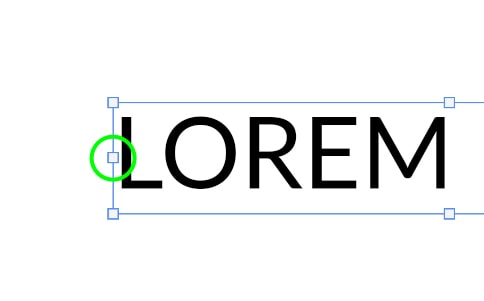
Then, drag the middle point up or down. If you want the text to be slanted upwards, drag the middle point up.
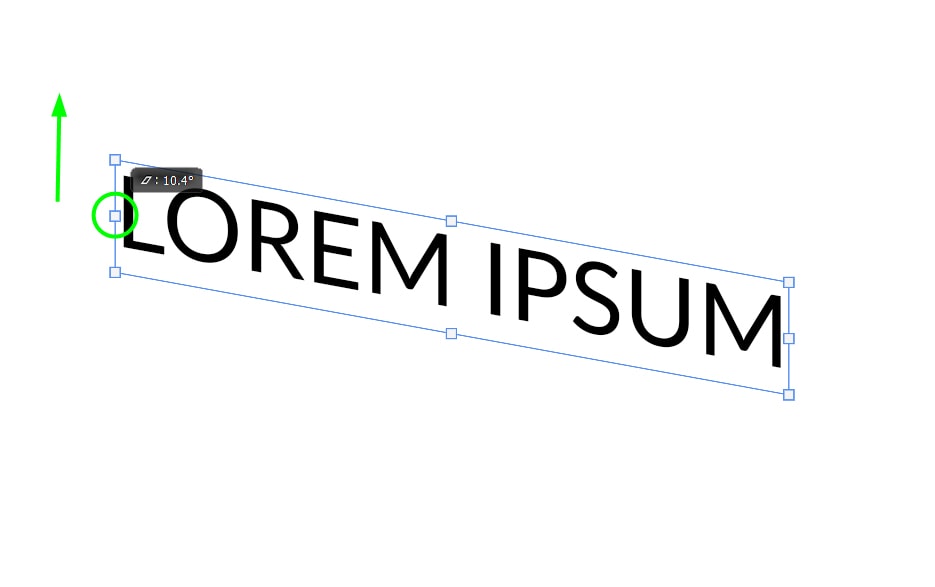
And if you want your text to slant downwards, drag the middle point down.

The more you drag the mouse up or down, the more slanted your text will be. Remember that slanting your text too much can make it hard to read.
Press Enter on your keyboard when you’re finished. This will disable the Free Transform Tool.


Option 2: Slant Your Text By Rotating The Text Layer
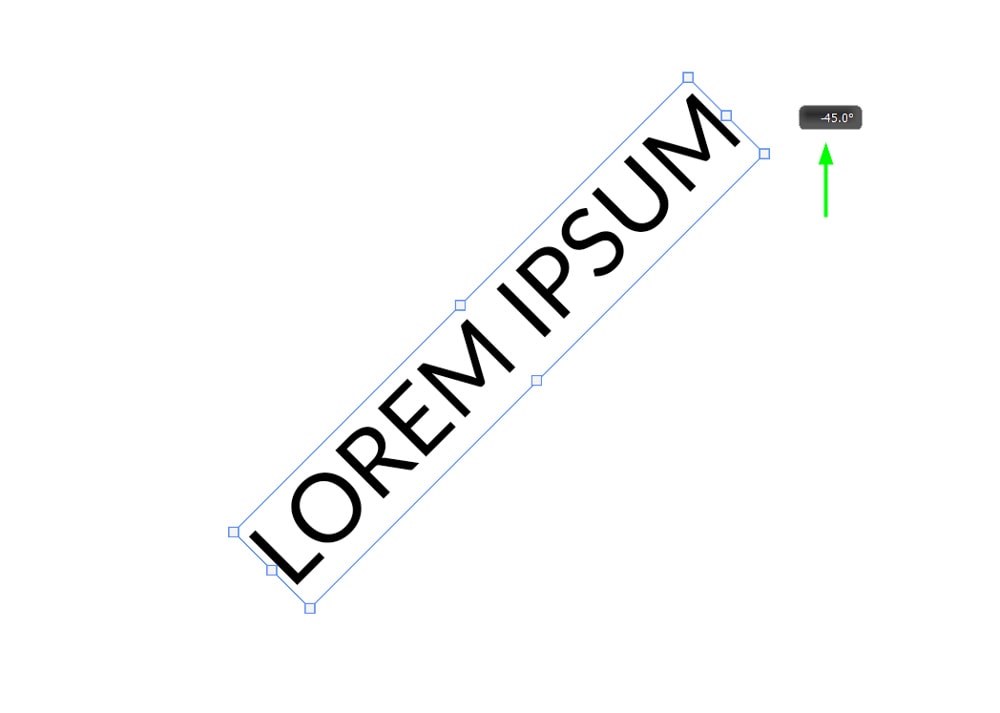
This technique consists of rotating the text to angle it. This method allows you to slant your text while giving you control over the angle your text is inclined. This is ideal when you don’t want to distort the letters of your text but just get a diagonal text.
Step 1: Create Your Text And Enable The Transform Tool
First, create the text and enable the Free Transform Tool by pressing Control + T (Win) or Command + T (Mac), as shown in the previous section of this tutorial.
Anchor points will appear around your text.
Step 2: Distort Your Text
Now, hover over the corner of your text until your cursor turns into a double-curved arrow.
Then drag the text up or down while holding Shift. With the Shift key held, your text rotates by 15 degrees at a time. You can keep holding Shift and dragging the text up or down until your text is inclined at a 45-degree angle if you want to create a perfect diagonal text.
Hit Enter when you are finished to disable the Free Transform Tool.

Option 3: Using Italics To Create Slanted Text In Photoshop
The Italics text style makes your text look slanted in a click. It is possible to make any text italic in Photoshop, even when your font doesn’t include an italic version. Here is how.
Step 1: Add Your Text To The Canvas
First, create your text, as shown in the previous section. As you will see next, there are two ways to make your text italic.
Step 2: Check If Your Font Includes An Italic Version
For the first method, you need to check if the font you are using comes with the italic font style. To do this, highlight the text by double-clicking it.

Then, go to the Options bar and change the font style to Italic.
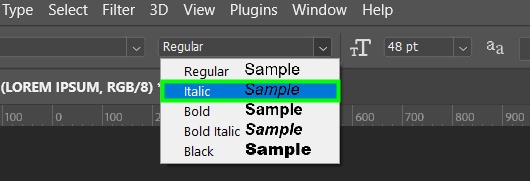
Your text will be italicized and appear slanted.

Step 3: Create A Faux Italic Effect
If your font doesn’t include an italic version, don’t worry because you can always make it italic in Photoshop. To do this, create and highlight the text, as demonstrated above.
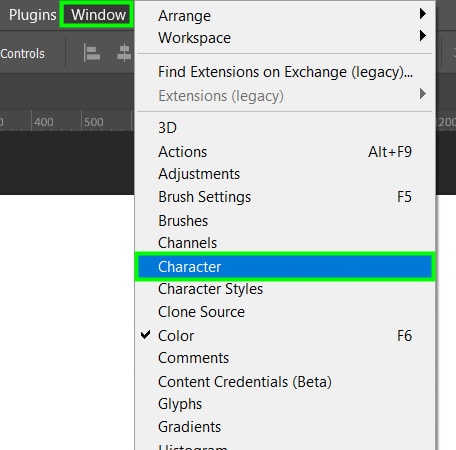
Then, go to Window > Character.
Within the Characters panel, click the Faux Italic button.
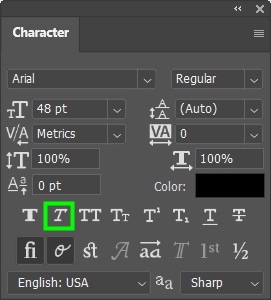
This will immediately make your text italic.

Keep in mind that because this is an artificial method of making a text italic, the results will not always be perfect.
Hit Enter on your keyboard when you’re finished.

With these three methods you can easily tilt or slant your text in Photoshop depending on your style. To learn more about what you can do with text in Photoshop, check out my guide to mastering the Type Tool here.


