

With many text style options, adding bold text in Photoshop is pretty easy, but for unsupported font types, you may need to know other methods to create bold text in Photoshop.
As well as bold text options, you’ll also learn how you can apply an italic effect to your text in Photoshop. You may think you know the obvious ways to add text effects in Photoshop, but sometimes using unsupported fonts can throw you a curveball, and you need to know some workarounds.
Luckily, once you’ve finished reading this post, you’ll know all the ways to create both bold and italic text using Photoshop.
How To Bold Text In Photoshop
There are many ways to bold text in Photoshop, with the simplest using the bold style of the font. However, not every font has a bold style, and in these cases, you will need to create a faux-bold effect, either using the Character Panel or a Stroke Layer Style.
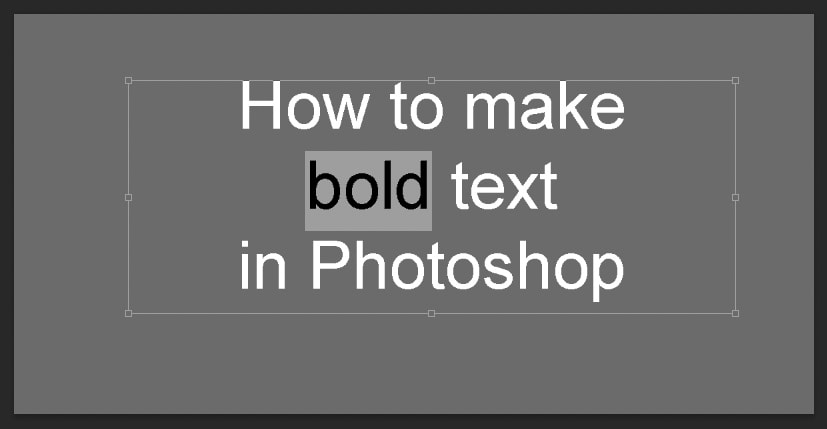
Before bolding the text, you need to add some text to the canvas using the Type Tool (T), adding a text box, and typing the text on the canvas.
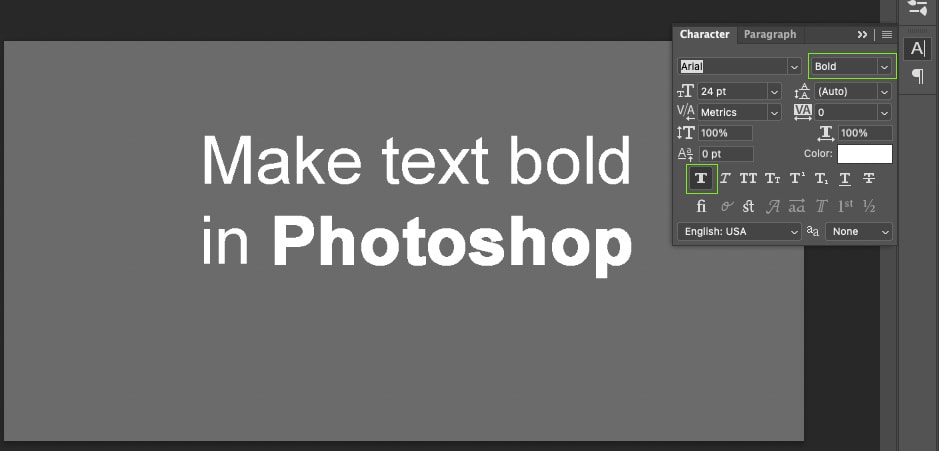
Option 1: Bold Text Using The Upper Settings Bar
With the Type Tool (T) selected, highlight the text you want to bold. You can highlight a single word, a sentence, or an entire paragraph.
In the Upper Settings Bar, you’ll see a dropdown menu between the text font and size menus. If you’re using a standard font, this dropdown menu should say Regular. If you don’t see an option in this menu, it may mean you can’t bold your font using this method.

Click to open the dropdown menu and reveal the options for different font styles. Choose Bold.
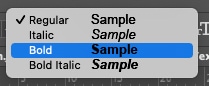
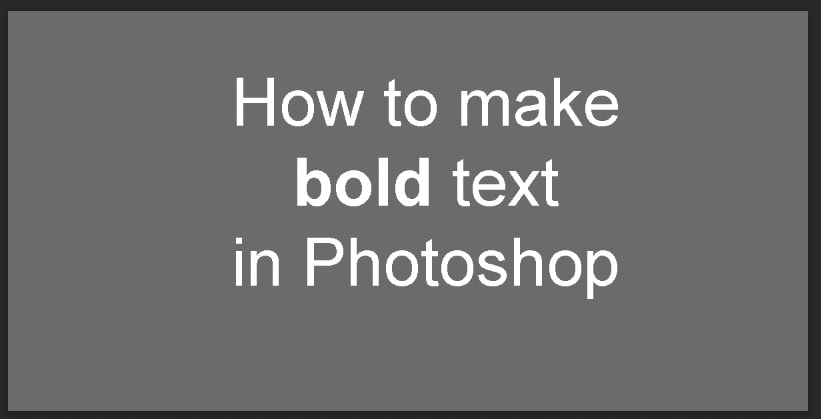
This will change your highlighted text to bold, leaving anything not highlighted in its previous state.
This is the simplest way to make your text bold; however, there are some fonts that do not support this option. Luckily, there are other techniques you can use.
Option 2: Using Faux Bold Text In The Character Panel
The Character panel is another menu for text refinements. Although it offers the same method for creating bold as the Upper Settings Bar, it also offers more detailed options like kerning, line spacing, and ligatures, to name a few. It also offers another option to bold text if there is no bold font style available.
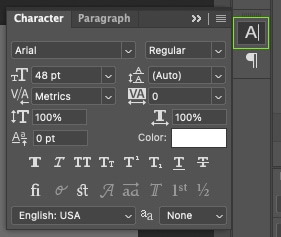
To access the Character panel, go to Window > Character. You can hide or show the Character panel by pressing the Character button at any point.

The bold option on the Character panel can be found in two ways. It allows you to add bold text when it may not always be supported with your font type. This method is called Faux Bold.
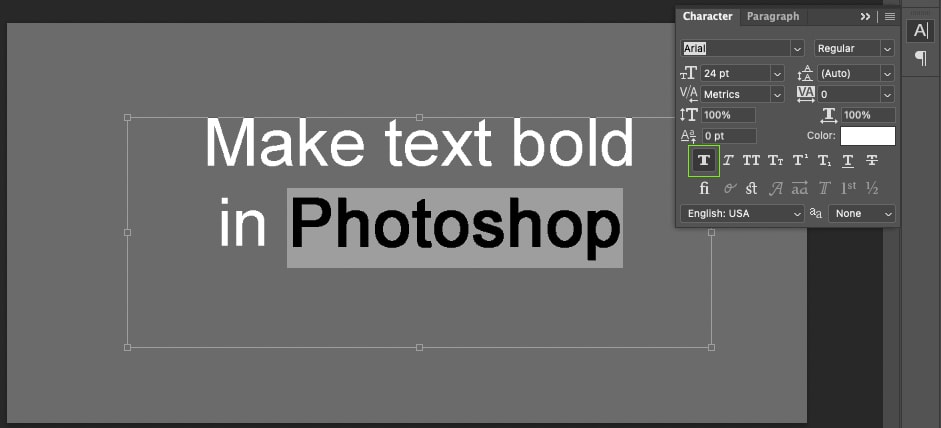
First, add your text and then use the Type Tool (T) to highlight any word or phrase you want to bold.
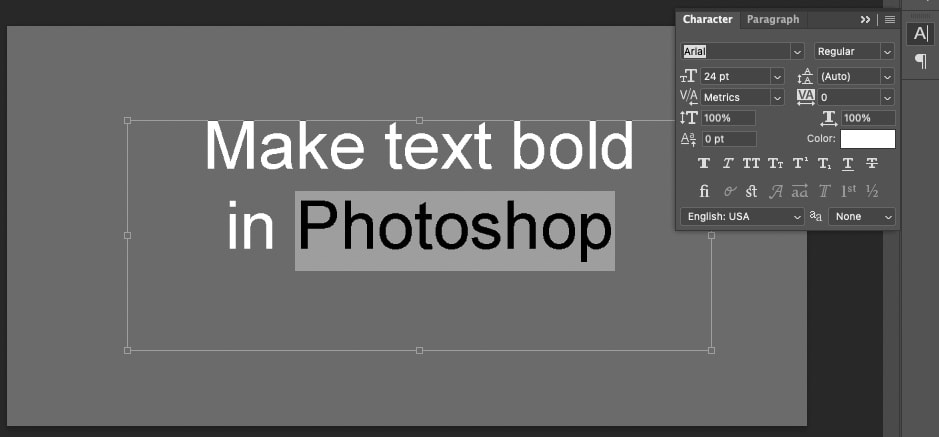
In the Character Panel, you’ll see a row of T icons. The first one is the Faux Bold option. Click Faux Bold to make your highlighted text bold.
As earlier mentioned, there are two ways to access the Faux Bold from the Character panel. For the other method, click the Menu button on the Character Panel and choose Faux Bold.
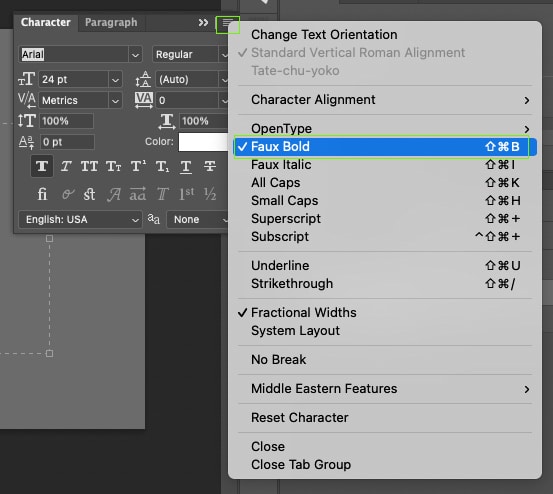
The Faux Bold effect creates the same bold style as the Upper Settings Bar bold option.
Faux Bold will stay on until it’s manually disabled, even if you start a new project. This means you can actually use the Faux Bold setting in conjunction with the normal bold setting. This combines both to create a super bold result.
Option 3: Bold Text By Adding A Stroke Effect
This final technique offers a more dramatic bold effect if needed. Unfortunately, this effect can only be applied to the entire text layer and not individual words or phrases.
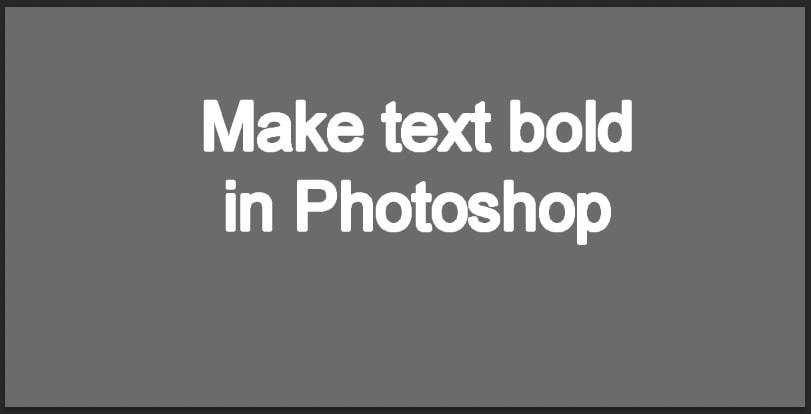
Using a stroke effect to make your text bold is the best way to make bold text when you’re using an unsupported font type or if you want a very heavily bolded text that the standard methods don’t offer.
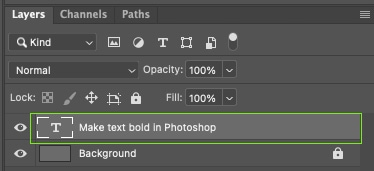
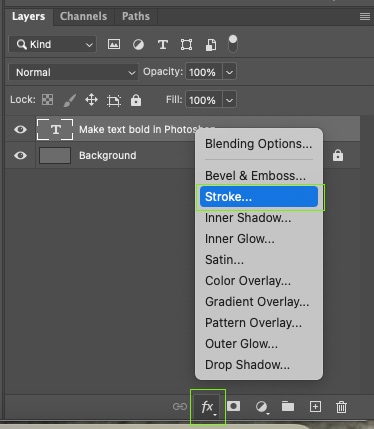
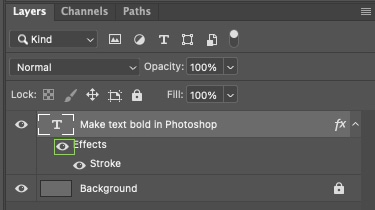
When you add text using the Type Tool (T), your text becomes its own layer in the Layers Panel. Click on your text layer to select it.
Then, at the bottom of the Layers panel, click Effects > Stroke. This opens a Layer style menu where you can add non-destructive style effects to your layers.
In the Layer Style window, choose the same color as your text, set the Opacity to 100%, and set the position to Outside. These settings will best replicate the bold text.
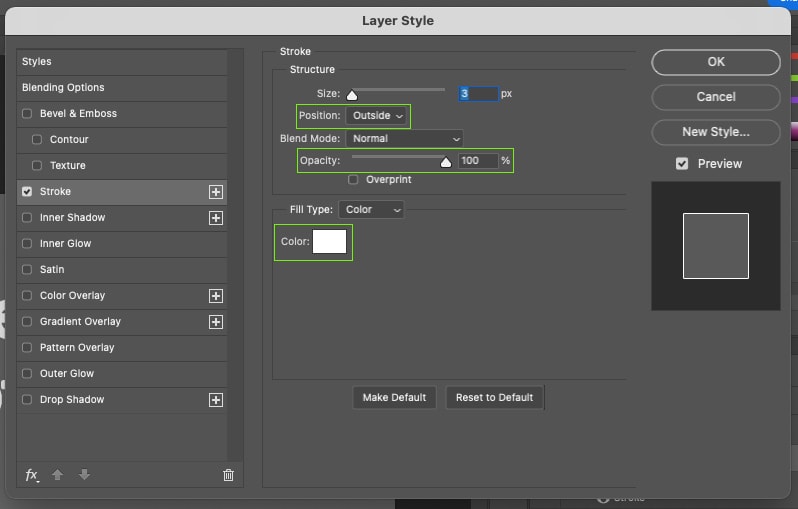
This technique allows you to create a wider stroke size around your letters than you’d find using traditional methods for bold text. To increase the stroke, thus the boldness, change the stroke size using the Size slider in the Layer Style menu.
As you change the slider, you can preview your text on the Canvas to ensure it is still legible. When you’re happy with the bold effect, click OK in the Layer Style menu.

In the Layers Panel, you’ll see the non-destructive layer style you’ve applied appear under your text layer. You can switch it off by clicking the eye icon if you no longer want to see it.
Since this technique only works on an entire text layer, it may not always be appropriate to use for bold emphasis as it can’t bold only specific words.
However, you could use individual layers of text to ensure you’re only affecting the words you want to bold.
How To Make Italic Text In Photoshop
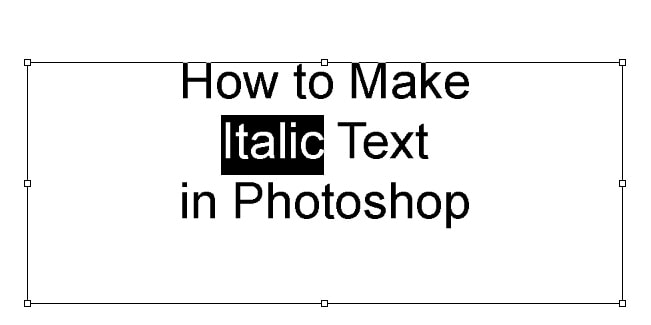
Creating bold text is great for emphasizing a particular word or phrase, but when you want to emphasize tone, using italics is much more effective.
Photoshop offers at least two options for making your text italic. You can create italic text in the Upper Settings bar or by using the Character panel.
Option 1: Via The Upper Settings Bar
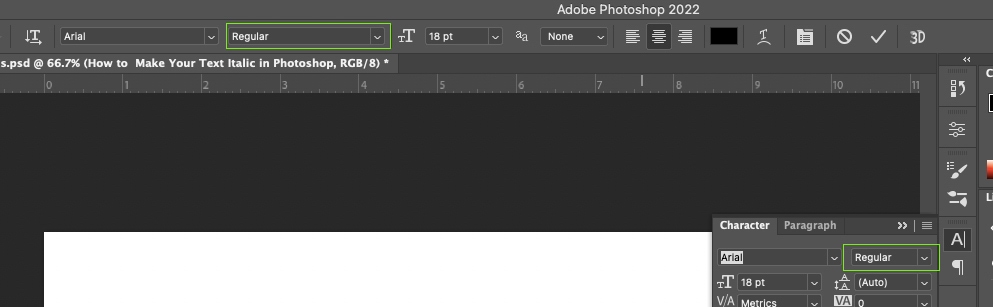
The simplest way to get italic text in Photoshop is to use the Upper Settings bar. The Upper Settings Bar will appear when the Type Tool is active.
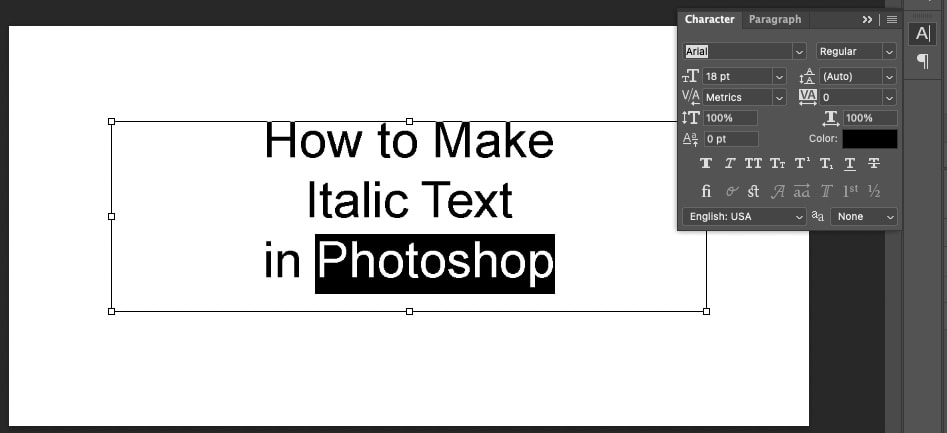
To start, you need to write some text by selecting the Type Tool (T) and clicking on your canvas to begin typing.
Once you’re happy with your text, decide which word or phrase you want to be in italics. Then, use your cursor to click and drag over those words to highlight them.
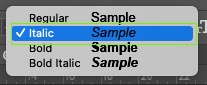
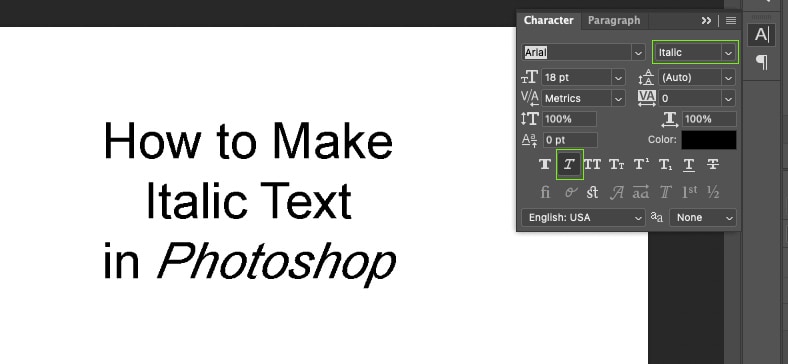
Now go to the Upper Settings Bar or the Character panel and click the dropdown menu that says Regular.
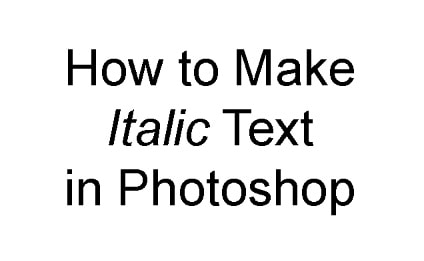
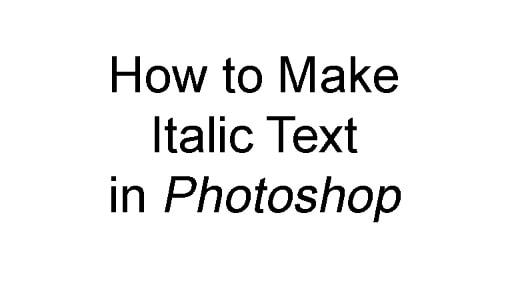
From the dropdown options, choose Italic. This will change your highlighted text to italics.
Option 2: With The Character Panel
There is another way to get italic text in Photoshop if you’re using an unsupported font type.
I’ve mentioned the Character Panel throughout a few of the previous steps, but as a reminder, to get the Character Panel, go to Window > Character.
Now, just like before, type out your text, and then highlight the word or phrase you wish to be in italics.
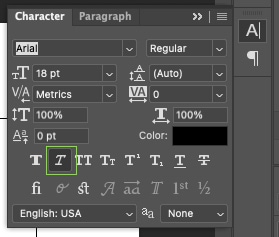
After highlighting your phrase, open the Character Panel and click the Faux Italic icon.
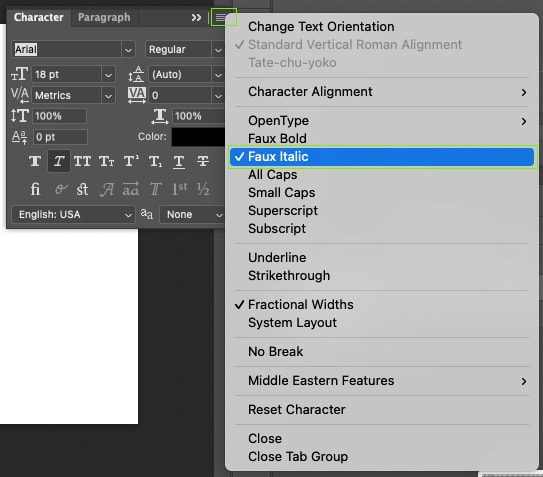
You can also find this method by going to the Character Panel’s menu and choosing Faux Italic.
When you have finished your project, remember to switch off this italic setting as it stays on by default otherwise. However, much like the Faux Bold setting, you can also use Faux Italic in conjunction with the standard italic tool from the Upper Settings Bar to achieve an ultra-italic effect.
Although this combination of italic effects works, it produces a very over-the-top italic result which may not be suitable for most uses.
Now, if you’ve been stuck trying to learn how to work with text in Photoshop, be sure to check out my next guide on creating text in Photoshop. It breaks down absolutely everything you need to know when working with text in Photoshop and is the ultimate resource if you’ve ever felt stuck with the Type Tool.
