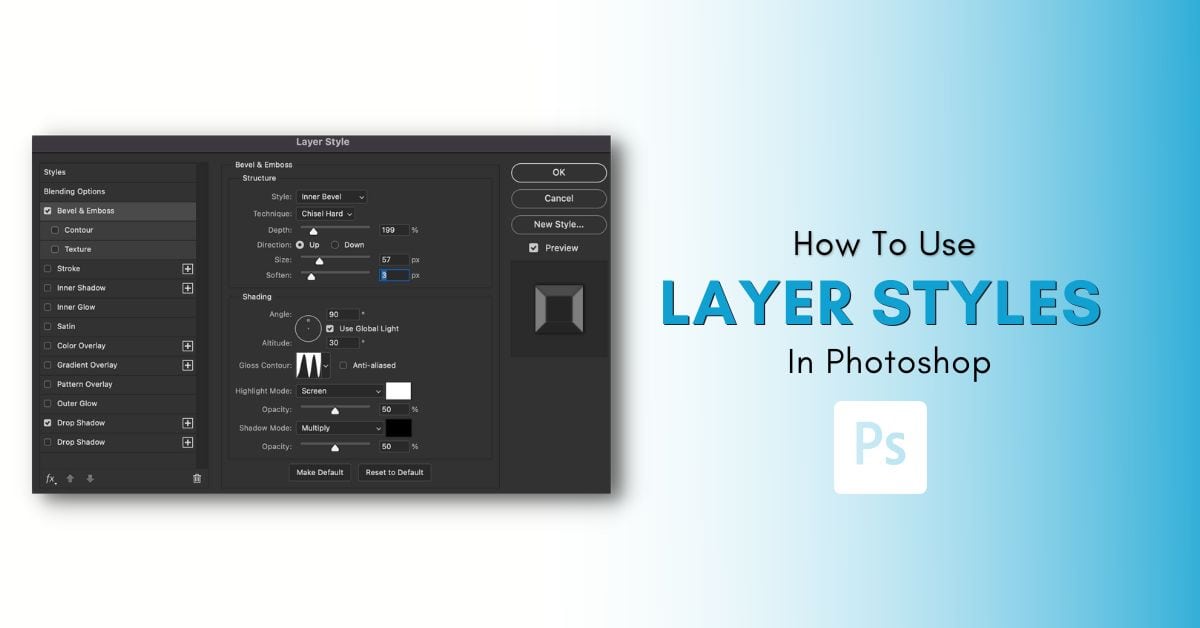

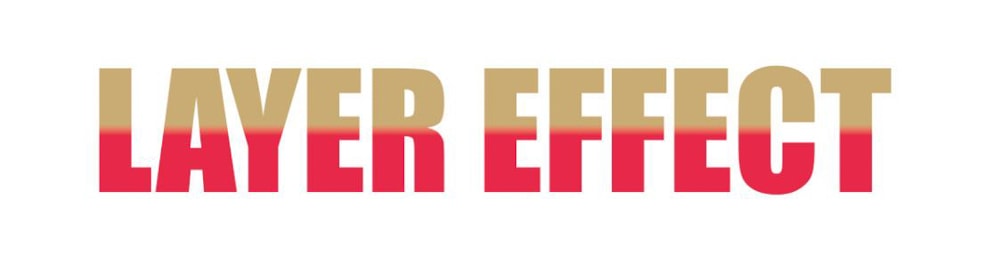
It’s common for most Photoshop users to use the terms “layer style” and “layer effects” interchangeably. However, there’s a big difference between these two terms, and learning how to use both of them in your projects can result in some truly professional work.
Today you’ll learn the difference between layer styles and layer effects. You’ll learn how to use the preset layer styles found in Photoshop and also how to import layer styles you find online. I’ll show you how to create your own custom layer style, and I’ll do a rundown of all ten layer effects you can apply to your designs.
Ultimately, everything you could ever need to know about working with Layer Styles and Layer Effects will be broken down in this tutorial! Let’s get started.
Layer Styles Vs Layer Effects In Photoshop
The best way to explain the difference between a layer style and layer effects is to say that the layer style is the “whole,” and layer effects are the “parts” that make up the whole.
In other words, a layer style is a collection of layer effects.
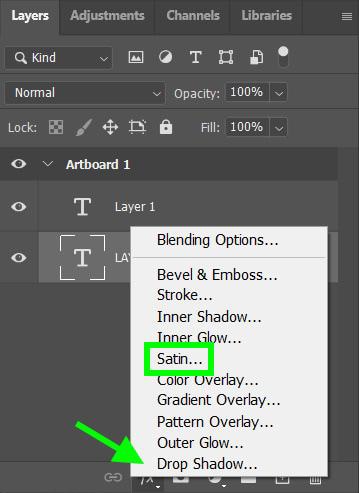
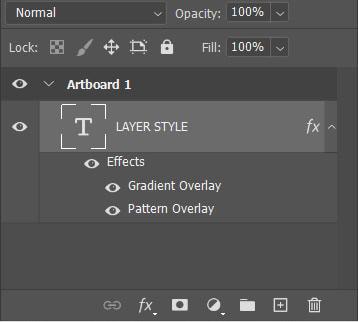
Layer effects are the non-destructive, editable effects themselves. The Stroke, Color Overlays, Pattern Overlays, and the rest of the effects come together to create the layer style.
What Are Layer Styles Used For In Photoshop?
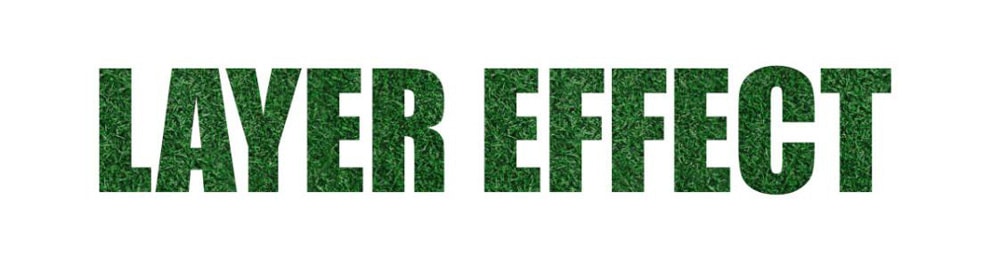
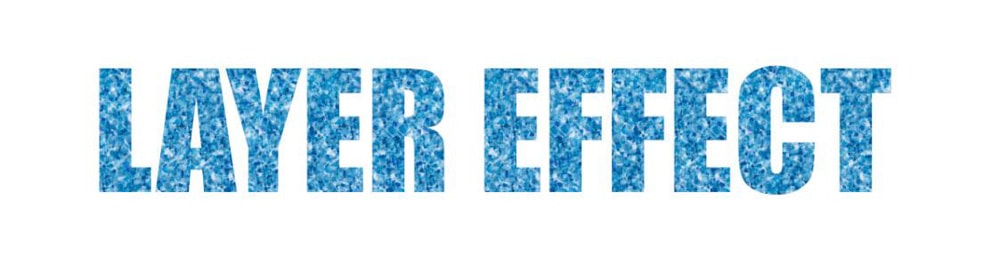
Layer styles are a quick and easy way to transform a bland or boring design into a fun, stylized, professional-looking piece of work. Layer styles quickly add various pre-defined effects to the entire layer, such as overlays, shadows, and more.
Keep in mind that layer styles can not be applied to locked layers or groups.
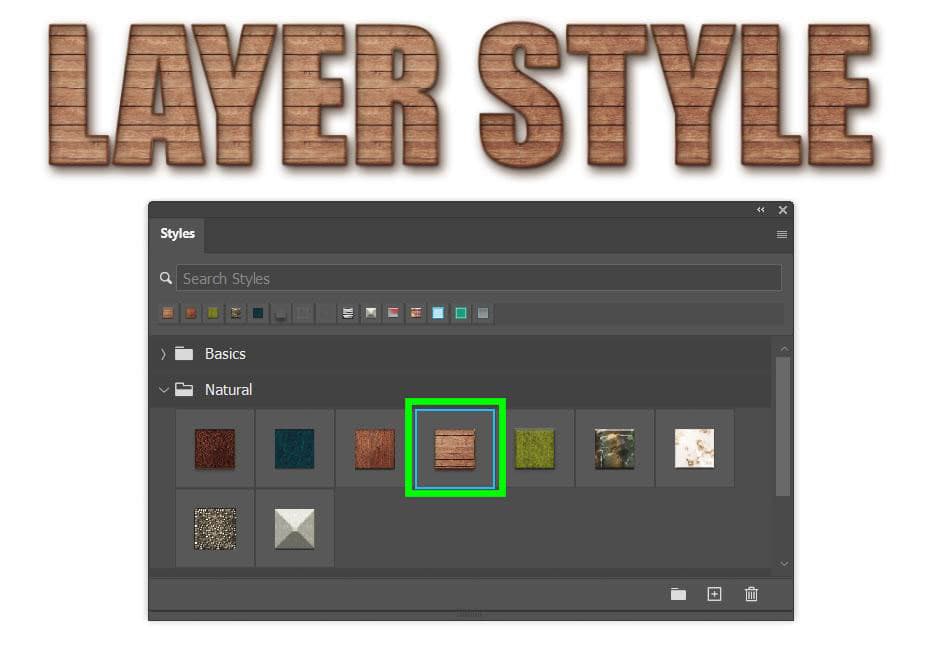
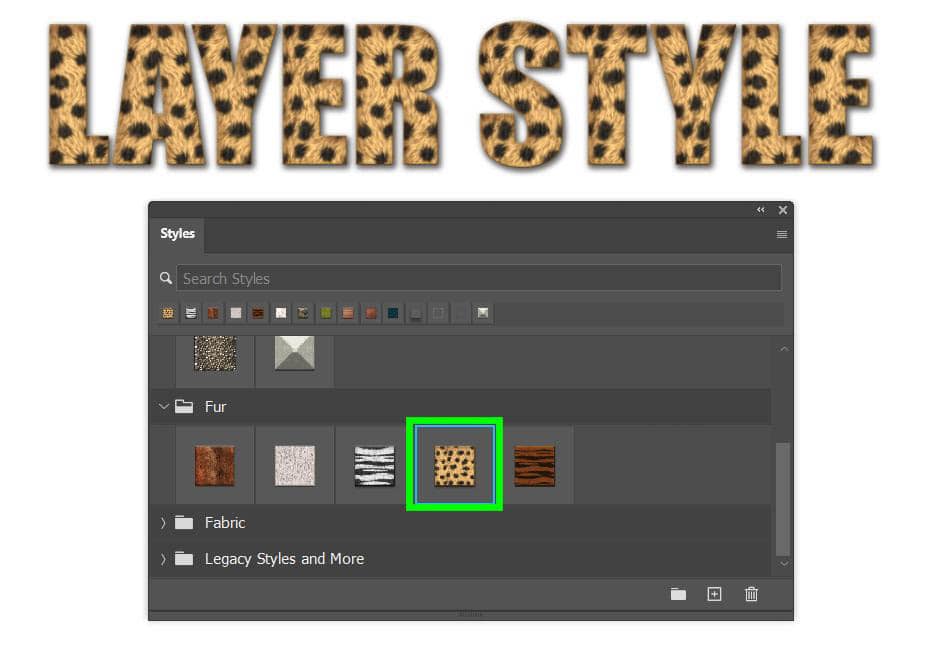
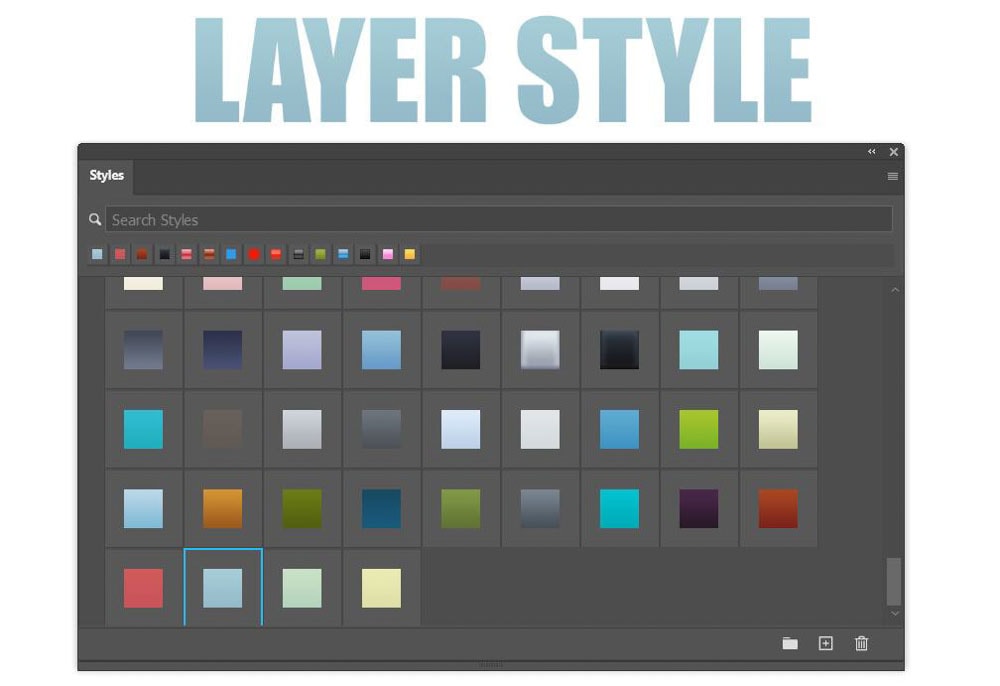
How To Add A Preset Layer Style
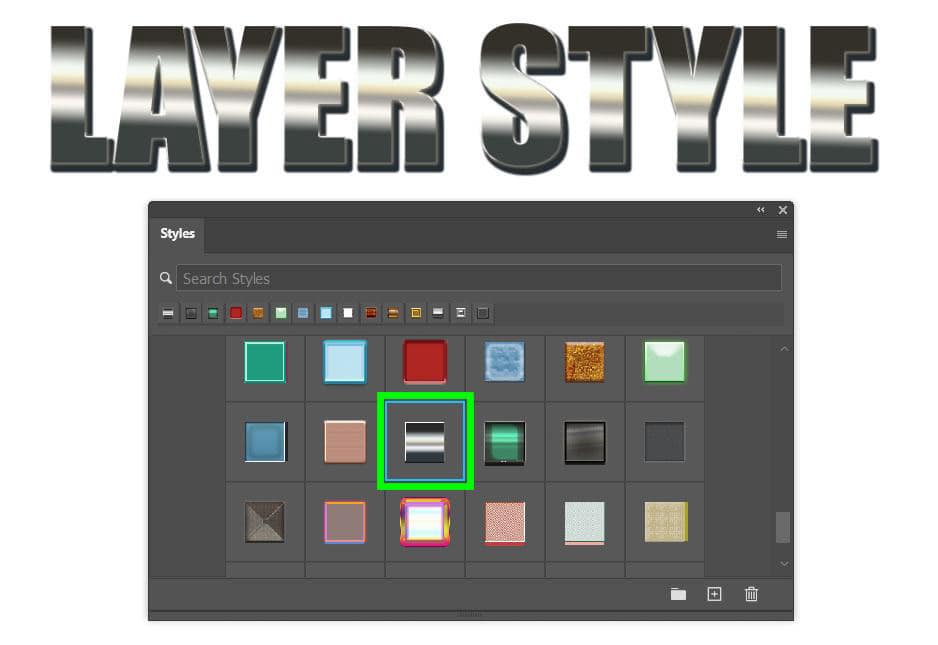
Photoshop has many preset layer styles for you to choose from, and they are easy to apply.
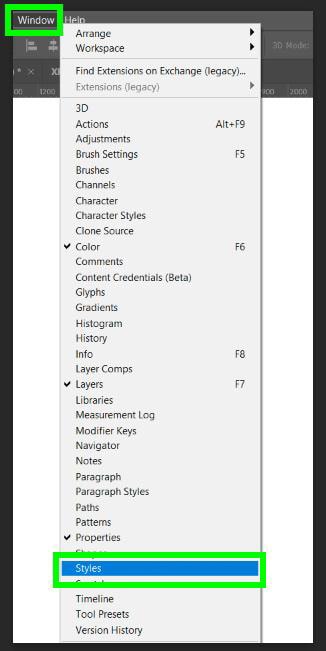
To find the preset layer styles available to you, first, open the Styles Panel by going to Window > Styles.
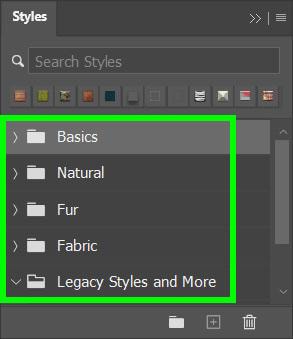
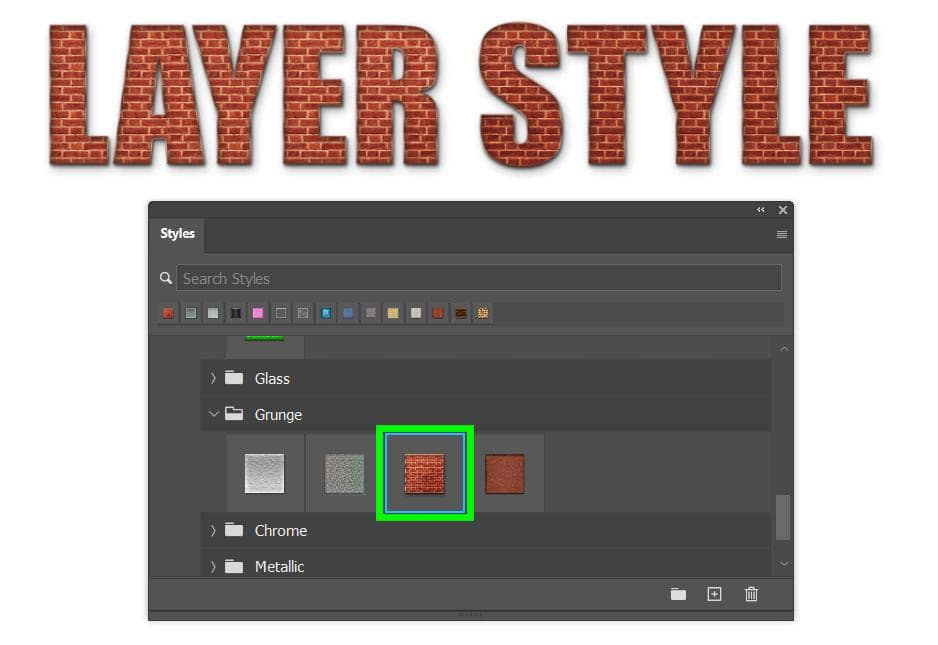
The layer styles that come with Photoshop come in separate folders to make it easy for you to find the type of layer style you need for your project.
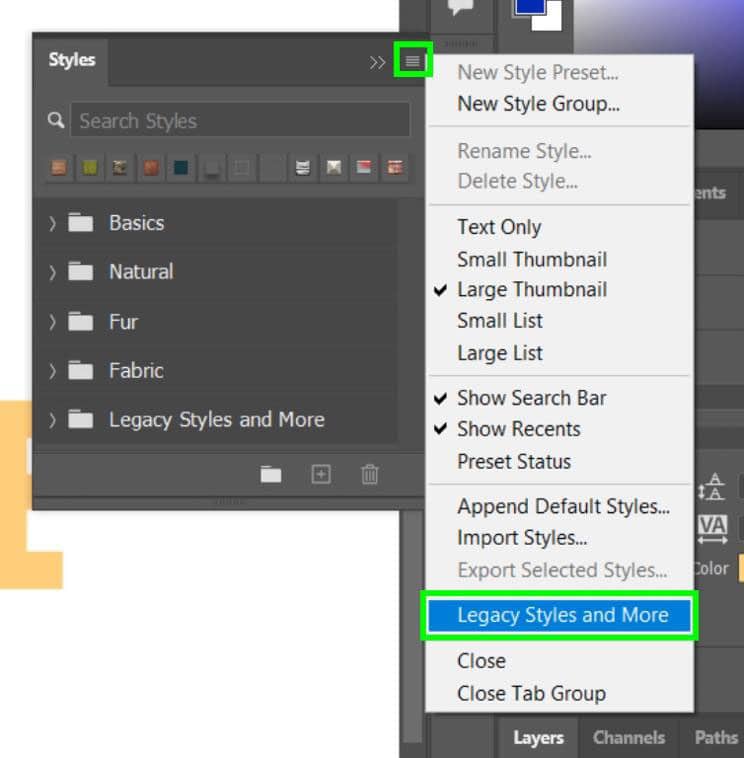
The folder named Legacy Styles and More may be missing when you first open the Styles Panel. If this folder is missing, you can bring it back by opening the Hamburger Menu in the Styles Panel and selecting Legacy Styles and More.
Once you ensure that all of your options are available, click on the layer you wish to apply your layer style.
Once you have your layer selected, click on one of the layer styles in the Styles Panel. Your layer will instantly change into the layer style you clicked on, with no need to adjust any other settings.
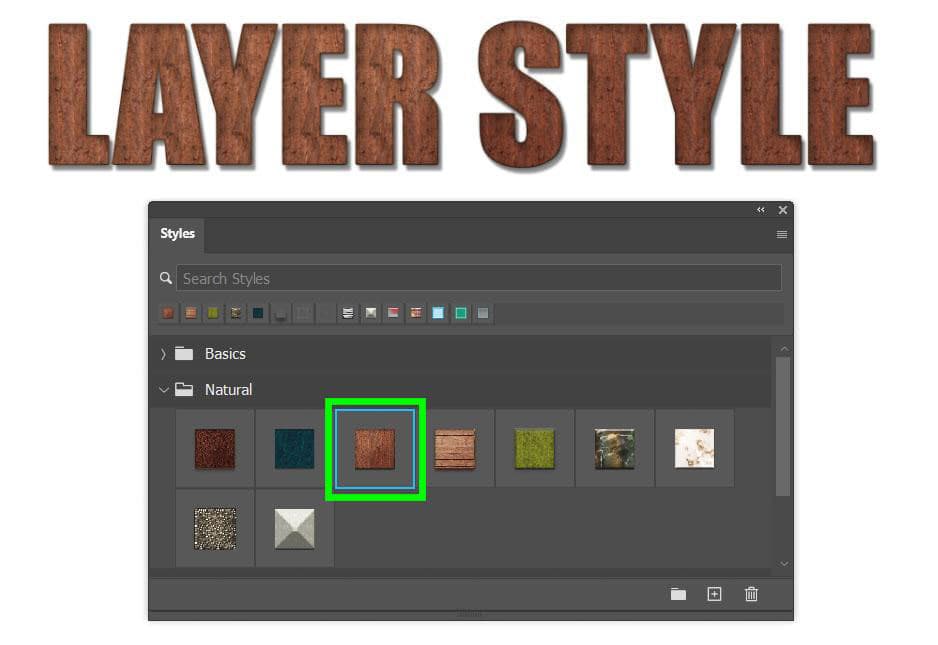
The layer styles under the Natural folder work great on text layers and are excellent for backgrounds.
The layer styles under the Fur folder have more niche uses. These layer styles are not for every design, but they are still kind of neat.
In the Fabric folder, you’ll find layer styles perfect for backgrounds and many different projects.
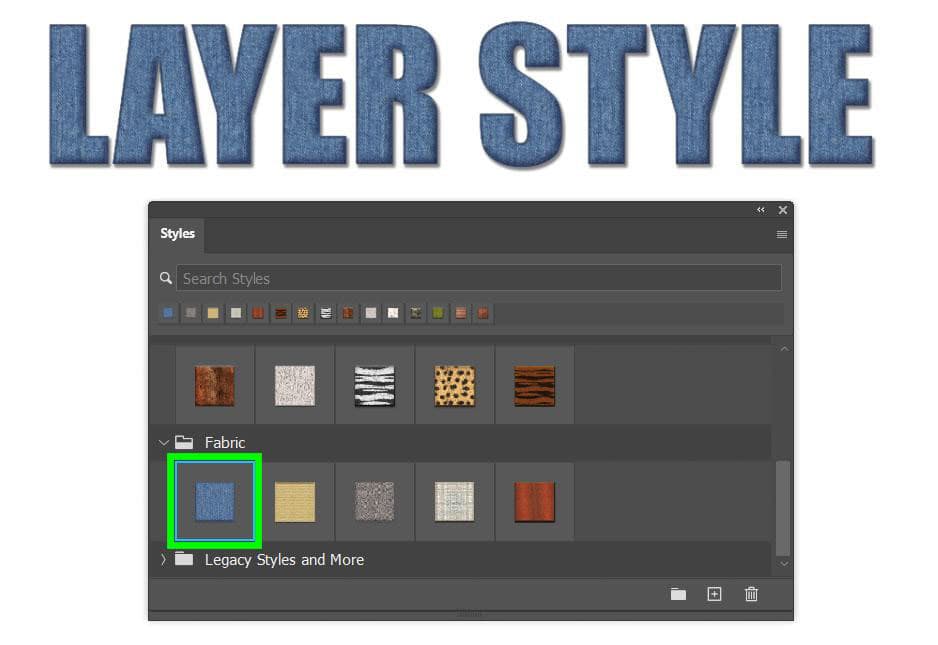
The Legacy Styles and More folder is often used for website creation. The layer styles here are great for buttons and banners.

As you can see, using a preset layer style can turn a normal or boring design into a professional or fun-looking one. This is especially true for shape layers or text layers in your projects.
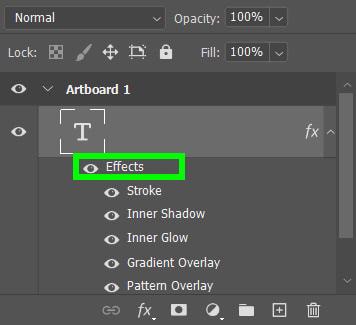
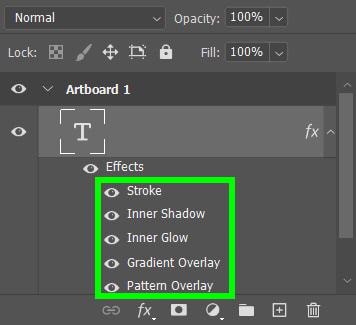
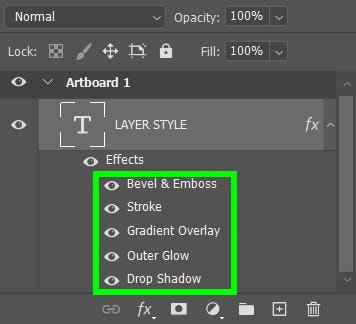
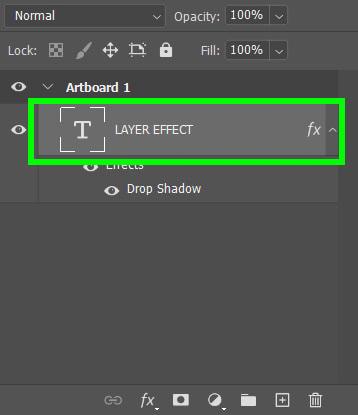
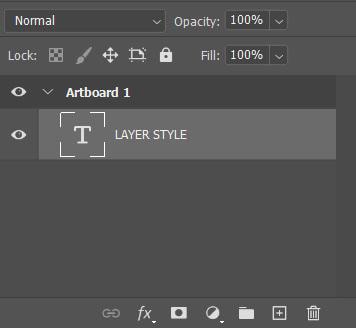
Once you apply a layer style to a layer, you’ll see all of the different applied layer effects listed below the layer in the Layers Panel. If you need to adjust any of these effects, you can click on the effect itself to adjust the settings.
How To Import Additional Layer Styles To Photoshop
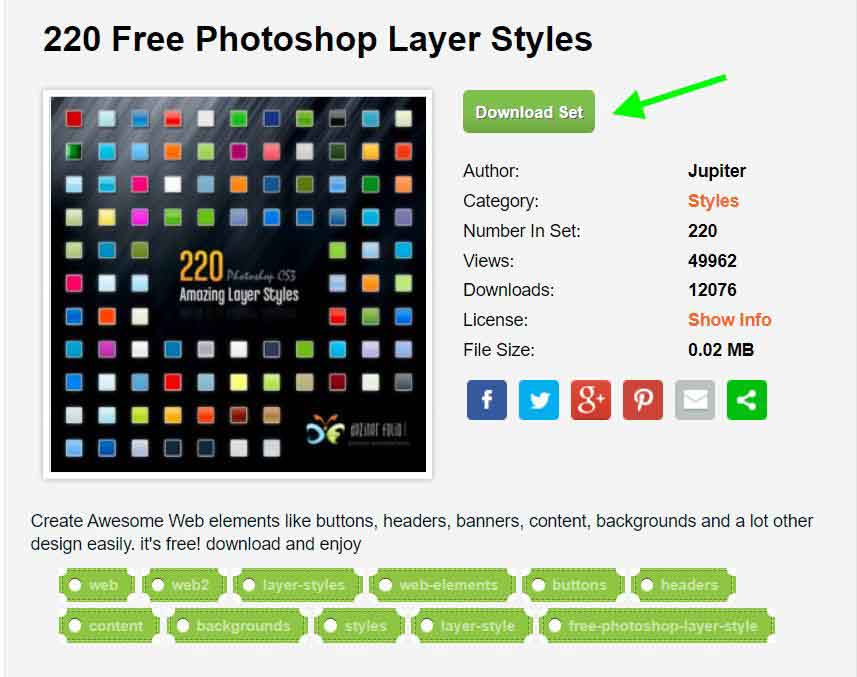
When it comes to layer styles, you don’t have to rely on just the free ones that come with Photoshop. There are plenty of layer styles you can download from the internet.
While you can easily search for the perfect layer style by searching for free layer styles for Photoshop or something similar to this phrase, it causes quite a hassle.

When you search for free layer styles on Google, you will be bombarded with hundreds of websites. If you don’t have virus protection software on your computer, be very picky with what website you decide to click on. Be even pickier with what set of layer styles you choose to download to your hard drive.
A few good and reputable sites to look for layer styles are Freepik, Brusheezy, PSD Gold, or Inscribe Mag.
Once you find the right layer style or set of layer styles to use in your design, go ahead and hit the Download Button.
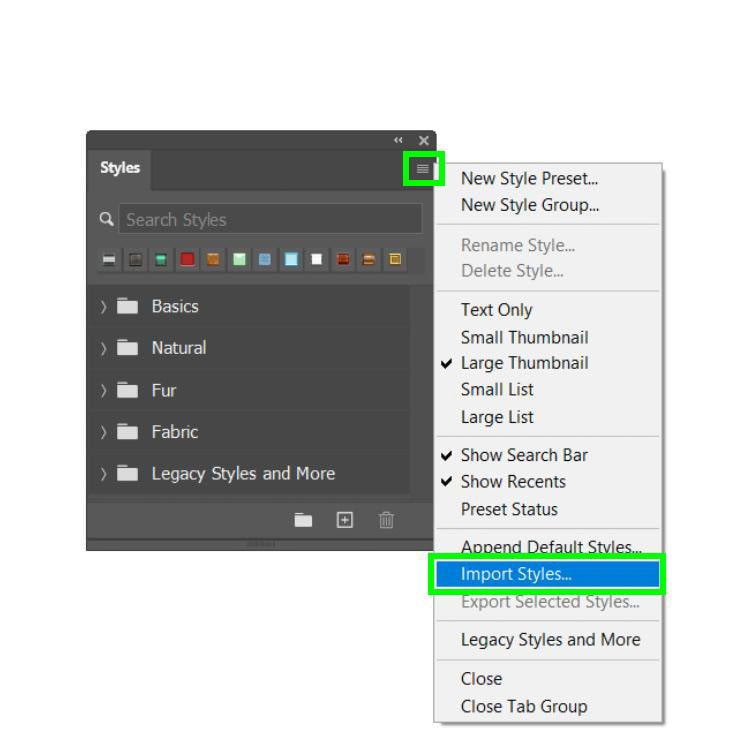
Now that your layer styles are downloaded onto your computer go back to Photoshop and open the Style Panel by going to Window > Styles.
To download your layer styles into Photoshop, click on the Hamburger Menu in the Styles Panel and select Import Styles.
You will be prompted to find the layer styles you just downloaded. Once you find the file(s), click Load.
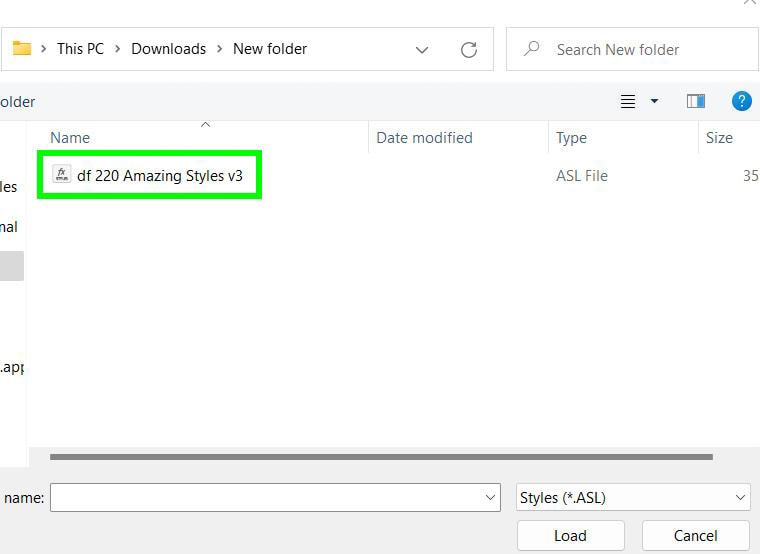
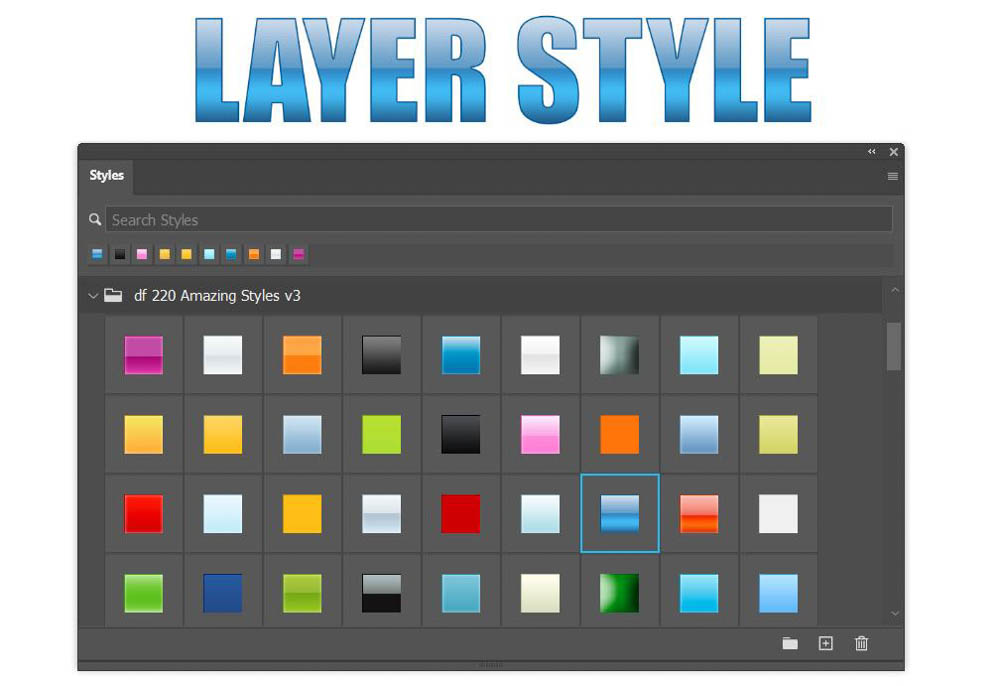
Hitting Load will add a new folder to the Styles Panel containing the layer styles you downloaded.

With the newly downloaded layer styles available, you can quickly and easily switch which layer style you want to use in the Styles Panel.

How To Add A Custom Layer Style In Photoshop
If you can’t find the perfect layer style within Photoshop or in the vast amount of free layer styles on the internet, you can always make the perfect layer style yourself. It can be a lot of work, but creating your very own layer style can be a fun and rewarding process.
I’m going to walk you through the process of creating your very own layer style and how to save that style for future projects.
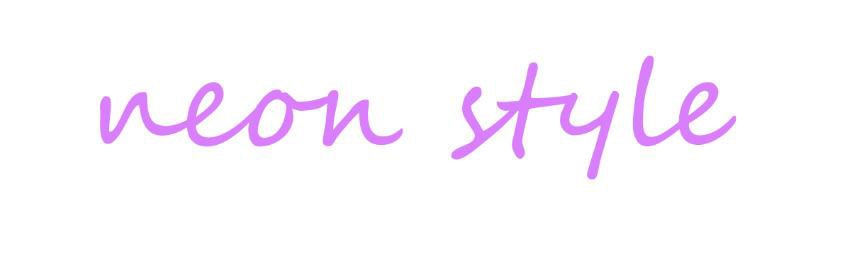
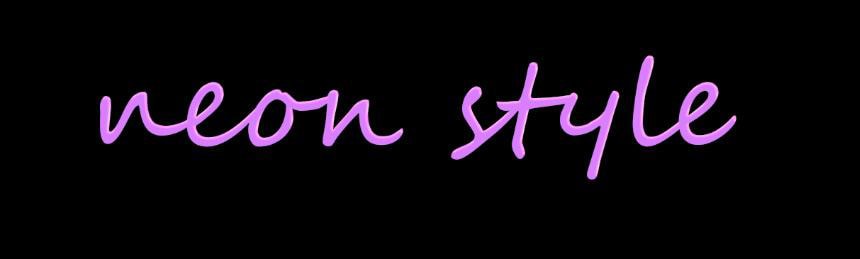
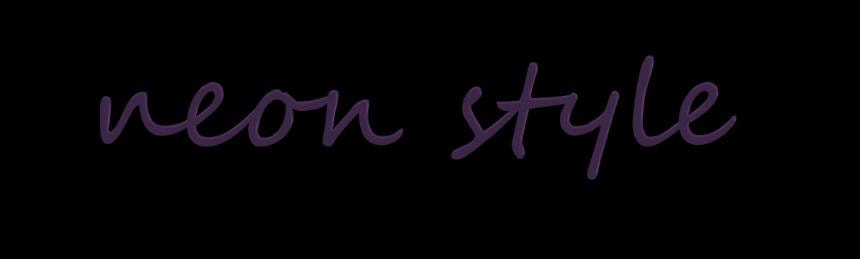
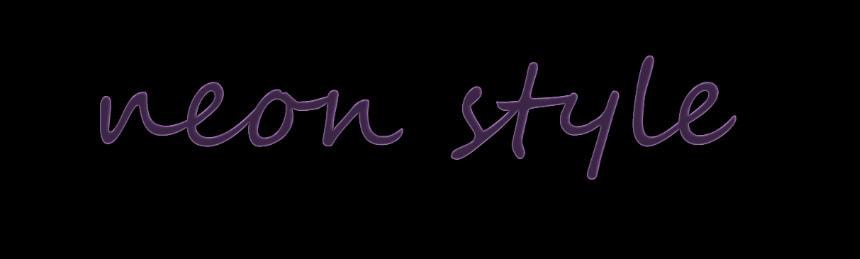
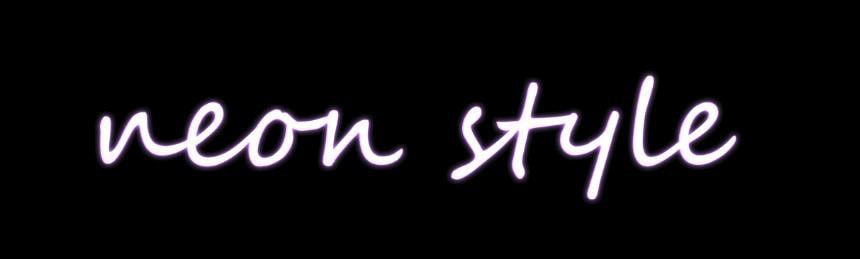
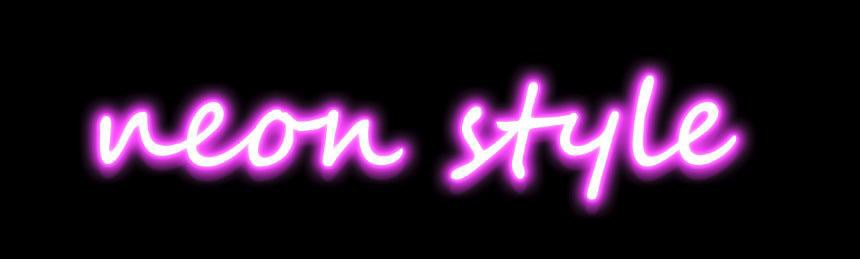
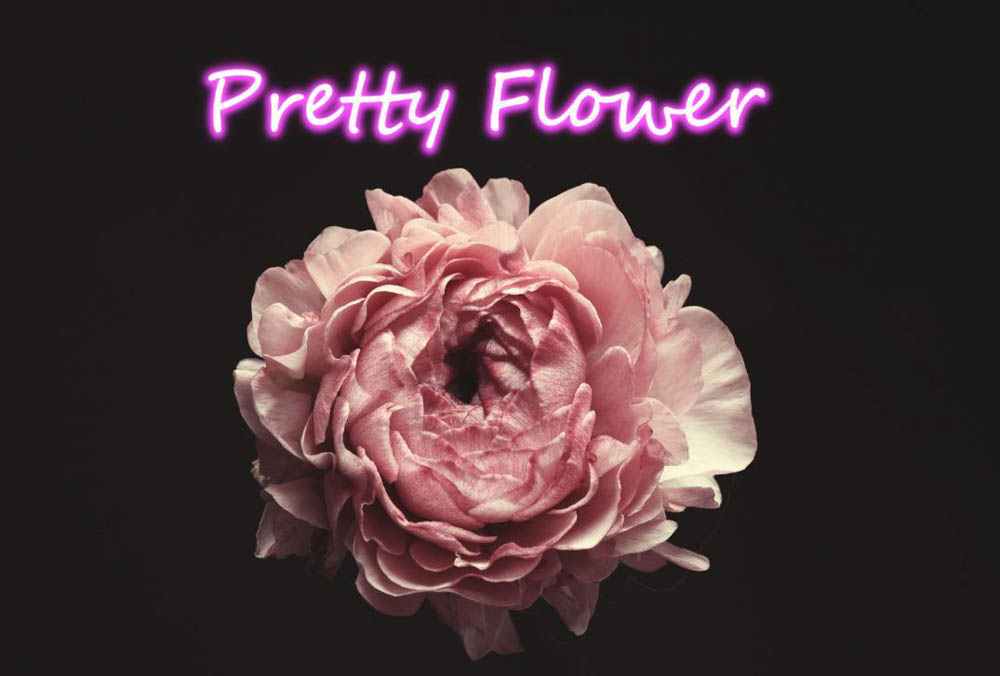
In my example, I’m going to make a neon-style effect. You can copy all of the settings shown below if you want to make the same exact effect, but I suggest you adjust and tweak all of these settings to create something unique to you. It’s best not just to copy what I do but to experiment with each setting on your own.
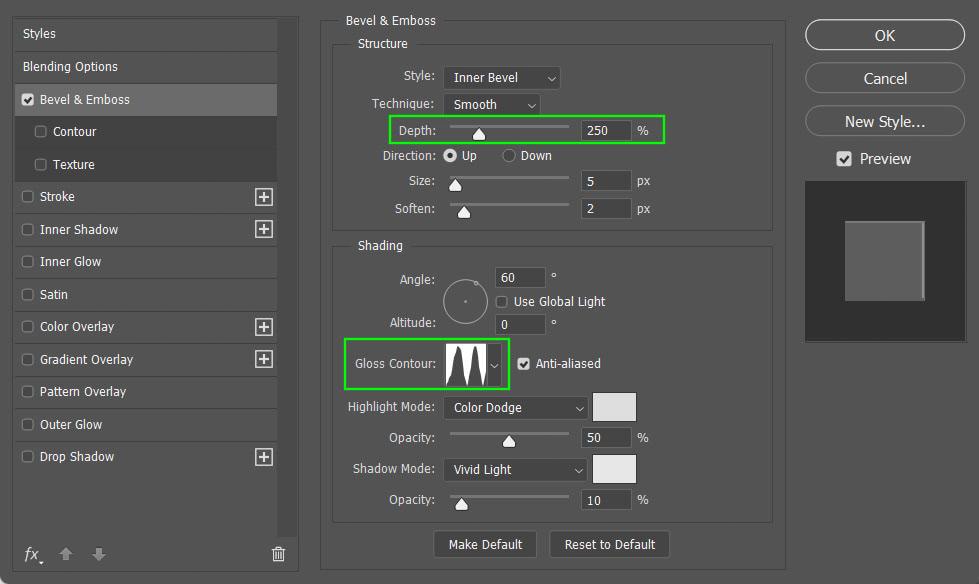
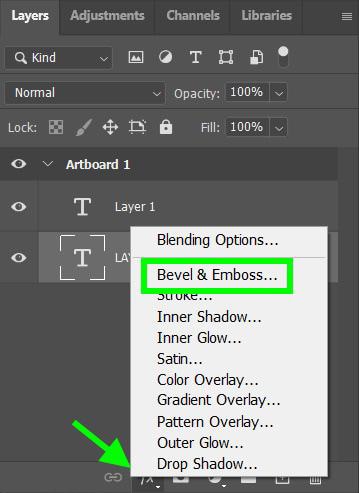
A layer style is created by adding multiple layer effects together. Adding a Bevel & Emboss effect will indent the text, which will help the other effects look more realistic.
The essential options to look at here are the Depth and the Contour options. Adjusting the Depth will adjust how far the effect will go within the design. Picking the right contour can be important for creating rich reflections in more complex shapes in your design.
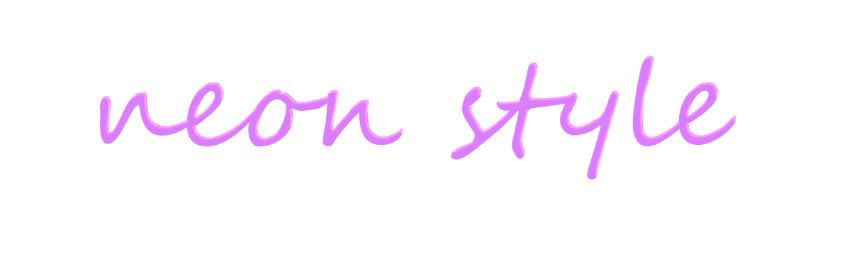
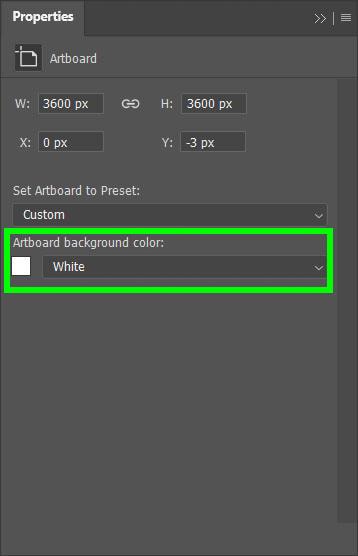
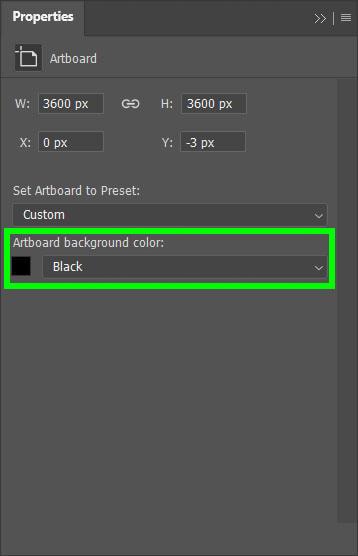
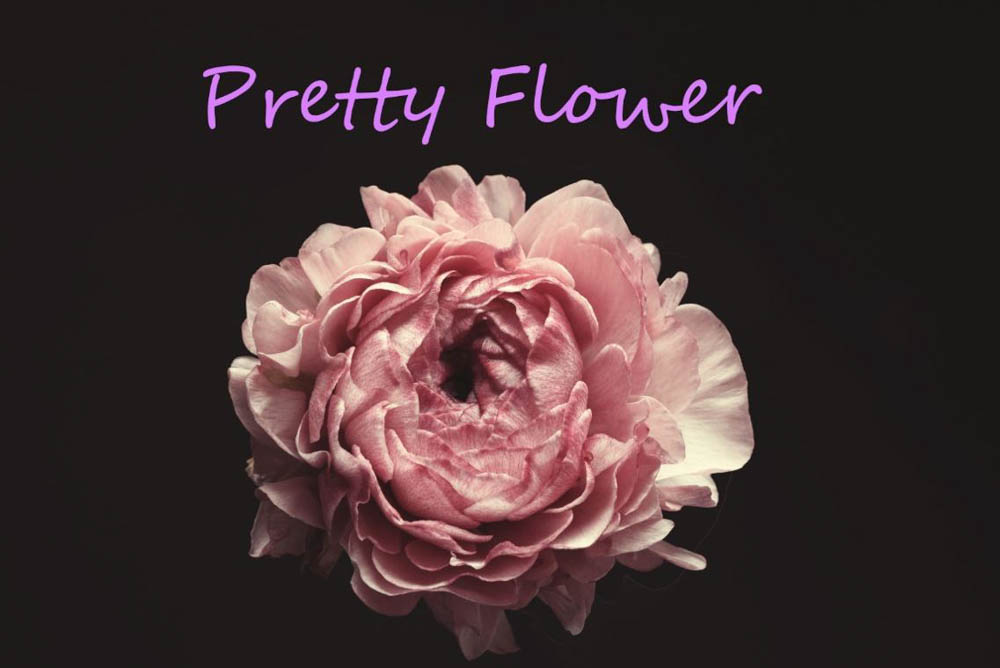
The effect has been applied, but it’s hard to see with the white background. I need to make the background a dark color.
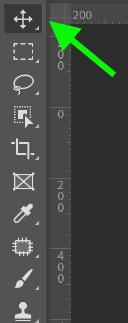
To do this, make sure you have the Move Tool selected and click on the background. In the Properties Panel, change the Artboard/Canvas Background Color from white to black.
Now that the effect is easier to see let’s also drop the Fill of the layer itself.
Make sure the layer is selected in the Layers panel, then drop the Fill to about 20%.
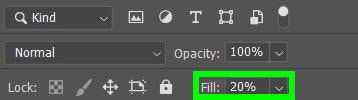
This will allow us to see the effects better as we apply them to the layer style.
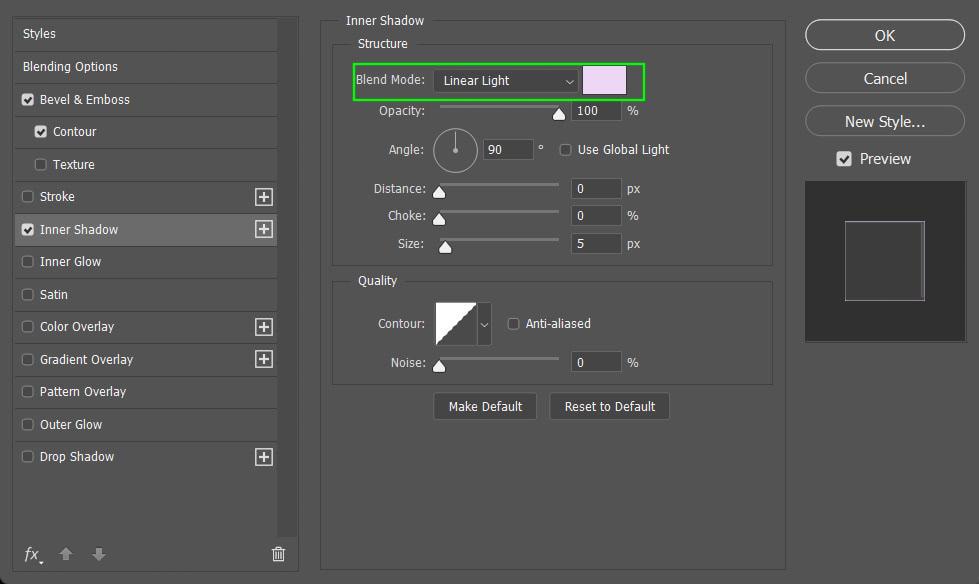
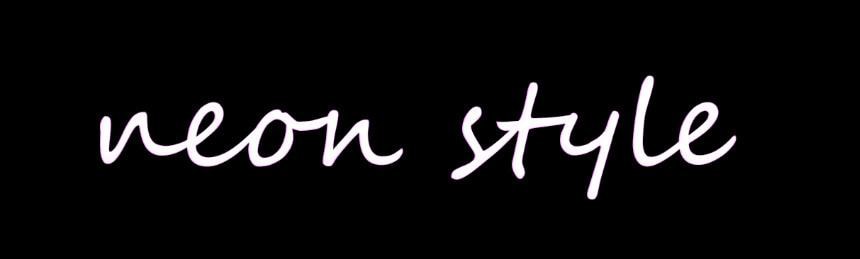
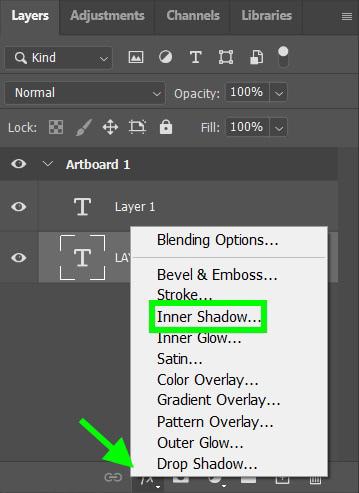
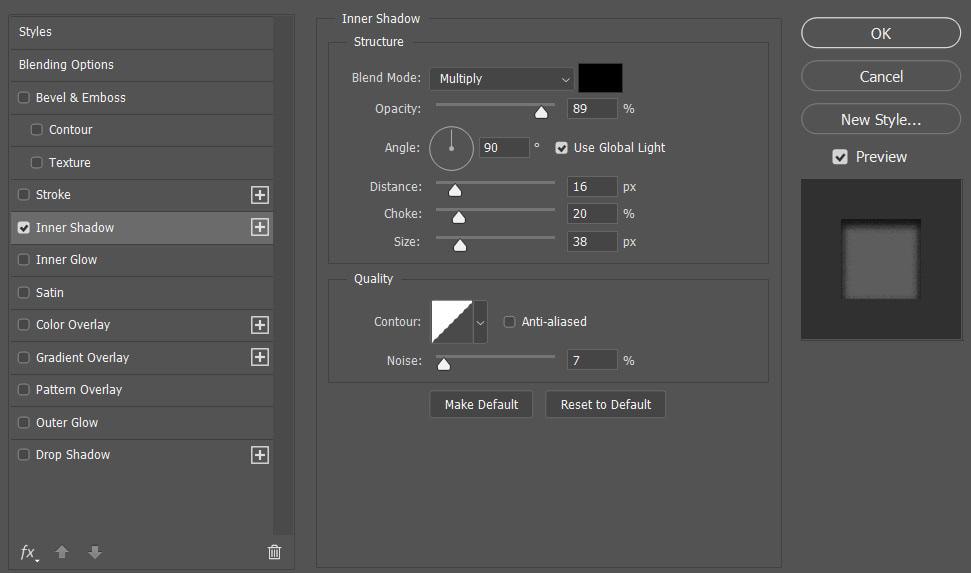
Now that the Bevel & Emboss is applied, I’m going to add an Inner Shadow.
Experiment with the Blend Mode here. Go through all of the options to see which one works the best. I’m going to go with Linear Light here.
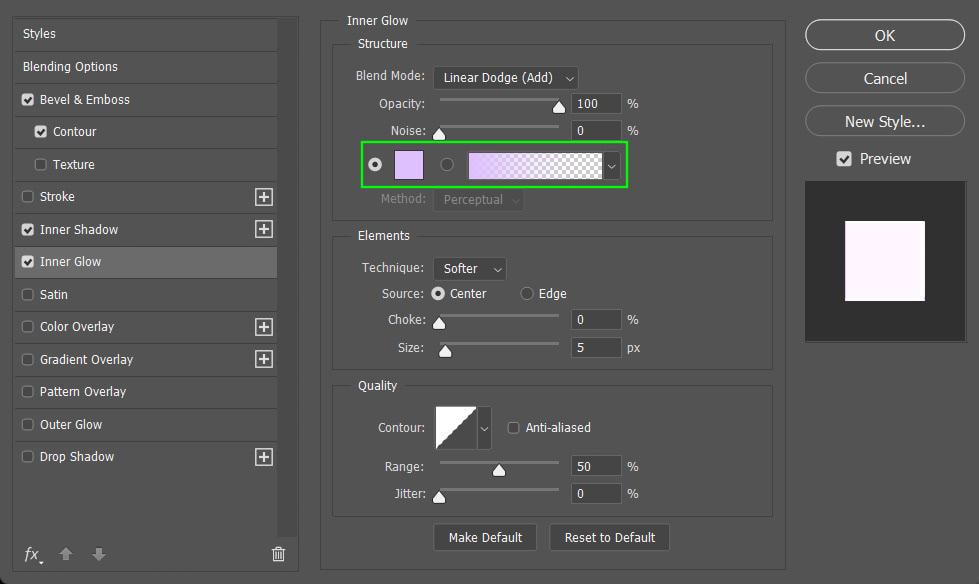
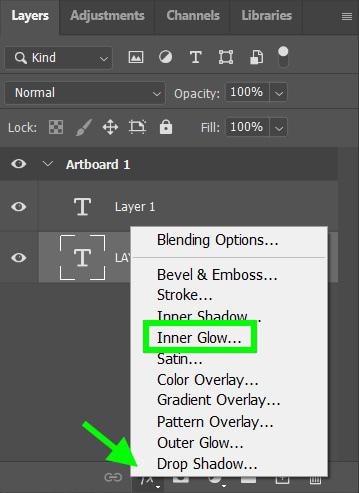
The third effect layer I’m going to add is an Inner Glow. Most of the settings here just need to be tweaked a bit, but the most important option here is the Color. Choosing the correct color is essential for a layer style like this.
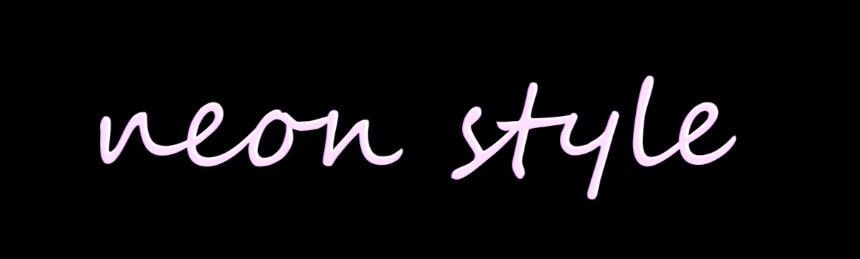
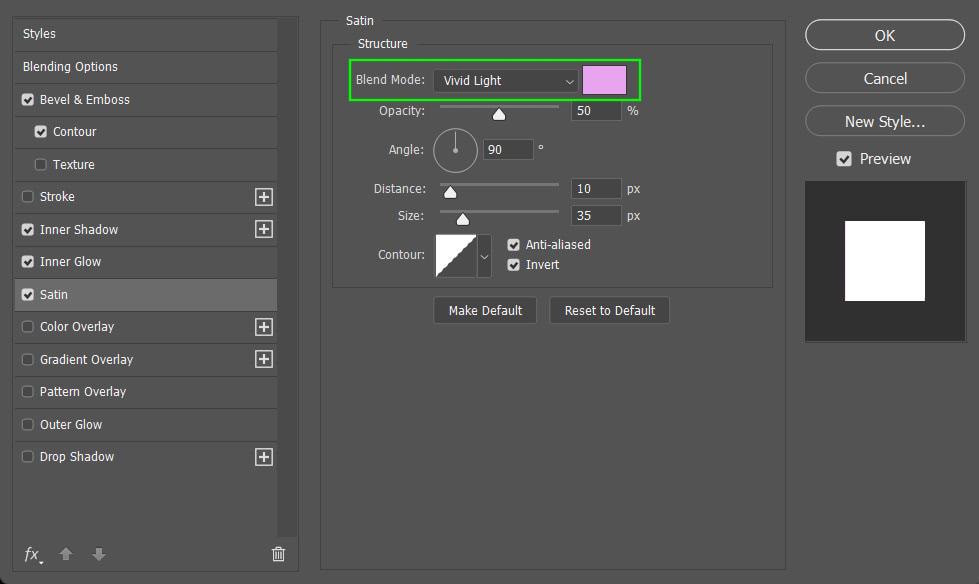
The next effect to add to this layer style is the Satin effect. This effect will help define the shine of the final product. The Blend Mode is also important with this effect, and I chose Vivid Light.
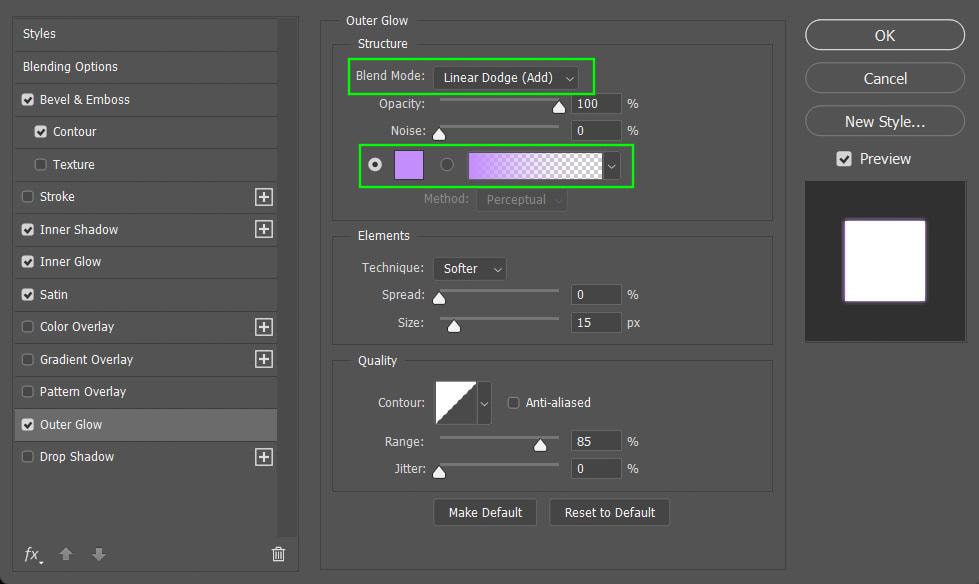
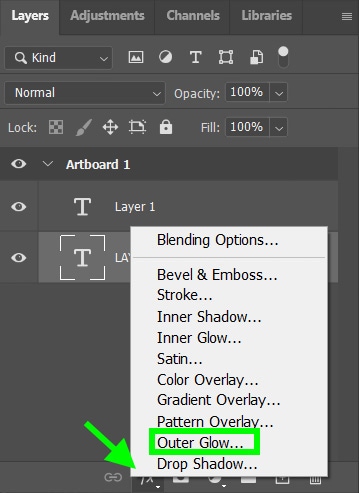
The next effect is the most important for making a neon layer effect. In order for a neon layer effect to work, you need to add an Outer Glow.
The two most important options here are the Blend Mode and the Color. The Linear Dodge works the best for the neon effect. For the color, it’s best to pick a color that’s similar to the colors you’ve chosen for the other layer effect colors.
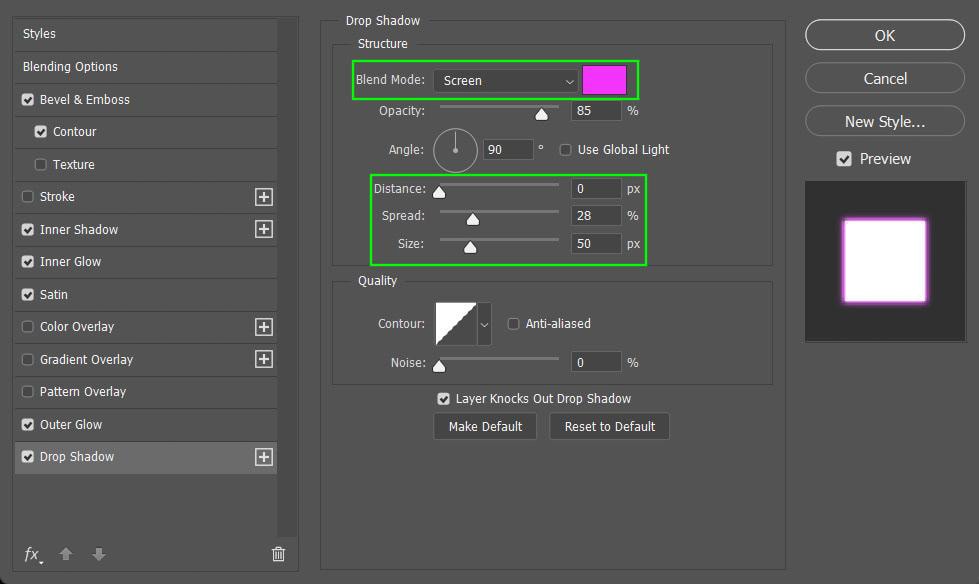
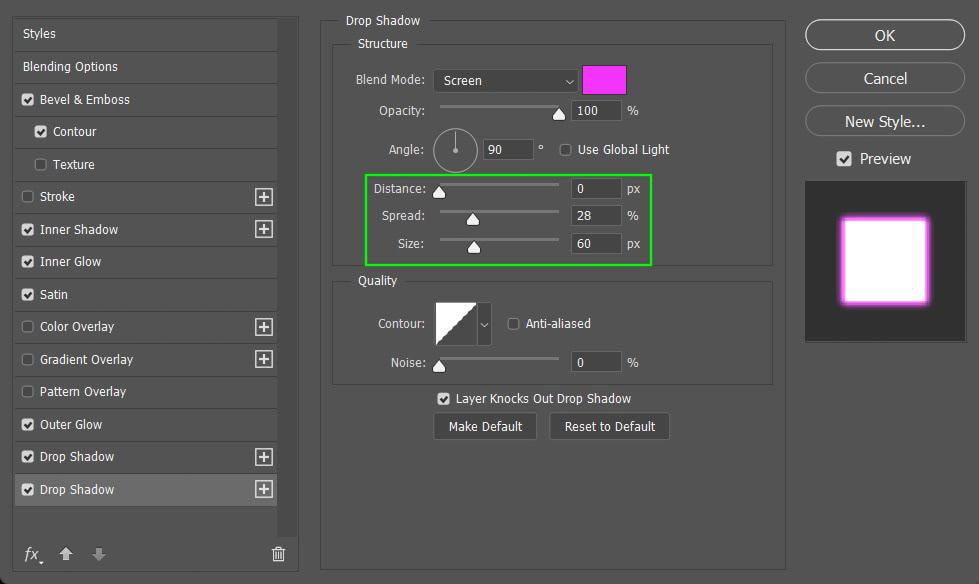
Believe it or not, all of the layer effects that have been applied so far are really just prep work for the layer effect I’m about to add now: the Drop Shadow.
Adding a Drop Shadow will create a contrast against the Outer Glow, making the neon effect more prominent. In order for this to work, you need to choose a slightly darker version of the colors you’ve chosen so far in the Color option.
The other important options to fiddle with are Distance, Spread, and Size. Just experiment by moving the levers up and down and seeing what works the best.

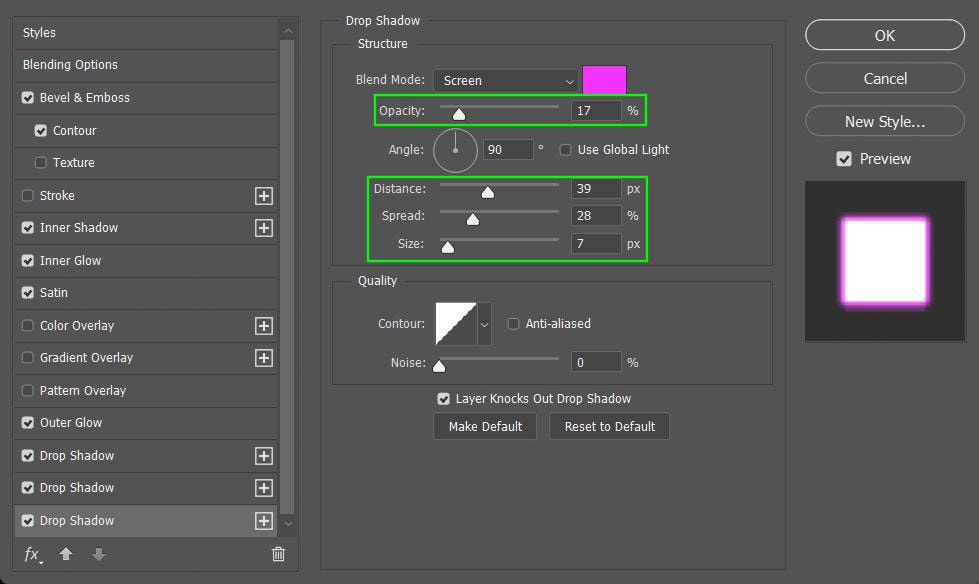
Now that I’ve added a Drop Shadow, I’m going to add another Drop Shadow. Adding multiple Drop Shadows will create depth to this layer style.
To add a second Drop shadow, hit the Plus Button next to the Drop Shadow tab in the Layer Style Panel.

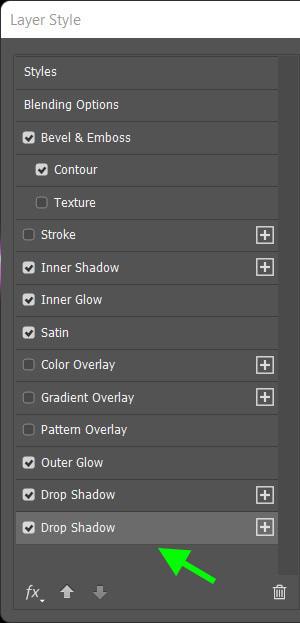
For the second Drop Shadow, you can keep the color the same and just adjust the Distance, Spread, and Size to your liking.
The last effect to add to this Layer Style will be a third Drop Shadow. You can do this exactly like with the second Drop Shadow by clicking the Plus Button on the Drop Shadow Tab in the Layer Style Panel.

For this third Drop Shadow, you can keep the color the same but bring the Opacity down to below 25% or so. This will create the effect of the neon glow trailing off.
Lastly, tinker around with the Distance, Spread, and Size.
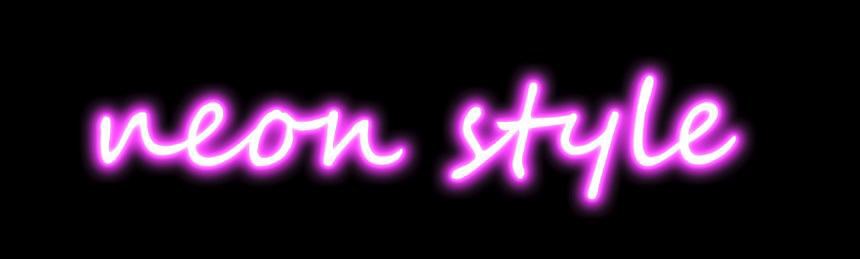
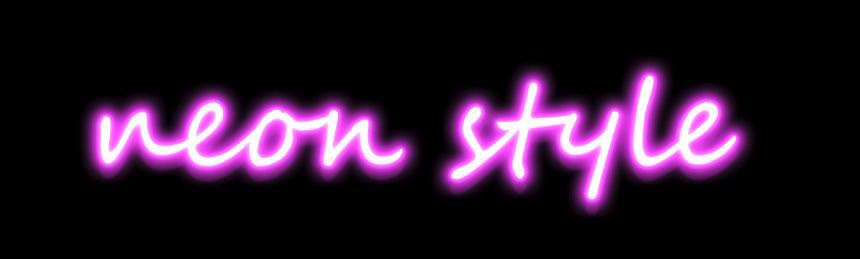
To complete the neon effect for this design, adjust the Fill of the layer. The amount of fill you should adjust to depends on your preference and how bright you want your design to be.
Here is what my design looks like with the Fill at zero percent.


Here’s what my design looks like with the Fill at 100%.

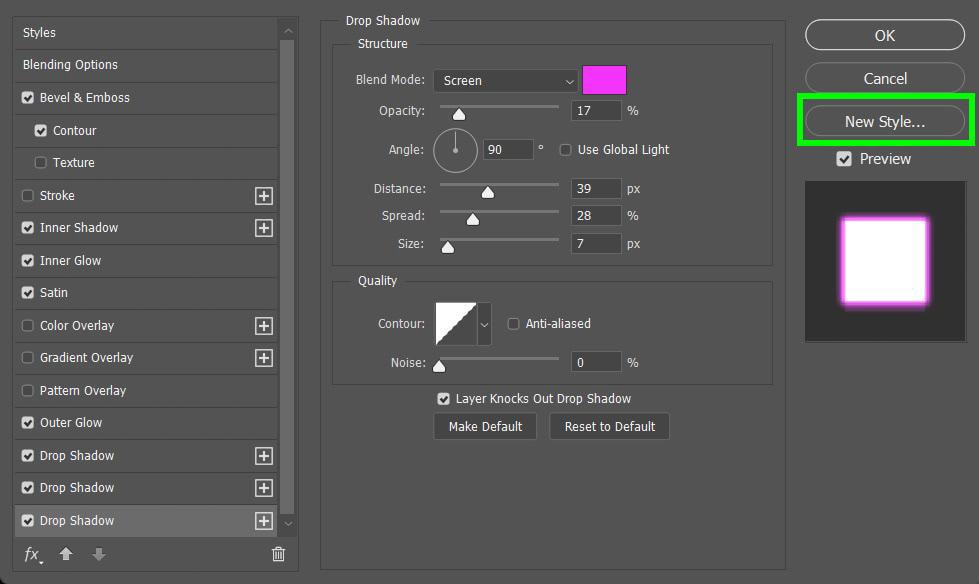
Once your Layer Style is completed, you can save what you created to use in future projects.
To do this, click on New Style in the Layer Style Properties Panel.
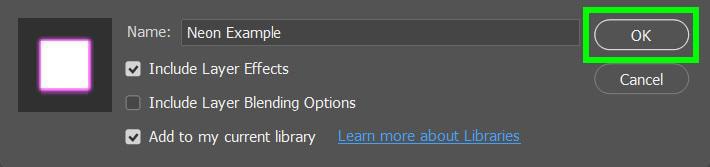
When you hit New Style, you will be prompted to name your new layer style. Hit OK when you’re done.
Once you name your layer, your layer style will be added to the Styles Panel.
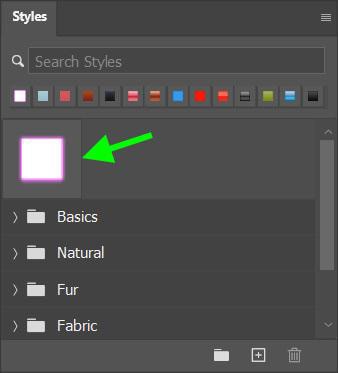
Once your layer style is available in your Styles Panel, you can easily apply it to another layer by clicking the layer and then clicking the layer style you just created in the Styles Panel.
Types Of Layer Effects In Photoshop
Photoshop comes with ten different layer effects that you can use to create your layer styles. I will explain what makes each one of these layer effects so powerful below.
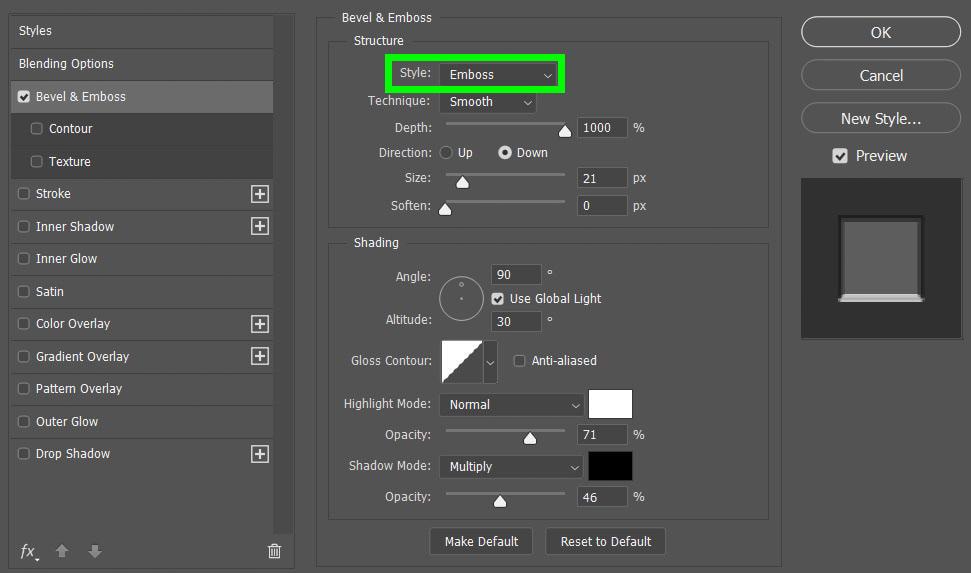
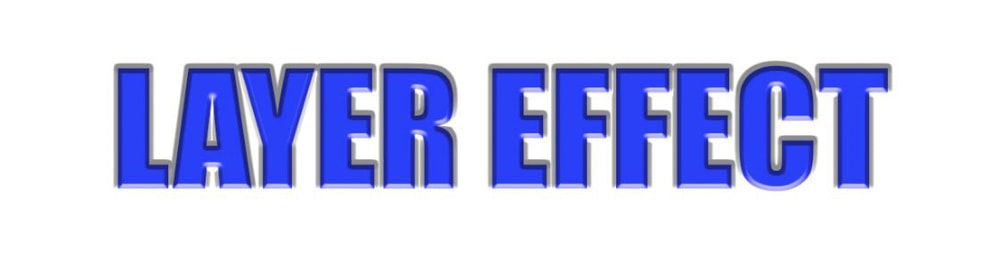
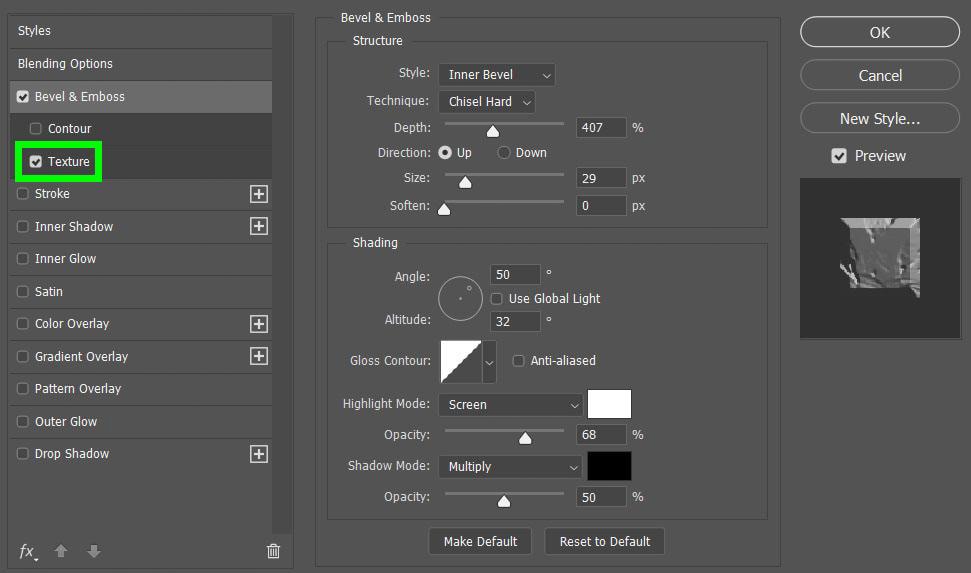
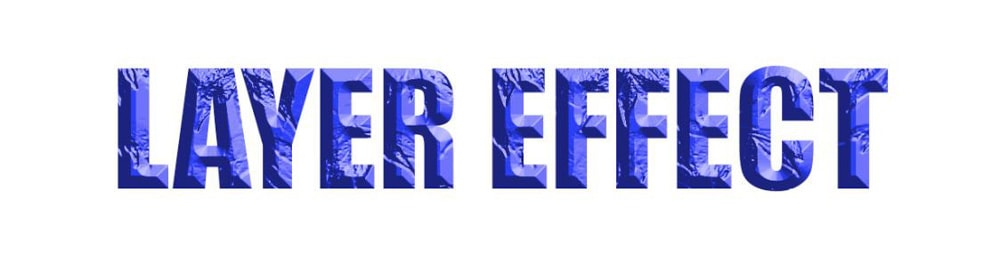
Bevel & Emboss
The Bevel & Emboss effect will create a “popped out” or “pressed in” look using a combination of highlights and shadows to your layer.
The two most used options for Bevel & Emboss are in the Style Drop Down Menu.
Outer Bevel will make your layer pop out more. Inner Bevel will give your layer a basic three-dimensional look.
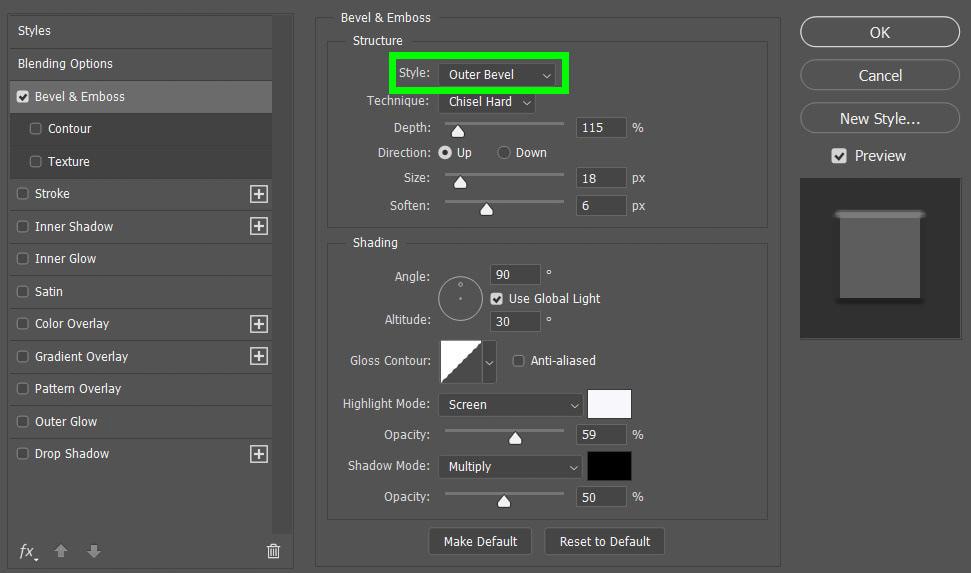
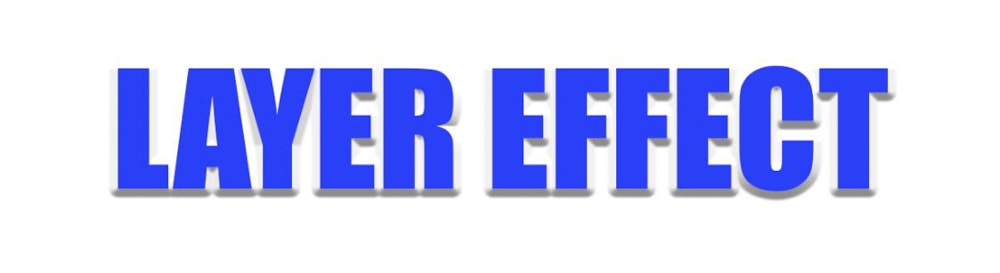
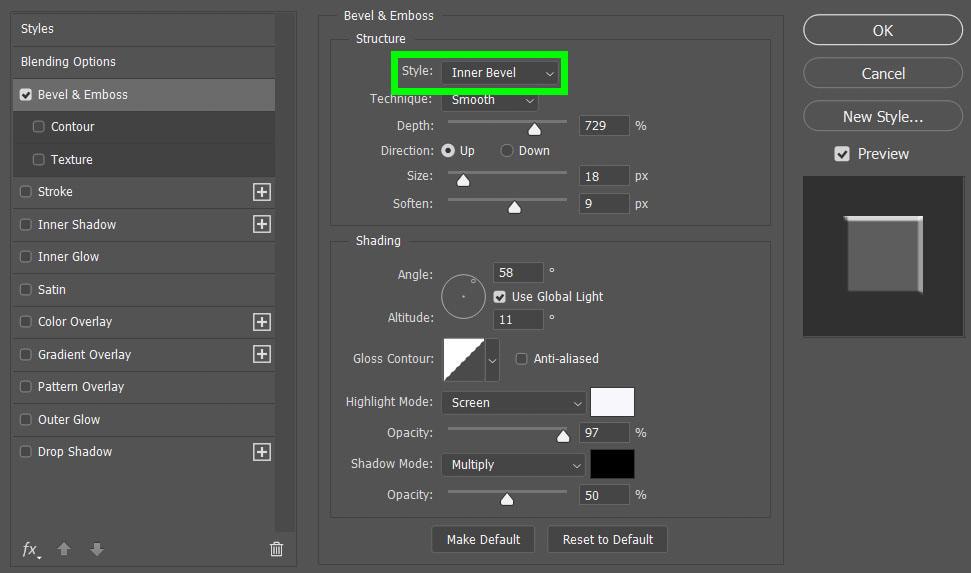
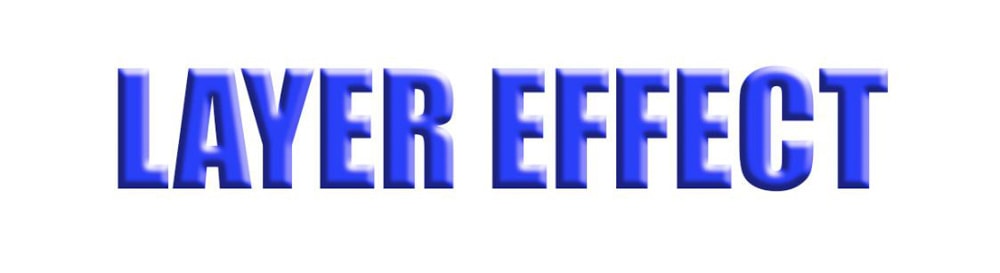
The Emboss option works very well for text layers, creating a “pressed in” feel.
Another fun option is the Texture option. This can be used to create a more creative effect.
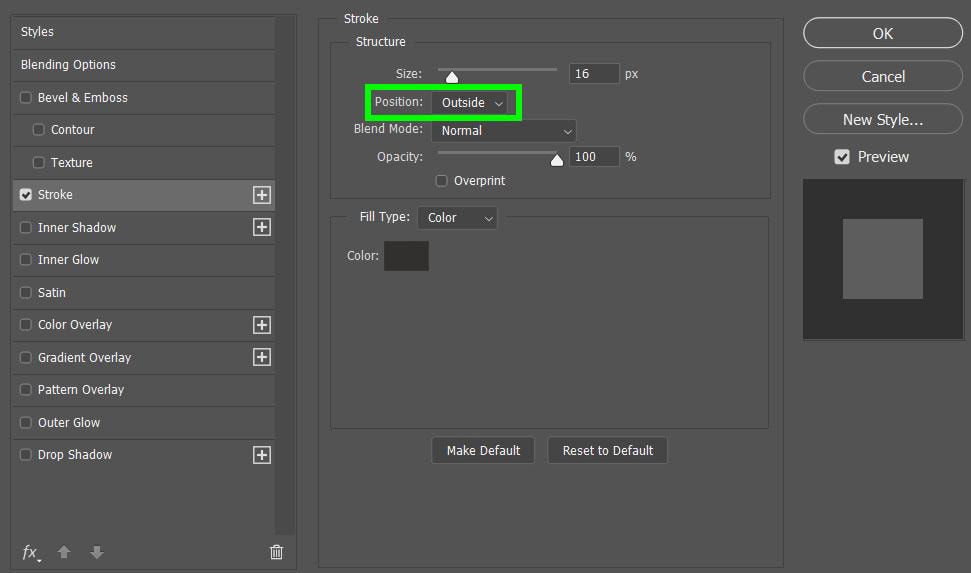
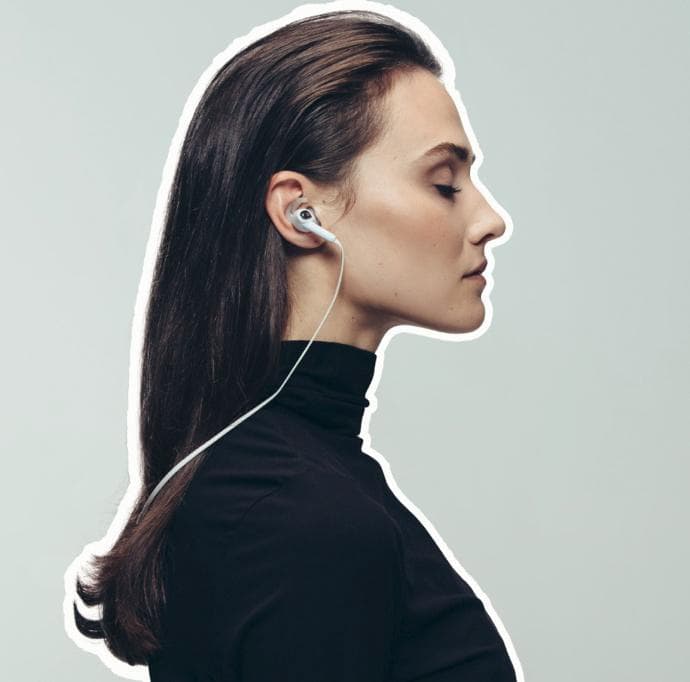
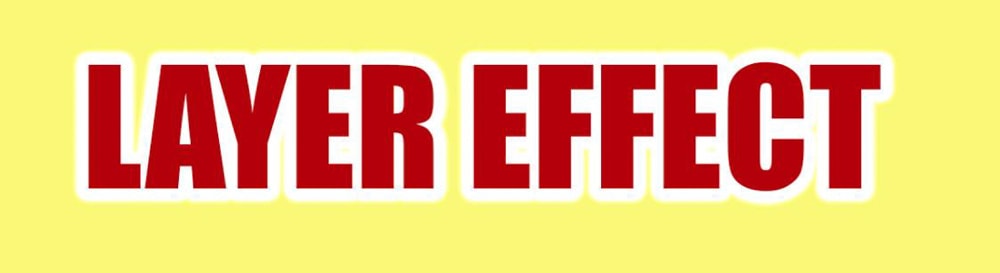
Stroke
The Stroke effect will outline your entire layer with the color, pattern, or gradient of your choice.
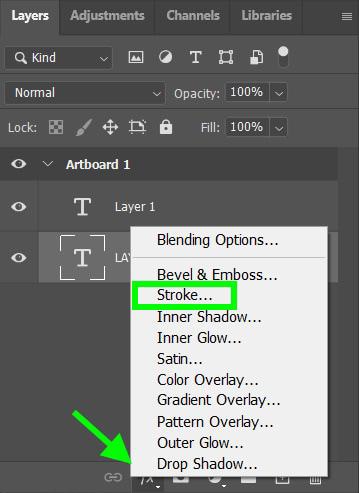
Adding a Stroke effect is common for many Photoshop users. The two most used options are the Outside and Inside options.
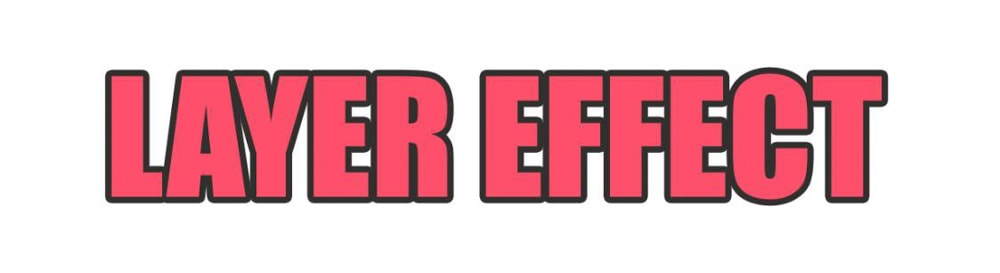
The Stroke effect is perfect to use with people and objects to make them pop off the background.
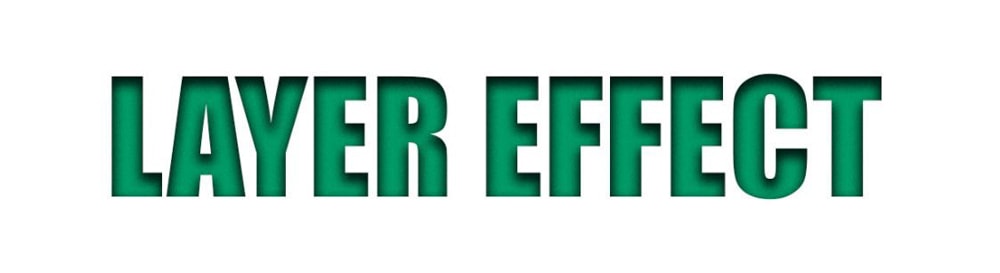
Inner Shadow
The Inner Shadow effect will add a shadow to the inside edges of your layer, creating a recessed appearance.
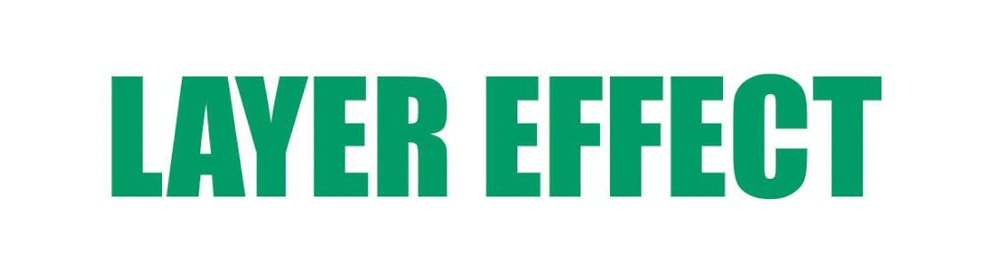
This effect is the quickest way to create a “pressed in” look that can lead to some very professional-looking designs.
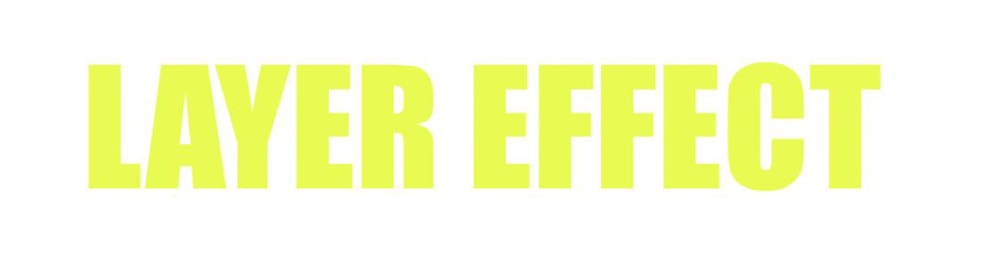
Inner Glow
The Inner Glow effect will illuminate the inside edges of your layer.
This effect will create an almost dreamy or angelic feel.

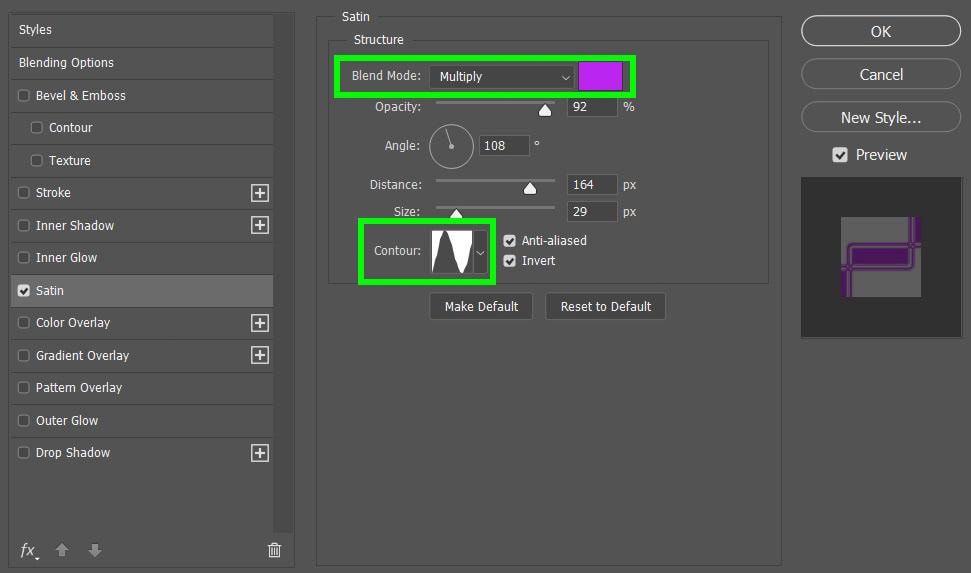
Satin
The Satin effect applies a polished finish to your layer using interior shading. This effect is useful for creating effects such as fabric and glass.
This effect usually requires a lot of tinkering with the properties in order to make the effect work. Spend extra time with the Blend Mode and Contour options when applying the Satin effect.
Color Overlay
The Color Overlay effect will fill your layer with any color you choose.
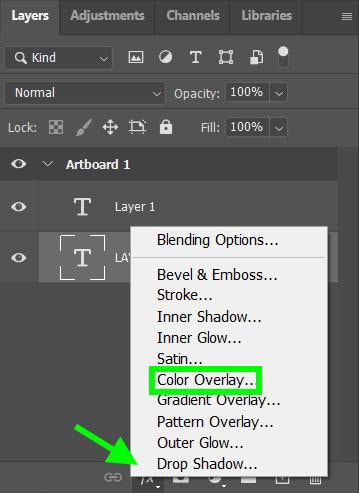

This effect can be used to make subtle color changes or more extreme color changes.
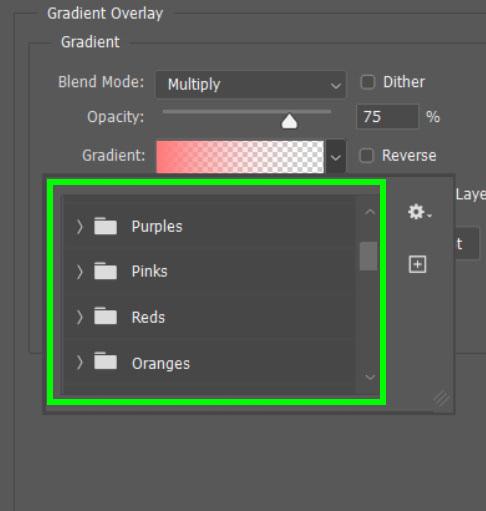
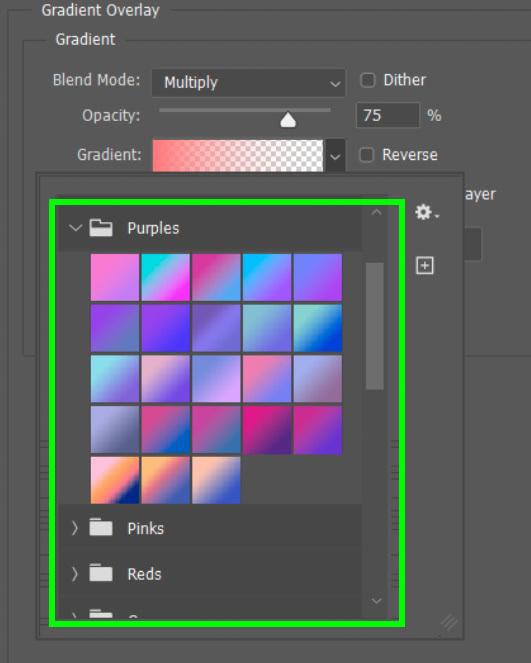
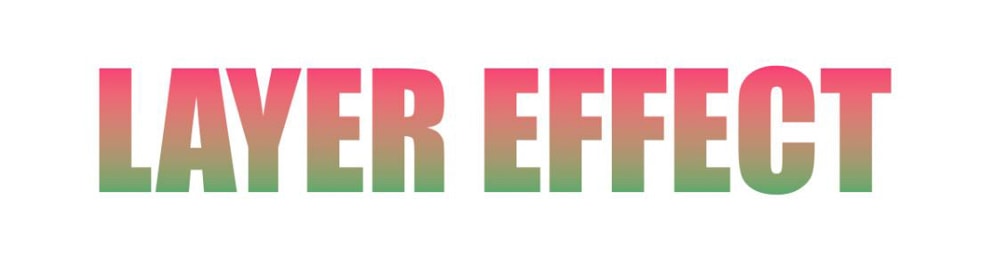
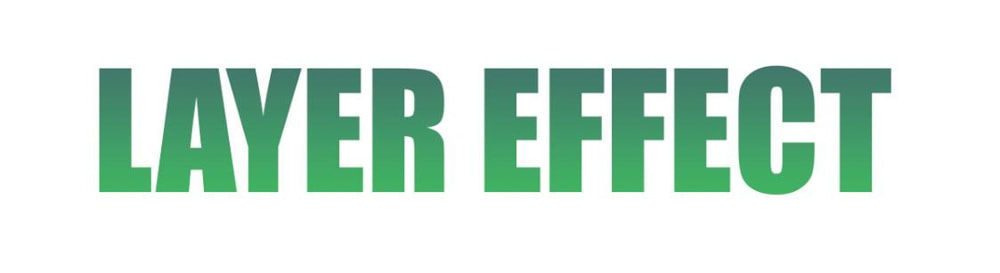
Gradient Overlay
The Gradient Overlay effect will fill your layer with at least two colors of your choice that will blend flawlessly.
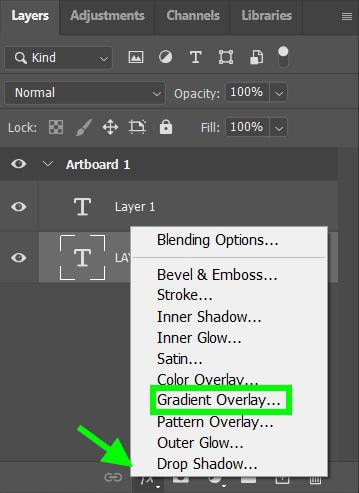
The most important option for this effect is the colors you choose. Open up the Gradient Drop-Down Menu to see all your options.


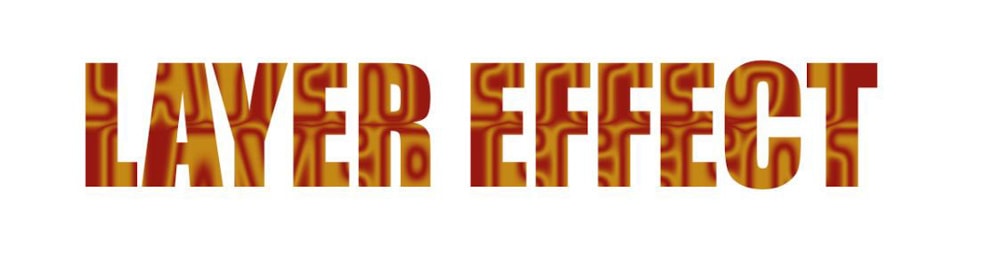
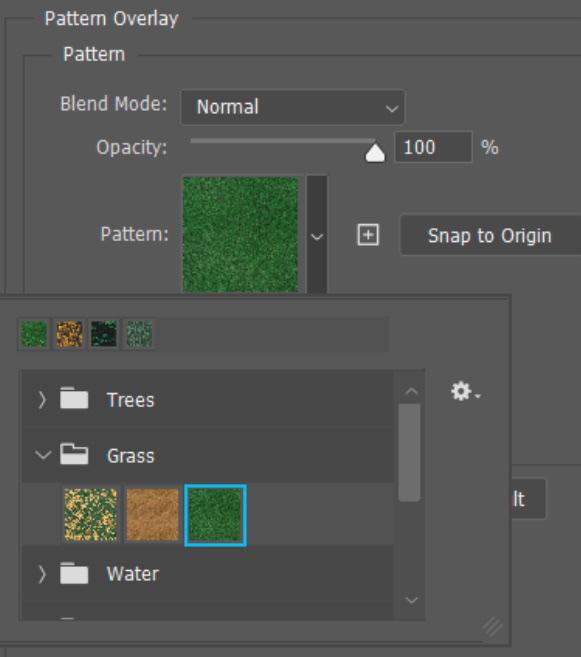
Pattern Overlay
The Pattern Overlay effect will fill your layer with a pattern of your choice.
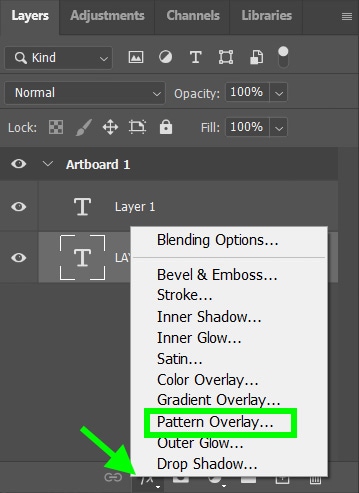
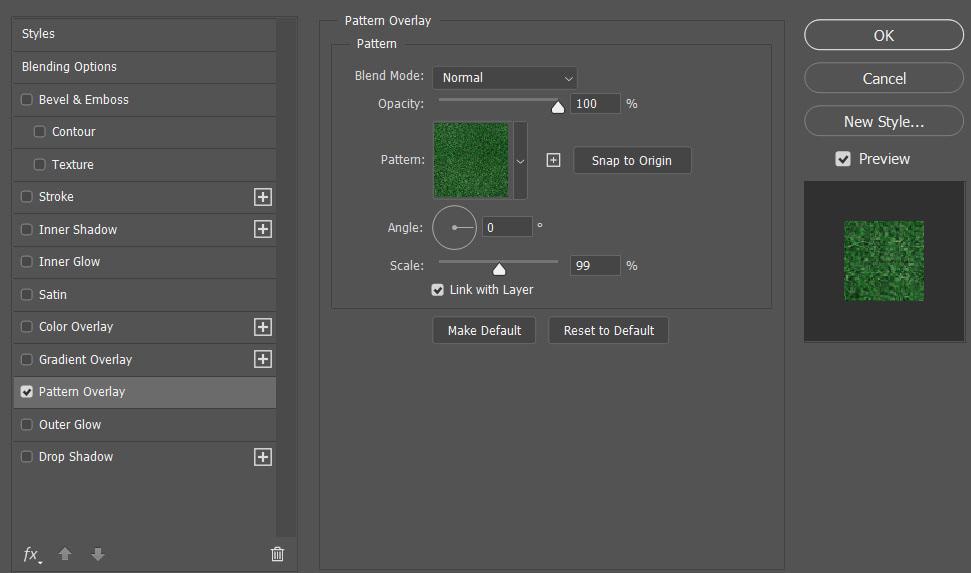
For this effect, you’ll find all your pattern options under the Pattern Drop Down Menu.
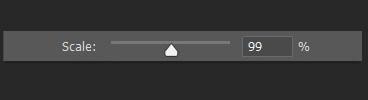
The most important option for this effect is the Scale. Adjusting the scale of the pattern will turn a blurry-looking pattern into a sharper one.
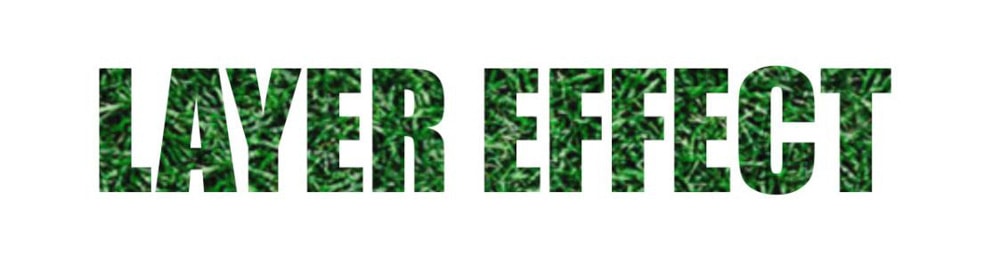
This layer effect can also be used to quickly add to or change your design.
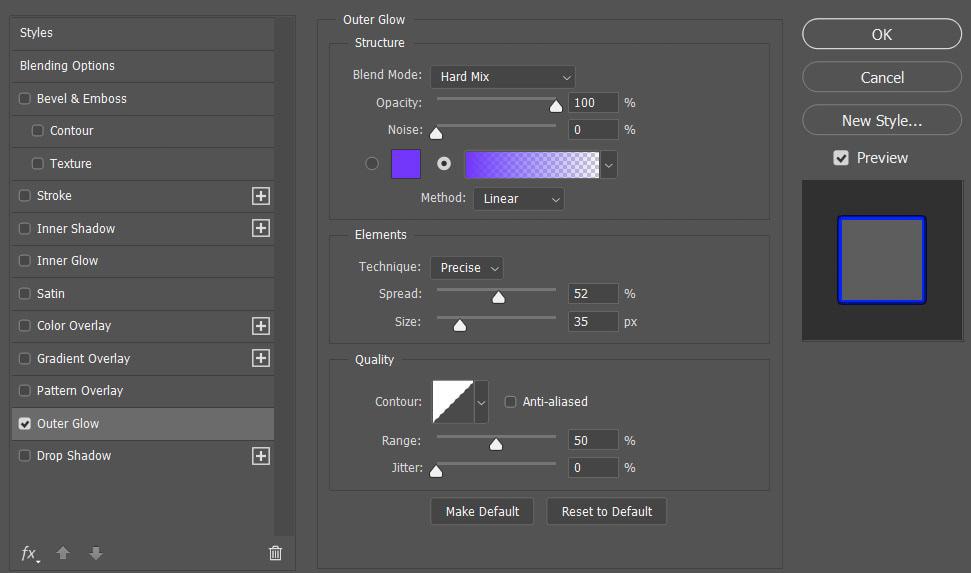
Outer Glow
The Outer Glow effect will illuminate the outside edge of your layer.
For the best results for this effect, play around with the Blend Mode and Opacity.
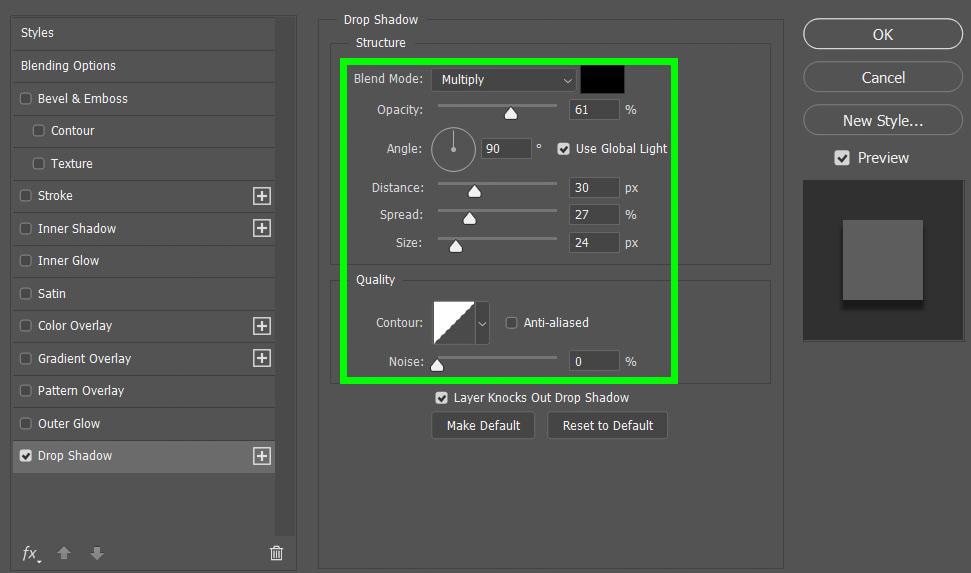
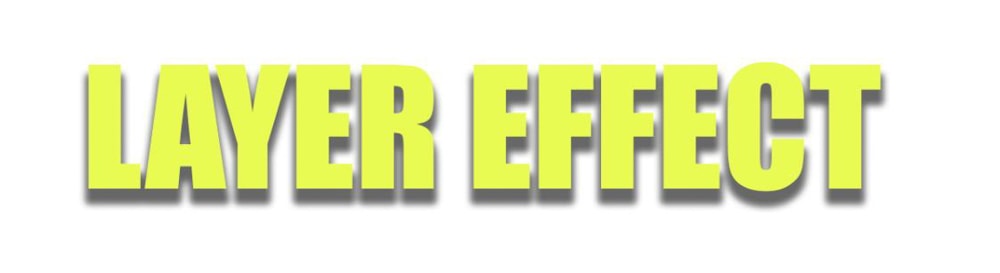
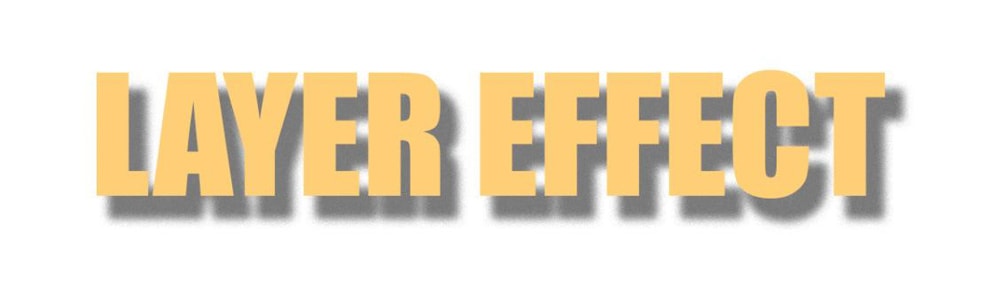
Drop Shadow
The Drop Shadow effect will add a shadow behind your layer.

The best way to make the perfect Drop Shadow is to adjust every single one of the options. It may take some time, but it’s worth it to add this professional touch.
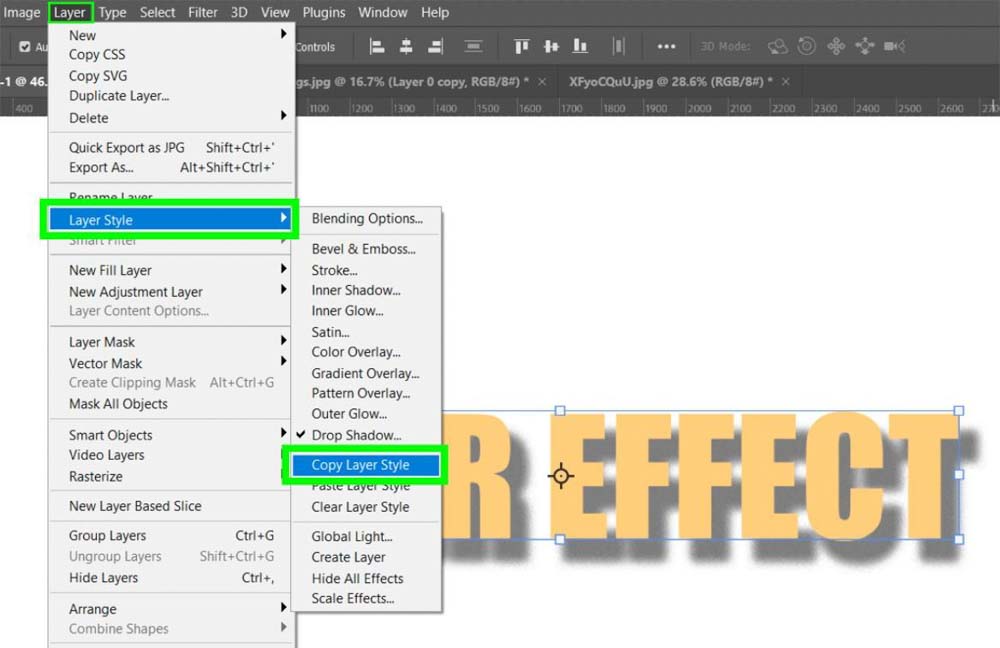
How To Copy Layer Effects In Photoshop
Creating layer effects can take a long time. There’s nothing worst than spending a half hour creating a layer effect and then forgetting how you made it, making it impossible for you to recreate the same layer effect again. Copying layer effects is also helpful to quickly add the same effect to multiple layers.
Here’s how you copy a layer effect from one project to another. Let’s say you have a bland-looking text layer.
You then remember you made the perfect layer effect in a previous project.
To copy a layer effect, click on your layer in the Layers panel, then go to Layer > Layer Style > Copy Layer Style.
After you’ve copied the layer effect, return to the project you want to paste the layer effect to. Click on the layer you want to add the effect to and go to Layer > Layer Style > Paste Layer Style.
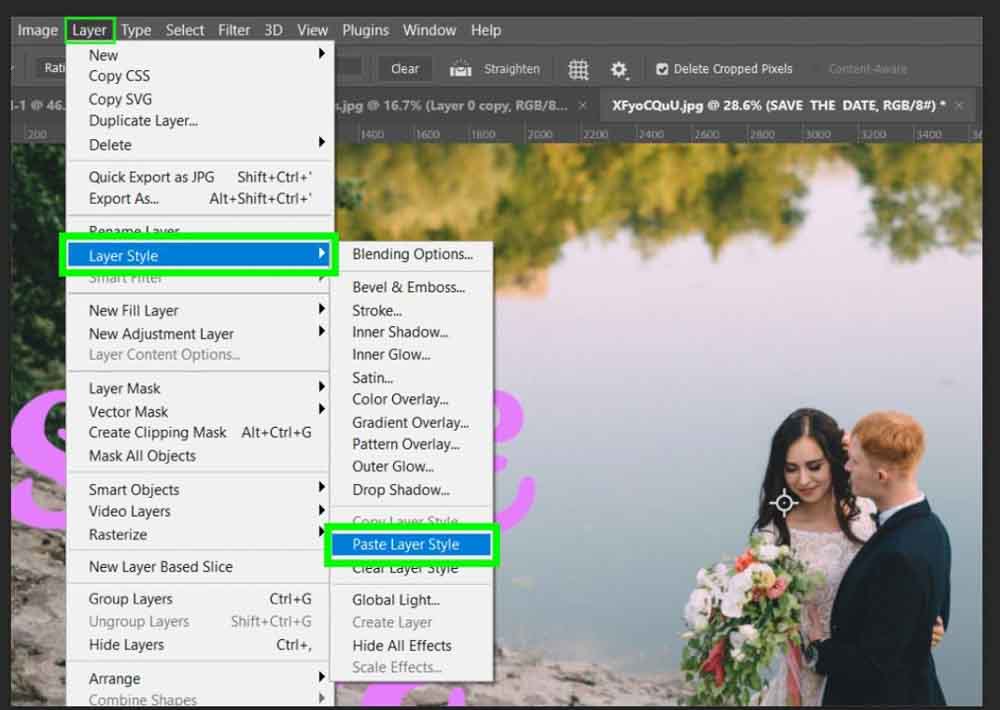
Now your design has the professional pop it needs!

How To Remove Layer Styles
When it comes to removing layer styles, you can remove the entire layer style or remove the individual layer effects that make up the layer style.
To remove the entire layer style, click and drag the Effects Bar under your layer in the Layers Panel to the Trash Icon.

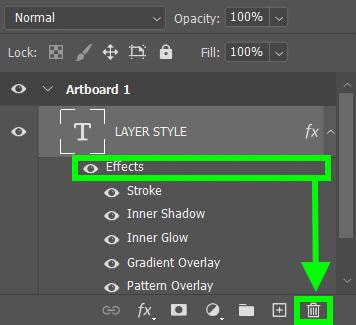
The Effects Bar will disappear from the Layers Panel, and the Layer Style will be removed from the design.
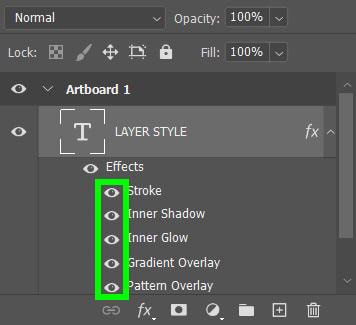
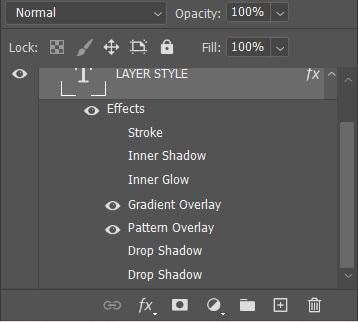
To temporarily remove an effect from your design, click on the Eye Icons next to the effects you’d like to hide.
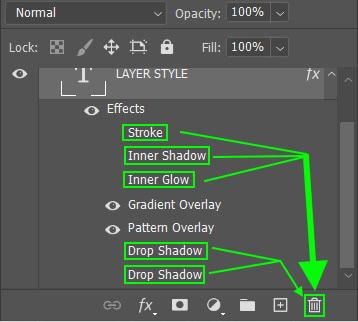
To delete the effect, click and drag the effects you wish to delete to the Trash Icon.
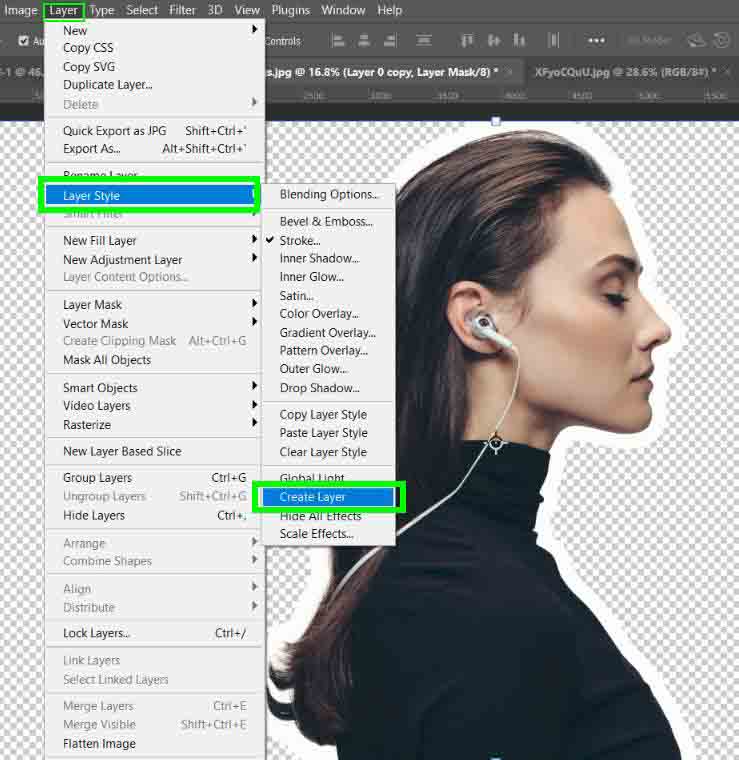
How To Convert Layer Styles Into Layers
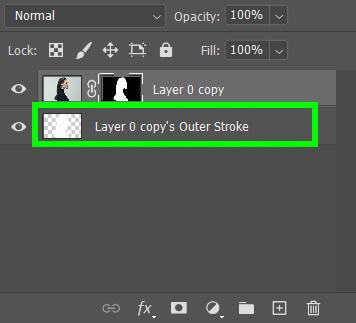
Converting a layer style into editable layers can lead to some impressive results. To start, click on the layer you need to convert and go to Layer > Layer Style > Create Layer.
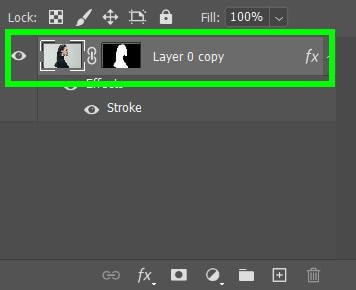
The effect itself will become its own layer that you can edit.
Using editable layer styles can result in some amazing results.