
Outlining an image in Photoshop is made easy with the Layer Style Panel and the stroke option. Using these two tools, you can create an outline of your entire image or around a specific selection in just a few clicks. Here, you’ll learn how to use these tools to outline an image in Photoshop with a solid color, gradient, or texture overlay! Let’s get started.
To outline an image in Photoshop, double-click on your layer to open the Layer Styles panel. Select the Stroke style and set the stroke type to Outside. From here, simply change the color and width of your outline to suit the look you want!
Video Tutorial
How To Outline An Image In Photoshop
You may not want to create an outline around your entire photo, but instead, just outline a specific section. In this example, I’ll show you how to outline the subject in your photo while leaving the rest of your image untouched.
This technique does require some base knowledge of selection tools in Photoshop. However, I’ll share the easiest selection tool to use for this technique.
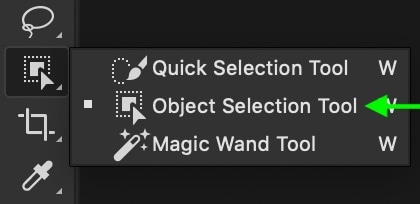
Step 1: Select The Subject Using Any Selection Tool
To outline the subject, grab the Object Selection Tool by pressing W or find it in your toolbar.
This tool is only available in Photoshop CC 2020 and newer. If you are using an earlier version, you can use the Quick Selection Tool instead.
With the Object Selection Tool active, set the Mode to Rectangle and check off Enhance Edge and Object Subtract.

To make a selection, click and drag out a rectangular selection around your subject. Once your subject fits inside this box, let go, and Photoshop will snap your selection around the subject.
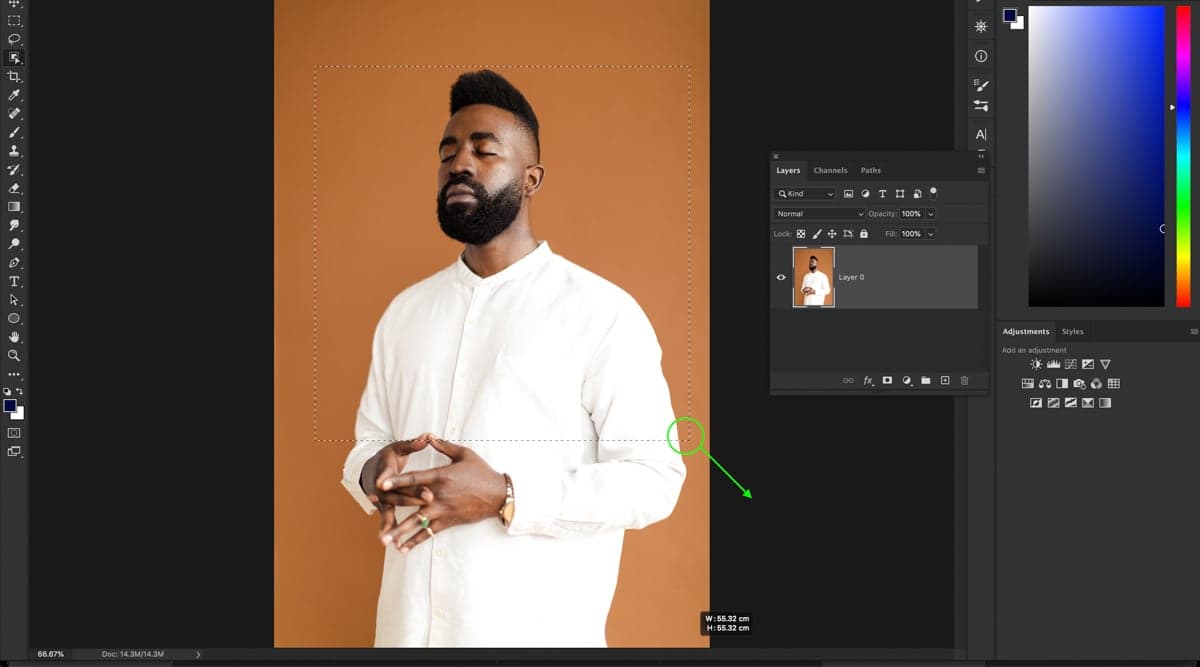
If your subject is on a solid-colored background, you can press Select Subject instead to speed up this process.

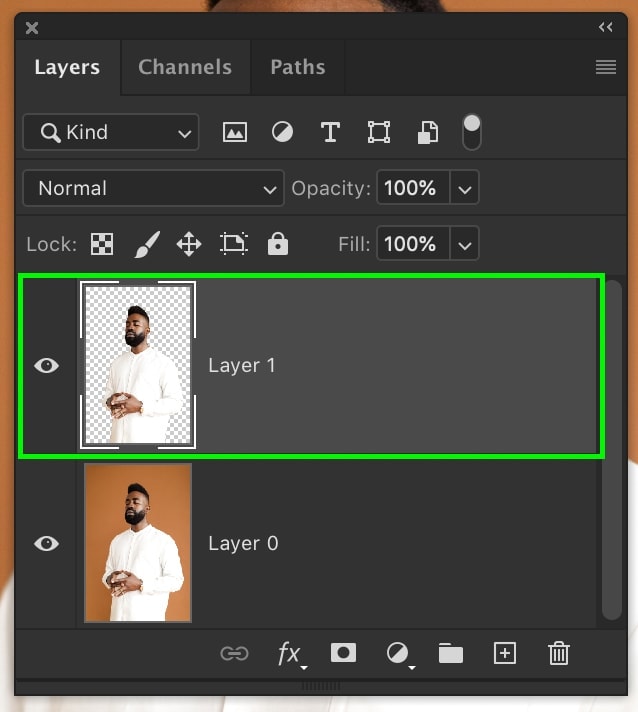
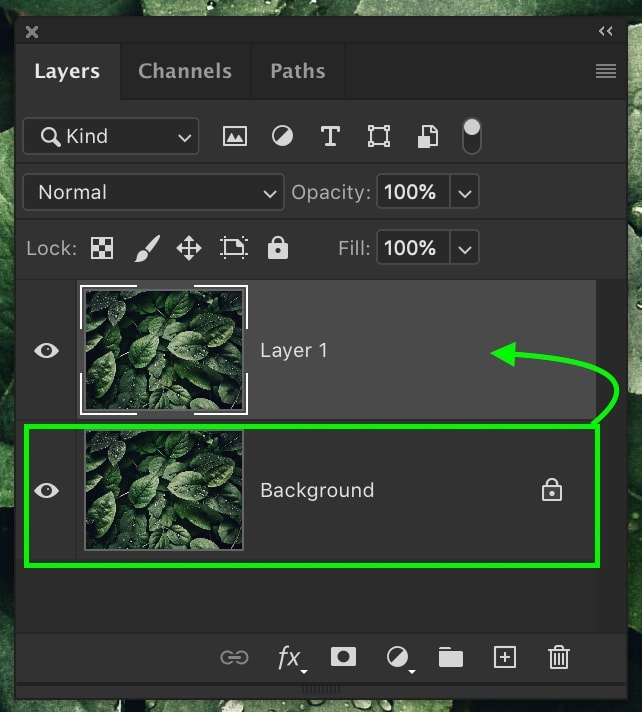
Step 2: Duplicate Your Selection Onto A New Layer
With an active selection around your subject, press Control + J (Win) or Command + J (Mac) to duplicate your selection onto a new layer.
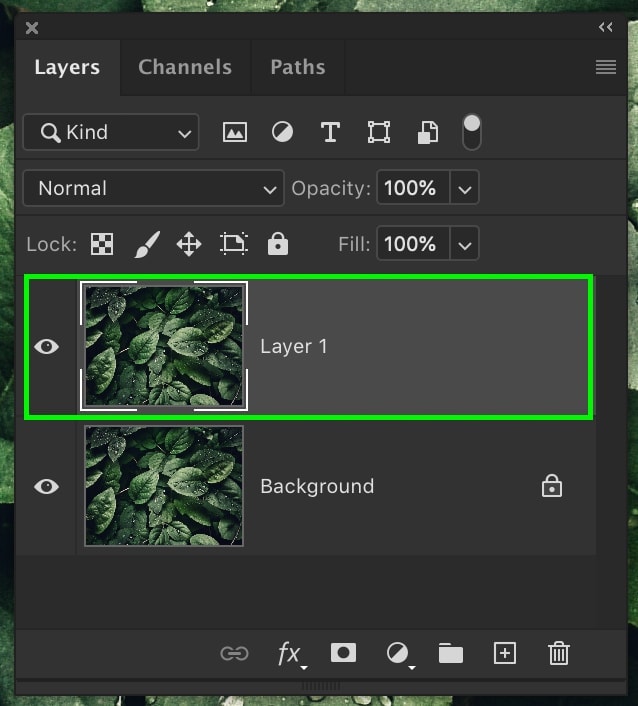
Step 3: Add A Stroke Layer Style To The Subject
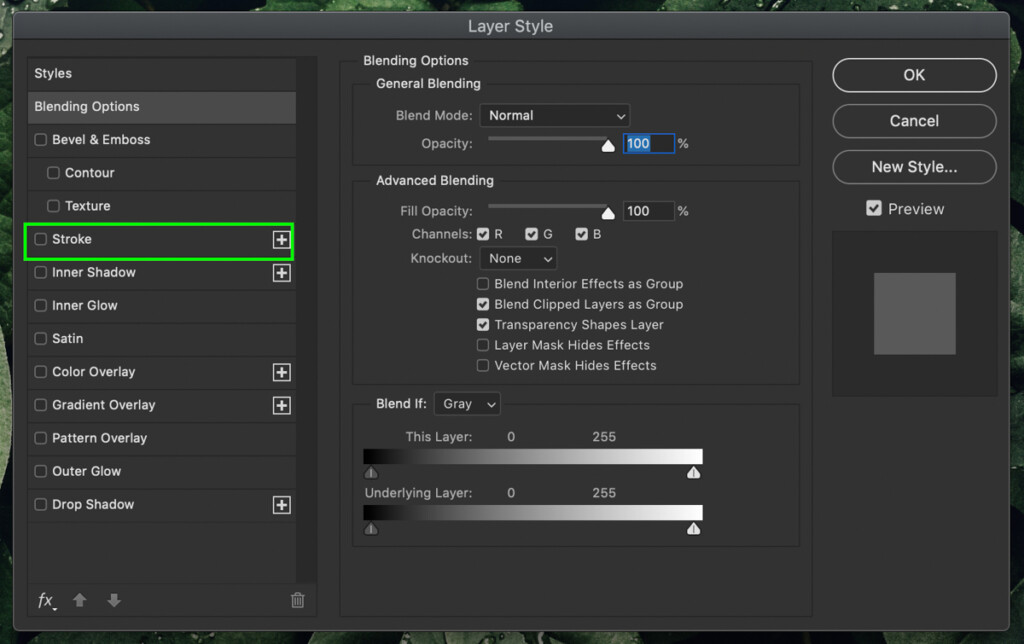
Double-click on the new layer to open the Layer Style Window.
In the Layer Style window, select Stroke from the lefthand side panel and adjust the following settings to customize the stroke:
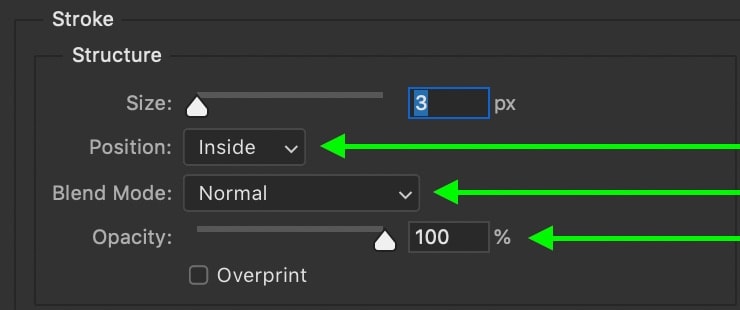
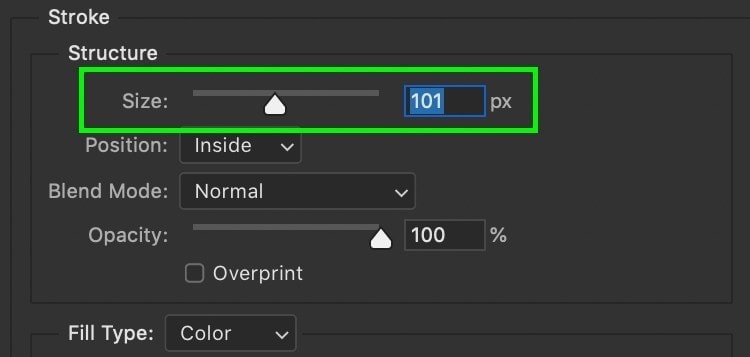
- Set the Position to Outside
- Leave the Blend Mode set to Normal
- Leave the Opacity at 100%
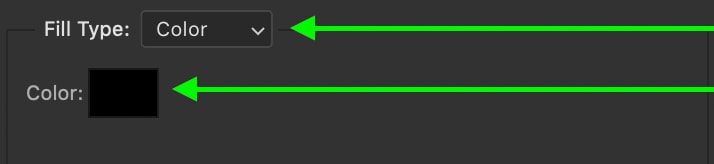
- Set the Fill Type to Color
- Choose a Color to border your selection
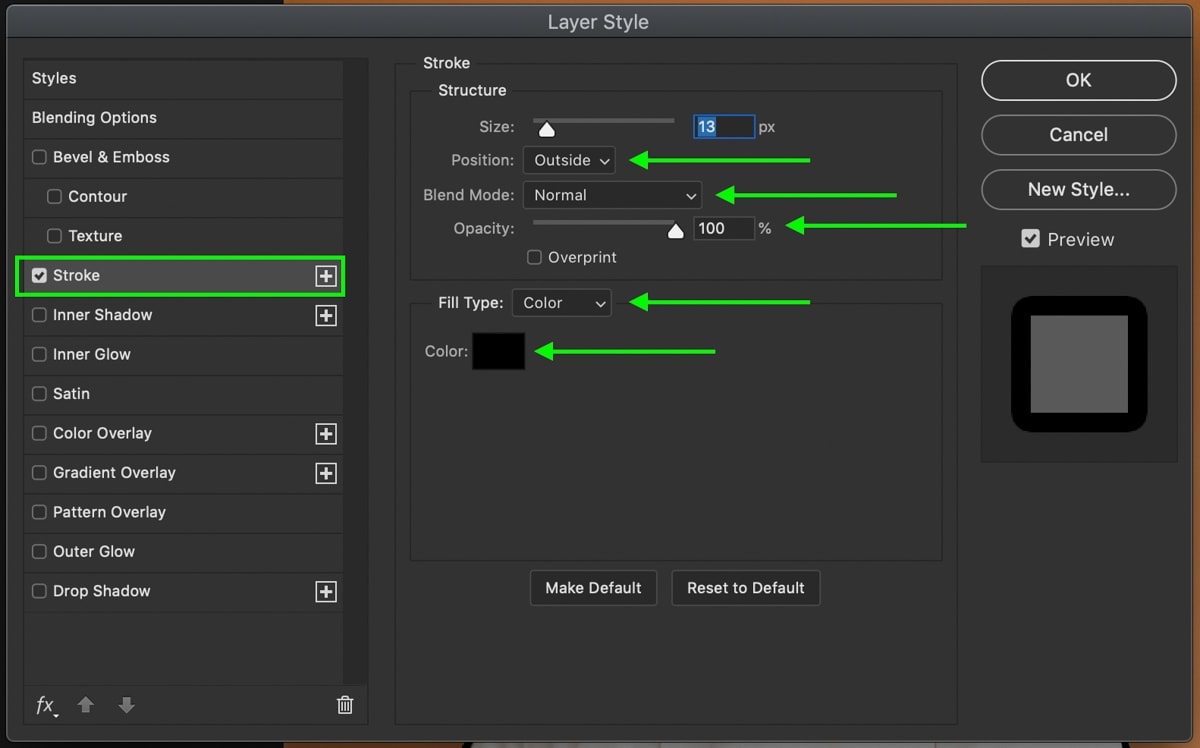
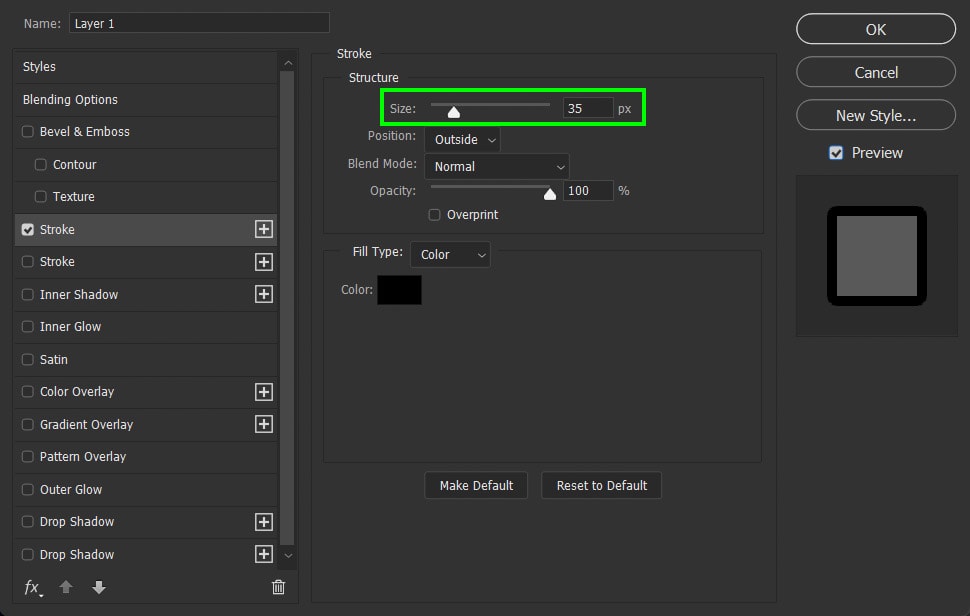
Finally, set the size of your stroke with the Size slider. This will increase the size of the outline around the cutout.
You will now have an outline around the subject of your image.

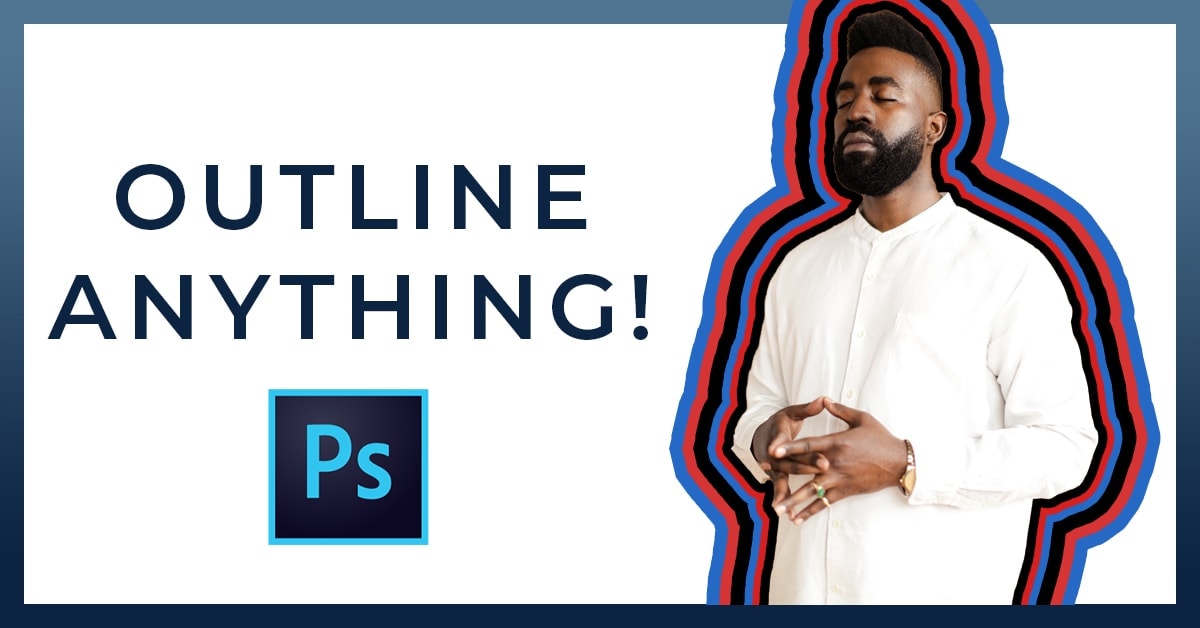
How To Outline An Image With Multiple Colors
Just choosing one color to border an image with can be boring. Why not spice it up and add some extra colors into the mix? Fortunately, this is easy to do and can be done in seconds after your initial outline is complete.
Step 1: Add The First Stroke Using The Method Above
After you’ve done the initial work of creating your first stroke, you’re now ready to add a second color.
Step 2: Add A New Stroke Effect In The Layer Style Window
To add a second color to your outline, ensure the Layer Style window is open and press the plus icon beside the stoke option.
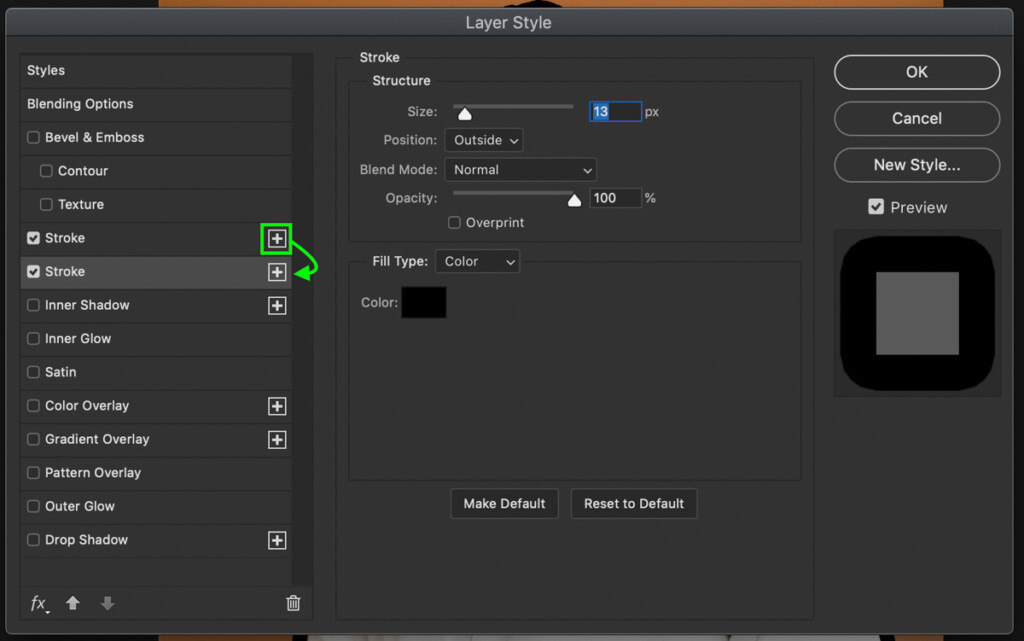
Step 3: Customize The Second Stroke Using The Settings
A second stroke option will appear, and you can begin customizing it. Leave all the settings the same, but change the color and size values accordingly.
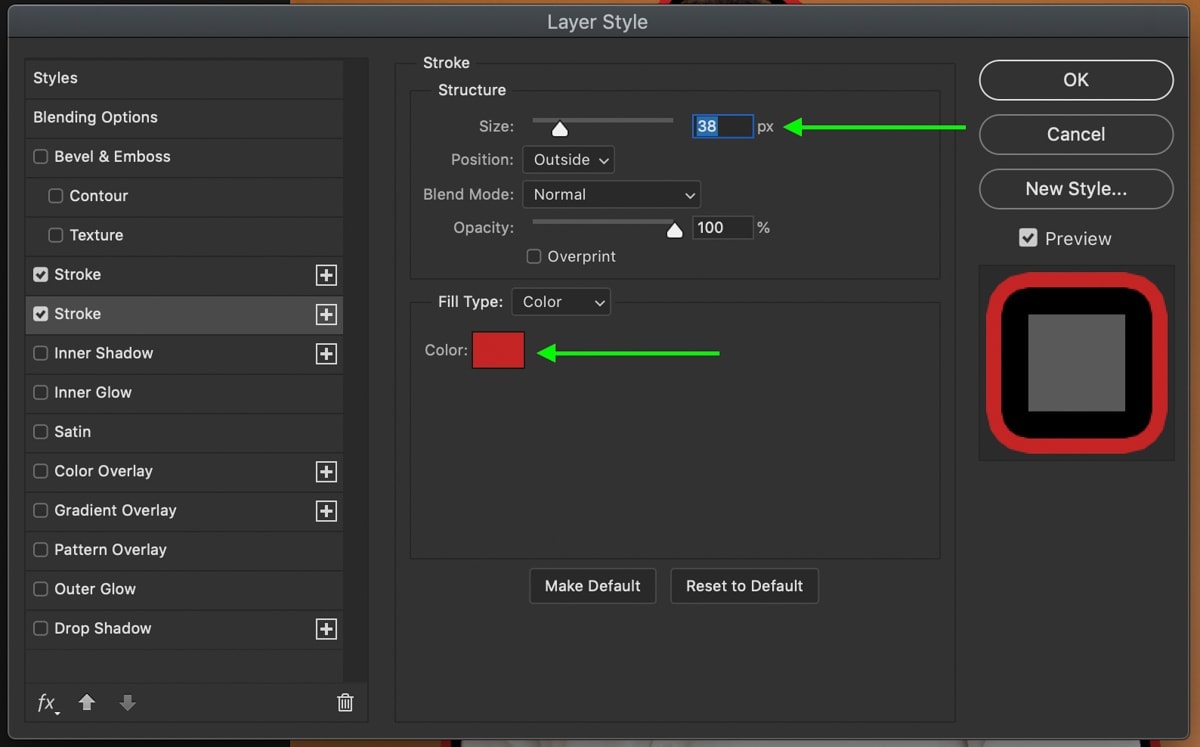
To get the best results, make sure your second stroke is slightly larger than the first. This way, you can see both colors at once.
If you want to add more colors, continue these steps until you’re satisfied with the results.

Just by adding a second stroke, you can create a lot more interest in your outlined images in Photoshop. This technique can be used to border your entire photo or around a cutout subject.
How To Outline The Edges Of An Image
Another way to outline the edges is to outline the entire photo. Rather than focusing on a particular section of the image, this effect will create a border around the whole picture.
First, duplicate the layer you want to create a border around. This way, you will always have a backup layer if something goes wrong. Use the shortcut Control + J (Win) or Command + J (Mac) to duplicate a layer.
If you already have a large group of layers, duplicate and merge them using Control + Alt + Shift + E (Win) or Command + Option + Shift + E (Mac). This shortcut will create a new merged layer to add your outline to.
Next, double-click on the duplicated layer to open the Layer Style Panel.
Select Stroke from the Styles on the lefthand side of the window.
Set the stroke position to Inside and leave the Opacity at 100%.
Set the fill type to Color and select the color you want to outline your photo.
With everything set, adjust the size of your stroke using the size slider. This option is totally up to you, and there is no right or wrong.
You will now have a customized border around your image.
With just a few clicks, you have successfully outlined an image in Photoshop using the stroke option.
How To Add A Gradient Outline To An Image
To take things one step further, you can add a gradient to any image outline you make. All it takes is a quick change of the fill type option within the Layer Style Panel!
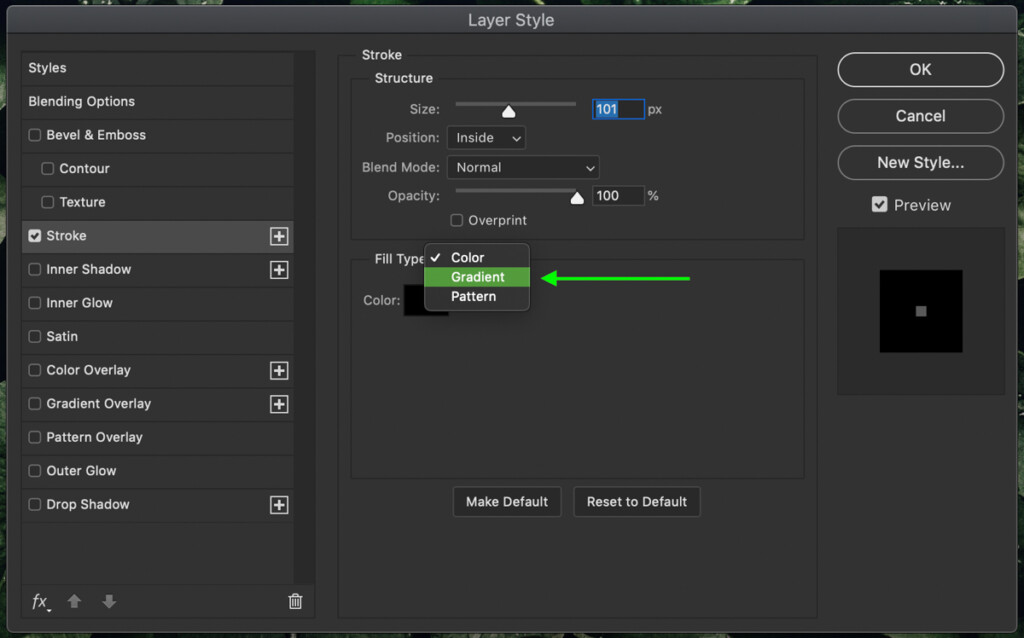
Once you’ve created your initial outline, change the fill type from Color to Gradient.
A few different options will appear, but the first one to focus on is the gradient color. Simply click on the gradient box to open the Gradient Editor.
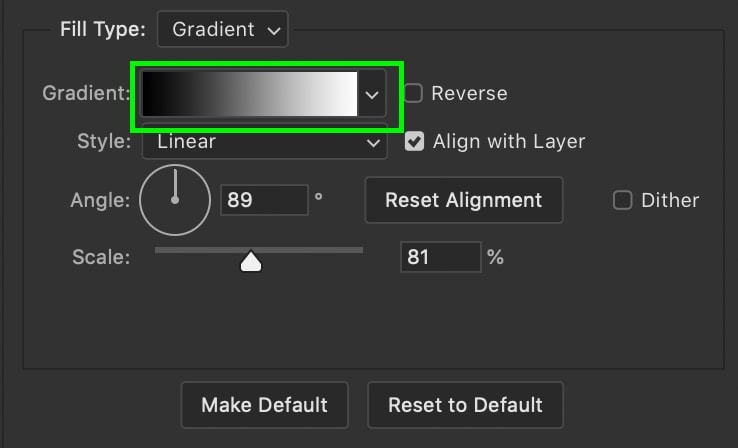
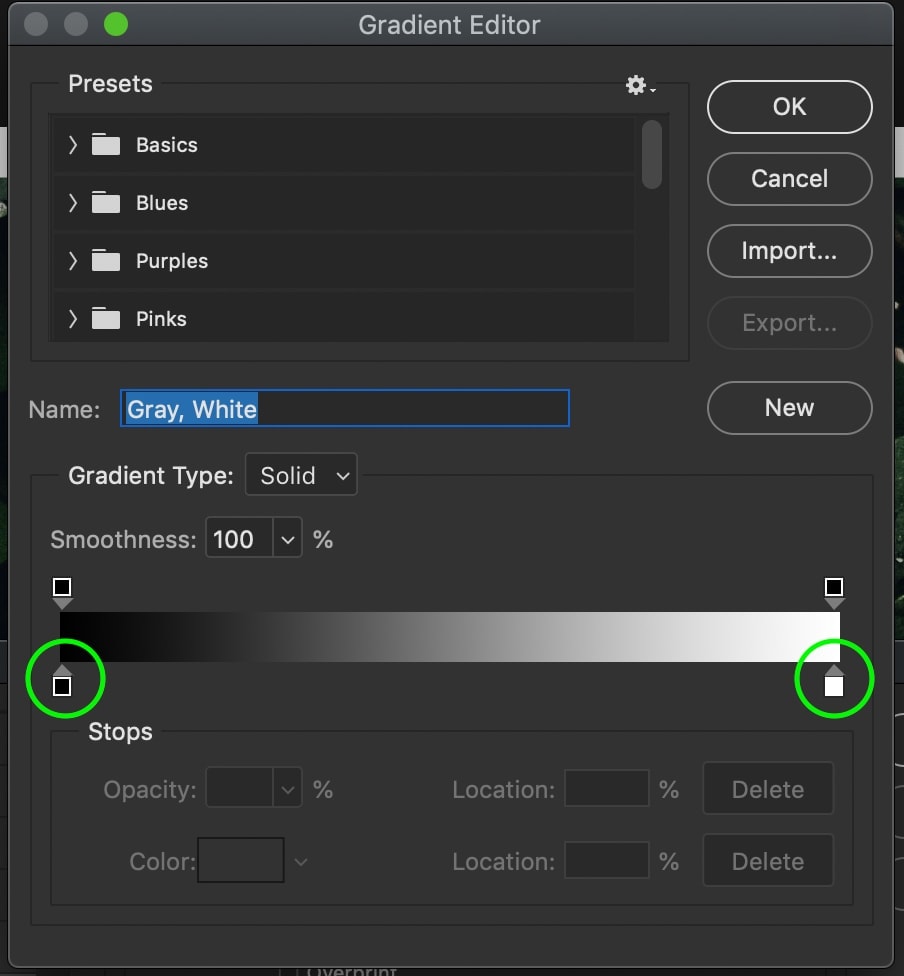
Within the Gradient Editor, you can create your own gradient or choose from a variety of preset options.
To create a gradient, click on the color swatches at either end of the gradient preview. A color picker will appear, allowing you to change the color.
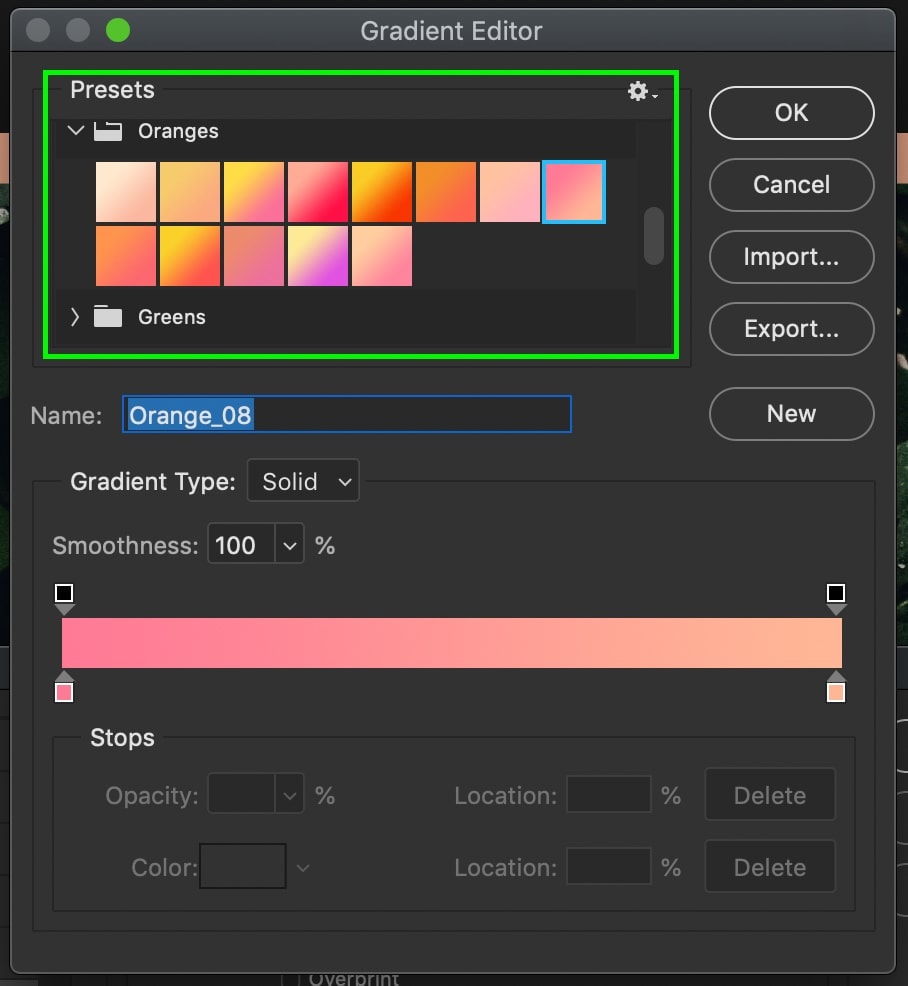
To use a preset gradient, browse through the premade folders and select an option you like. For this example, I’ll go with one of the gradients in the Oranges folder.
Now that the color of the gradient is set choose a gradient angle by rotating the angle alignment. This setting changes where the gradient starts and ends.
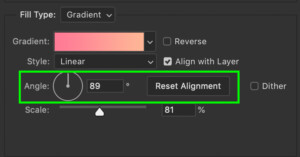
Next, set the scale of your gradient to make the transition softer or harder. A large scale will create a smooth transition between each color, while a small scale will have harsher lines.
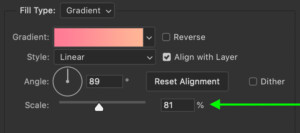
Lastly, choose what type of gradient you want to use. If you aren’t sure, leave this set to Linear.
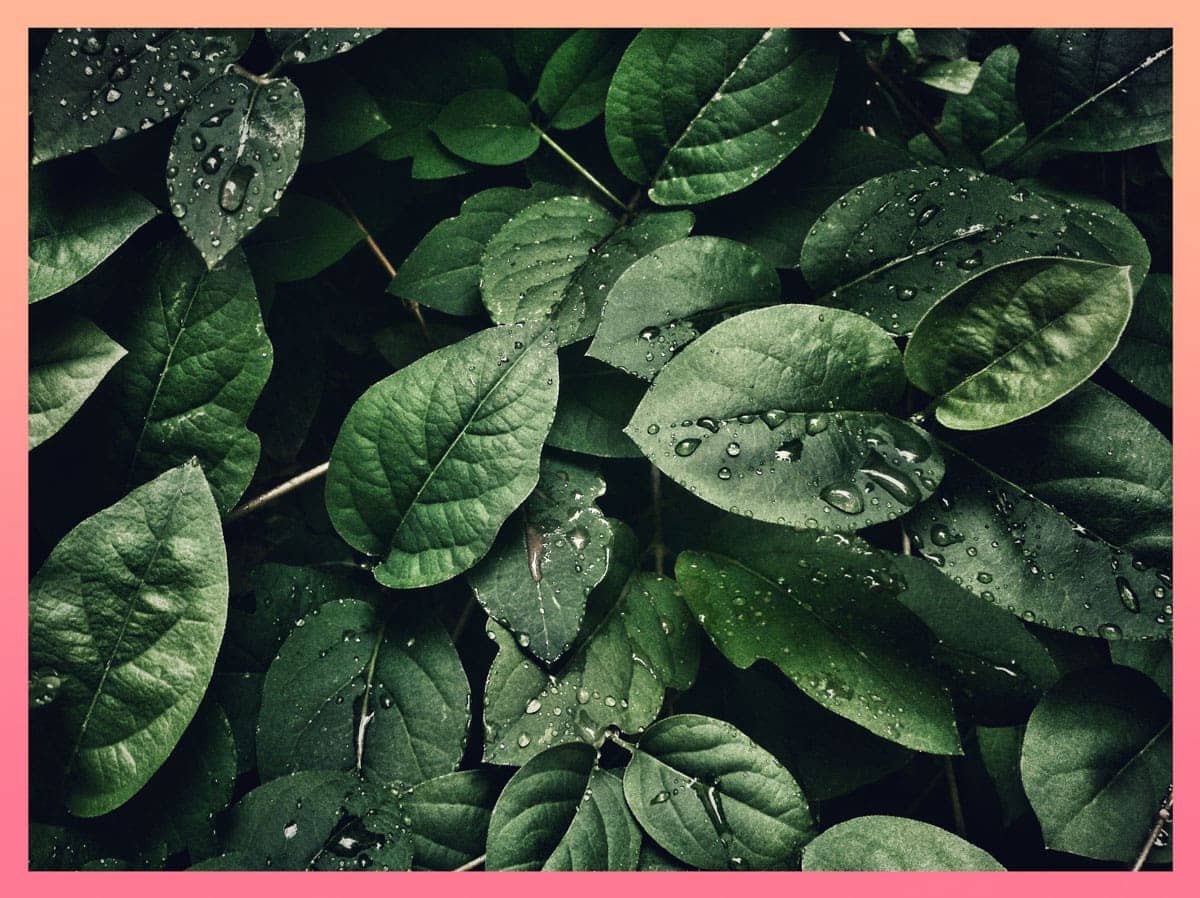
Creating a gradient outline in Photoshop is a fun way to add a bit more flair to the stroke option. Although it may not fit every image, it’s worthwhile to experiment with!
How To Outline An Image With A Texture
The last way you can outline an image in Photoshop is by creating a texture or pattern for your border. This is another easy option you can utilize after you’ve created the initial outline around the photo.
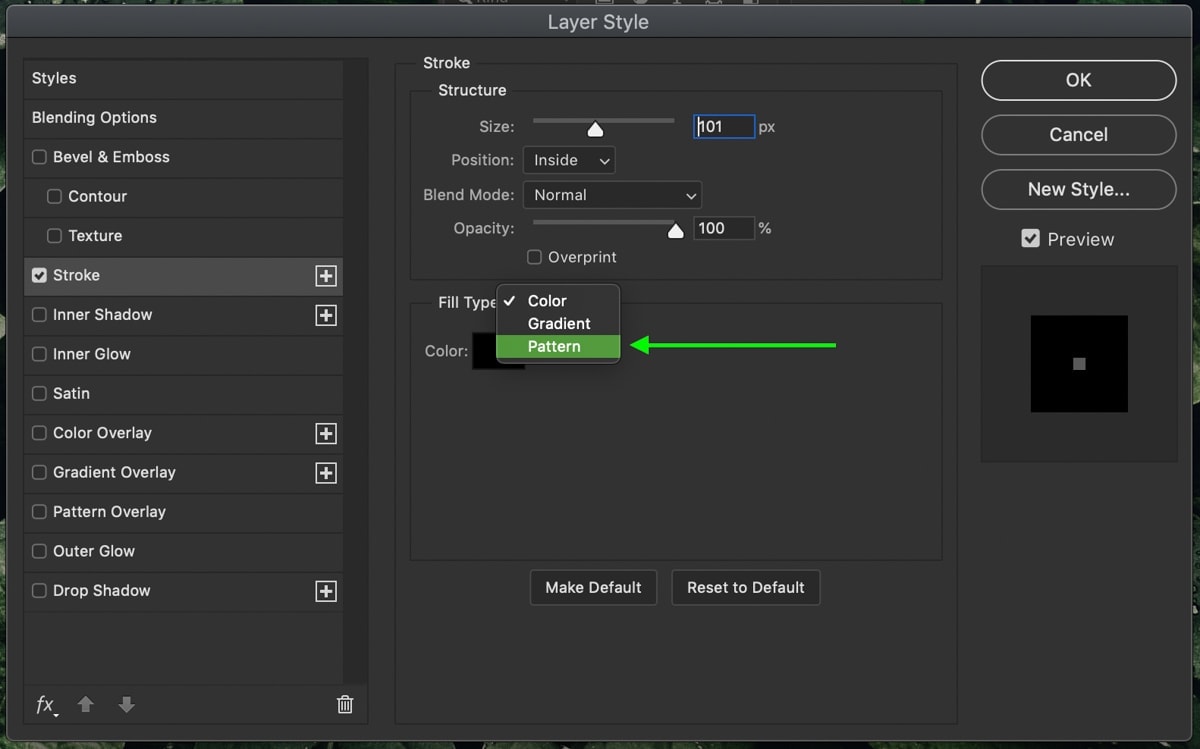
With the initial outline created, change your fill type from Color to Pattern.
Click on the Pattern Box to access new patterns.
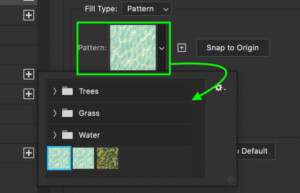
There are a few default options you can use, or you can download free patterns online.
You can learn how to import patterns into Photoshop here.
Once you’ve settled on a pattern for your image outline, adjust the angle if necessary. This changes the orientation of the pattern to line up better with the outline.
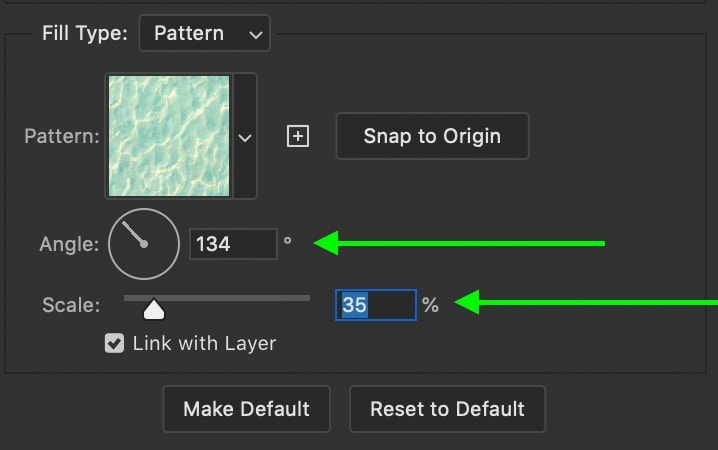
Lastly, set the scale of the pattern to best suit the look you’re going for.
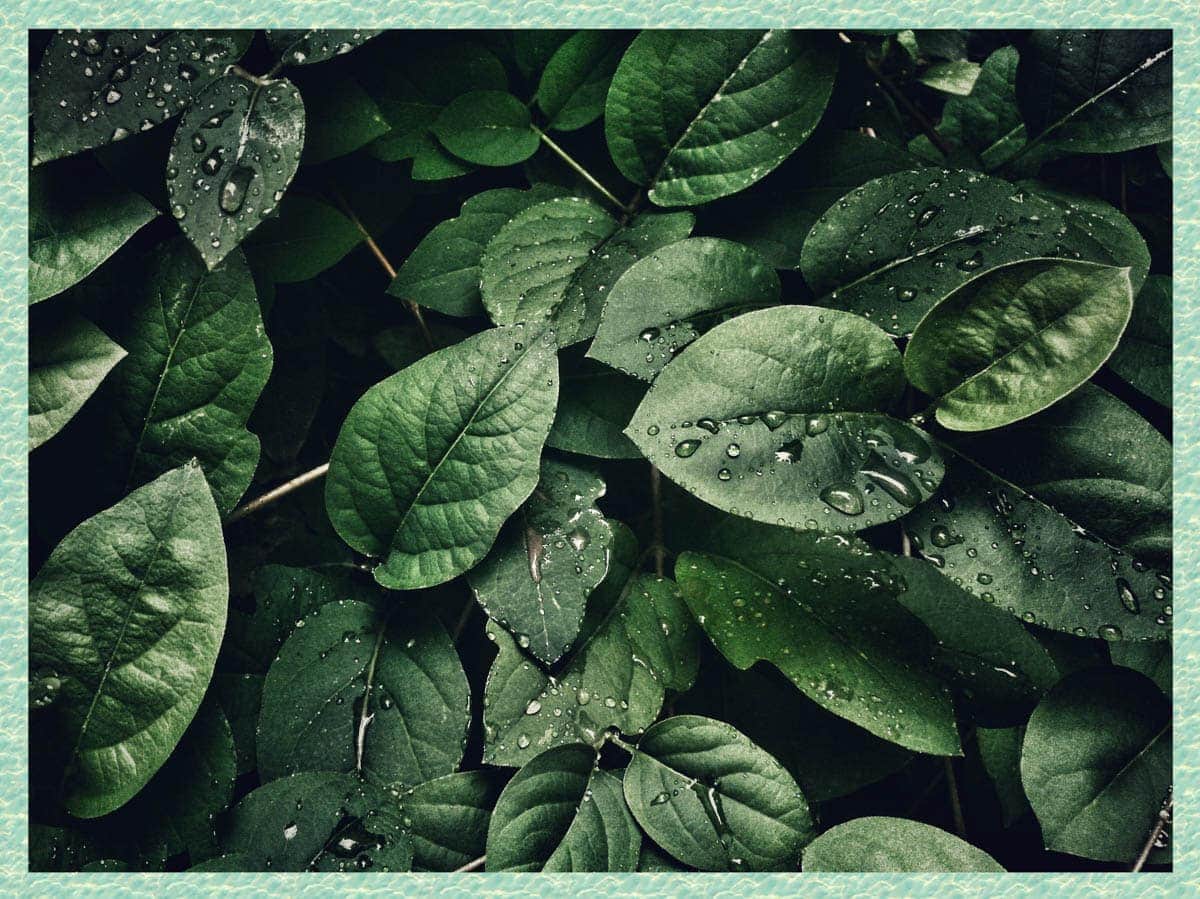
Adding texture or a pattern to an image outline in Photoshop is another great way to add some artistic flair.
Conclusion
Learning how to outline an image in Photoshop is easy when you use the Layer Style Panel and stroke options. This technique streamlines the process and makes it easy to adjust the size of the outline. Best of all, you can add additional effects within the Layer Style Panel, such as gradients, patterns, or multiple-stroke colors!
Want more tutorials like this? Subscribe to our weekly newsletter for more photography and photo editing tips delivered straight to your inbox!
– Brendan 🙂


