
When it comes to layer visibility, Photoshop is very flexible. You can easily turn off layer visibility in Photoshop and toggle it back on. Let’s get into everything you need to know about showing or hiding layers in Photoshop.
How To Turn Off Layer Visibility In Photoshop
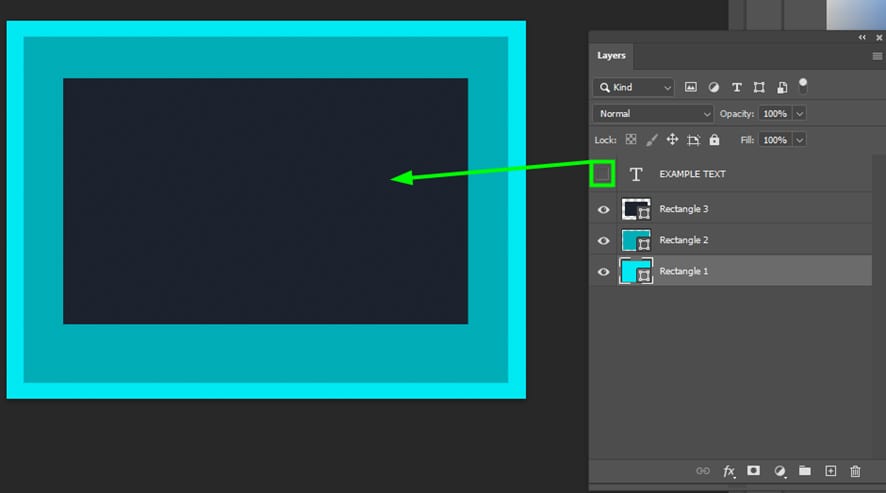
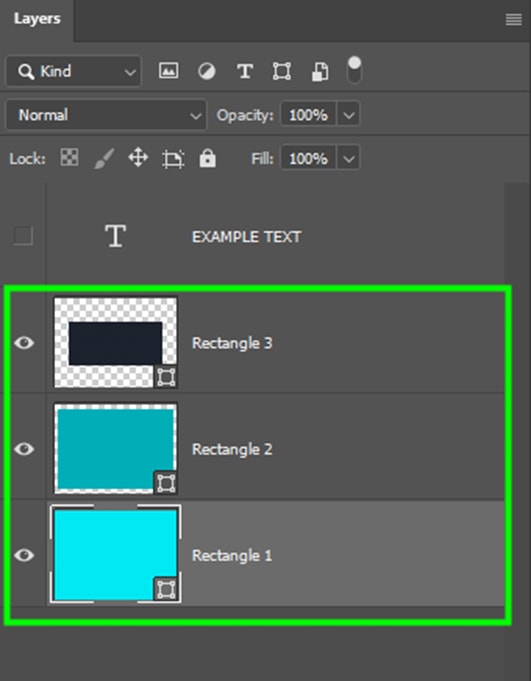
In the Layers Panel, to the left of the layer thumbnail, there is an eye icon to show the layer is visible.
Once you click the visibility icon, it shows an empty block next to the layer thumbnail, and the object corresponding to that layer will disappear from the canvas. You can click the empty space to turn the visibility back on.
How To Toggle The Visibility Of Groups In Photoshop
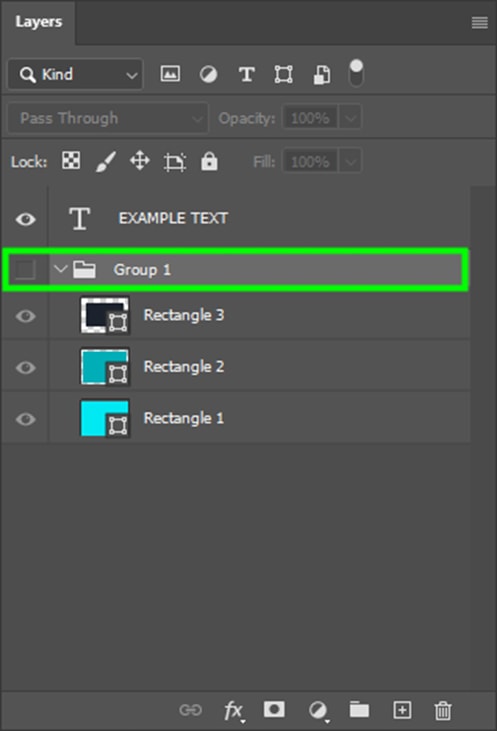
If you want to turn off the visibility of all layers of a group, click the visibility icon next to the group layer. That works because all layers inside a group are sublayers from that group.
How To Make Multiple Layers Visible Or Invisible
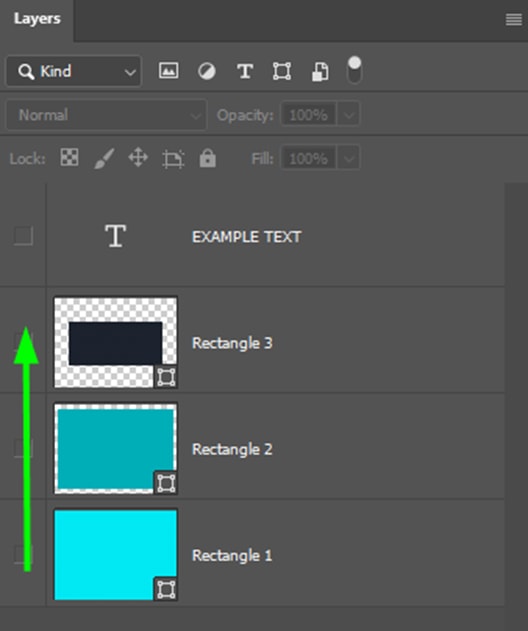
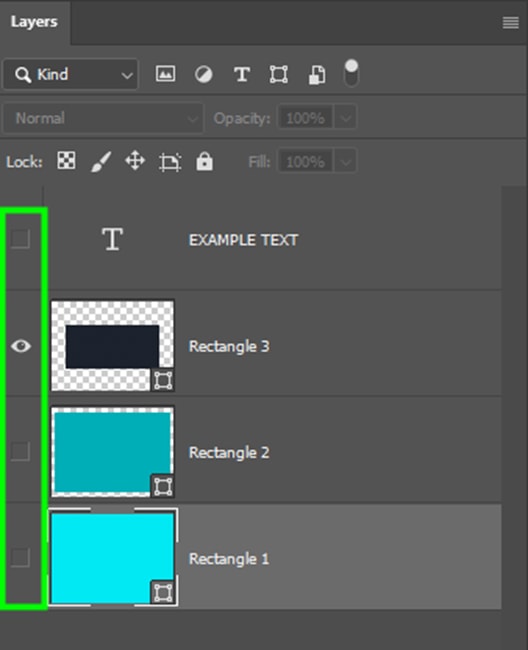
To make multiple layers invisible, click and drag over the eye icons next to the layer thumbnails. You can do the same action to make all the layers visible again.
How To Make Every Layer Visible In Your Project
Go to Select > All Layers or press Alt + Control + A (Win) or Option + Command + A (Mac).

Then, press Control + , (Win) or Command + , (Mac) to enable the visibility of all layers. Alternatively, you can go up to Layer > Show Layers.
How To Hide Every Layer Except One
Hold in Alt (Win) or Option (Mac) and click the eye icon next to the desired layer thumbnail. All layers will be hidden except that layer.
With these easy tricks for toggling layer visibility in Photoshop, you can take control over exactly which layers you want to see and when.
Happy Editing!


