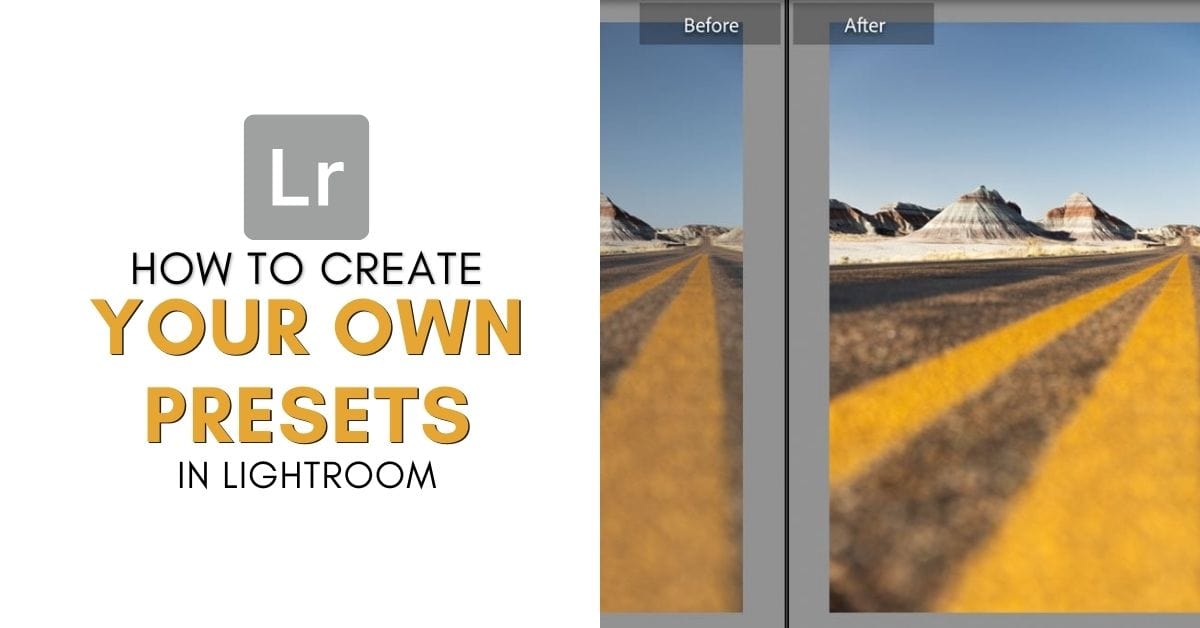

If you’re looking for a way to quickly edit your images, presets are a great option, as they contain an array of adjustments that you can apply to your image with a single click. There are tons of ways to take advantage of presets, from applying basic edits to multiple images to making your images fit a certain style or mood. You can download presets online or use the ones that come with Lightroom, but you don’t have to rely only on premade presets since you can make your own.
Making and saving your own presets is quite simple. All you need to do is edit a photo with the settings you’d like a preset to match, and then save those settings as a preset you can access later. Let’s take an in-depth look at this process and how to best take advantage of this useful feature of Lightroom.
How To Make Lightroom Presets
To create a preset in Lightroom, follow these steps:
- Go to the Develop Module
- Add your desired adjustments to a photo
- Open the Preset panel on the left side of the screen
- Click the + icon
- Choose “Create Preset”
- Choose the settings you wish to include in the new preset
- Click Create
The great thing about presets is you can make them for any type of photography. If you often photograph the same kinds of subjects, you can make a preset with settings that you’d normally use to edit that style of images. The same goes if you have a specific way you often like to edit — maybe you like a bright, airy appearance or maybe you prefer rich dark areas and heavy contrast.
For example, if you often edit your images to be black and white, you can make several different types of black and white presets of varying exposures and contrasts. Or maybe you have a few adjustments you often make to every image you take — having a preset on hand is a great way to quickly apply these edits to images without having to go in and adjust the different settings manually.
Let’s create a preset with some basic edits that will make images look bright and bold with a higher, slightly cinematic level of contrast. First, choose an image you’d like to build the preset on — this image should form a good general representation of the images you’ll normally apply this preset to. Head to the Develop module and make sure this image is open in the preview.

Now, you can start to play with the different adjustments you’d like to apply to this image and eventually save it as a preset. Head over to the Basic tab, as this is the best place to start.
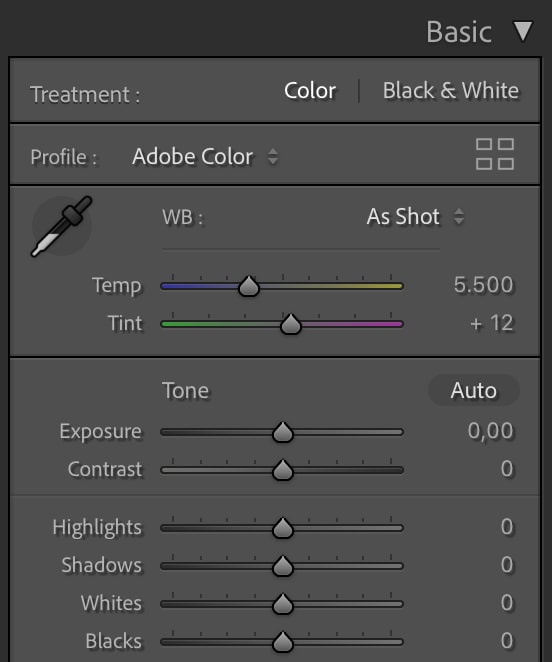
As we want this image, and the preset we’ll create from the settings, to have a bright, contrasting appearance, we’ll increase the exposure, contrast, highlights, and shadows and then darken the blacks. I’ll add a bit of warmth as well by increasing the temperature slightly. In the end, my settings will look like this:
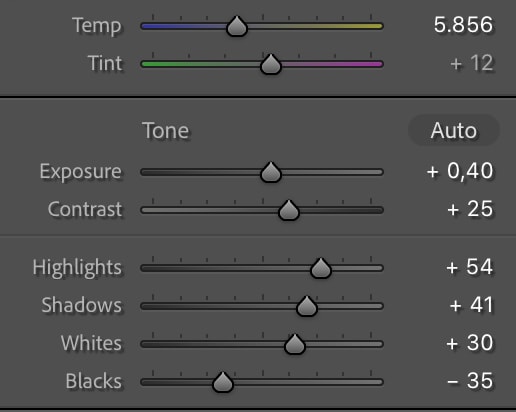
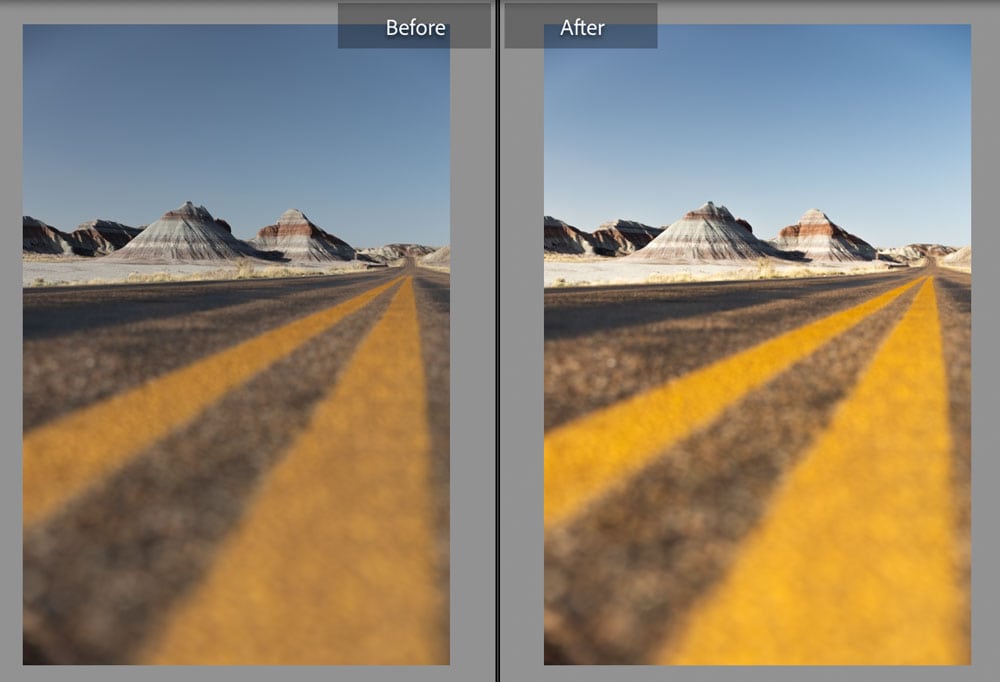
Below you can see the image before and after.
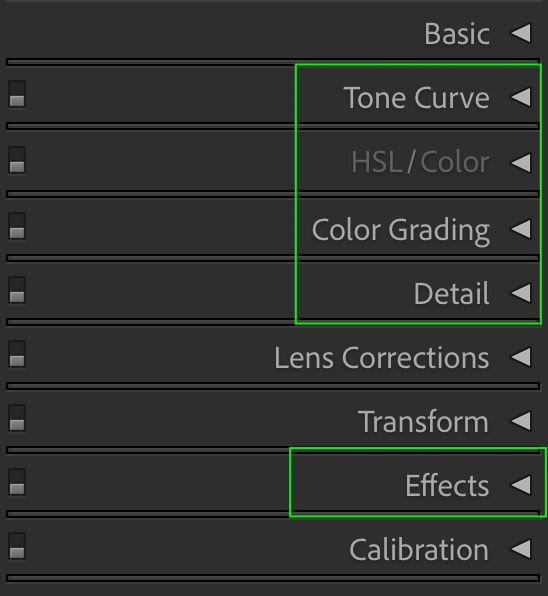
Other areas you can edit that will translate well in a preset are Tone Curve, HSL/Color, Color Grading, Detail, and Effects.
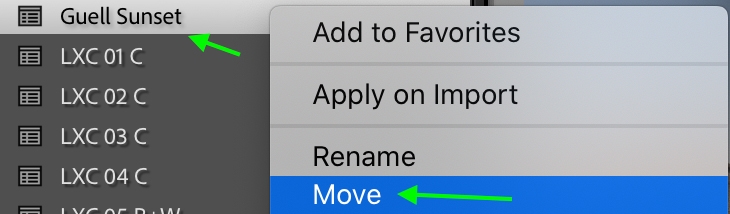
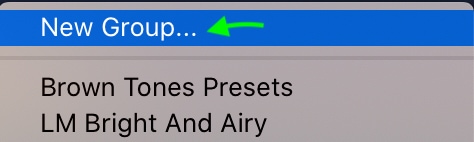
Once you’ve set the settings the way you’d like and you’re happy with how the image looks, it’s time to save the settings as a preset. First, let’s create a new group to place the preset in so it’s easy to find. If you’d like to create a preset group, head to your Preset groups, under Presets on the left.
Right-click or Control + click any of the presets, and select Move.
In the Move Preset window, click the drop-down menu next to Group.
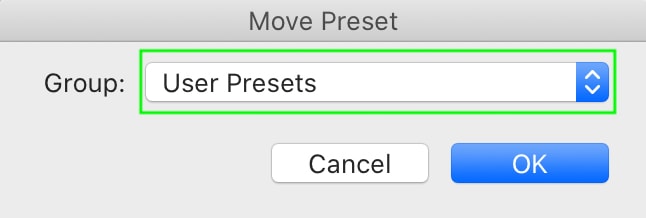
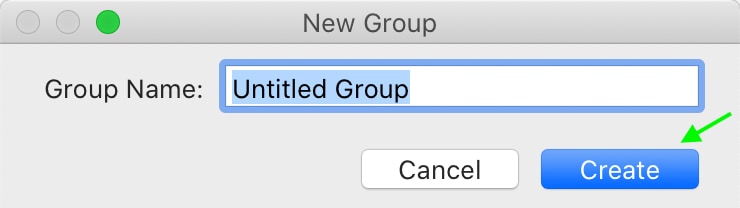
Then, scroll to the top and click New Group from the options that come up.
From here, name your group and click Create. The group will appear in the Presets section.
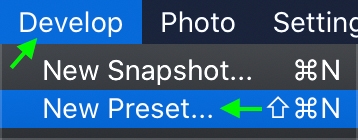
Now create your new preset with the settings you have added to the image by heading to Develop > New Preset.
The presets dialogue box will appear, and at the top, you can name your preset and select a preset group in which to place it. This is an important step as it’ll ensure you can easily find your presets in the future.
Once you’ve named the preset and selected the preset group, you’ll see all the various settings that can be included in your preset. The checked adjustments will remain in the saved preset while any you leave unchecked will not. By not saving certain adjustments into a preset, it gives you the option to create layered presets later on. You can choose which adjustments to save now.
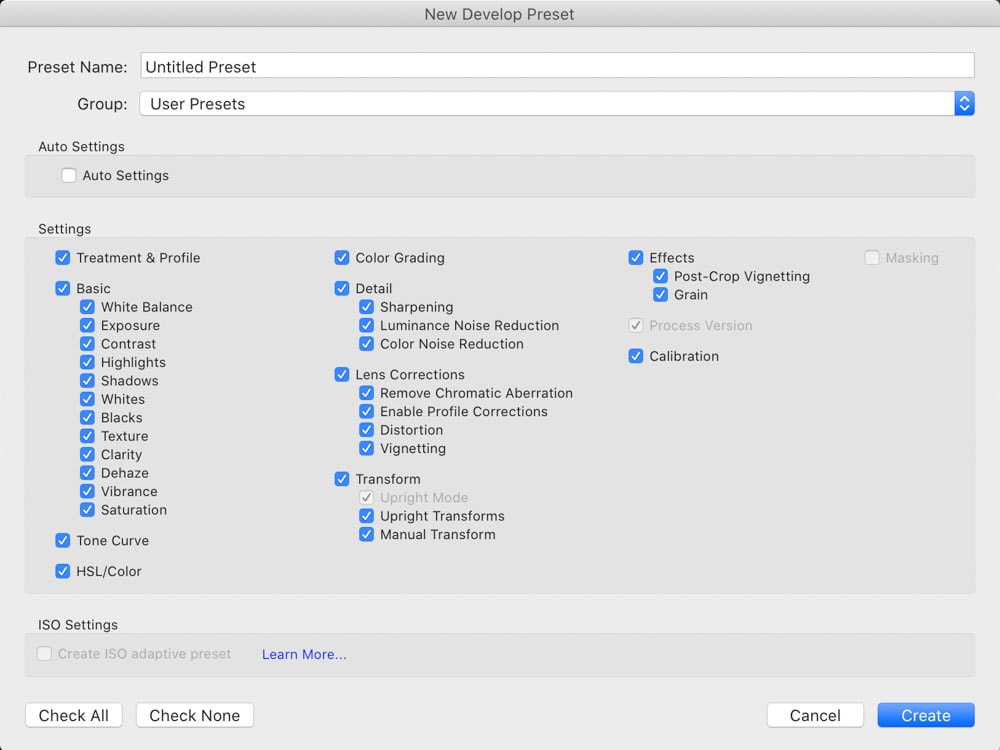
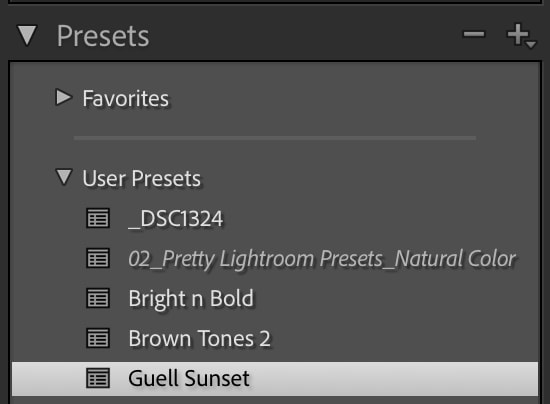
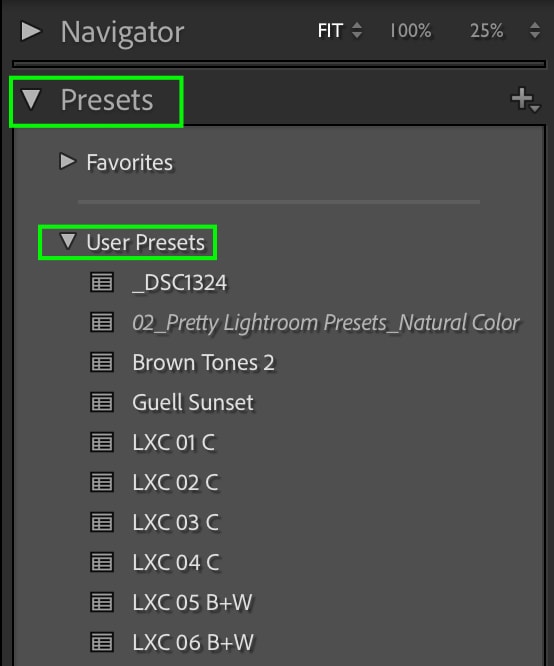
Once you’ve selected the adjustments to include in the present you can click Create. The preset will be visible under Presets > User Presets or the new group you saved it in, at the left of the Develop panel to use on any of your future images.
In Lightroom CC, the process of creating a preset is quite similar. With the image you’d like to build the preset on open, head to the Edit tab and set the various settings the way you’d like.


Once you’re satisfied, you can save the adjustments as a preset by heading to the Presets icon at the top of the Edit panel.

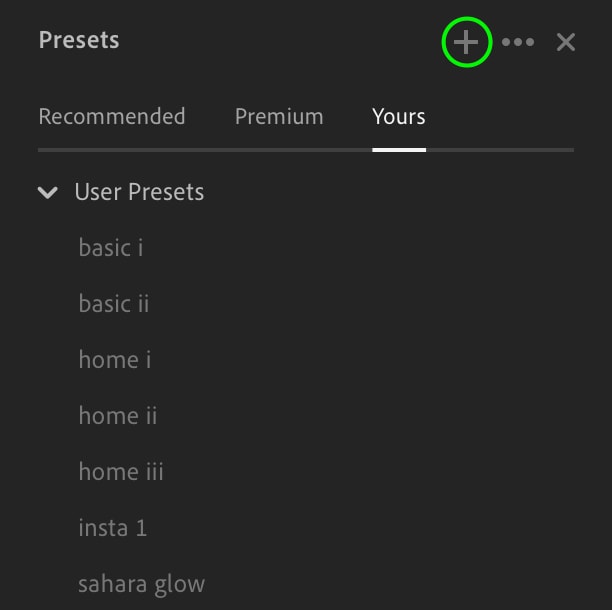
This will bring up the Presets panel, and it is here you can create a new preset using the adjustments you made by clicking the plus sign icon.
In the New Preset window, you can name your preset and select a preset group, and also make sure to uncheck any settings you don’t want to be included in the preset.

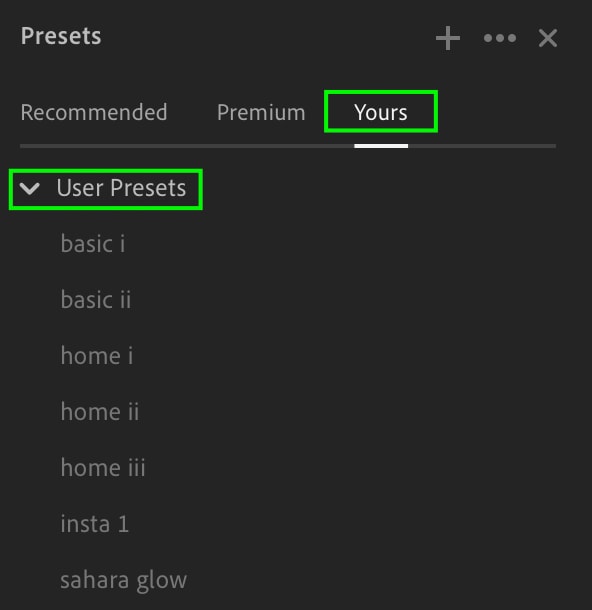
Click Create to save your preset. You can access all your presets by clicking the same Preset icon in the Edit tab and going to Yours > User Presets.
Tips For Creating Your Own Lightroom Presets
1. Avoid Saving Spot Adjustments When Creating Presets
If you’re trying to create a preset out of an image on which you’ve added any masks or spot adjustments, you might want to think twice.
Masks and spot adjustments won’t translate well in a preset as you can’t guarantee the local adjustments will be in the place you want them on different images. For example, if you’ve added a mask to the subject of a specific image, the mask won’t cover the same subject in an entirely different image.
You can still add masks to an image whose settings you’re creating a preset out of, just make sure you don’t include these adjustments by unchecking Masking in the New Preset window. And, of course, you can always add masks and spot adjustments after applying a preset to an image.
2. Don’t Include Crop Adjustments In Your Presets
Similar to the above point, it is probably best to avoid including any cropping adjustments you’ve made to an image, as they might not be necessary or fitting for every image you want to apply this preset to. You can’t guarantee what areas of the image the crop adjustments will cut off if they’re already set into your adjustments.
Again, you can still crop an image you plan to make a preset out of, but when you get to the window make sure you uncheck all crop-related adjustments in the New Preset window. You can also crop an image after adding a preset, so crop adjustments aren’t necessary for a preset.
3. Make Your Adjustments As General As Possible
It’s best to keep the adjustments you add to a preset as simple as possible. Anything related to exposure, contrast, and color will translate well across a wide variety of images.
For instance, as we can see in the before and after below, the preset I made earlier fits well on a different image. This is because the adjustments weren’t too strong or specific to one image, lighting, or style.
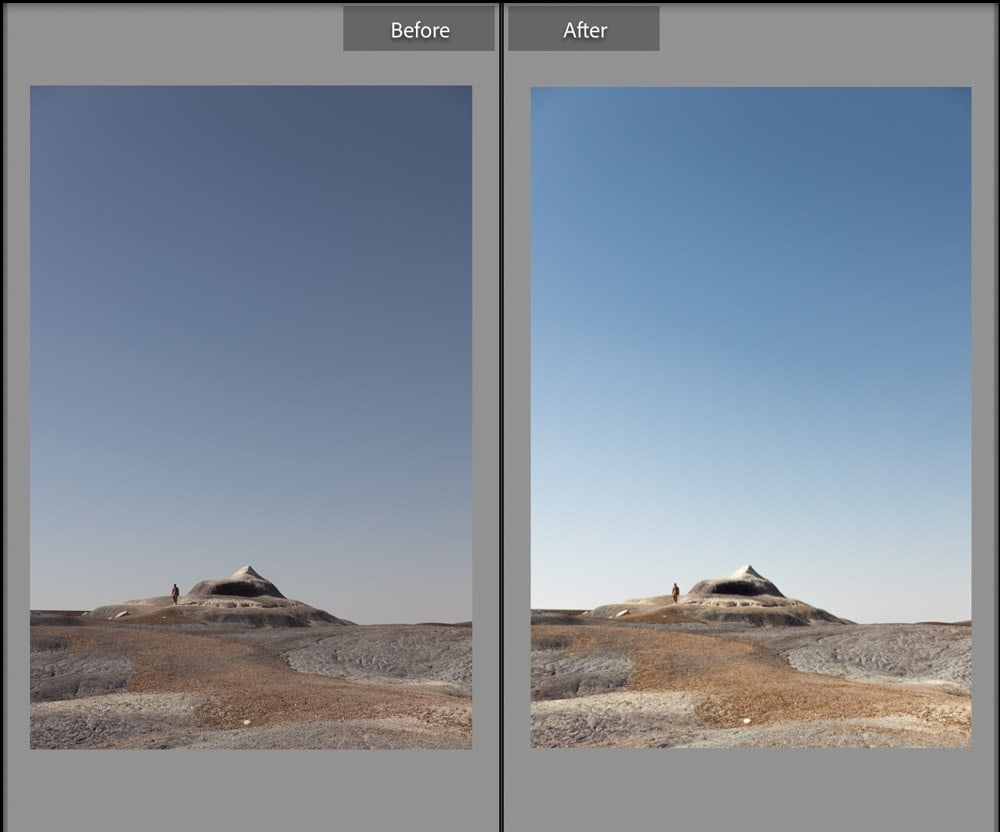
As tempting as it can be to make extravagant presets with tons of specific adjustments, you can’t guarantee this will look good on many photos besides the one you’re working with. With more general adjustments, you will have a more diverse range of image options that the preset will work with. General presets will be the most help to you as they can replace the adjustments you’d normally go through and make by hand, to a group of images, saving you tons of time and effort.
Want A Few Extra Lightroom Presets?
If you don’t have all the motivation you need to make your own batch of Lightroom presets, I have 12 free premium presets that you can get access to. Just click here to learn more and download my Free Lightroom Starter Kit preset bundle!


