

Many photographers struggle when trying to shoot a scene with lots of contrasting lights and shadows. For instance, a landscape scene with lots of bright sun and shadows might look beautiful in person, but when you try to capture it with your camera, the brights may be too bright or the darks too dark. A solution is to use HDR (or High Dynamic Range) processing.
HDR images are created by merging several photos of different exposures into one. If you’ve ever seen an HDR image, you may have been impressed by the detail the picture shows: both in lighter and darker areas. The shadows aren’t flat, and the brights aren’t blown out. HDR is the happy medium of photography. The best part is that you can edit images using HDR in Lightroom.
What Does HDR Mean In Lightroom?
HDR images are created using a process called bracketing. Bracketing combines several photos taken at different exposures into one picture with a more detailed and more accurate display of highlights, mid-tones, and shadows. The process is popular with landscape photographers, as it can be challenging to get details in both shadows and highlights using nothing but natural light.
Landscape photography is also a great fit for HDR processing because the scenes need to be as static as possible. Bracketing places the images on top of each other, so the process requires three or more images that are near replicas of each other except for their exposures. This can be tough if you work with moving subjects like animals or people. You’ll also need a tripod to ensure you get the same exact image every time.
Once you have the images, you can merge them in Lightroom. You can use a few different merge settings to get the final image just right.
How To Merge An HDR Image In Lightroom
Step 1: Upload The Bracketed Images
Upload the images you want to use for the HDR process. Remember, these should be nearly identical except for the exposures; otherwise, the process won’t work well.
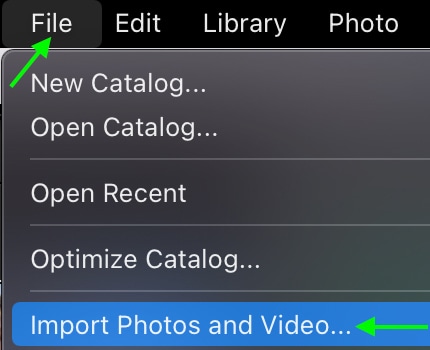
To upload images to Lightroom, head to File > Import Photos and Video.
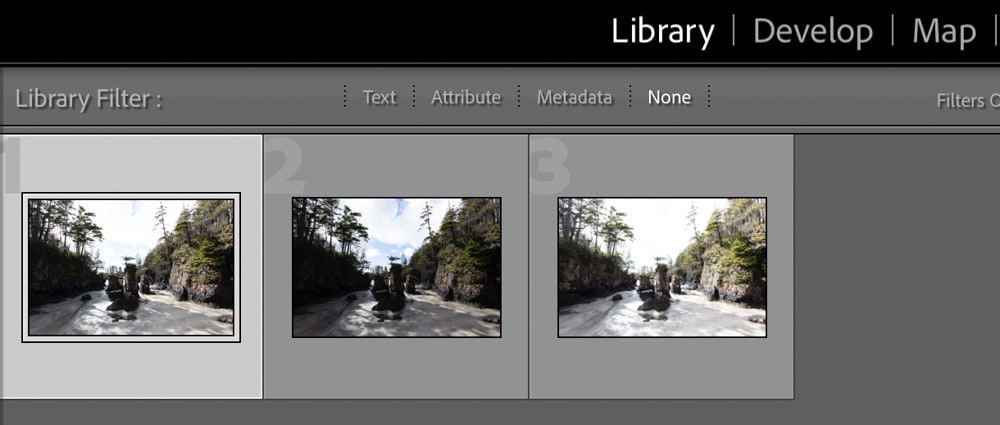
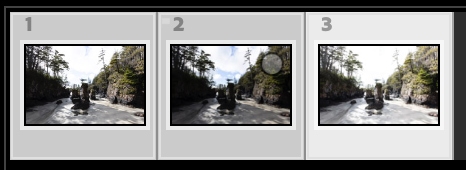
In the Import window, find and select the images you want to import from the files on the left, then click Import. The files will appear in your Library. I recommend you use at least three or more images to achieve the best results for this technique.
Step 2: Select The Images
You can start in the Library module and select the images you’d like to merge to create your HDR image by holding Control (Win) or Command (Mac) and clicking. The photos will turn lighter gray when selected.
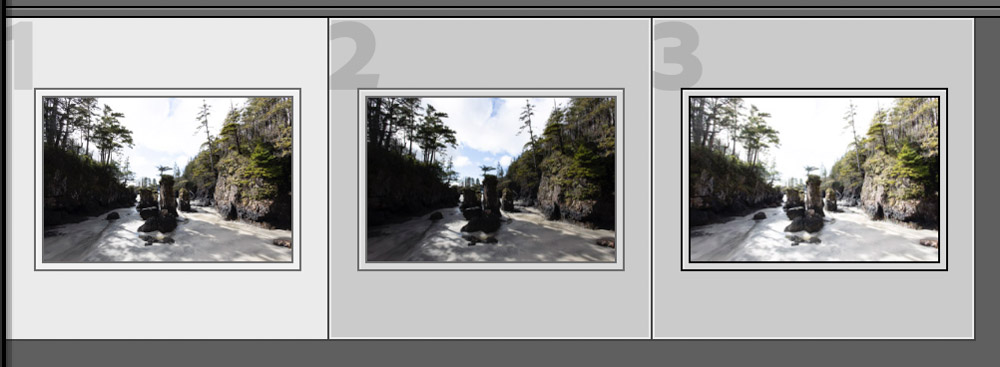
You can also select images from the filmstrip while working in the Library or Develop modules.
Step 3: Merge The Images
Once you’ve selected the images you’d like to merge, head to Photo > Photo Merge > HDR.
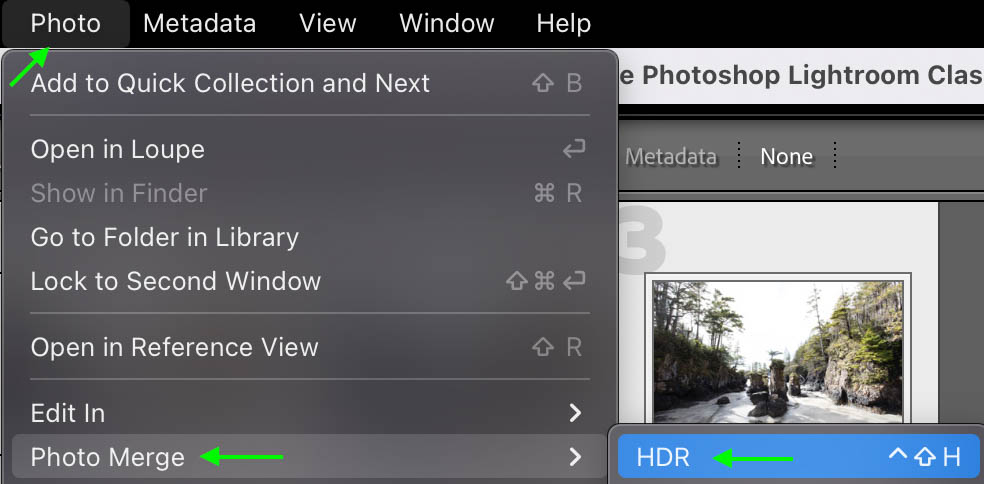
You can also right-click or Control + click any of the selected images and select Photo Merge > HDR.

Step 4: Set Merge Settings
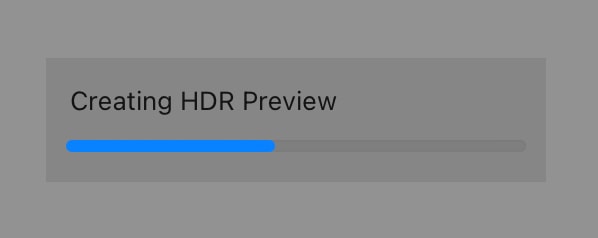
Once you select to merge your images, the HDR Merge Preview window will open. Wait a few moments for Lightroom to make a preview of the final image — the more photos you select to merge, the longer it will take, so be patient.
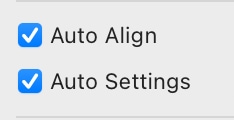
Once the preview is created, you’ll see a few settings to the right of the merged image.

The Auto Align setting automatically lines up the photos in case the camera moved a bit between taking the individual images (for example, if you were holding the camera by hand rather than using a tripod).
This box will be checked automatically, and it doesn’t hurt to leave it checked to ensure the most accurate merge. The Auto Settings box will also be checked already. This will automatically make minor adjustments in the tone of the merged photo.
The Deghost setting is also important in the final merged image. Deghost is also useful in case anything unwanted is featured in the photo, particularly if the subject (if there is one) moved slightly between shots. Obviously, even when using a tripod, objects like trees and clouds might still move, resulting in a strange “ghost” effect near those objects. The deghost setting makes Lightroom automatically reduce the ghost effect.
You can select the Deghost strength from the options provided: Low, Medium, or High (or None). The option you choose entirely depends on the bracketed image set you shot and your preferences. Each HDR image will require something different, but in most cases, Medium works well.
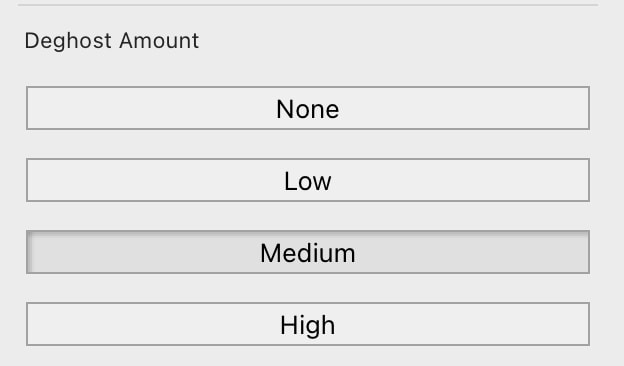
Below the Deghost strength settings, you’ll see the Show Deghost Overlay checkbox. Check this to view the areas of the “ghost” effect that Lightroom detects. The ghost effect appears as a translucent red highlight.


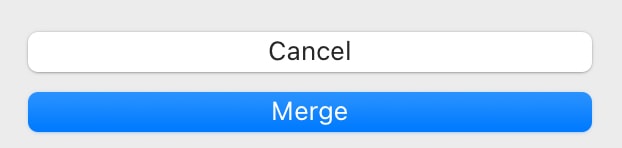
Step 5: Click Merge To Finalize The Image
Once you’re happy with your settings, click the Merge button in the bottom right to finish the process.
The image will appear in the preview. You’ll be able to notice the difference when looking at one of the images before you merged them alongside the merged image.
How To Refine Your Merged HDR Photos In Lightroom
Once you’ve merged the images, there are a few ways you can further refine and enhance the final product. Some photos may benefit from boosting the exposure or contrast, while others may need an adjustment of highlights and shadows or even white balance.
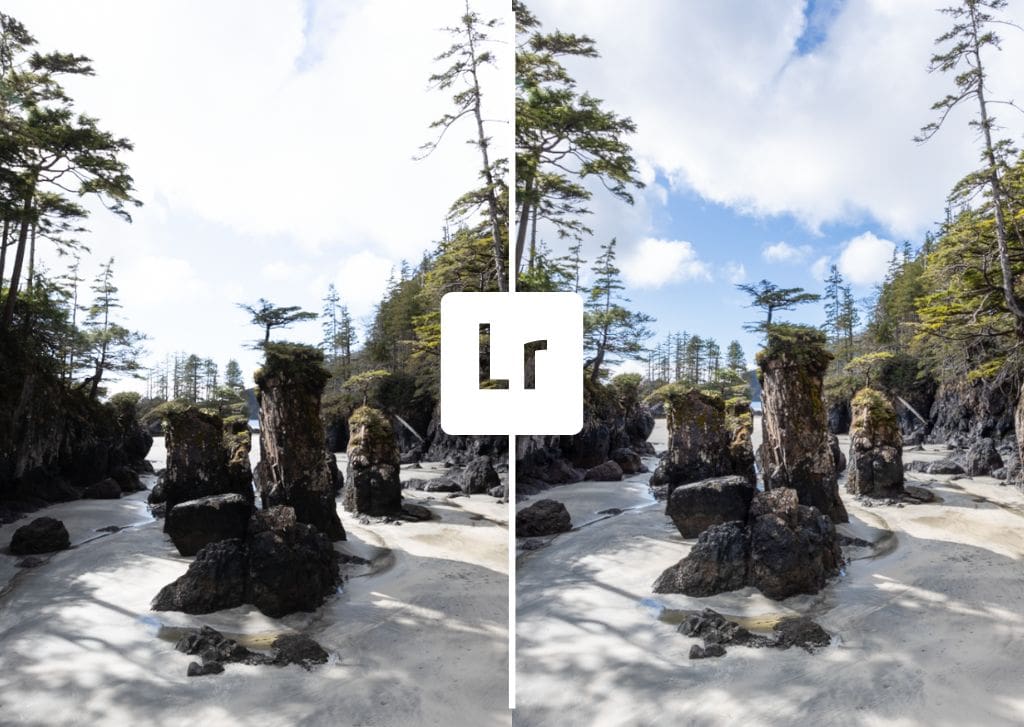
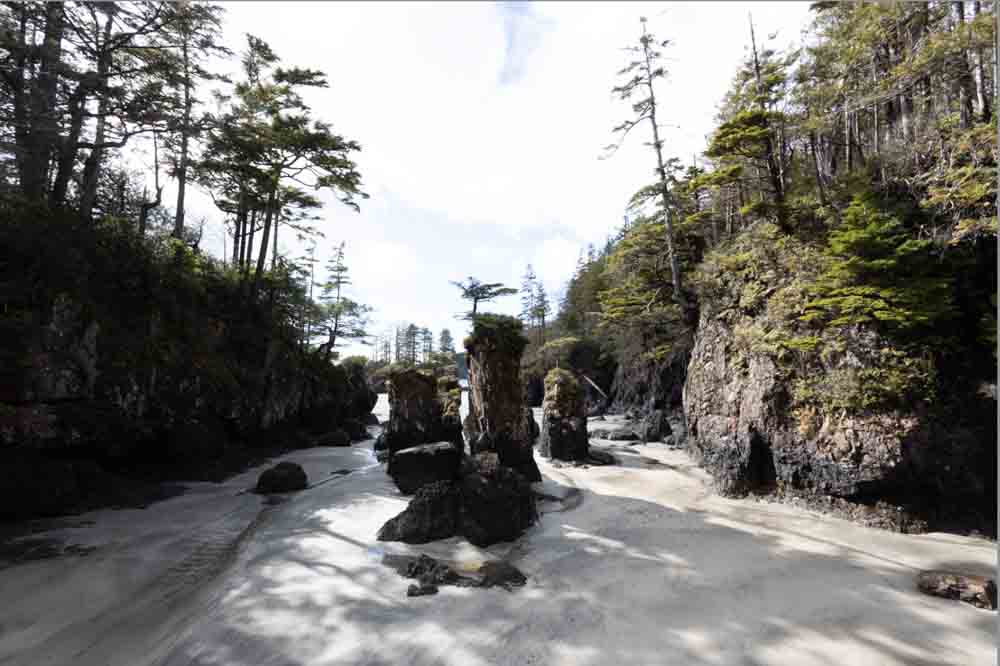
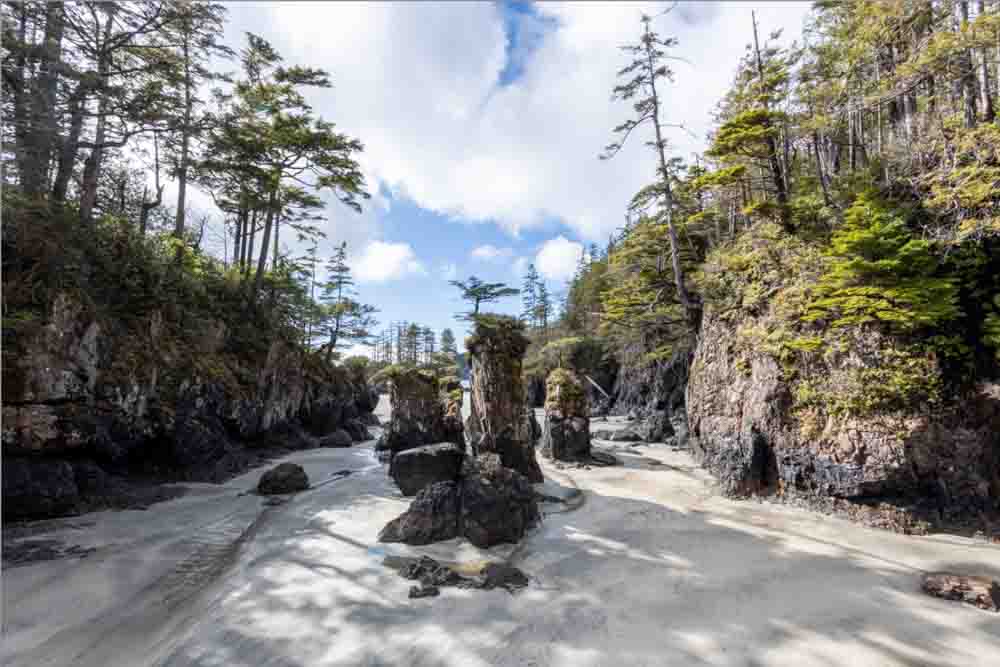
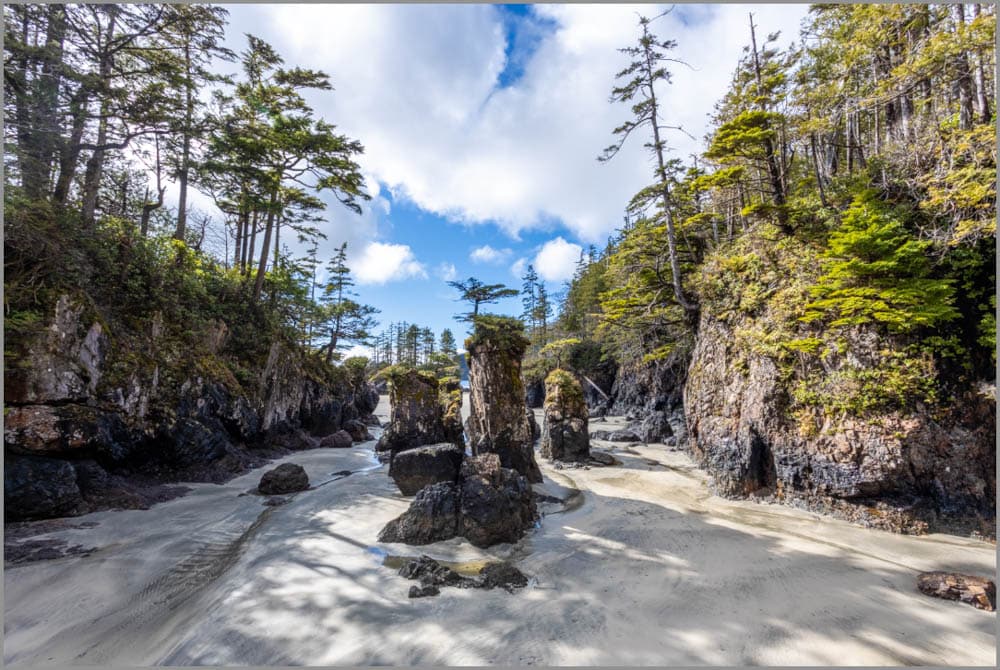
For instance, the HDR process in the below image brought out details in both the darkest and lightest parts of the scene, but we can bring out the shadows on the left side even further to brighten it a bit more.
In addition, because the HDR process can brighten the dark areas up and brings the light areas down, the resulting image is sometimes flattened. We can fix this by increasing the contrast, which will help the image pop.

Adjusting the develop settings like exposure, contrast, and white balance can easily and quickly improve the HDR image.
Should You Always Use HDR When Editing Photos?
Because HDR can bring out so many details in an image, you’d think you should always edit using HDR, right? Actually, no! Whether or not you use HDR depends entirely on the photo you want to edit and whether you’ve planned to create an HDR image.
First, you won’t be able to create an HDR image without multiple bracketed images, and the photos need to be almost exactly the same. So if you haven’t planned to create an HDR image, you probably won’t be able to use this technique.
If you don’t already have a set of bracketed images, don’t worry. In some cases, you won’t even need the HDR process to bring out the details in your photo. Adjusting the Highlights, Shadows, Exposure, and even the Whites and Blacks can help find the right balance for your image. I share how to recover highlights in a photo in this tutorial.
Just make sure you’re always shooting in Raw so that your camera picks up the most information possible when taking the picture. That way, you can recover any lost details in the shadows and highlights, regardless of whether you use this HDR technique or not.
