fbpx

How To Select Multiple Photos In Lightroom


Selecting Multiple Photos For Import, Editing, And Export

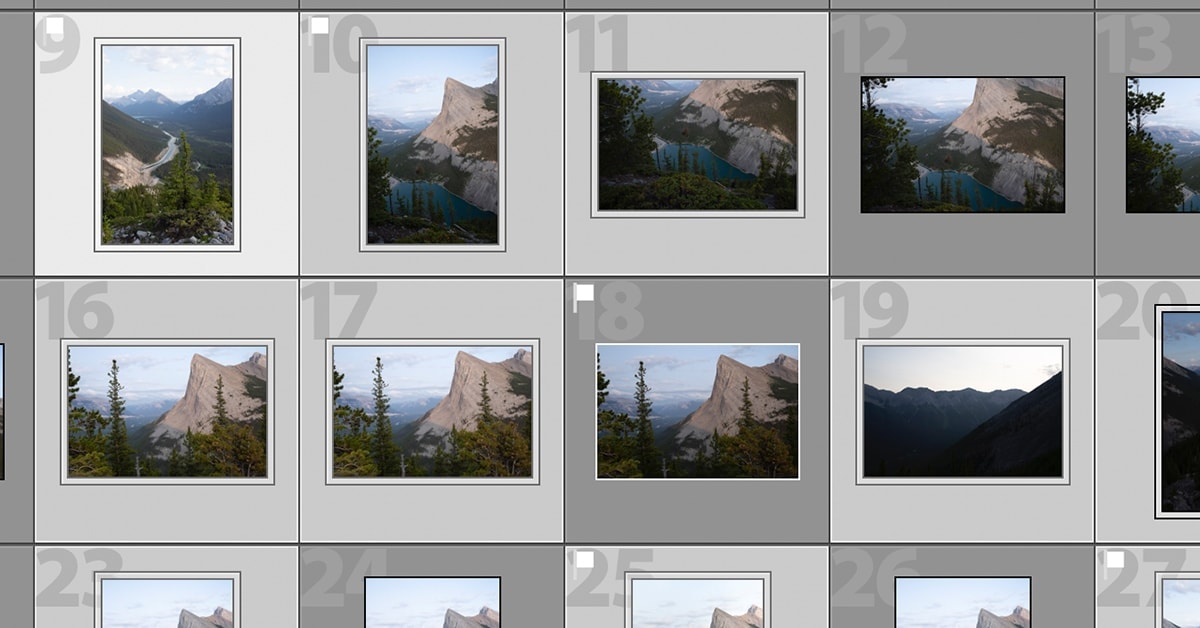
When you are editing photos in Lightroom, you’re dealing with hundreds or even thousands of images at once. In order to speed up your workflow, it’s crucial to be able to select multiple photos at once in Lightroom. That way, you can import all the correct images, batch edit photos, and streamline the export process. Fortunately, it’s extremely easy to select multiple photos at once in Lightroom regardless of what module you’re using. Let’s go over the best ways to select your photos for import, organization, and export!

How To Select Multiple Photos In Lightroom

There are a variety of different methods you can use to select multiple photos in Lightroom. All you need to do is remember a few keyboard shortcuts. In a nutshell, here are the most different options you have when selecting your photos:

Option #1: Selecting A Series Of Images

selecting-lightroom-photos-tutorial-image

If you want to select a specific sequence of images, this method is most effective. Simply click on your first image, hold the Shift Key, and click on the last picture in the series. This will not only select the two images you clicked on but every image in between as well.
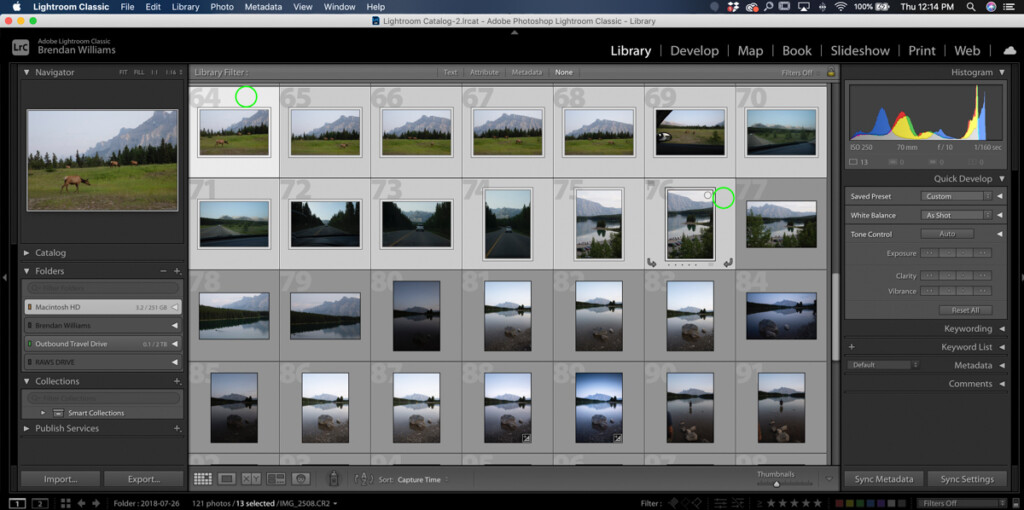
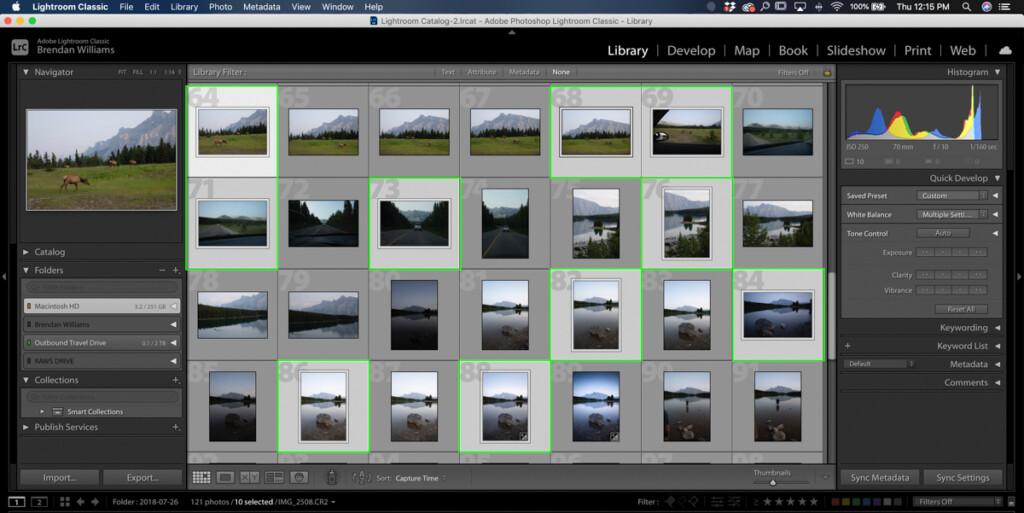
Options #2: Selecting Individual Images

selecting-lightroom-photos-tutorial-image-2

There are a ton of times where you’ll need to select multiple individual photos at once. To do this, hold the Command Key (Mac) or Control Key (PC) and click between your desired images. This will select all of the photos you clicked on, no matter what order they’re in.
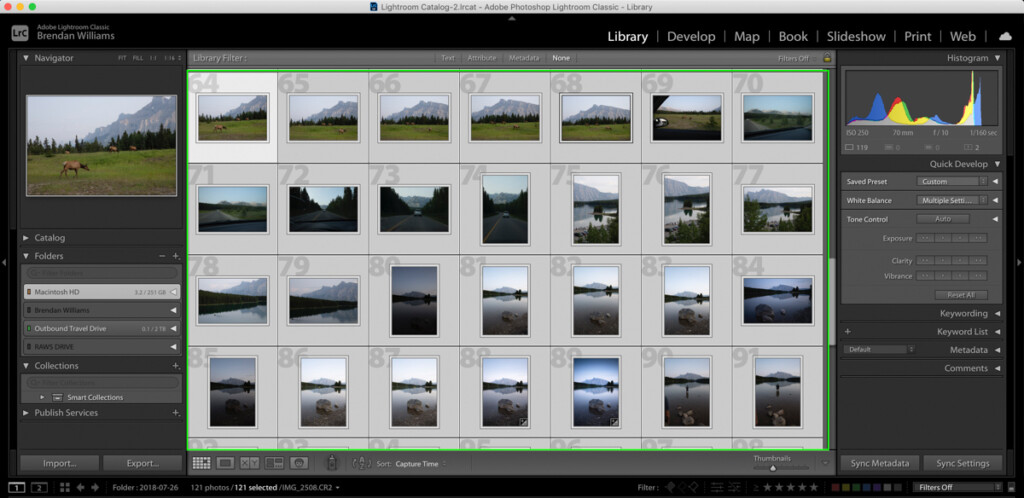
Option #3: Selecting All Images At Once

selecting-lightroom-photos-tutorial-image-3

If you don’t need to be specific and just want to select all your Lightroom photos at once, just use this easy keyboard shortcut. Press Command + A (Mac) or Control + A (PC) to select all your photos at once.

There is no right or wrong way to select multiple photos in Lightroom; it just depends on how many you need to select at once. With these three options, you cover all the bases by selecting groups, individual photos, or all your images at once!

Now that you know the shortcuts let’s talk about which areas you can make these image selections in Lightroom.

Where Can You Select Multiple Photos

The short answer is anywhere that you can see your photos. Places like the Library Module or the Filmstrip are the main locations.

– In The Library Module

When you’re using the Library Module, you have a couple of different viewing options called ‘Grid View’ and ‘Loupe View’.

These settings are found in your Lightroom Toolbar. If you don’t see these settings go to View > Show Toolbar or press T on your keyboard.

how-to-show-toolbar-in-lightroom

selecting-lightroom-photos-tutorial-image-6

When you’re in Grid View, you can see all of your images in a tiled pattern. This is the ideal viewing mode for selecting a large number of photos in Lightroom.

selecting-lightroom-photos-tutorial-image-4

Once in this view, use any of the three selection options mentioned earlier to select your images. I most often use options 1 (holding the Shift Key) or 2 (holding Command or Control + clicking)

selecting-lightroom-photos-tutorial-image-9

The other viewing option in the Library Module is Loupe View. This viewing mode lets you see one image at a time, while still seeing other photos in your Filmstrip. This is ideal for getting a closer look when you cull photos.

selecting-lightroom-photos-tutorial-image-5

Since there’s only one image in view, it may not be as obvious how to select your photos.

That’s where the Filmstrip comes into play.

selecting-lightroom-photos-tutorial-image-7

The Filmstrip is a sliding roll of images at the bottom of your Lightroom workspace. Here you’ll find all of your photos from your set. Any of the pictures on the Filmstrip can be selected using the same three methods as before. Your selected photos will now have a highlight around them.

– In The Develop Module Or Other Lightroom Modules

While you’re using any other Lightroom Module, you don’t have the same luxury of going between multiple views. In these cases, all you have access to is your Filmstrip.

If your Filmstrip is not visible, you can access it by going to Windows > Panels > Show Filmstrip.

From here, use your preferred selection method to select multiple photos in the Lightroom Filmstrip.

How To Select Multiple Photos To Import In Lightroom

The methods we discussed so far only work once your photos are imported to Lightroom. It’s a little bit different when selecting multiple photos to import to Lightroom, but the methods are still extremely simple. Let’s go over how to do it.

Once you’ve imported and found your file locations, you will see a large grid of images with checkmarks.

(If you’re not sure how to import files to Lightroom, click here to learn how)

Now, these checkmarks represent a selected photo. By default, Lightroom will select all of the pictures from the destination to import. This is perfect since you’ll want to import all the images from a folder 98% of the time.

If there are a few images you know you don’t want to import, just click the checkmark icon to uncheck an image. This will grey it out, and it will not import into Lightroom.

In some cases, you may want to add new photos to an already existing folder in Lightroom. In this situation, select ‘New Photos’ at the top of the import window. This will deselect all previously imported images leaving only the ones you want.

When selecting multiple photos to import in Lightroom, you don’t need any keyboard shortcuts. Just click a few checkmarks or use the ‘New Photos’ import option to refine the selected images!

How To Select Multiple Photos To Export From Lightroom

Nobody wants to spend the time to individually export hundreds of photos from Lightroom. Thankfully you can streamline this process and select multiple photos to export from Lightroom at the same time.

In either the Library or Develop Modules, select the photos you would like to export. You can use any of the three methods discussed at the beginning of this article.

Once you have a series of images highlighted, go to File > Export to begin the export process. This will export all of your selected images at the same time and save you a ton of time. Whether it’s two photos or 2000 photos, this process remains the same.

selecting-lightroom-photos-tutorial-image-16

To make sure you get the highest resolution possible from your Lightroom exports, be sure to check out The Best Export Settings For Lightroom.

Conclusion

Learning how to select multiple photos in Lightroom is key to speeding up your workflow and saving your sanity. Rather than individually selecting pictures to import, edit, and export, you can streamline the process by working in multiples. Fortunately, these steps are easy to remember if you’re new to editing photos Lightroom!

Want more posts like this? Subscribe to my weekly newsletter for more photography, and photo editing tutorials delivered straight to your inbox!


Article By

Brendan Williams

Hey, I'm Brendan! I'm a professional photographer and photo retoucher who has spent the majority of his career shooting or retouching outdoor lifestyle and social media campaigns for brands like G-Adventures, xoxo Bella, P&G, Fitbit, Chevy, Tourism California, and more. These days I primarily focus my efforts on this site, creating guides and tutorials that I wish I had earlier in my career. Each week I publish new tutorials on Photography, Photoshop, Lightroom, and Canva to help you unlock new skills and bring your creativity to new levels! Everything you learn here is backed by real experience, so you can finally skip the fluff and focus only on what matters.


Continue Reading:

How To Invert Colors In Photoshop

Learn how to quickly invert the colors of an image or a layer mask in Photoshop along with tips to selectively invert your colors instead!

How To Invert A Selection In Photoshop

Learn the importance of learning to invert a selection in Photoshop with the help of simple keyboard shortcuts and several other methods.

How To Use The Gradient Tool In Photoshop

Learn the ins and outs of how to use the gradient tool in Photoshop with useful tips to help make the most of this impressive tool!

Adobe Lightroom System Requirements For Mac & PC

Here's a breakdown of the system requirements for Adobe Lightroom Classic and Lightroom CC to make sure it will run smoothly on your computer.

How To Add A Watermark In Lightroom Classic & CC

Learn how to add a text or graphic watermark to a photo in Lightroom Classic and Lightroom CC to protect your photos from theft.

How To Use Dehaze In Lightroom

Learn how to use dehaze in Lightroom along with five different ways you can use the dehaze tool to improve your images in Lightroom.

35+ Best Fonts For Logos In Canva

Here's a list of the best fonts for logos in Canva to help give you inspiration in your next logo design!

How To Create Curved Text In Canva

Learn how to quickly create curved text in Canva desktop and mobile with just a few clicks to spruce up any design!

35 Best Fonts For Teachers In Canva

Discover the best fonts for teachers in Canva to help with your next worksheet or presentation for your class!

The 9 Best SD Cards For Sony

Discover the best SD cards for Sony to find the most reliable and best valued memory cards for your photo and video needs.

The Best Canon Lens For Low Light (10 Top Picks)

Get a complete view of the best Canon lenses for low light photography and video along with tips to make the right buying decision.

Affinity Photo VS Photoshop – Which Should You Choose?

Let's take a deep look at the similarities and differences between Affinity Photo and Photoshop to see which program you should pick.