

While today’s digital cameras can capture excellent night photography, you may still need to work on photos you take at night to improve them in post-editing. It is now easier than ever to enhance and edit night photos in Lightroom. Let’s look at the most common steps you’ll need to take to enhance the details in your low-light and night time images!
How To Edit Night Time Photos In Lightroom
Editing photos taken at night is very different than editing photos taken during the day. The process requires a few steps you wouldn’t usually need to take when editing daytime photos.
Each image is unique and may require slightly different adjustments, but you’ll often need to adjust the exposure and contrast, correct the color, and reduce the noise that often comes through when shooting in low light.
Use the steps below as a guide to edit your night images, and of course, your adjustment settings will differ from mine based on your photo.
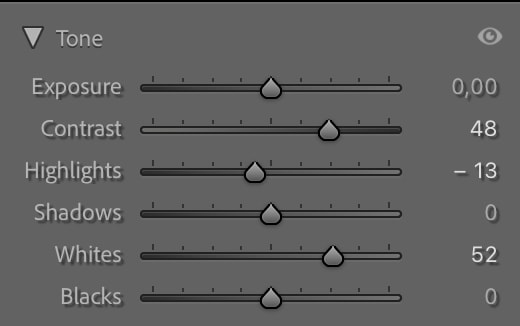
Step 1: Boost The Exposure & Add Contrast
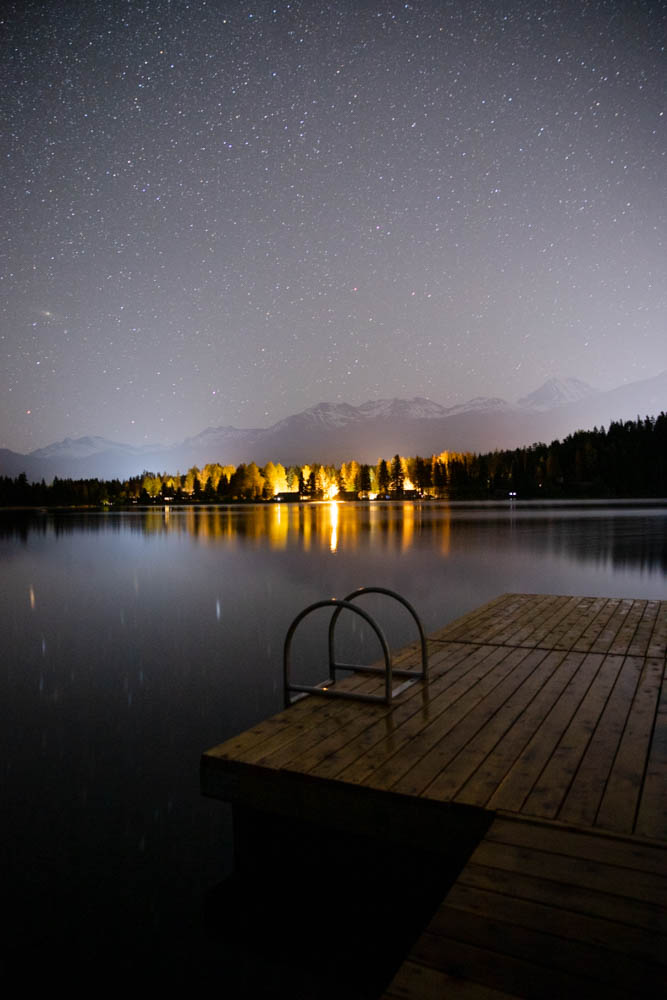
Despite the impressive ability of most cameras to capture images with little to no light, your photo will probably still be pretty dark. So, the first step will be to adjust the exposure and related sliders until you can see everything you need.
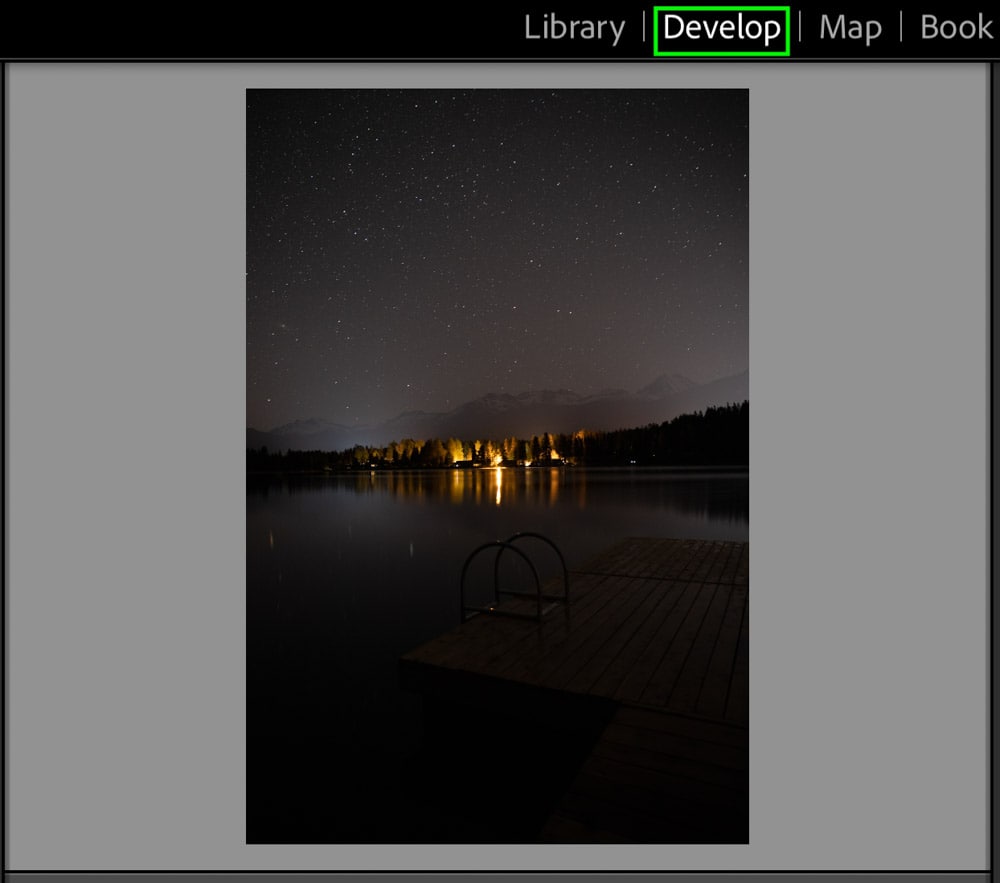
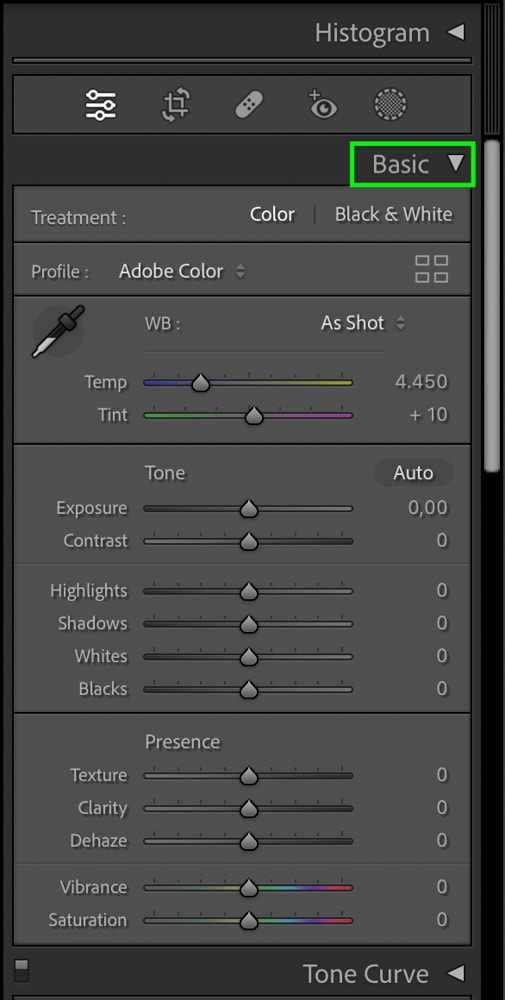
With the photo open in Lightroom’s Develop module, head to the Basic tab from the adjustments panel on the right.
Drag the toggle on the Exposure slider to the right to increase the exposure as much as you need to for the elements in the image to be visible.
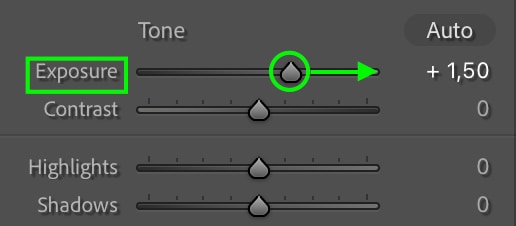
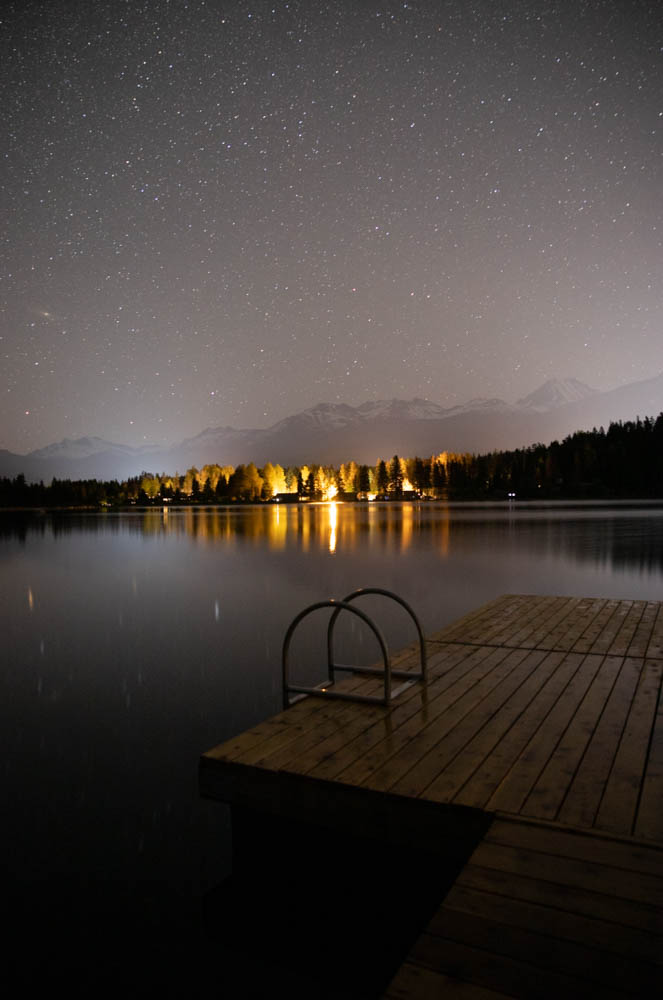
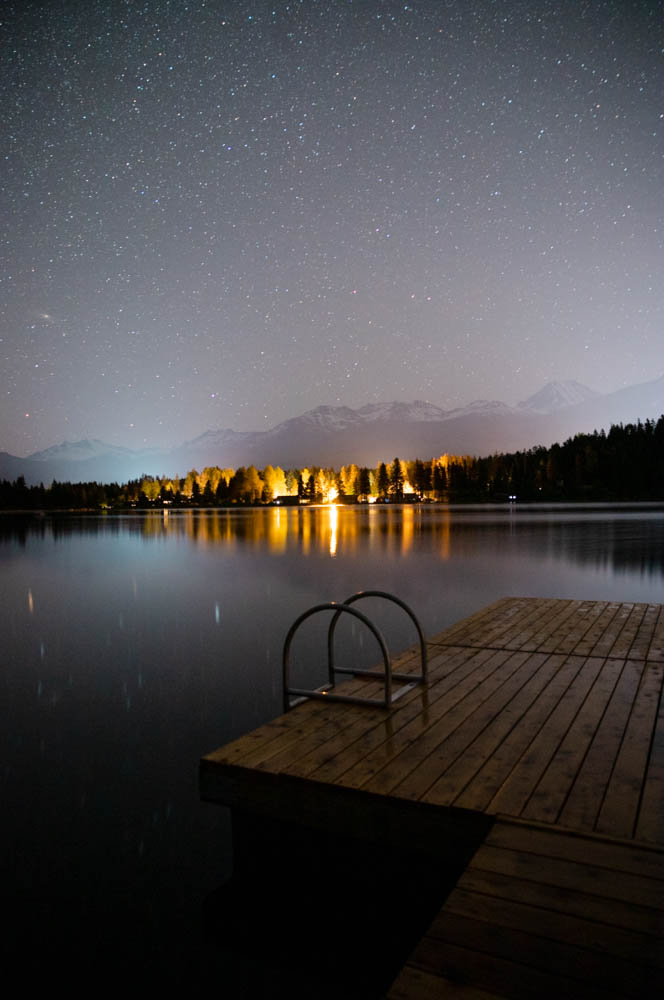
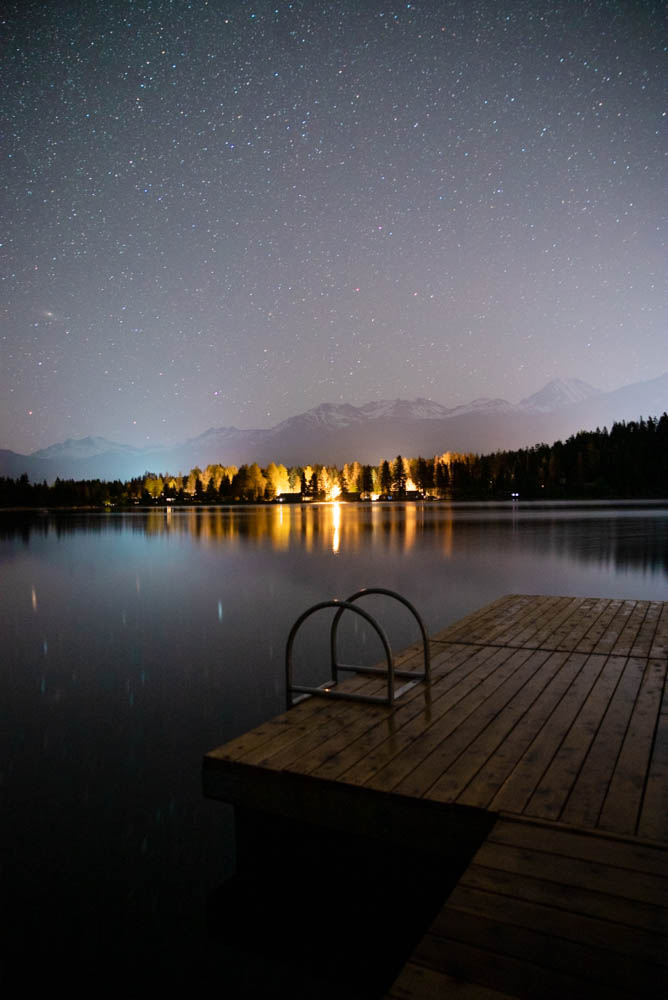
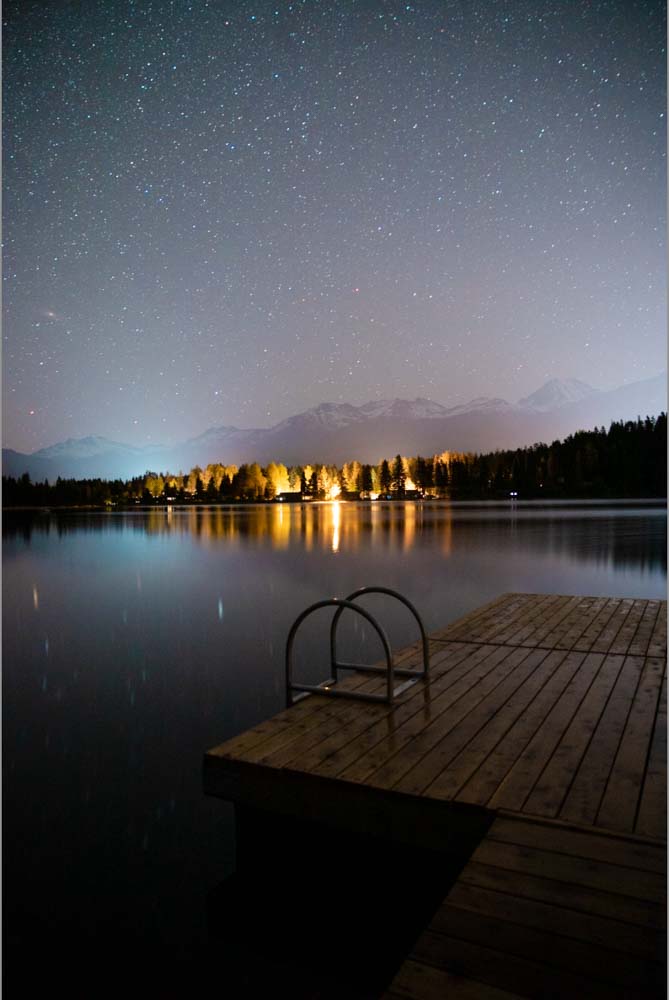
You can then go in and further adjust the highlights or shadows as needed. For instance, in the above image, the foreground is still quite dark, but I don’t want to increase the exposure more as the lights by the cabins are already bright enough.
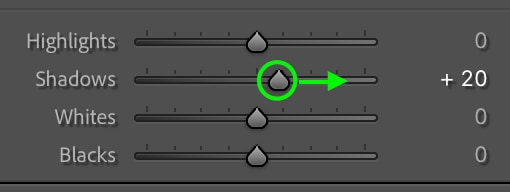
Luckily, I can bring the Shadows up by dragging the toggle to the right, which will brighten the foreground while leaving the image’s brightest areas alone.
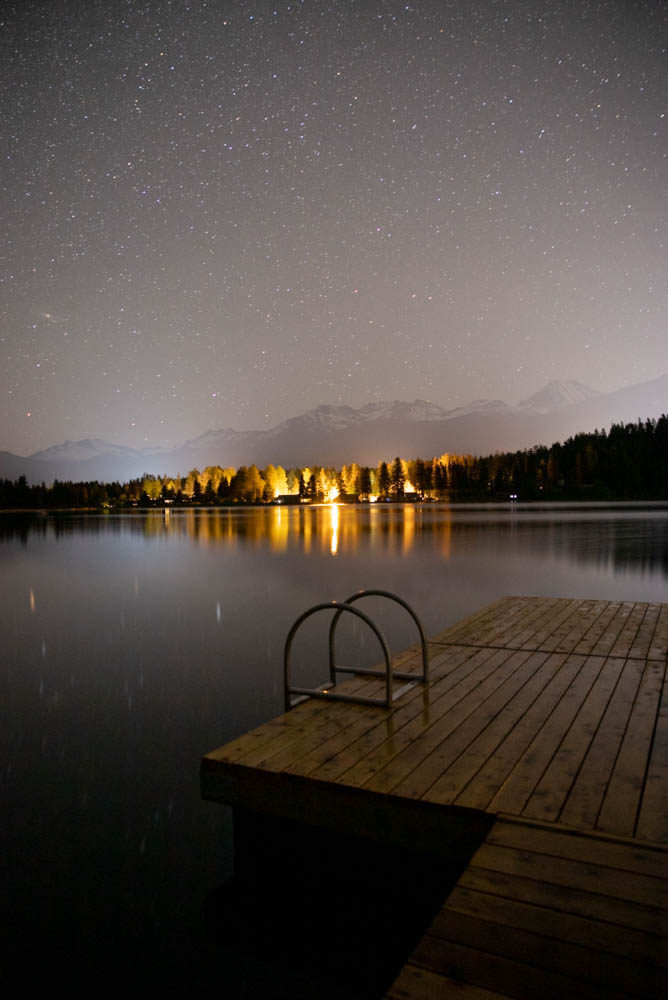
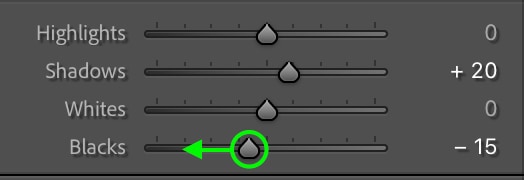
Finally, I’ll bring down the Blacks to add back a bit of contrast.

Feel free to make any other adjustments to the Shadows, Highlights, Blacks, and Whites that you deem necessary to expose the image and correctly add a bit of contrast.
Keep in mind the more you bring up the Exposure, Shadows, and Blacks, the more grainy your photo will appear, so only boost these sliders as much as necessary. There can be a lot of grain in the shadows the more you boost the brightness.
Step 2: Cool Down The White Balance
Most cameras automatically correct the white balance of night photography, which can make the white balance appear too warm in post. You can fix this using the Temperature slider at the top of the Basics tab.
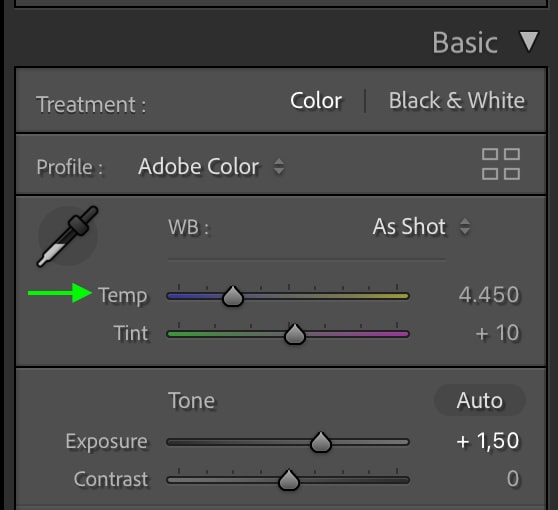
Drag the toggle toward the cool tone, away from the yellowish warmer tone.

This returns the cool nighttime hue to the image.
Step 3: Boost Contrast With The Tone Curve
Now, head to the Tone Curve, which sits below the Basic tab.
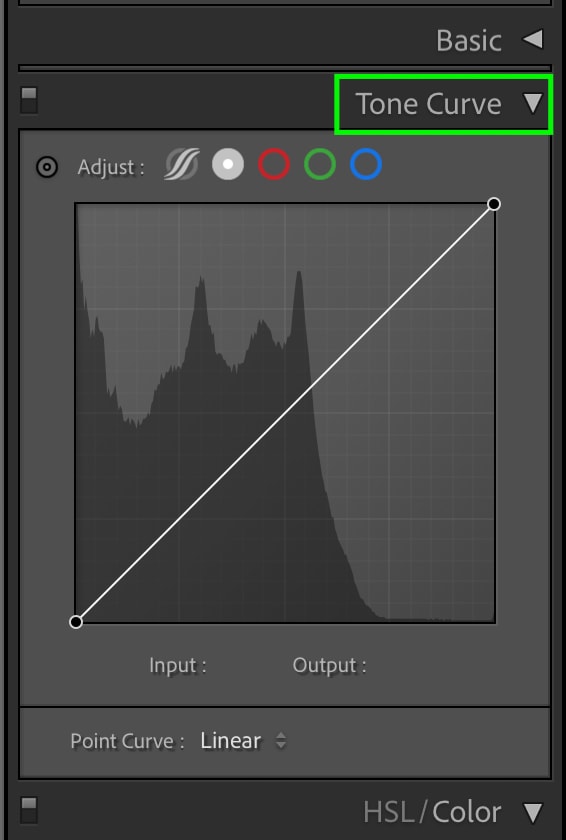
Here, we can further boost the contrast to make the image pop. The best way to do this is to first add an anchor point along the highlights and drag it up to boost the highlights.
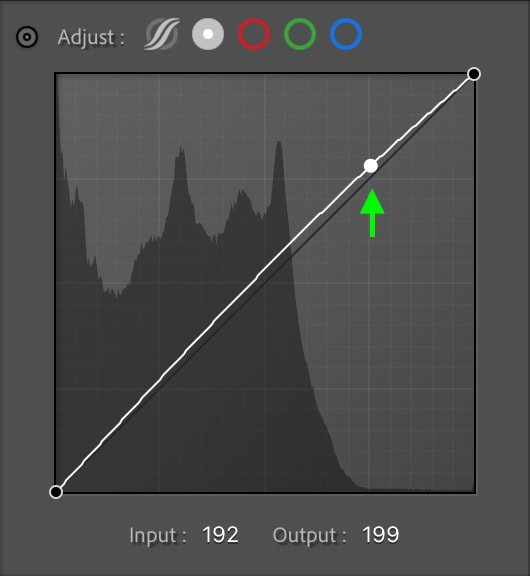
Dragging up one anchor point will move the entire tone curve line, so it helps to add another anchor point at the midtones and drag the point back down a bit.

Finally, you can add another anchor point to the shadows and bring it down slightly.
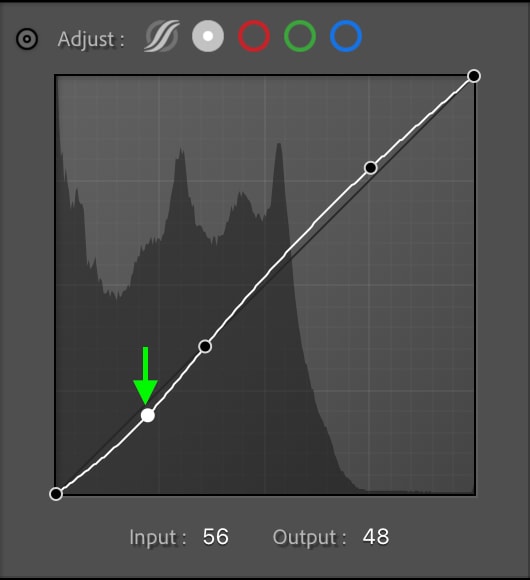
Remember that you can make very slight adjustments to the Tone Curve – a little goes a long way. Even these tiny changes can improve the overall look of the image.
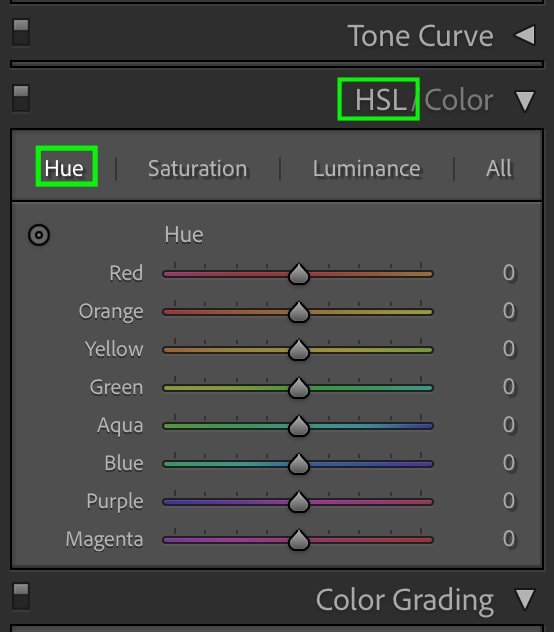
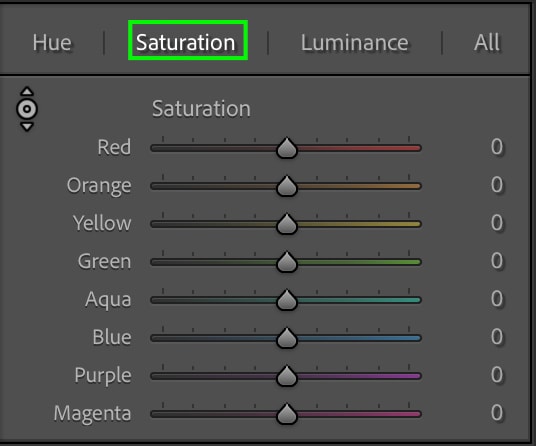
Step 4: Improve Colors Using HSL
Next, you can move on to the HSL tab, which sits below the Tone Curve. These adjustments are optional, but the HSL tools can improve the colors in your image, particularly in the sky, as some night shots can result in a strangely-colored sky.
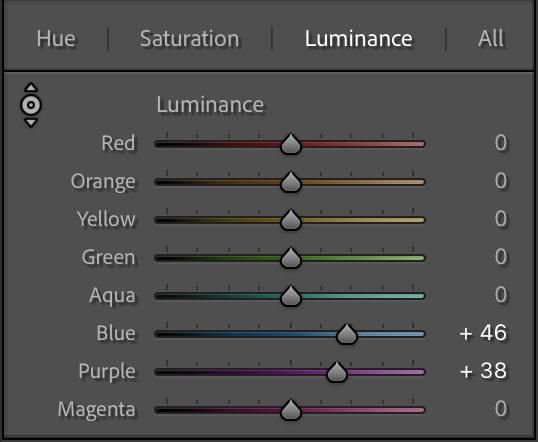
You can work from the HSL or the Color tab, as the adjustments are the same but are organized differently. I’ll work from the HSL tab as I prefer seeing all the colors I can adjust at once. From the Hue, Saturation, and Luminance options at the top of the panel, I’ll start with Hue.
Using the color sampler is the easiest way to know exactly which color to adjust. Click the icon at the top left of the panel.

Now, click a part of your image with the color you’d like to correct and drag up or down to adjust the hue. For my image, I’ll click the sky and adjust the Blue hue towards more of a teal color.
Next, I’ll click the cabins in the background to make the Yellow and Orange hues a bit more orange. In the end, my Hue sliders look like this:
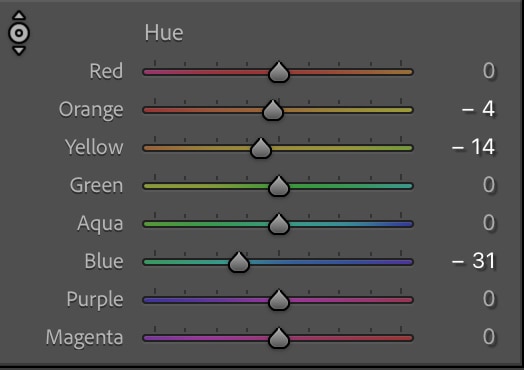
The emphasis on Orange and Teal tones creates a nice contrast in the image so far.
Next, I’ll click the Saturation option.
You can boost (or reduce) the saturation of any colors you’d like. For this image, I’ll increase the saturation for the colors in the sky (Blue and Purple) and reduce the saturation for the Yellow and Orange hues.
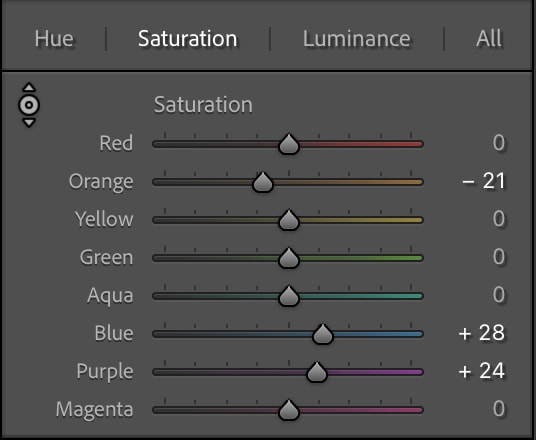
The colors pop a bit more now.
Finally, you can click the Luminance option to adjust the lightness of the colors.
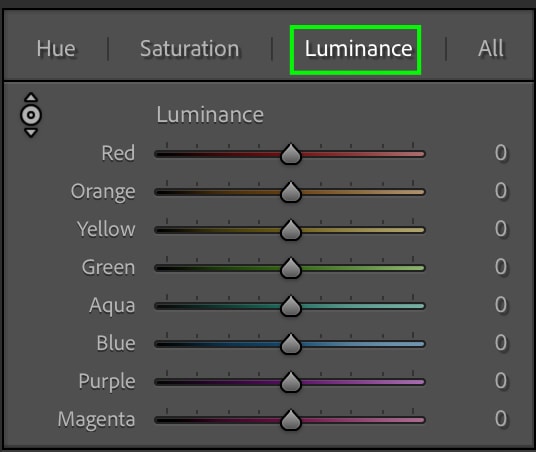
I’ll increase the Luminance for the Blue and Purple hues in the sky just a touch.
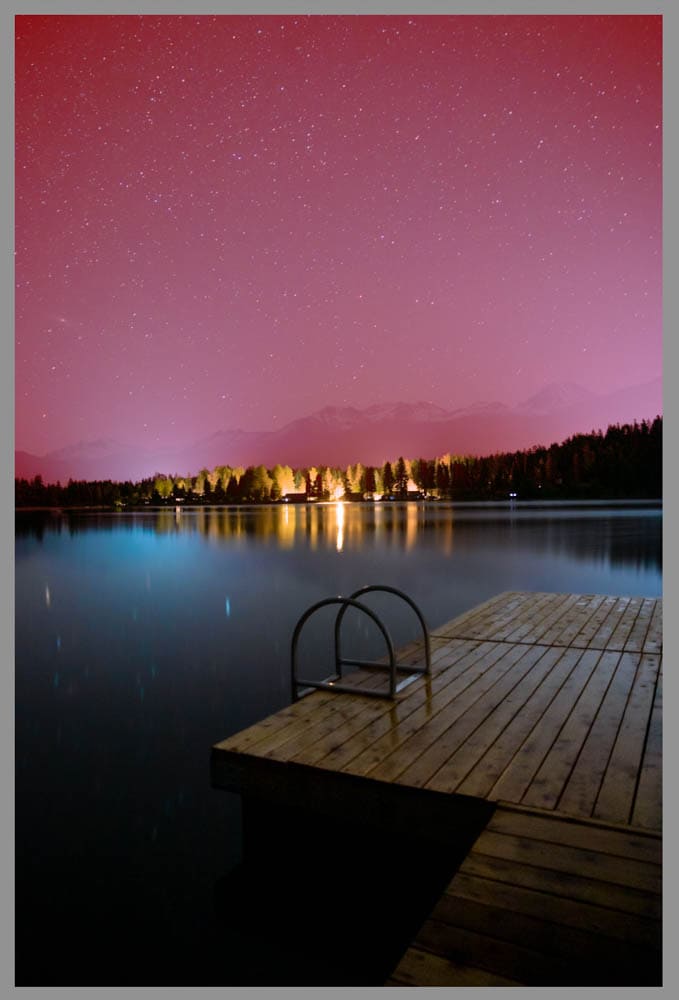
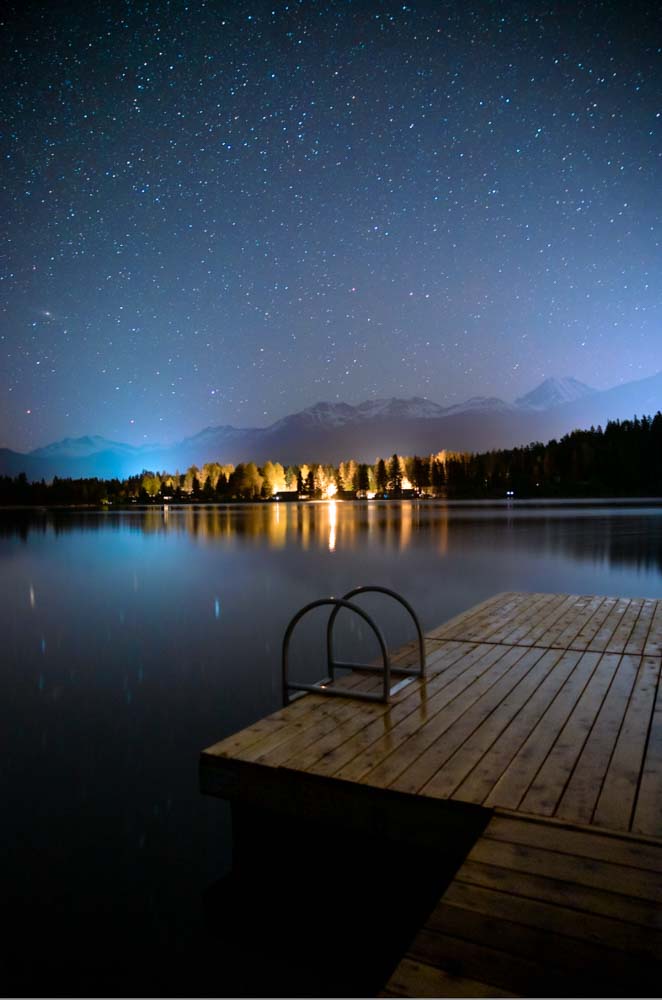
The final image has a much cooler palate with brighter colors than the image before I color-corrected it using the HSL.
Feel free to make any further adjustments to the HSL to color-correct your image as you see fit.
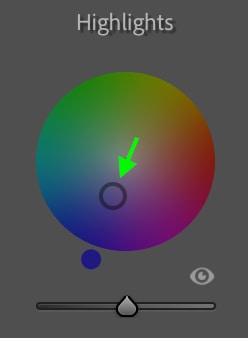
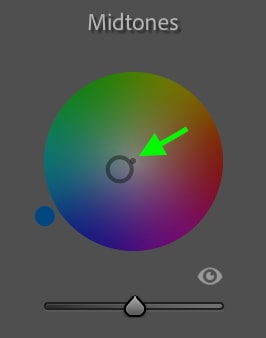
Step 5: Add Stylized Color With Color Grading
If you’d like, you can also use the Color Grading Tool to add stylized color to your photo. The main colors we’ll work with are cooler tones like blues and purples, as these colors will give the image more of a nighttime atmosphere.
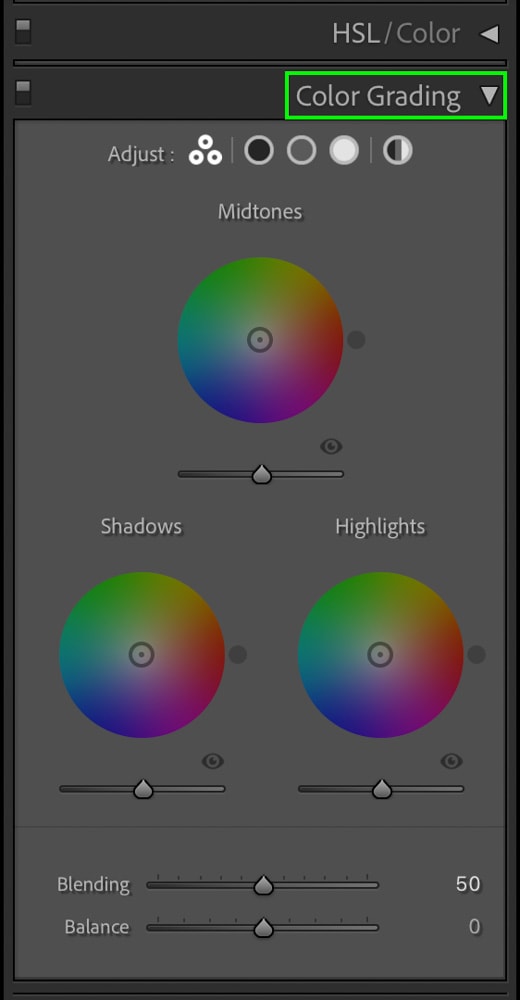
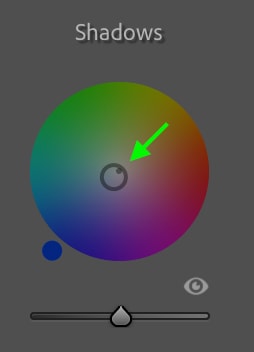
Starting with the Shadows wheel, I’ll click the center point and drag it toward a deep blue color. You’ll want to keep the point close to the center for the most subtle effect, as the farther the point moves toward the edge of the wheel, the more saturated the color will appear.
Next, I’ll move the point in the Highlights wheel toward a purple-ish blue color.
Finally, in the Midtones wheel, I’ll drag the point toward a lighter blue than the shadows wheel.
Now, the whole image should have a more stylized, cool-toned appearance.
Step 6: Reduce Noise
Next, there is an important step you should take that will improve the overall quality and appearance of your nighttime photo. You’ll likely need to keep your ISO high when shooting in low light so you’re sure to get some grain in your image. And when you increase the exposure in post, you’re essentially exposing even more grain in the picture.
Therefore, you’ll need to reduce the noise at some point while editing to avoid having an overly pixelated, noisy image. To reduce the noise, head to the Detail tab, which sits below the Color Grading tab. You’ll see the Noise Reduction adjustments in the lower half of the tab.
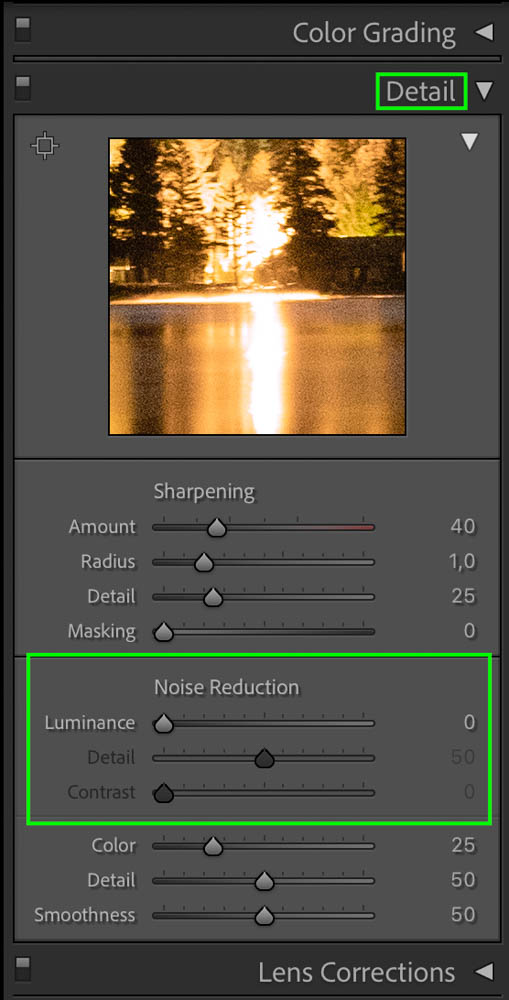
The slider you want to adjust sits next to Luminance. Click the toggle and drag it up to reduce noise in your image.
You want to smooth the grain in the picture, but remember that the effect can blur the details in your photo too much, giving it an unrealistic look, so you don’t want to bring the slider too far up. Somewhere around the 30 mark is best.
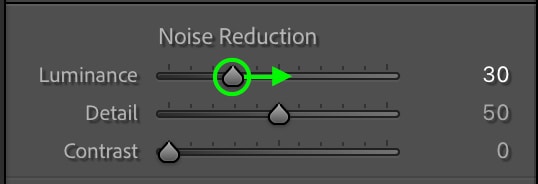
As you can see, there is much less noise than before.
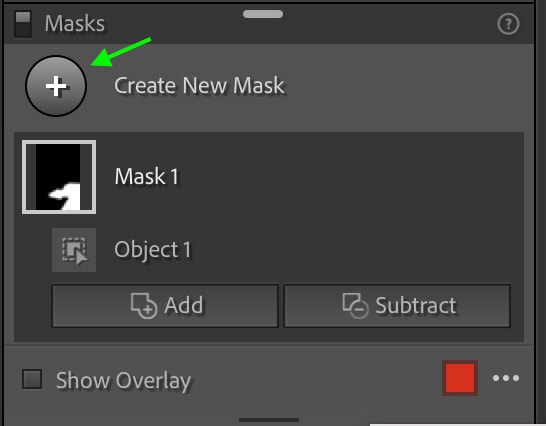
Step 7: Add Masks To Draw Attention To Points Of Interest
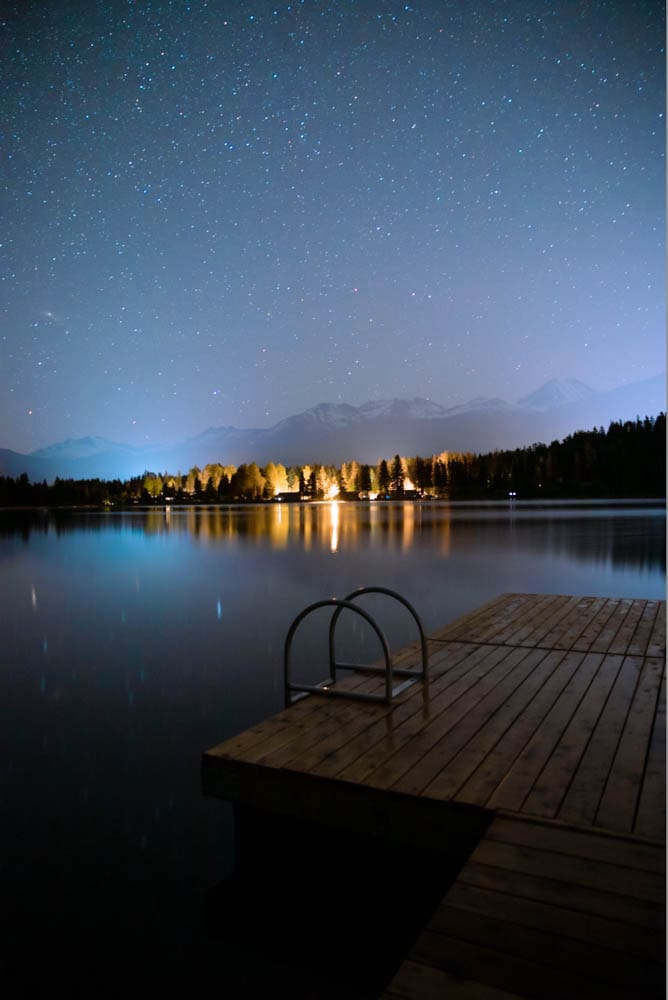
Masking helps make some aspects of a photograph stand out, and night photos are no exception. Using the masking tools can help draw the eye to a specific subject or point of interest. In my photo, I’ll use the masking tool on the dock and brighten it up, so it stands out more.
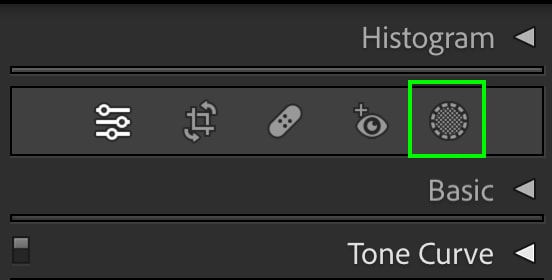
You can find the masking tools by clicking the Masking icon, which sits between the Histogram and Basic tabs.
You’ll see a list of Masking tools to choose from. At this point, the masking tool you use depends entirely on your photo.
If you’d like to highlight an object or the subject in your image, you could use the Objects tool. If you want to highlight an area of the photo, you could use the Brush or one of the Gradient tools. Because I’m highlighting the dock in my image, I’ll use the Objects tool.
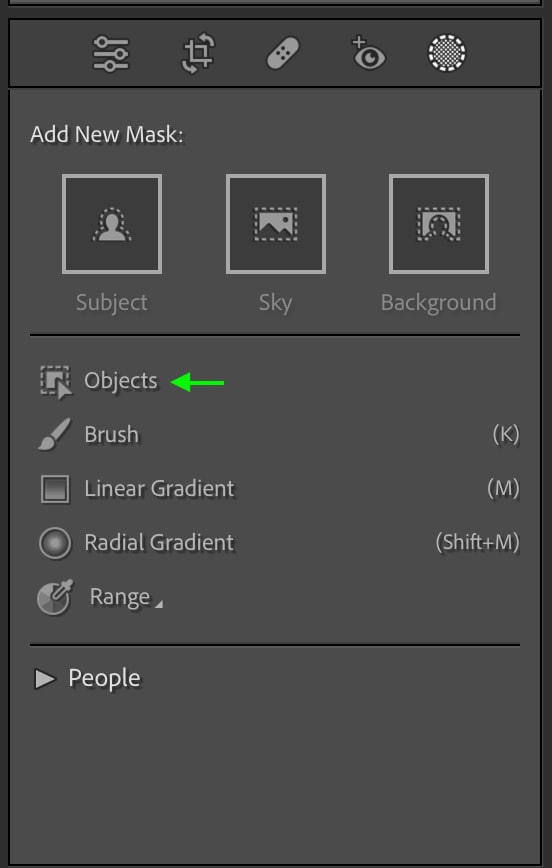
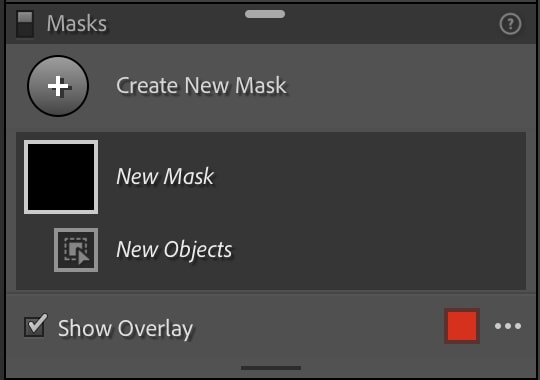
You’ll see the Masks panel appear, with the New Mask listed in the panel. You can return to this panel to add a new mask or edit an existing mask.
You’ll also see a Select Objects area in your panel. I’ll adjust my brush size by dragging the toggle next to the slider and then start painting over the dock.
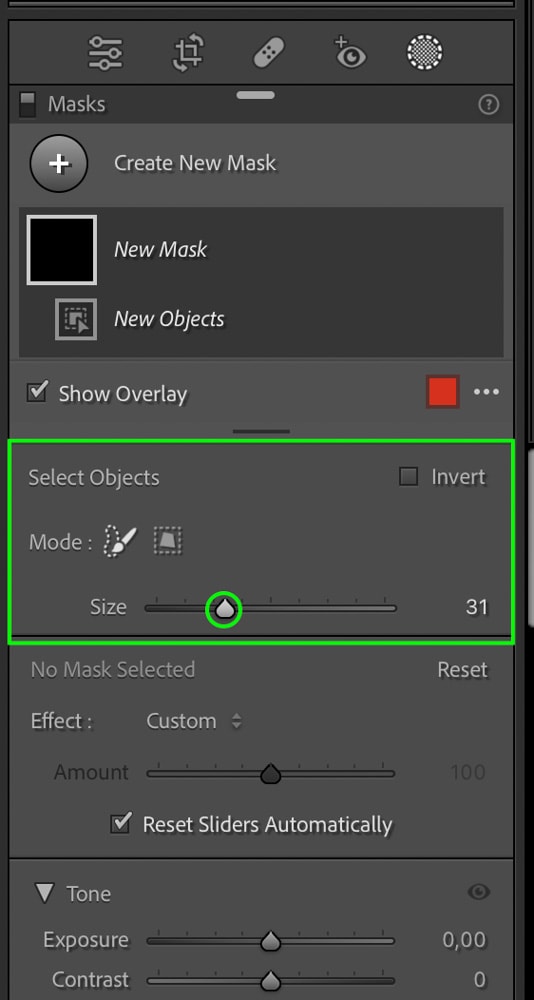
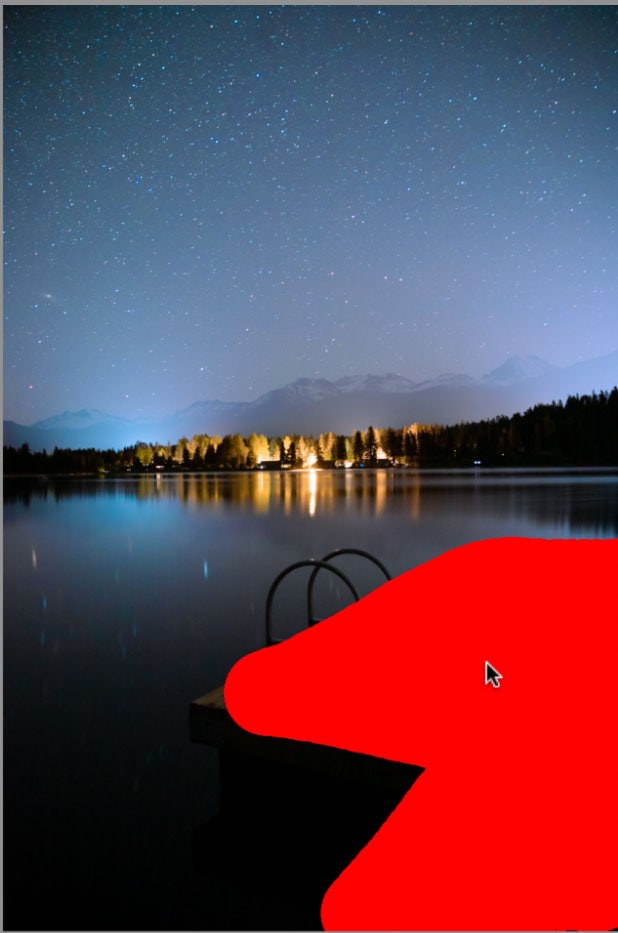
Don’t worry about painting accurately if you’re using the Object tool – the system will detect the object’s boundaries and help ensure the selection is accurate.

From here, I’ll head to the adjustments panel and increase the Exposure and Highlights for this mask, as well as reduce the Blacks to add back some contrast.
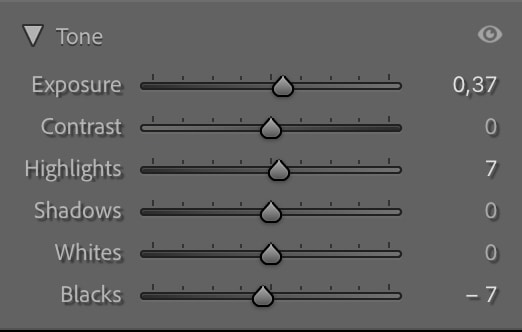
These adjustments help the dock stand out much better in the photo.
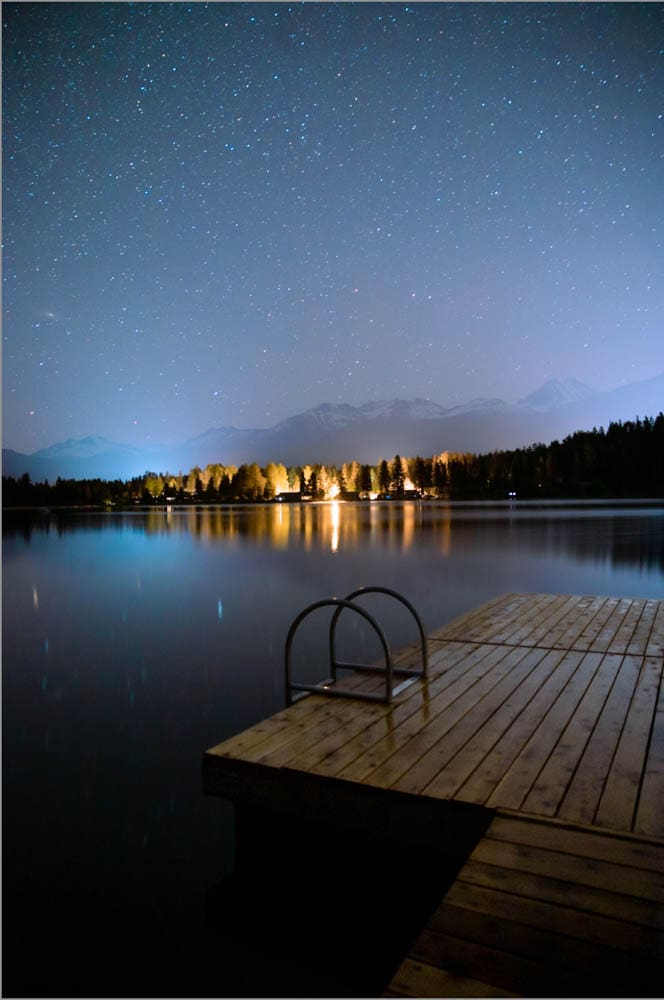
Another way you can use Masking tools to enhance your night photography is to boost the stars in the sky. In the Mask panel, click New Mask and select which mask you want to add from the options. Because I want to make a mask over the sky, I’ll choose Select Sky.
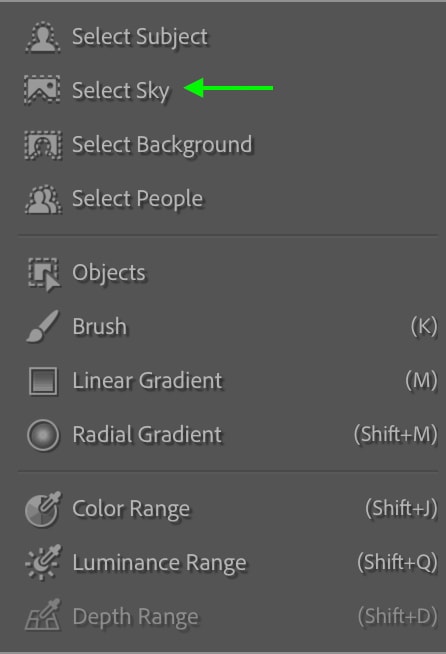
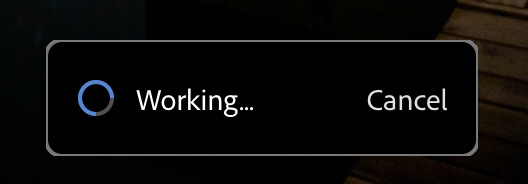
After a moment, Lightroom will automatically select the sky in your image.
To boost the appearance of the stars, I’ll increase the Contrast overall, then reduce the Highlights and increase the Whites to bring out the light in the stars. Finally, I can bring down the Blacks to darken the sky around the stars, adding even more contrast. The result is a sky that pops.
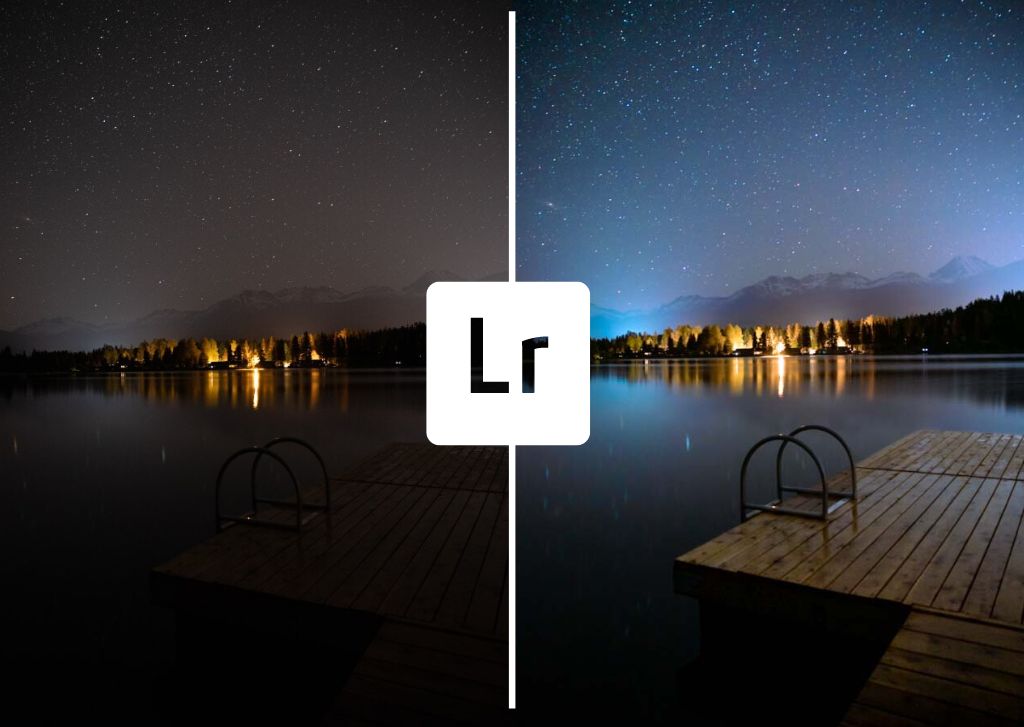
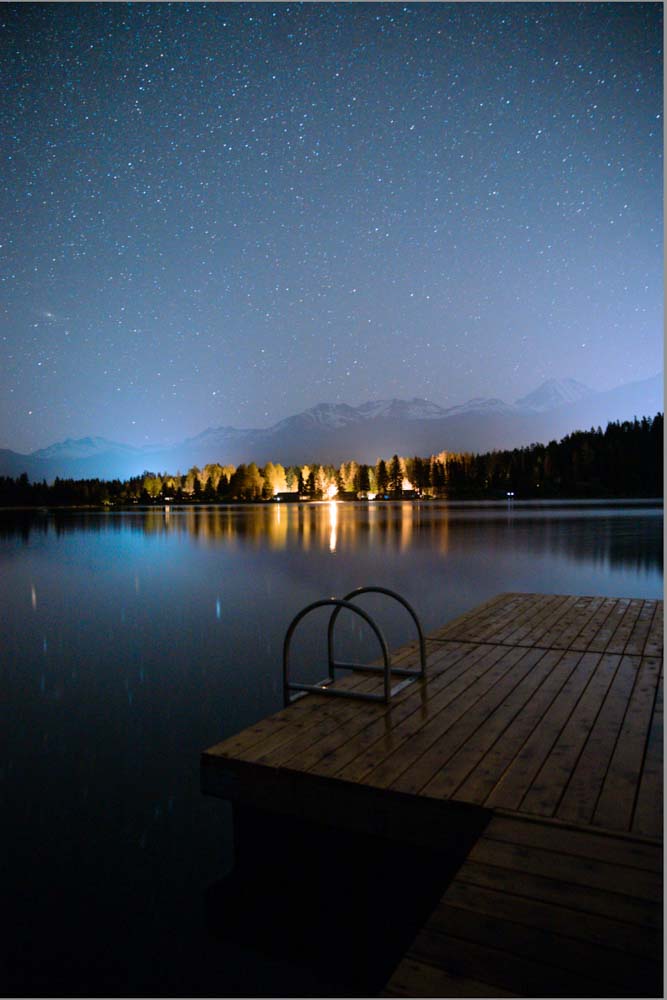
It’s impossible to ignore the improvement when comparing the original image with the final, edited image.
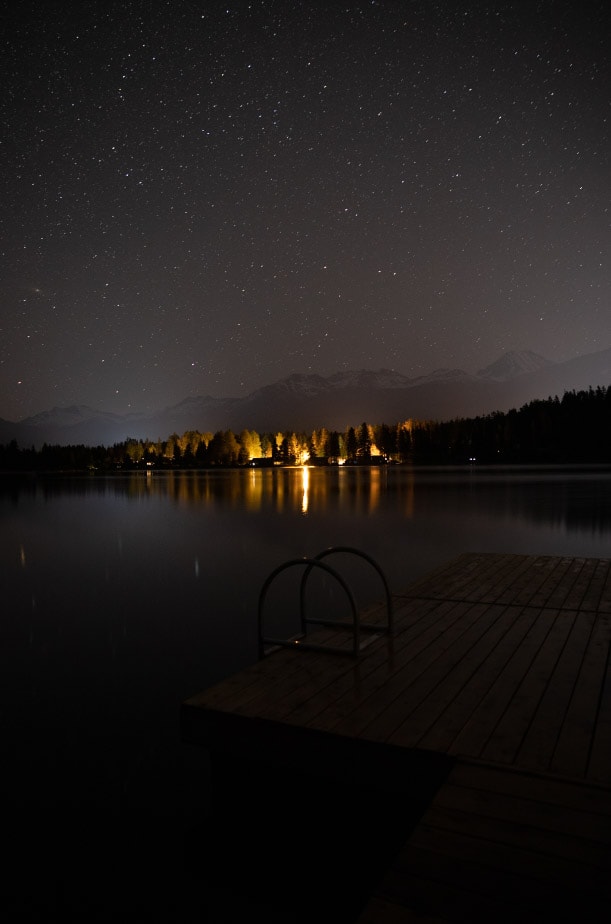
The difference is unmistakable – the edits have brought out much of the image that was too dark before and added an explosion of color and contrast that makes the image more striking. I hope this tutorial has made it easier for you to edit photos taken at night. It only takes a few simple steps in Lightroom to turn your night photography into something truly breathtaking.
Happy Editing!
