
There’s an easy fix if you’ve been trying to create a new text layer in Photoshop, but everything you write is stuck in caps. When this first happened to me, I was equally confused and frustrated until I found the one button that was causing the issue.
When your text is stuck in all caps in Photoshop, it’s likely because the “All Caps” option in the Character Panel is selected. To fix this, go to Window > Character and click on the “TT” icon to allow your text to have both capital and lowercase characters.
Although this is the most common reason, there are other possible reasons for your capitalized text. So let’s break down everything you need to know to fix this problem!
Video Tutorial
How To Fix Text Stuck In Caps In Photoshop
Here are two possible reasons why your text is stuck in all caps and what to do about it.
1. Check Your Font Doesn’t Only Use Capital Letters
One common cause of text being stuck in all caps is that the font type you have used only has uppercase letters.
In most cases, you can see if a font is all caps on its download page on the website where it’s available. If you didn’t check this or forgot to do so, you can always check this information in Photoshop.
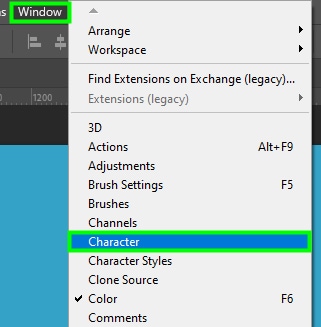
To do this, open the Character panel. If you can’t see the Character panel, go to Window > Character.
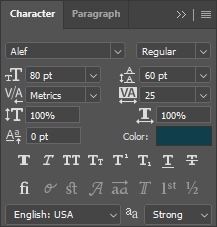
Within the Character panel, you can check whether or not your font is all caps. To help you better understand how it works, I tested two different fonts to see if they have uppercase letters only. For the first test, I used Alef.
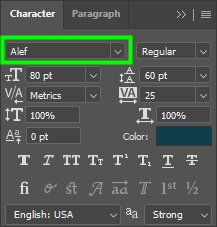
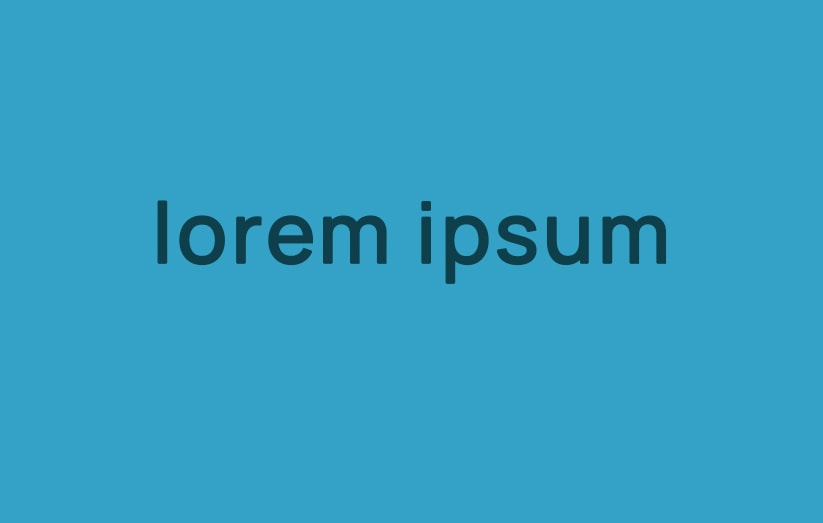
By clicking the font drop-down menu, you can see the font preview. Because the font preview showed both uppercase and lowercase letters, I learned that Alef is not an all-caps font.
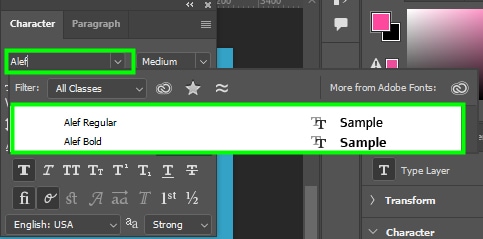
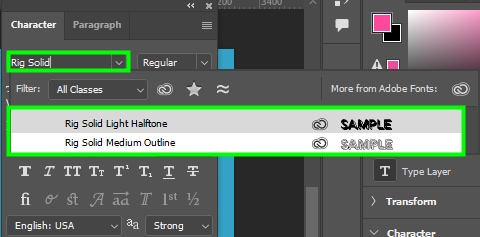
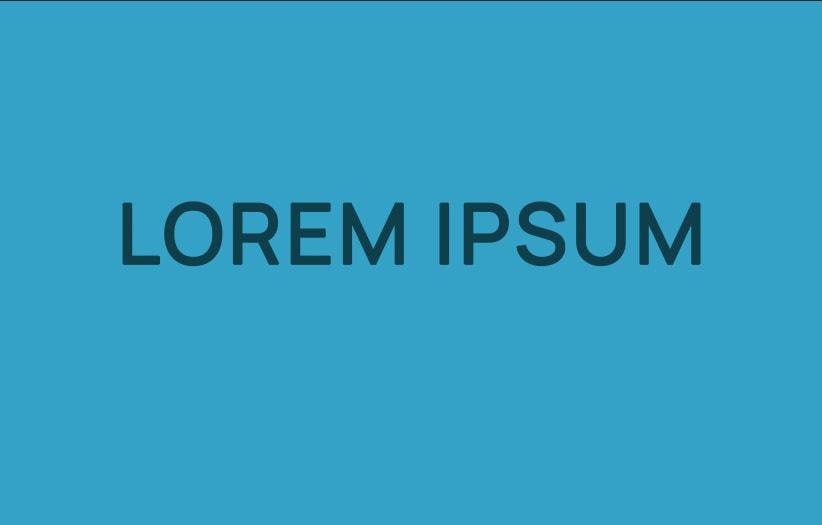
For the second test, I used Rig Solid. The font preview displayed only uppercase letters, indicating that such a font doesn’t include lowercase letters.
If the font you’re using is all caps, you won’t be able to create lowercase text with it.
However, you can try the following: if you downloaded a font from a typeface that includes multiple font types, you can go back to the website where you got the font and see if you can find fonts from the same typeface that contain lowercase letters. Then, you can download these fonts and use them.
But if the font you’re using offers both uppercase and lowercase letters and your text is still uppercased, no matter if you’re using caps lock or not, there may be another reason for your problem.
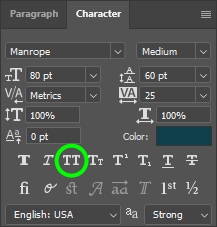
2. Check That The All Caps Option In The Character Panel Is Disabled
Another probable reason Photoshop only lets you type in caps is that the All Caps button is turned on. As the name suggests, such a button makes all characters of your text turn into uppercase letters.
So once you type your text and want to check if the All Caps button is turned on (and, of course, turn it off), select your text by double-clicking it.

After that, open the Character panel by going to Window > Character.
Then, find the TT icon at the bottom of the Character panel.
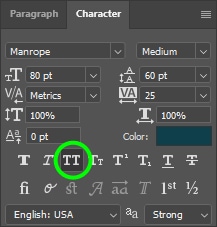
When the TT icon is highlighted, it means it’s activated, and that’s why everything you type in Photoshop is capitalized.
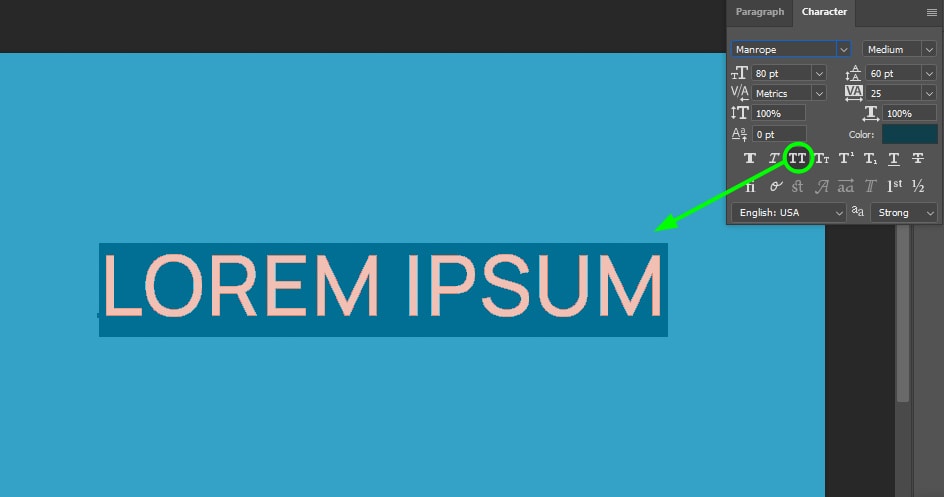
To disable the all caps option, simply click the TT icon.
This will instantly uncapitalize your text, and you will be able to type normally again.

Alternatively, you can use the shortcut Control + Shift + K (Win) or Command + Shift + K (Mac) to convert text to lowercase. Make sure you highlight the text before using this shortcut. You can highlight your text by double-clicking it. This shortcut deactivates All Caps, making your text lowercase.
If your text is still stuck in capital letters after checking these issues, the problem might not be related to Photoshop. Thus, I suggest you try other ways to resolve your issue. For example, you can check if your keyboard driver is up to date since an outdated driver might cause one or more keys to stop working correctly.
Now, if you’re just getting the hang of working with text in Photoshop, be sure to read my ultimate guide to working with text in Photoshop to help set you on the right track!
Happy Editing!


