Arrows are valuable graphic resources. You can use them for many purposes, such as to indicate things in manuals and decorate cards. Luckily, it’s quick and easy to learn how to make an arrow in Photoshop.
It only takes a few clicks to make an arrow in Photoshop. But if you prefer maximum customization, you can create your own arrows from scratch. Thankfully, you will learn how to do all the above in this article.
Video Tutorial
Method 1: Using The Custom Shapes In Photoshop To Make An Arrow
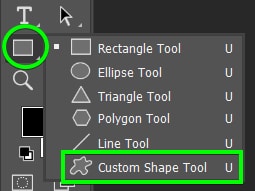
Step 1: Activate The Custom Shape Tool (U)
The easiest way to make an arrow is to find a custom arrow shape by accessing the Legacy Custom Shapes. To do this, select the Custom Shape Tool, found in the Shape Tool fly-out menu.
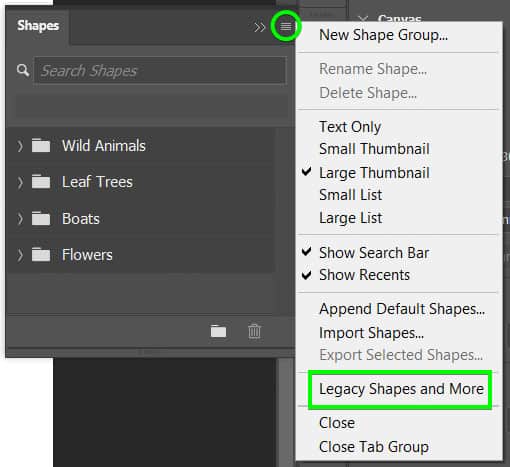
Step 2: Open The Shapes Panel, Click On The Menu, And Select Legacy Shapes And More
Then, open the Shapes Panel (go to Window > Shapes if you don’t see it). Click on the hamburger menu and select Legacy Shapes and More.
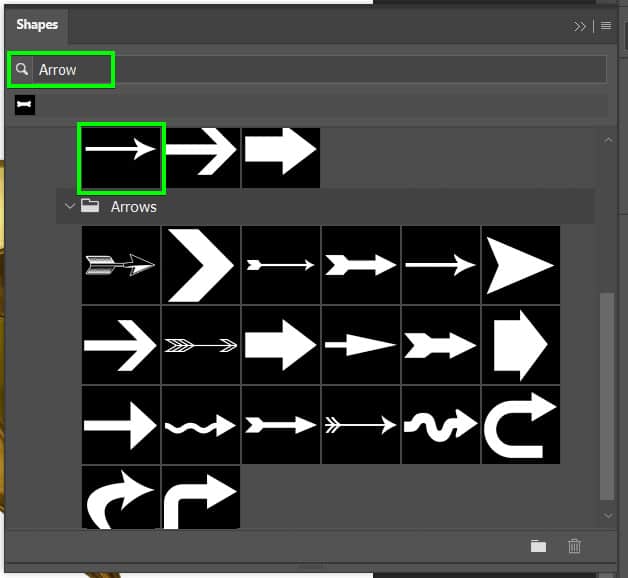
Step 3: Type “Arrow” Into The Search Bar And Select An Arrow Shape
The Legacy Shapes and More folder will appear in the panel at the bottom. Type “Arrow” into the search bar to find all the available arrow shapes and select the one you want to use.
Step 4: Click And Drag On The Canvas To Add The Arrow Shape
Next, click and drag on the page to add the arrow to your design. You can now edit the shape as you would with any other shape in Photoshop.

Method 2: Make An Arrow In Photoshop Using The Line Tool
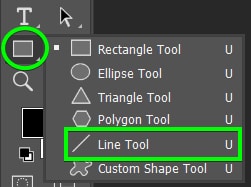
Step 1: Activate The Line Tool (U)
First, click the Line Tool in the Toolbar. Alternatively, press Shift + U until the Line Tool appears in the Toolbar. Next, go to the Options Bar and set the line tool mode to Shape.
Step 2: Open The Shape Settings And Adjust The Arrowhead Settings
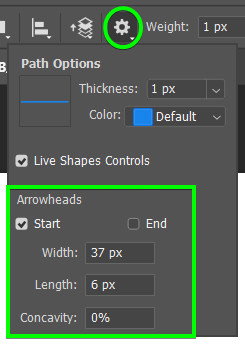
Then, click the gear icon on the right side of the Options Bar. In the Arrowheads section, you will find options to adjust your arrowhead.
You can place an arrowhead at the Start or the End of a straight line. Mark both options if you need a double arrow. You can also change the arrowhead Width. You can adjust the Length of the arrowhead by as many pixels as you want. Increase Concavity to make the arrowhead look curved.
Step 3: Drag On The Canvas To Draw The Arrow
After adjusting all the necessary arrowhead settings, drag out on your canvas to create the arrow.

After adjusting the arrowhead settings, you can customize the arrow as a whole in the Options Bar. You can change the stroke color and adjust the arrow stroke width by moving the stroke width slider. You can also change the arrow width and height in the Width and Height boxes.

Alternatively, push the control points around the arrow up or down to change its height. You can also move the control points to the left or right to alter the width of the arrows.
Method 3: Make An Arrow In Photoshop Using Shapes
Step 1: Activate The Rectangle Tool (U) And Draw A Rectangle
First, select the Rectangle Tool (U) in the Toolbar.
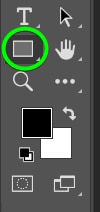
Then, go to the Options bar and set Fill and Stroke to any color you want by clicking the boxes. Next, drag out on the canvas to create a rectangle.


Step 2: Click On The New Layer Icon In The Layers Panel
Now, create a new layer by pressing the little plus sign icon in the Layers Panel.
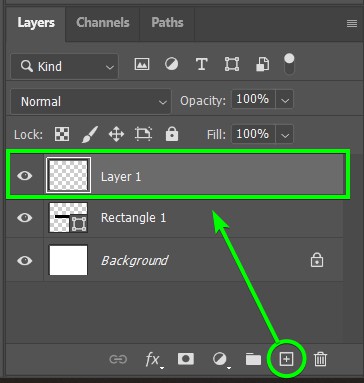
Step 3: Activate The Triangle Tool (U) And Draw A Triangle
With the new layer selected, click the Triangle Tool in the Toolbar. Alternatively, press Shift + U until the triangle icon appears in the Toolbar.
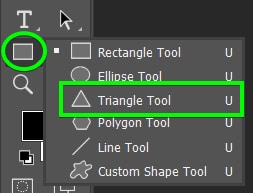
With the Triangle Tool active, drag out on the canvas while holding Shift to create an equilateral triangle. Let go of the mouse when you are satisfied with the size of the triangle.
Step 4: Rotate The Triangle And Attach It To The Rectangle
The triangle will serve as an arrowhead to the arrow. Now, you must assemble the arrow. To do this, drag the triangle as close to the rectangle as possible.

Then, go to the Properties Panel and find the Rotate option. If you can’t see the Properties Panel, go to Window > Properties. Then, select the 90-degree option from the Rotate drop-down menu.
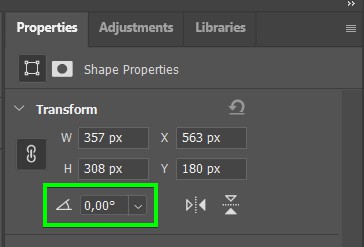
That will rotate the triangle by 90 degrees.
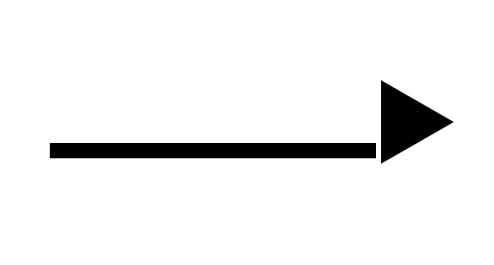
Now, assemble the arrow by dragging the triangle towards the rectangle.

Step 5: Select Both Shape Layers, Right-Click, And Select Merge Shapes
After combining the triangle with the rectangle, you need to turn the shapes into a single arrow that you can save to use later. To do this, select both the rectangle and the triangle layer again by clicking both layers while holding Shift. Then, right-click (Win) or Control + click (Mac) any of the layers and choose Merge Shapes.
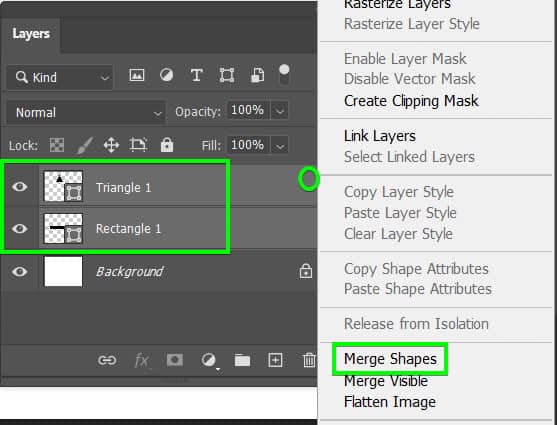
The triangle and the rectangle will occupy the same layer and be successfully converted into an arrow. You can change the name of the resulting layer to keep things more organized.
Step 6: Go To Edit > Define Custom Shape To Save The Shape For Later
Now that you created your arrow, you can save it for later use. To do this, go to Edit > Define Custom Shape.
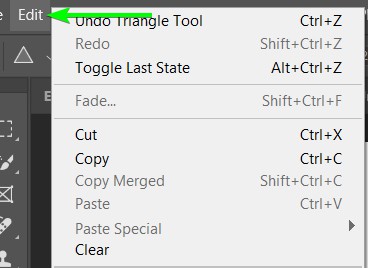
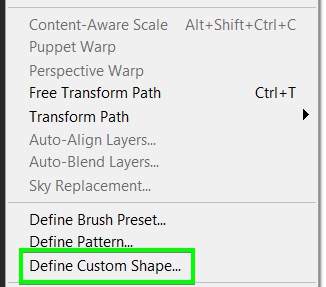
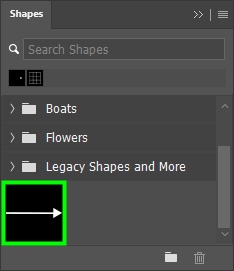
A dialog box will appear for you to name your arrow. Name your new arrow, and click OK to confirm your choice.

You can now access your new shape via the Shapes Panel while the Custom Shape Tool is active.
Where To Find Free Arrow Shapes For Photoshop
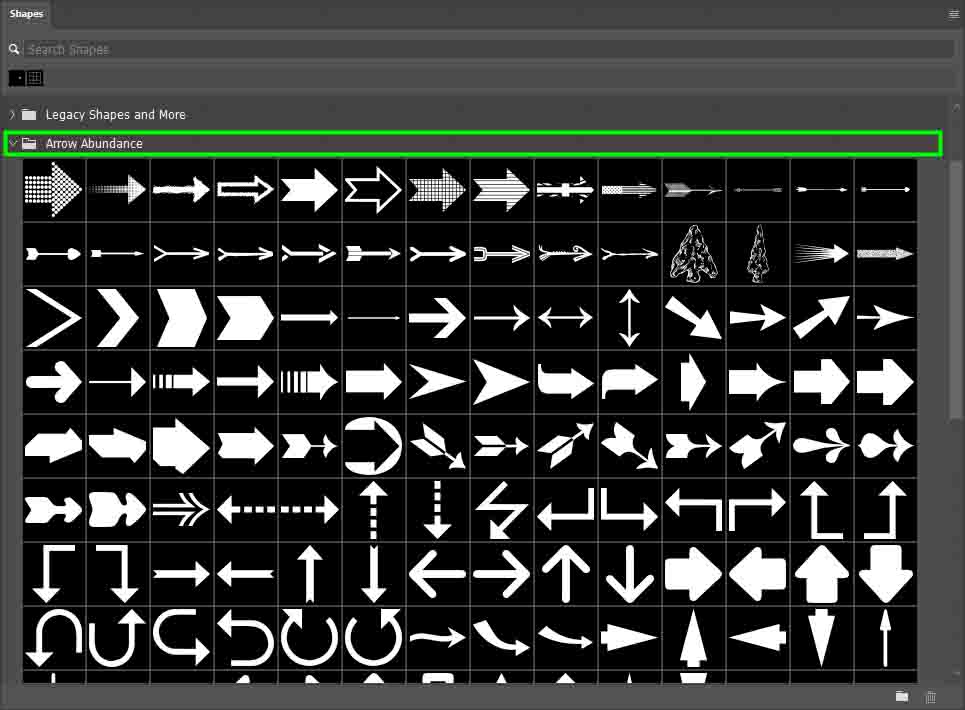
Brusheezy has thousands of excellent free shapes to download. Browsing the website, I found a nice pack of 230 arrow shapes called Abundant Arrow. With this pack, you will have plenty of arrows to use in various projects.
To download the pack, go to the Abundant Arrow page. Then click the blue Download button on the webpage. This folder contains a .CSH file (a Photoshop custom shape file). Double-click the file to install it.
Next time you open Photoshop, your new pack will appear in a folder within the Shapes Panel.
Now, if you want to take this one step further, you can learn how to create curved arrows in Photoshop here.
Happy Editing!


