

When you have a bunch of elements in your design that need similar formatting, grouping them will make your life much easier. In Canva, grouping your elements is as easy as pressing a button and can save you hours of time in the long run.
So, let’s walk through exactly how to do it together in Canva desktop and mobile so you can start working more efficiently on all your future projects.
How To Group In Canva On Desktop
Step 1: Lock The Background And Select The Elements
An optional step, which helps select elements easier is to lock the background. To lock the background, click on your background element(s), then click on the Lock icon in the screen’s top right corner.
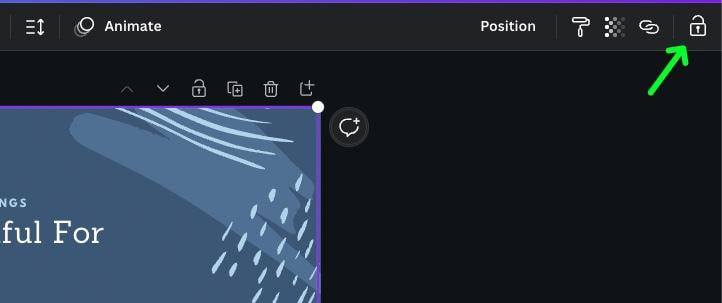
The first time you click the icon, you will enter a mode that only allows you to replace content. Click the Lock icon again to lock the element officially. You will know it’s locked when you see a Locked lock icon.
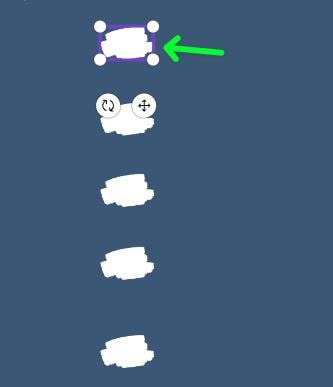
Next, drag your mouse over the elements you wish to group. Doing this will temporarily group the elements you’ve selected.
Note: You can also select elements by clicking on your first element, holding down the Shift Key, then clicking the rest of the elements.

Step 2: Click The Group Button To Group The Elements
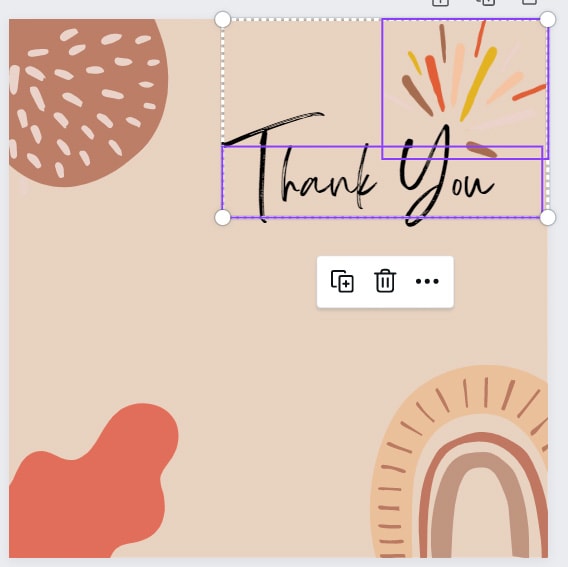
Once you have your elements selected, it’s now time to make your group official. Click on the Group button. This will form all of your selected elements into a single component.
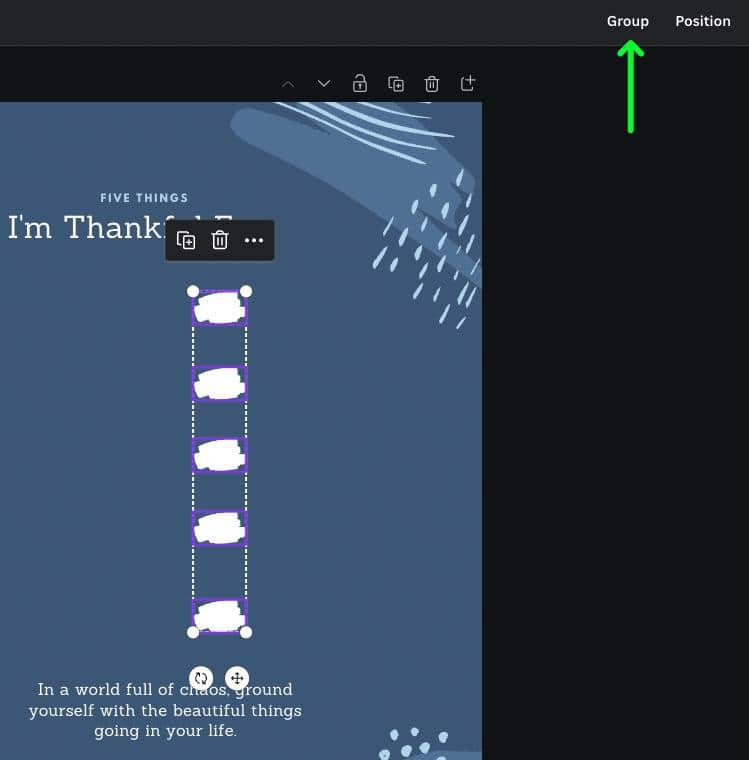
You will know that you did this correctly when you see a purple bounding box surrounding your new group. You can now move this element around your design by selecting any piece of it and dragging it around. You can move this grouped element at any time as you work on your design.

Step 3: Ungroup Elements In Canva By Clicking The Ungroup Button
Grouping your elements doesn’t mean that your elements are glued together forever. You can ungroup your elements at any time with the Ungroup button.
To do this, first, click on any part of your grouped element. You will see one single bounding box around the entire element. Once your element is selected, click on Ungroup in the top right corner of your screen.
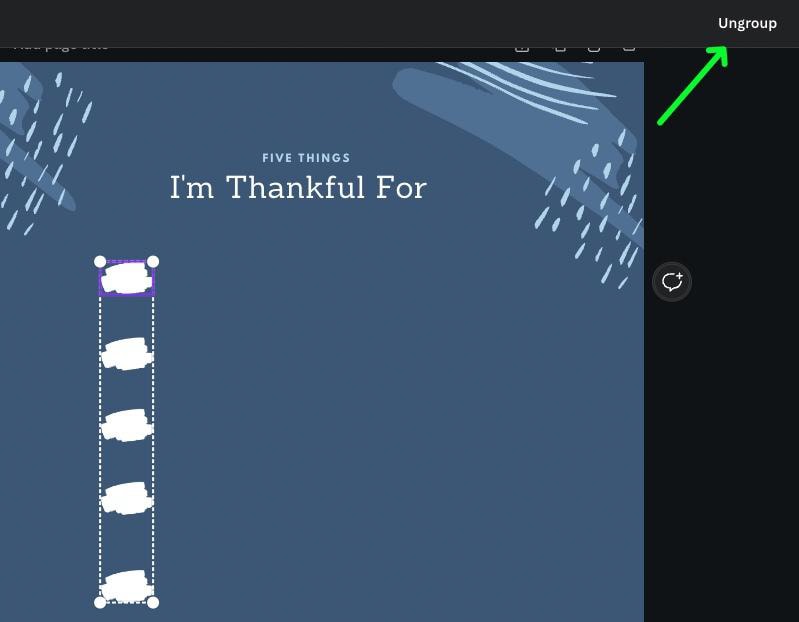
Your grouped element is now successfully ungrouped. To confirm that this worked, click on the first element and then the last element and see if each one has a separate purple bounding box.
How To Temporarily Group Elements In Canva
To temporarily group your elements, drag your mouse over your elements. You will know that your elements are temporarily selected if you see a white bounding box around the elements.
You can now freely move your temporary selection however you wish. Click anywhere else on your canvas to deselect your temporary selection. This is useful for moving multiple things at once without committing to a group that will stay connected.
How To Group & Ungroup In Canva Mobile
Step 1: Select An Element And Tap The Three Dots Menu
Once your elements are in place, tap on one of them and tap the Three Dots that pop up.
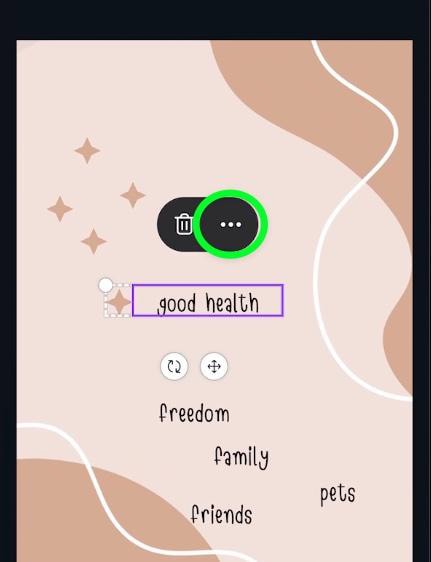
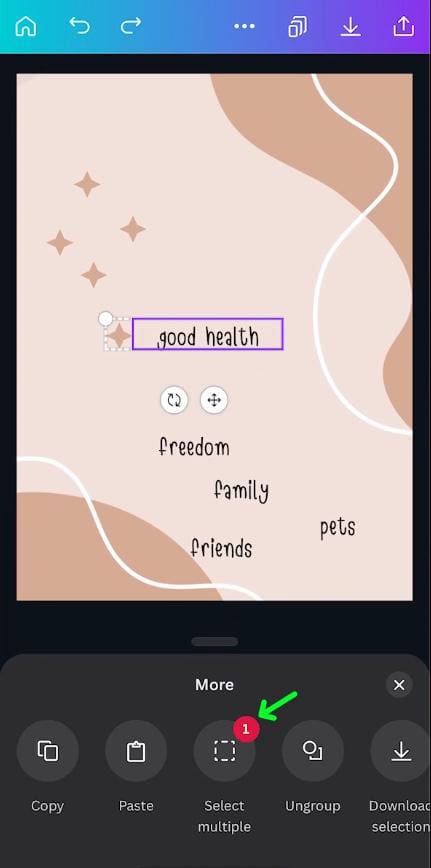
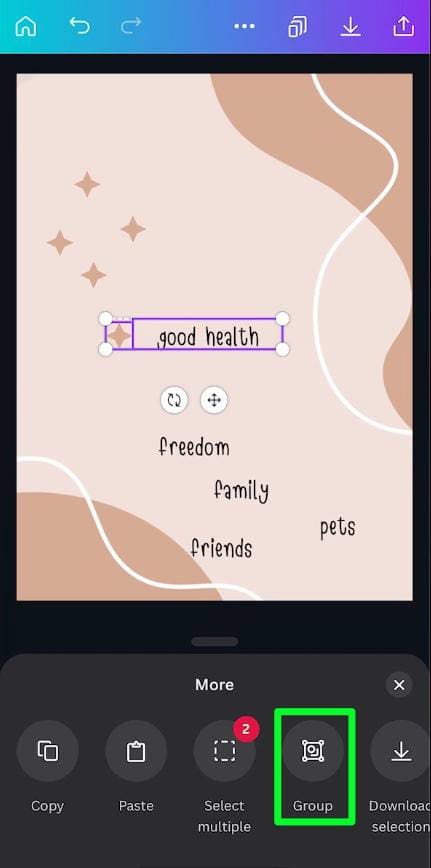
Step 2: Tap On Select Multiple In The Options Bar And Select The Other Elements
In the Options Menu, you can now tap on Select Multiple. You will see the number 1 displayed in a red bubble.
Tap and hold onto the element you want to add to the group. When the element is added, you will see two things:
- A purple bounding box around the newly selected element.
- The number in the red bubble now reflects how many elements you have selected.
Repeat this process as many times as you need to.
Note: This is considered temporarily grouping your elements. This is useful when moving elements elsewhere without making an official group. If you don’t plan on making an official group out of this collection of elements, then skip the next step.

Step 3: Tap On Group In The Options Bar
Once you’re done adding elements to your selection and you want to make your selection an official group, tap on the Group button. This will merge all of the elements into a single component.
You can move your grouped element around your design as much as you need. Repeat this process as needed to form your overall design.
Step 4: Ungroup The Elements Using The Ungroup Button In The Options Bar
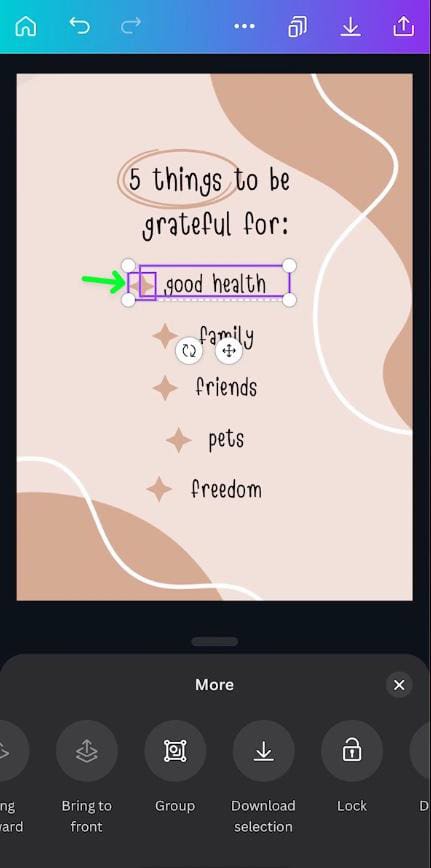
If, for whatever reason, you need to ungroup one or more of your elements, first tap on the grouped element to open the Options Panel below your canvas. Then, tap on Ungroup.
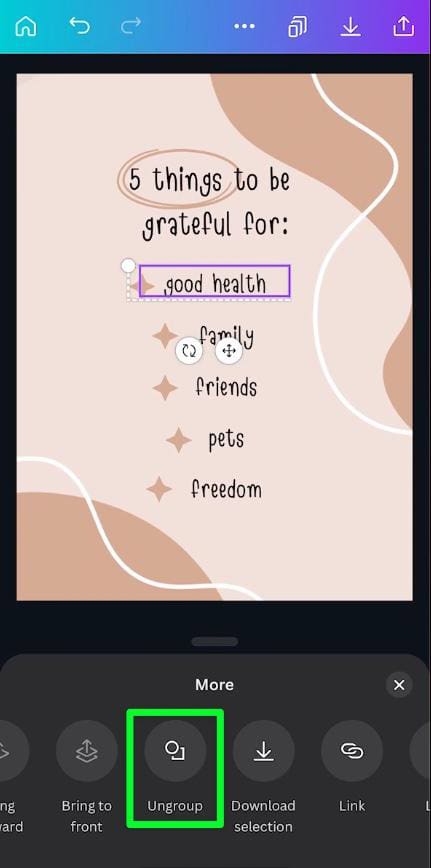
Once you ungroup your element, you will have two separate elements with two separate purple bounding boxes. You can now make any changes that you need to.
Grouping is by far one of the easiest time-saving tactics you can use when working in Canva, and it’s saved me hours of time over the last few years. I hope it can do the same for you now that you know exactly how to do it!
