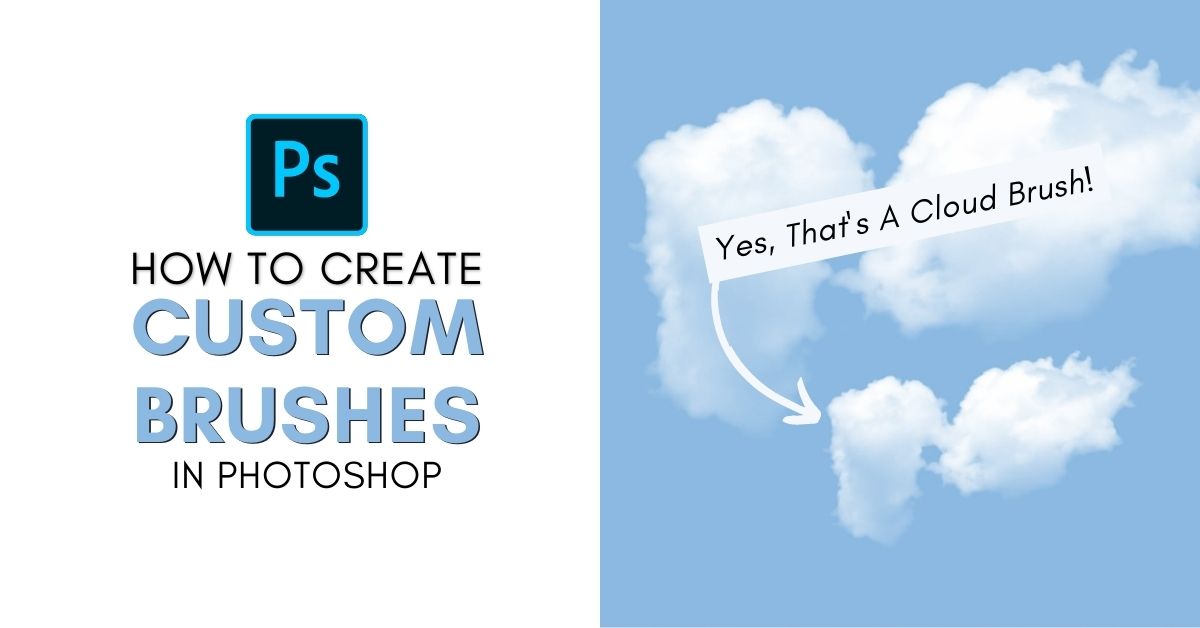

In Photoshop, you can make a custom brush from a series of black shapes or directly from an image. Creating your own brushes is useful for specific projects or can be used to add new elements to a photo, like clouds or waterfalls.
To make a custom brush from scratch in Photoshop, follow these steps:
- Create a new 500×500 300PPI document with a white background
- Add black shapes or brush strokes onto the white canvas
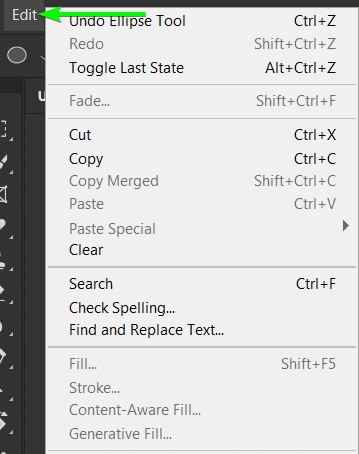
- Go to Edit > Define Brush Preset
- Give your new brush a name
- Edit your brush settings to customize the look
- Begin using your new brush!
Now, although that breaks down the process at a glance, in this tutorial, you’ll learn how to make two different types of custom brushes. The first example will share how to make a custom brush from scratch, while the second will explain how to create a brush from an image in Photoshop.
How To Make A Custom Brush In Photoshop
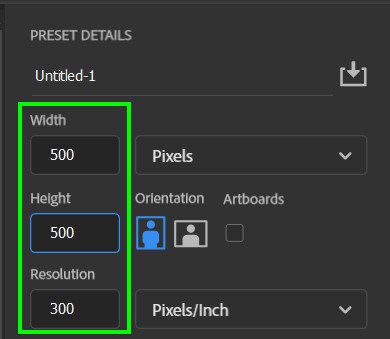
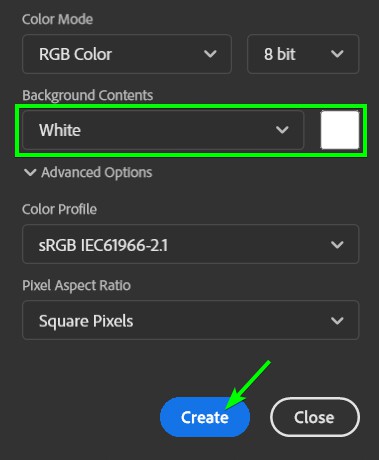
Step 1: Create A New Document At 500 x 500px And 300PPI
To create a high-quality custom brush, you need a white document to begin with, so go to File > New or press Control + N (Win) or Command + N (Mac). In the new document window, set the size to 500 x 500 px and the resolution to 300PPI.
Also, ensure the background is set to white. Click Create to open the document.
Step 2: Add Black Shapes Or Brushstrokes To The Canvas
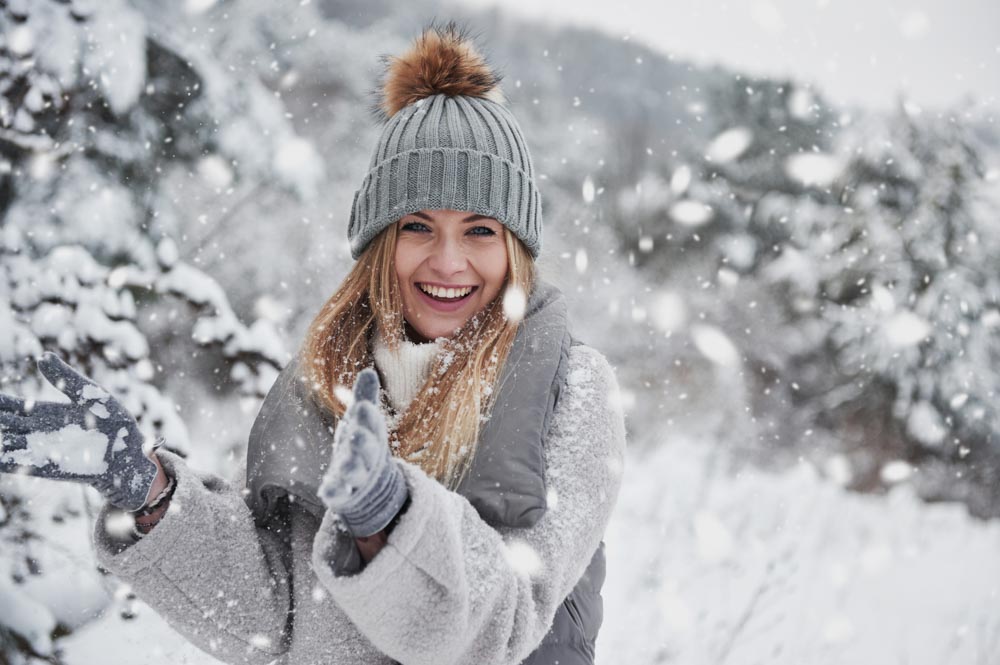
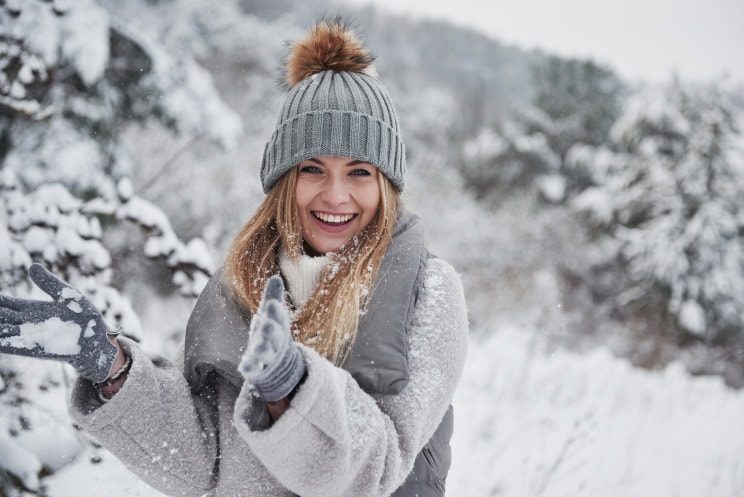
Next, add shapes to the canvas based on how you want the brush to look. My goal is to use the brush to create a snow effect to apply to images. If you’re unfamiliar with creating and editing shapes, refer to this guide on working with shapes. You can also create brush strokes using the Brush Tool (B).
Note: Remember to ensure the shapes or brushstrokes are black on a white background.
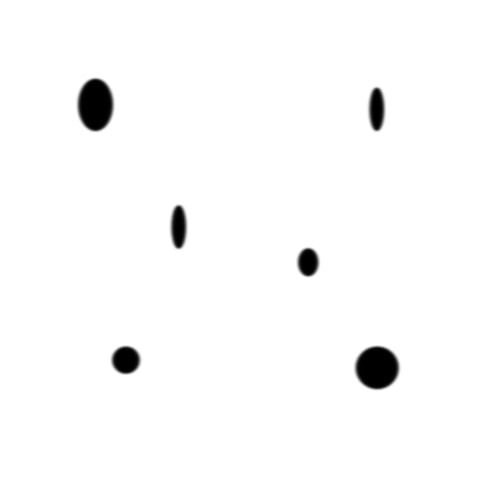
You can also add effects to the shapes. For instance, I applied some effects (gaussian and motion blur) to the shapes for a more realistic effect, but the shapes are black, so they will still work.
Step 3: Go To Edit > Define Brush Preset
Follow the menu path to save your shapes or brushstrokes as a new brush preset.

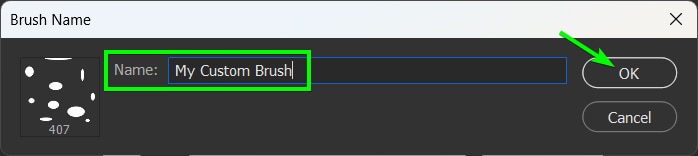
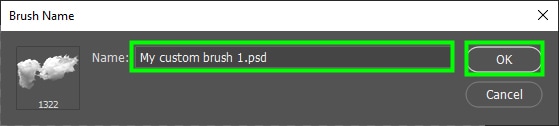
This will open the Brush Name dialog box, where you can name your brush. After naming your brush, click OK to save it.
This will save your brush in Photoshop, and you will be able to access it any time in the future when you open the Brush Panel.
How To Modify & Change Custom Brush Settings
You can access the brush settings in the next section via the Brush Settings panel. Keep the Brush Tool (B) active, your new brush preset selected, and go to Window > Brush Settings to open the panel or press F5 on your keyboard.
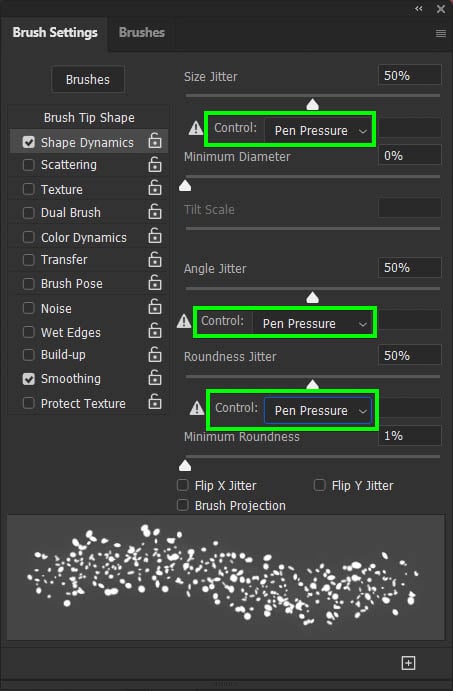
1. Shape Dynamics
The Shape Dynamics section allows you to adjust the Jitter, which determines how scattered or ordered the brush stroke is. You can determine the jitter based on Size, Angle, and Roundness.
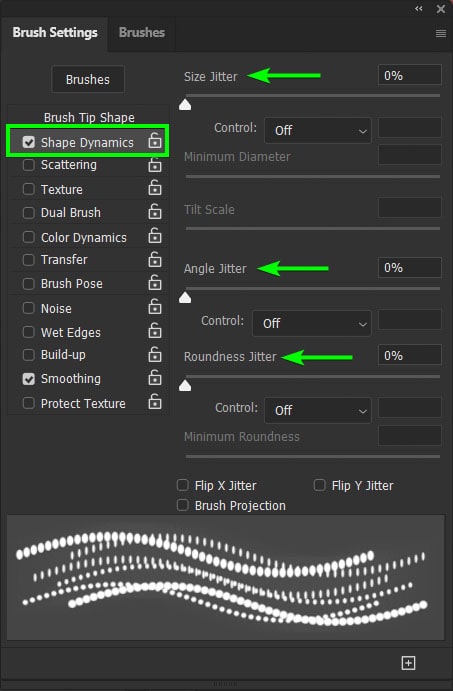
You can also adjust the Control settings for each jitter setting, which is important when using a stylus. These include various settings that affect the jitter based on your pen movements.
2. Spacing
You can change the Brush Spacing at the bottom of the Brush Tip Shape section, by moving the slider to the left or the right.
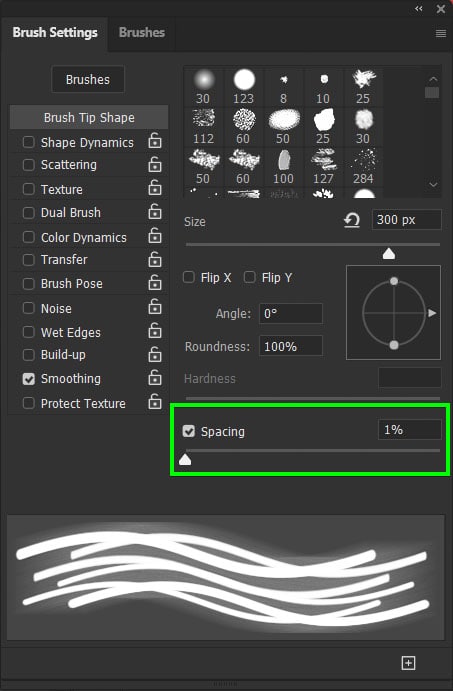
Most custom brushes need adjustments in brush tip spacing. That’s because if you set brush spacing to the default percentage (1%), Photoshop will compress the shape you created into a continuous stroke.
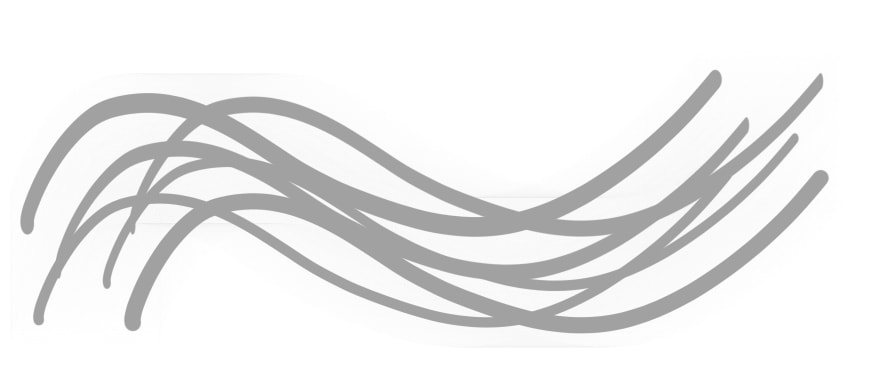
Using brush spacing at 1% is only convenient for specific situations, such as when adding brush strokes to a painting. In these situations, you won’t need to adjust the spacing
But for situations where you need the brush to look more like a stamp, or scattered throughout your image, you will need to adjust the spacing.

3. Scattering
You can change brush scattering on the Scatter slider in the Scattering section of Brush Settings.
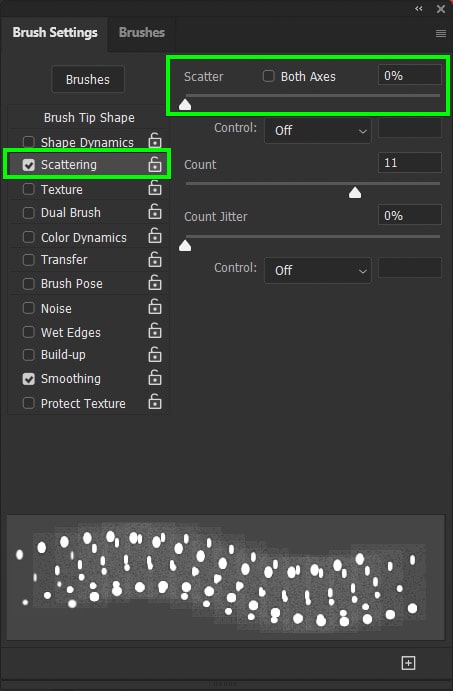
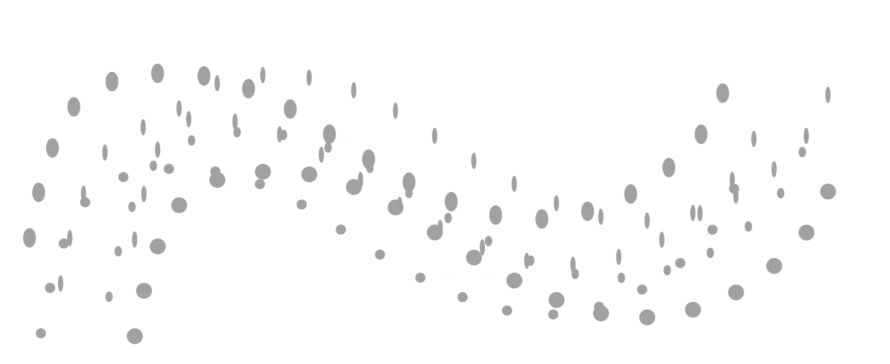
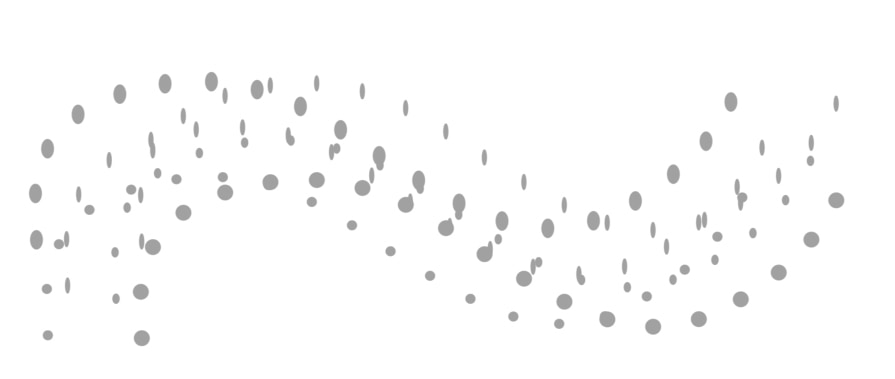
Scatter spreads out the brush tip shapes across the canvas. So, rather than keeping the shapes positioned next to each other, they will be arranged in different locations in relation to one another as you increase the Scatter percentage.
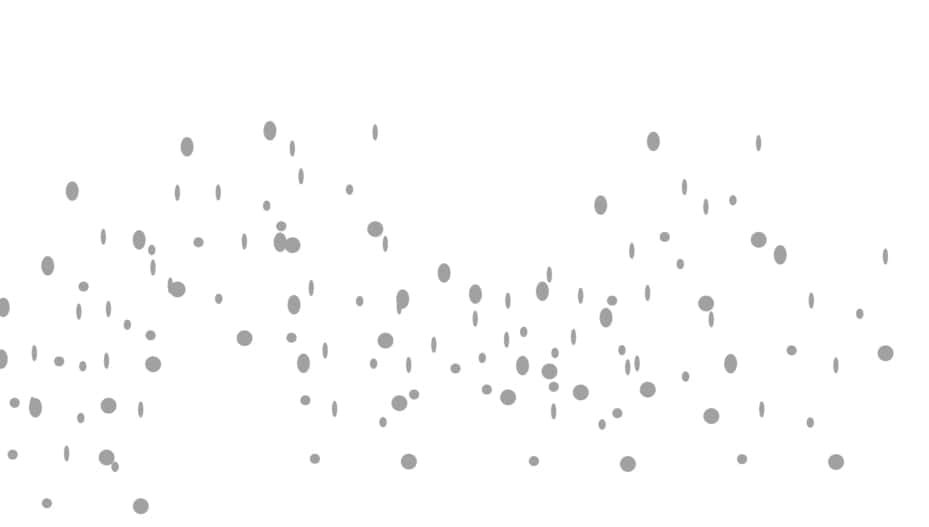
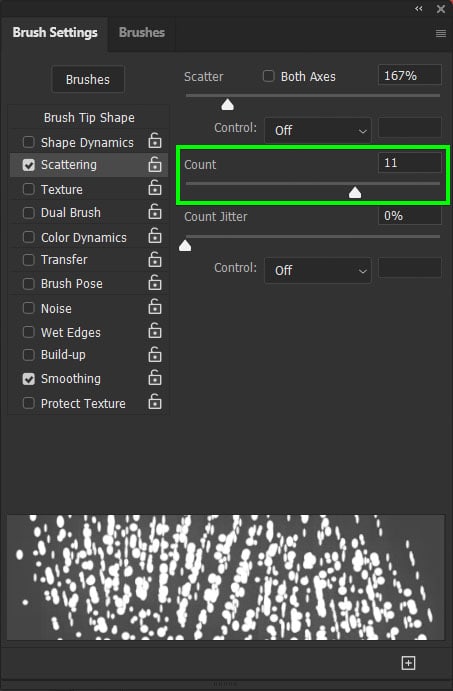
4. Count
You can combine Scatter with Count. The count will increase the frequency your brush is painted, and they will be scattered at the same percentage you determined for the brush tip in the Scatter slider.
There are lots of other settings you can adjust to customize your brush. I’d suggest you play around with them because the possibilities are endless.
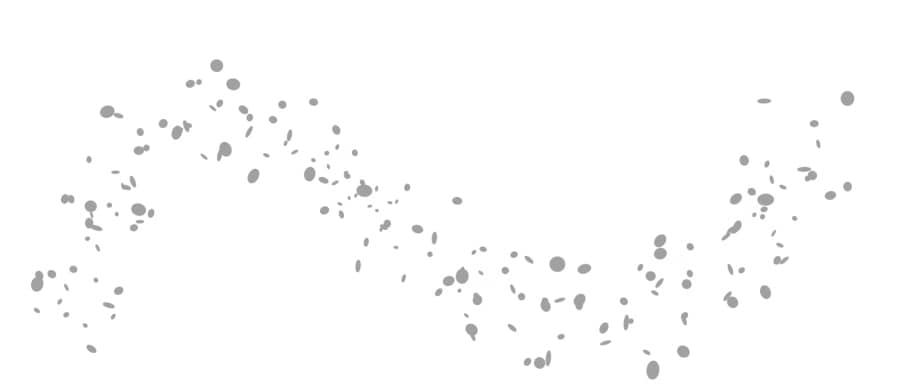
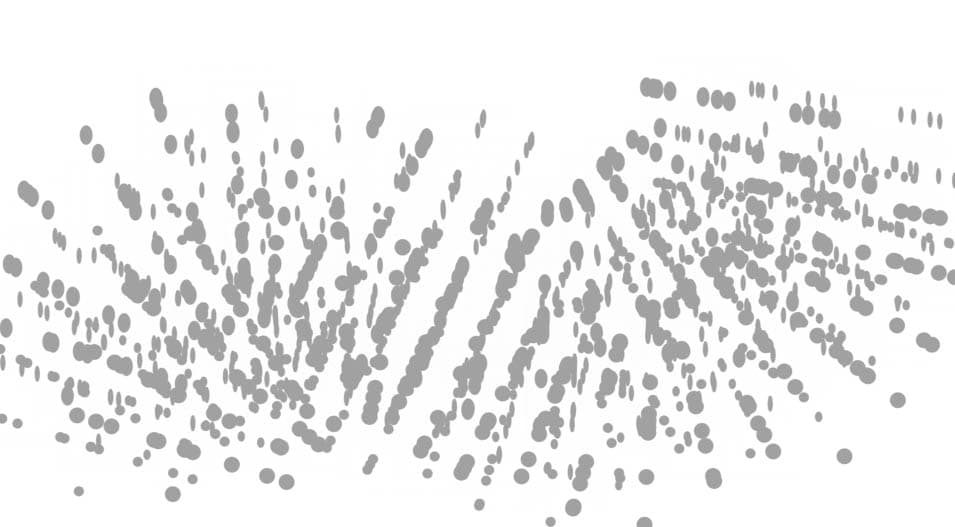
Using shapes to create custom brushes and adjusting their settings is perfect for creating nice effects in illustrations, paintings, and images. See the difference the snow brush above made in the picture below.
How To Turn An Image Into A Brush In Photoshop
As mentioned earlier, the only requirement for an element to be turned into a brush is that the object must be black and the background must be white. Thus, you can manipulate any image to meet these requirements.
Step 1: Select The Channel With The Most Contrast
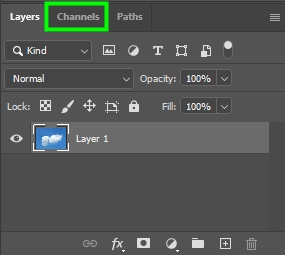
Once you have your image on the canvas, go to the Channels Panel, located beside the Layers Panel.
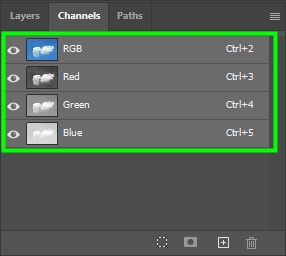
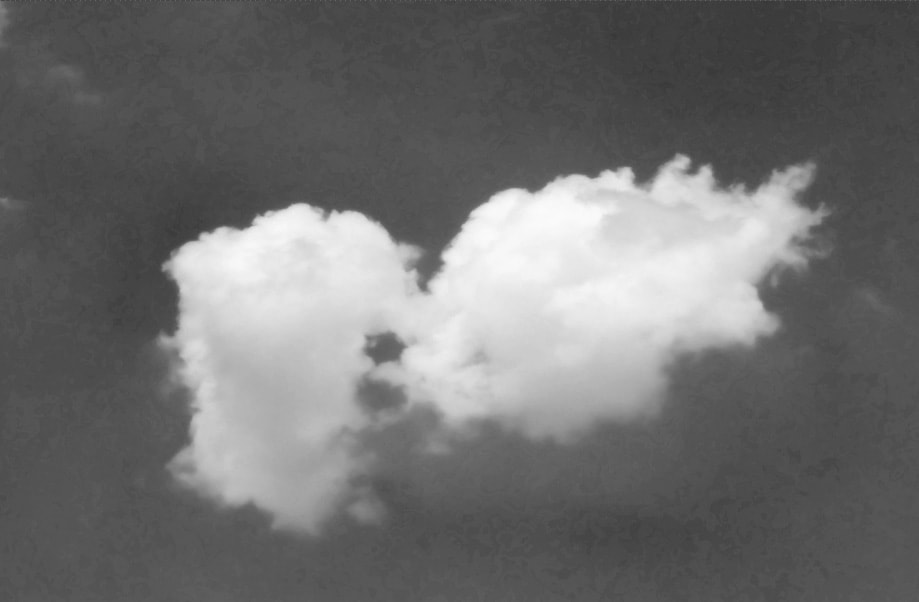
From the channels panel, pick the channel that has the most contrast. In my case, that was the red channel.
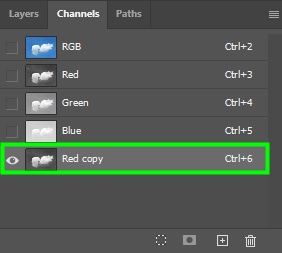
Step 2: Duplicate The Channel
Then, duplicate the chosen layer by dragging it to the plus sign icon at the bottom of the Channels Panel.

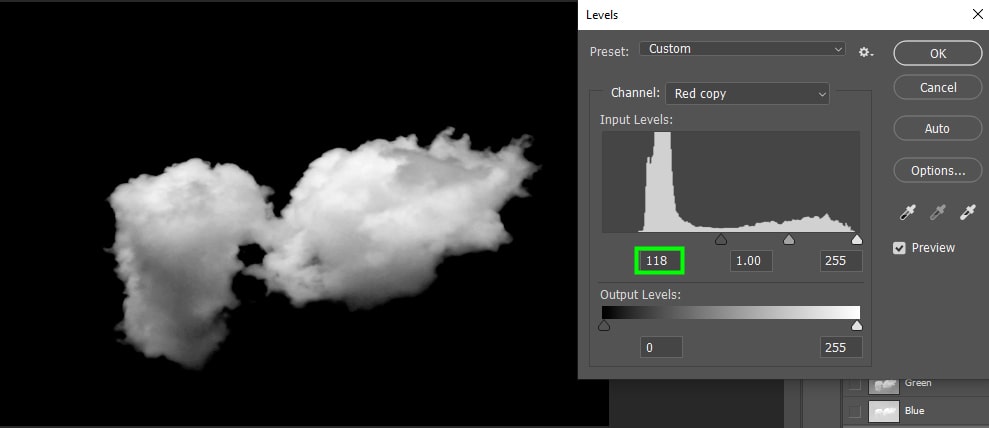
Step 3: Adjust The Channel Using The Levels Adjustment
To adjust your image tones, keep the target channel selected and then go to Image > Adjustments > Levels.
Alternatively, press Control + L (Win) or Command + L (Mac) to bring up the Levels window. In the Levels window, you will need to adjust the Input Levels.
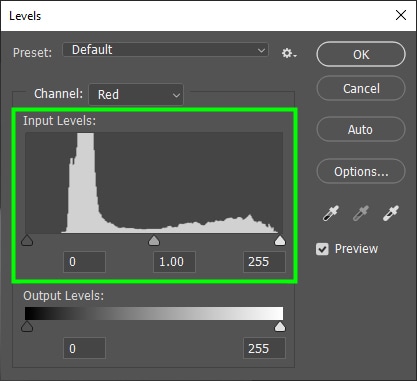
Notice that there are three arrows under the Input Levels histogram. The dark arrow on the left controls the dark pixels. The middle arrow controls the mid-toned pixels, and the white arrow controls the bright pixels. Thus, as we want to make the background black and the object white, we need to adjust the black and white sliders.
Let’s start with the black slider. Move the black slider to the right until the background turns completely black.
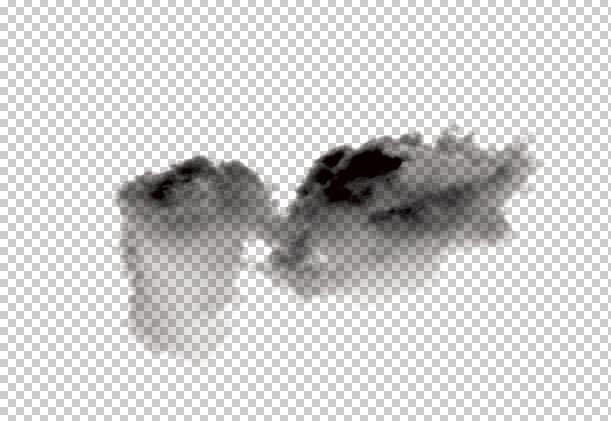
As for the white arrow, move it to the left until your object turns completely white (or almost white).
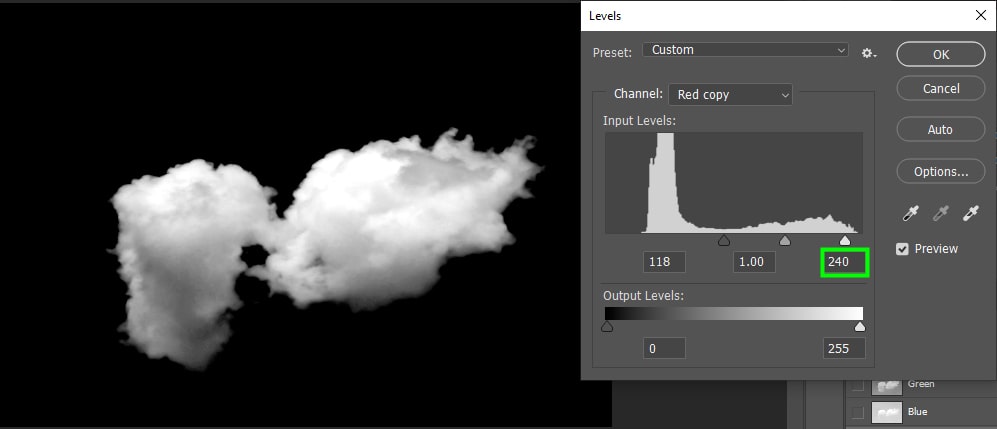
Since I was selecting a cloud, I didn’t mind having some areas of it semi-transparent. That meant, I didn’t need the selection of the cloud to be completely white and could leave a bit of grey with my levels adjustment. If you want to make your object visible, it’s better to make your selection completely white.
Keep in mind that while it’s sometimes a good idea to make some parts of your object transparent, you should never make your background semi-transparent. Thus, make sure your background is completely black.
When you’re done, click OK to close the Levels window.
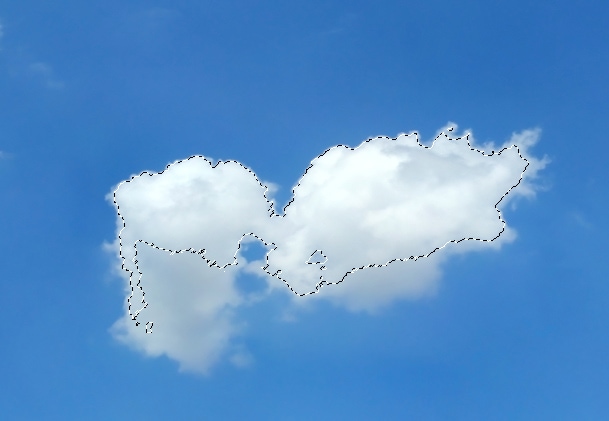
Step 4: Create A Selection Using The Channel
Then, go back to the Channels Panel and click the red channel copy while holding Control (Win) or Command (Mac). This will make a selection of the object.
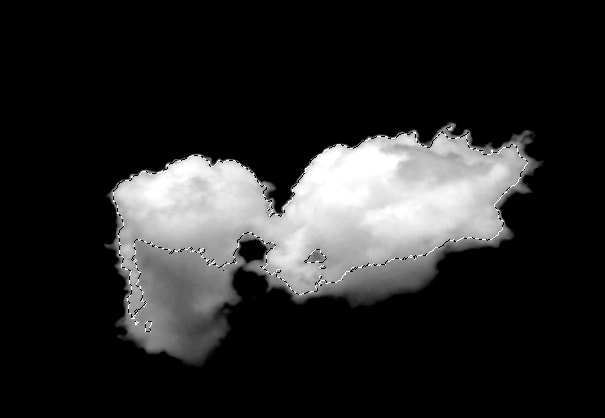
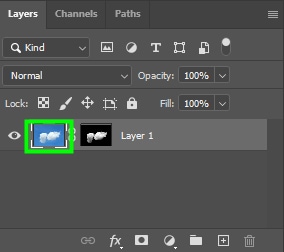
Now, go back to the Layers Panel and click the original image layer. This will transfer the selection to the original image.
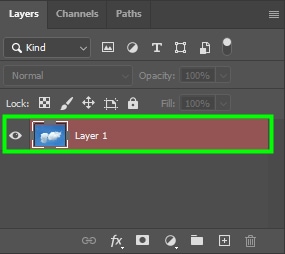
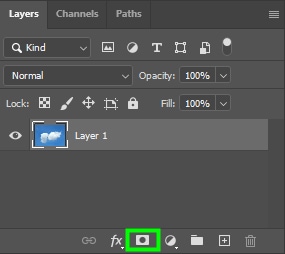
Step 5: Add A Layer Mask To The Selection
Then, click the Layer Mask icon to remove the background.
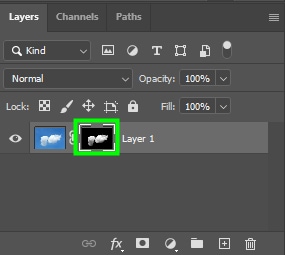
Step 6: Invert The Selection
Now, click the layer thumbnail and then press Control + I (Win) or Command + I (Mac) to invert the selection. This is necessary because you need your object to be filled with black to turn it into a brush.
Step 7: Go To Edit > Define Brush Preset To Save The Brush
Now, save the brush the same way you did when creating a custom brush from shapes.
Then, name your brush if you like, and click OK to save it.
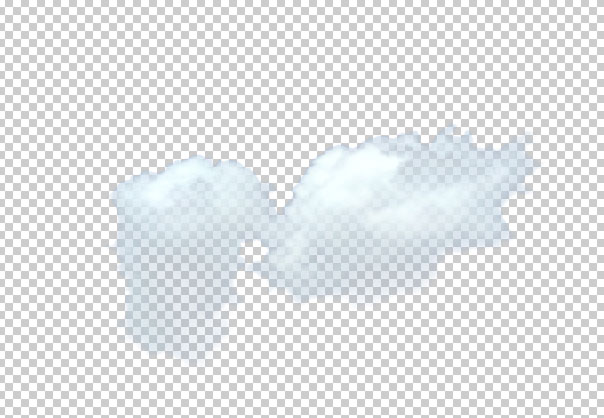
Once you save your brush, you can change its color and size, as shown in the previous section. Then, you can use it as you like. In my case, I changed the brush color to white and changed its size. Then, I placed the brush strokes against a light blue background, and I have a realistic cloud brush!

Creating a custom brush in Photoshop is definitely easier than doing it from an image. However, if you have experience creating selections and removing backgrounds, it’s pretty straightforward to turn image elements into a brush as well.
Now, if you were left feeling a bit confused by the channel selection method I outlined here, don’t worry. I explain the entire process of using channels more in-depth, along with 7 other easy background removal methods in my ultimate guide to removing backgrounds in Photoshop!
Happy Editing!


