
There may come a time when you’ll need to know how to make a star shape in Photoshop. It is quite a common shape that many graphic designers need to use at some point, yet Photoshop does not have a dedicated star shape that you can add to your project.
However, it is quite easy to make a star using the available tools. You’ll just need to work from the Polygon shape, as this will give you everything you need to make a five-pointed star.
Video Tutorial
How To Create A Star In Photoshop
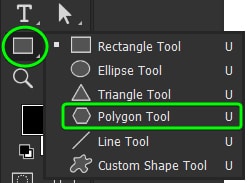
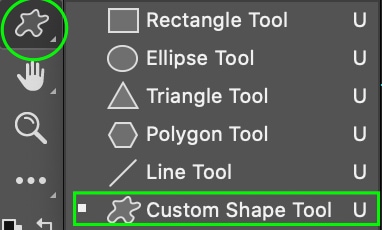
Step 1: Select The Polygon Tool (U)
The first thing you’ll need to do is head to the Polygon Tool (U). You can find this tool within the shape tool along the toolbar. Right-click or click and hold the icon and select the Polygon Tool.
Step 2: Set The Star Ratio In The Settings Panel
Once you’ve selected the Polygon Tool, click on the Settings icon in the Options Bar. Here, you’ll see a few different settings, including the star ratio percentage. Set the Star Ratio percentage to determine how thick or thin the star will be.
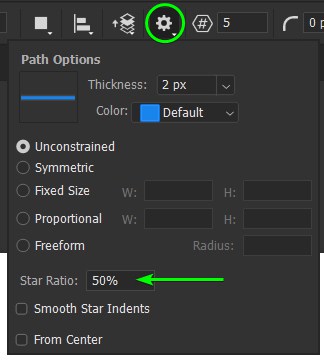
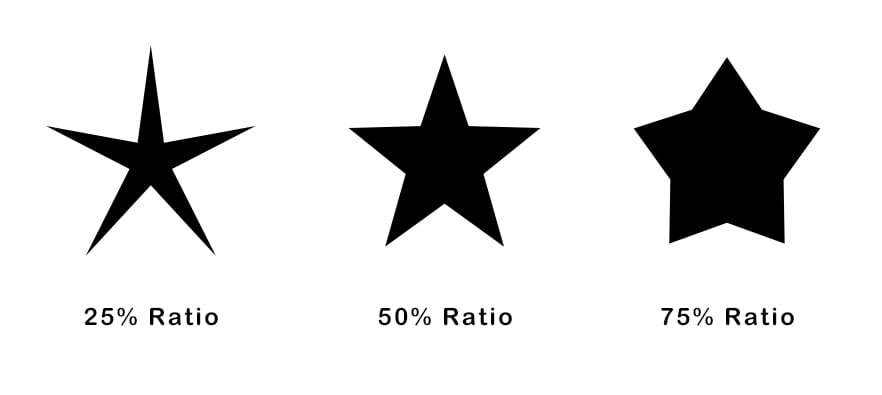
The ratio setting will change the width of the points in the star. A higher ratio, like 75%, will give you a chunkier star, while a lower ratio, such as 25%, will give you a star with very thin rays.
Step 3: Set The Number Of Points For The Star
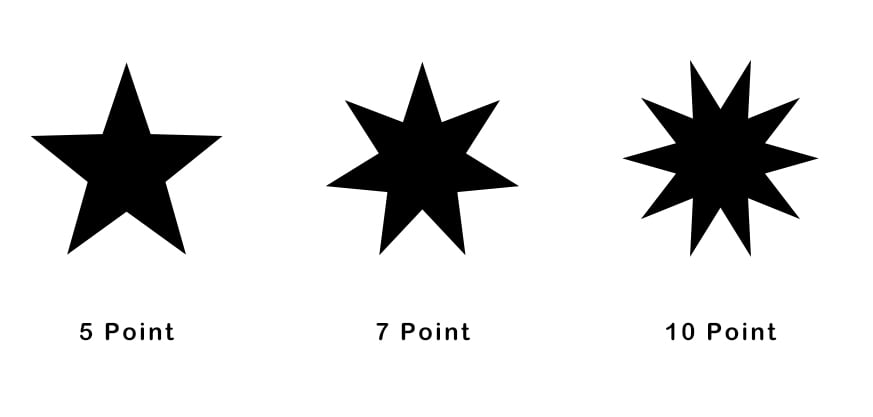
You can also edit the number of points your star will have. You can change the number of points by entering the number you’d like in the box next to the settings icon. For this example, I will create a 5-point star.

When you create the star, it will have the same number of points you entered. This allows you to create a star with as many sides as you want for a wide array of purposes.
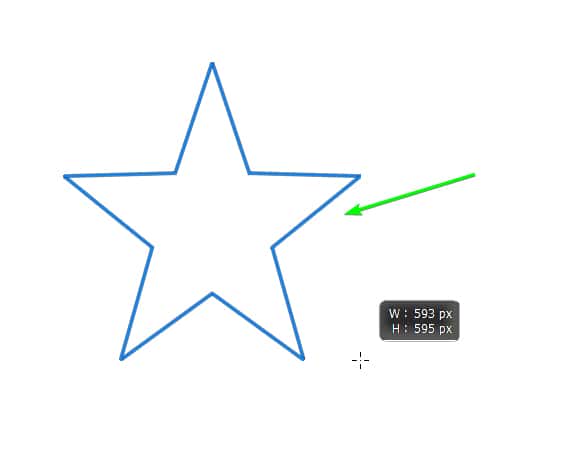
Step 4: Drag Out To Create A Star
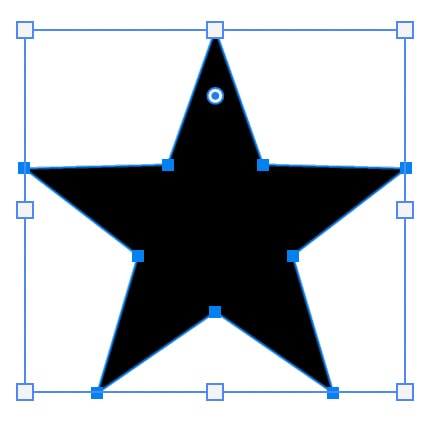
Now, you can drag your cursor on the document to create a star with five sides. If you want to make a perfectly symmetrical star so your star isn’t too wide or too tall, you can hold the Shift key while dragging your cursor.
If you want to resize the star, you can drag any square toggles surrounding a selected star.
Step 5: Change The Color Of Your Star
You can change the fill of your stars by clicking the Fill box in the Options bar. This will bring up the Fill panel.
Here, you can select which type of fill you’d like your star to have — the first icon from the left is No Fill and will leave your star transparent against the layer behind it; the next shows Solid Colors to fill your star; the next lets you create a Gradient to fill your star; the last lets you use a Pattern.
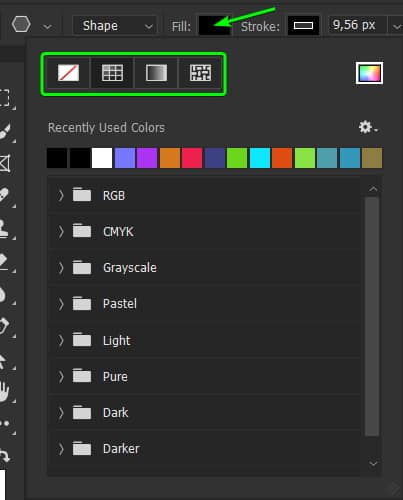
If you don’t want an outline around the star, set the Stroke Color to Transparent in the Options Bar.

Set your desired Fill and Stroke colors, and your selected star will change as you work.

How To Save Your Star As A Custom Shape
Step 1: Select Your Shape And Go To Edit > Define Custom Shape
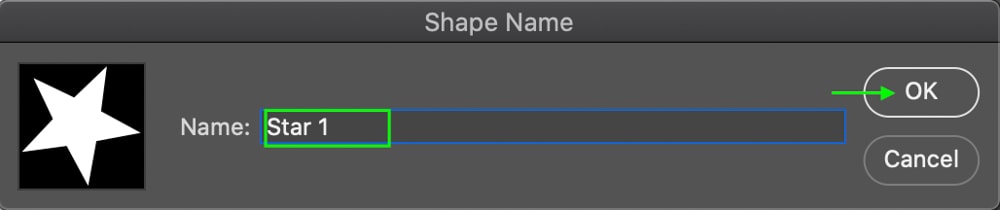
First, select the shape you want to save and head to Edit > Define Custom Shape. This will bring up the Custom Shape window. Here, you can type in a name for your shape that will help you find it later. Click OK to save the shape as a new Custom Shape when you’re finished.
Step 2: Access The Custom Shape Tool (U)
When you’d like to access the shape in the future, you can head to the Shape Tool and hold the cursor to select the Custom Shape Tool (U).
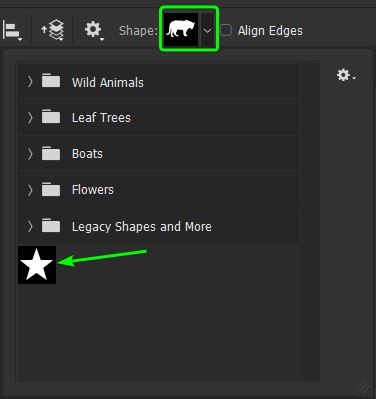
Step 3: Open The Custom Shape Options
In the Options Bar, find the Custom Shape icon and click the drop-down arrow to open the panel. Here, you’ll see some shapes that come with Photoshop, and below those are your custom shapes. Find your star shape and click to add it to your document.
Step 4: Drag Out On The Canvas To Create The Custom Shape
Once you have selected your saved custom shape, click and drag it out on the canvas to add your new shape to the document.
You can create and save as many different kinds of stars to use again in various projects, and you can always access your custom shapes in this panel. Creating and saving shapes for later use is a great way to optimize your workflow. To learn more about creating and editing shapes, check out my ultimate guide to the Shape Tools in Photoshop.


