
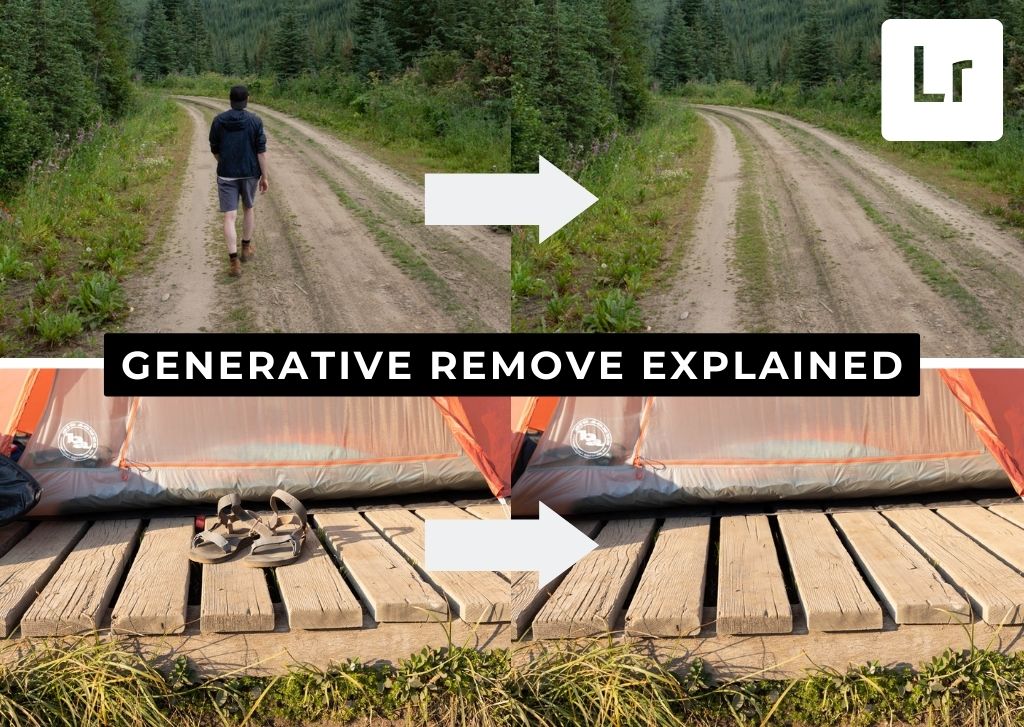

Yesterday Adobe released a huge new update to Lightroom called Generative Remove. This feature drastically improves the object removal capabilities of the program. However, there are some drawbacks.
What Is Generative Remove In Lightroom?
Generative Remove is a new feature found within the Remove Tool in Lightroom. Rather than sampling pixels from your photo to cover an unwanted object, Lightroom uses Adobe Firefly to render a new AI image to cover the selected area.
This feature is available in all versions of Lightroom, including Lightroom Classic, Lightroom CC, and Lightroom Mobile (Paid Version Only).
For those familiar with Generative Fill inside if Photoshop, this feature works very similarly. The primary difference is that you cannot prompt the AI generation inside of Lightroom like you can in Photoshop.
This feature gives Lightroom the ability to remove larger and more complex distractions from your photos. Offering edits that were previously reserved for Photoshop, this tool will transform the workflow of many photographers.


How To Use Generative Remove In Lightroom
I will outline this process using Adobe Lightroom Classic. Similar steps apply in Lightroom CC and Lightroom Mobile.
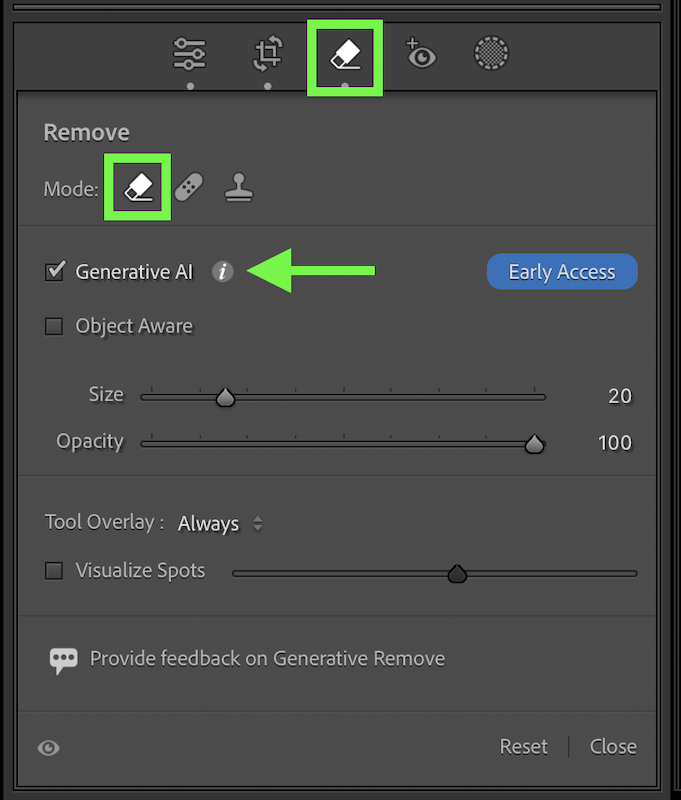
Step 1: Access The Remove Tool & Enable Generative AI
Within the Develop Module, click on the Remove icon, and choose the Remove Tool. From the panel that appears, check Generative AI to enable this new feature.
Step 2: Brush Over The Area You Want To Remove
Ensuring your opacity is set to 100%, paint over the object you want to remove from the photo. For the best result, leave some breathing room around the edge of the object. That way the AI can better match to the surrounding areas.
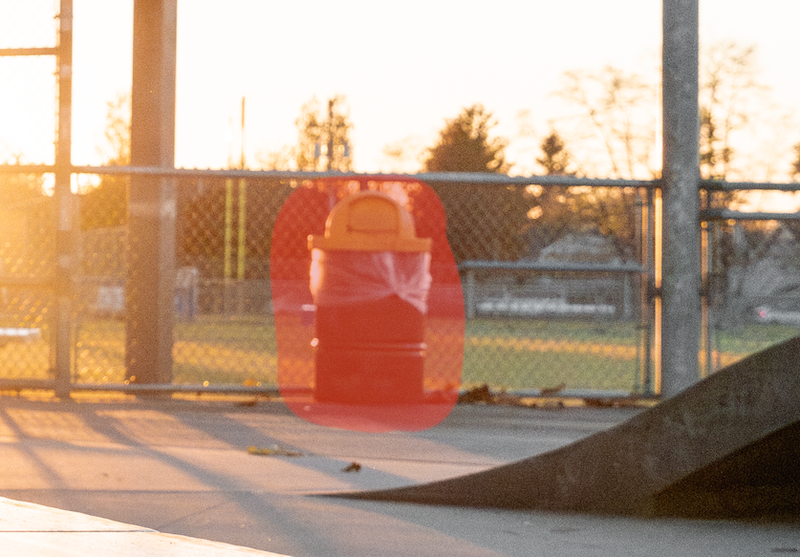
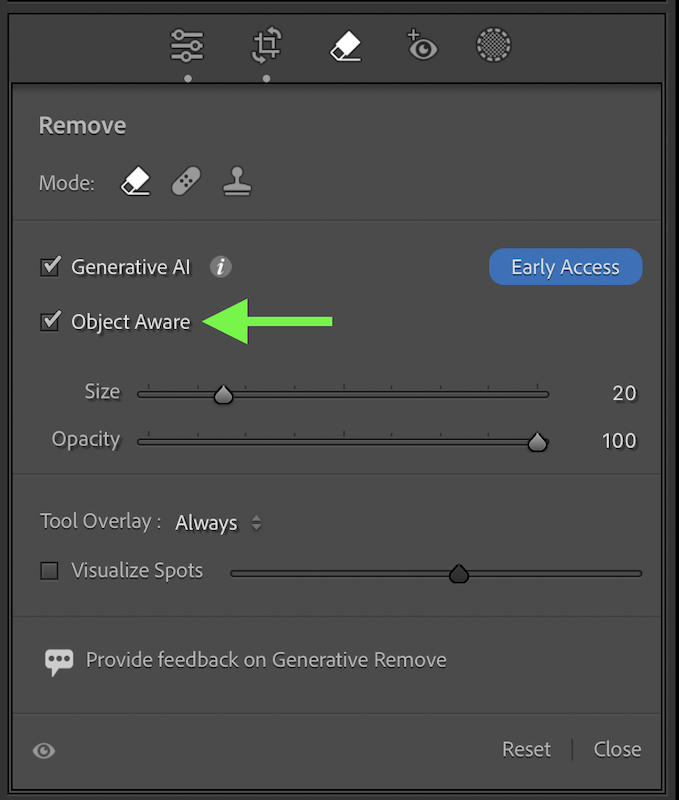
You can further improve your selected area by enable Object Aware in the Remove Panel. This will automatically detect objects within the selected area and refine your selection (indicated by the red highlight) accordingly.
The Object Aware setting works best around clearly defined objects you want to remove. For example, I would recommend enabling this feature when removing a person or a single object from a photo. Disabling this feature tends to work better for less defined objects in your photos.
Step 3: Refine Your Mask & Click Apply
After your initial mask adjustment, use the refine options to refine the selected area as necessary.
Remember that anything covered by the red highlight will be removed.
Click Apply to begin the AI generation.

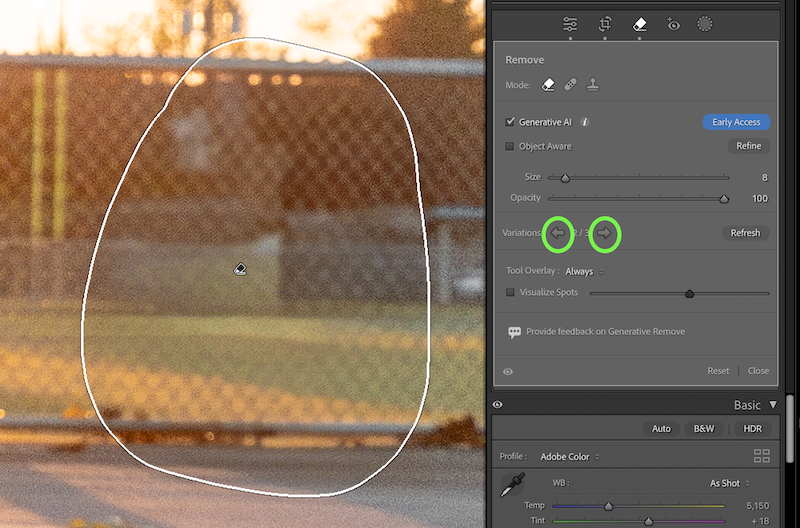
Step 4: Choose The Generative Remove Variation
After the AI generation is loaded, the masked area will be removed and replaced with your AI rendering. In many cases, the first result won’t look perfect so you can cycle between 3 variations.
Within the Remove Panel, click the arrows beside the Variations option. This will cycle between the three options you have to choose from.
Step 5: Refresh The Variations (Optional)
When all three of the variations aren’t usable, you can create three new variations by clicking Refresh.
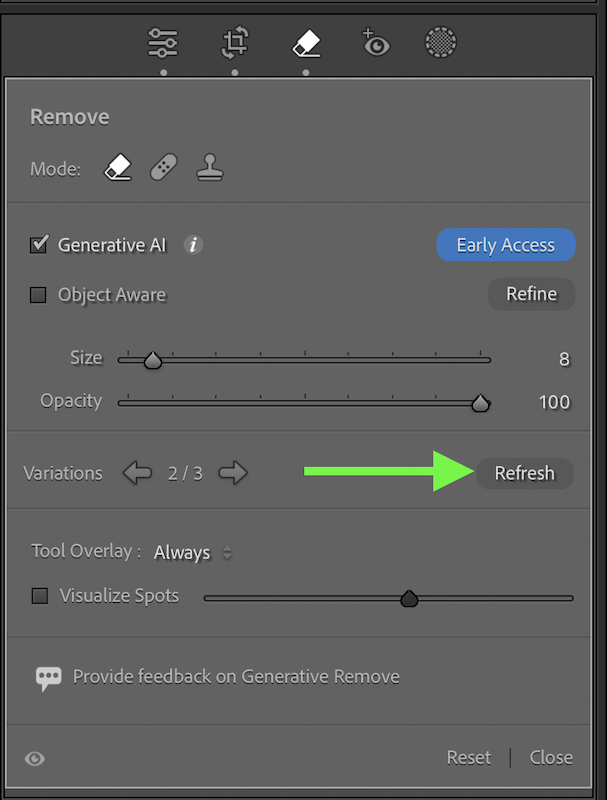
This will render three new AI generations to choose from. These can be cycled through using the same arrows in Step 4.


How To Access Your Generative Remove Variations Later In Your Workflow
If you complete your removal adjustment, but change your mind on a particular adjustment, you might be surprised that your 3 variations are gone within the Remove Panel. This is only because you haven’t selected the adjustment you want to re-edit.
By clicking on the existing Remove mask from before, you’ll regain access to the three variations you left previously. You can cycle and refresh these variations as normal from here.
The Downside To Generative Remove In Lightroom
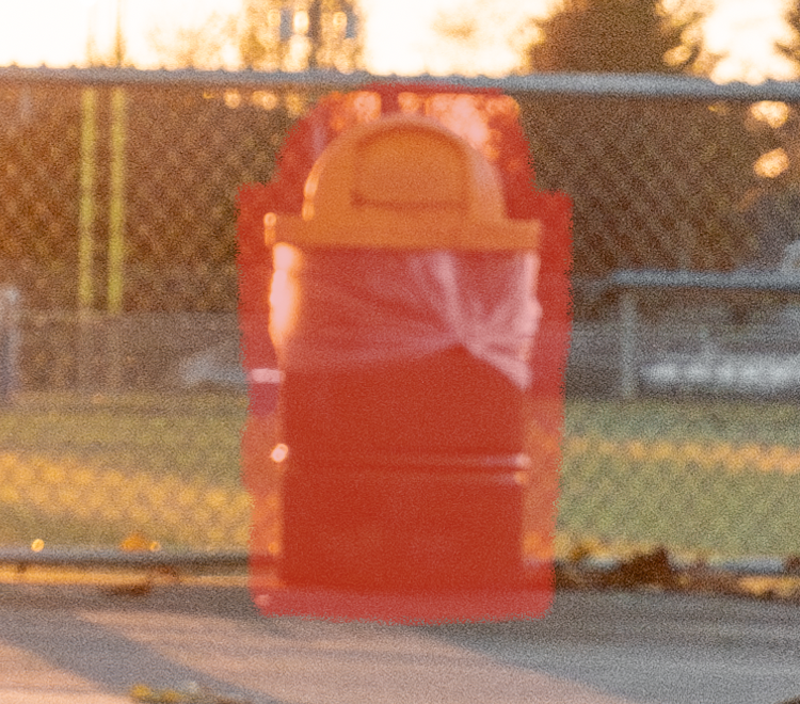
This new feature is marketed as a do-it-all removal tool for large objects in any photo. What isn’t mentioned is the large quality difference between the original image and the Generative Remove area.
From far away, the adjustments made from this feature look seamless. Upon closer inspection though, there is a noticeable quality difference around the AI generated area. This difference varies between images, but you will notice it when applying this tool in your own photos.
This is a similar story to what happens with the AI features in Photoshop too. It’s not a tool problem, it’s simply that Adobe Firefly image model can’t yet product the 1:1 quality results of a high res photo.
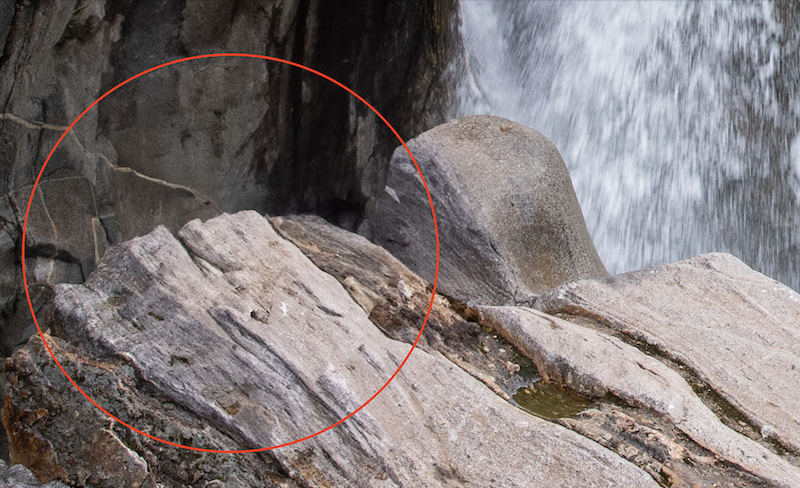
The results are much better when removing objects from a less textured, simple background. However, it’s always quite obvious where the AI removal took place in more complex removal areas.
I do believe this will change in time. For now, it’s a problem I would consider if you intend to print any of your photos. For online sharing and social media posting, it’s unlikely anyone would notice while viewing at these smaller sizes.
Is Generative Remove The Best Remove Tool In Lightroom?
Short answer: no.
The reason is that it can take up to 15+ seconds to render three variations. For one adjustment this is fine, but when removing blemishes, or sensor spots, this is a huge waste of time.
That’s why the Generative Remove Tool now holds a place as the best tool for large object removal adjustments in Lightroom.
Smaller removal areas are still best done with the other tools in Lightroom like the Heal, Clone, or the non-AI Remove tool.
Does This Make Photoshop Obsolete For Photographers?
Many photographers only use Photoshop for object removal. With a huge upgrade to Lightroom’s object removal abilities, it’s fair to wonder if you ever need Photoshop again.
As has always been the case between Lightroom and Photoshop, Photoshop still has the upper hand for advanced tools. This includes object removal and AI-based adjustments.
Specifically with Generative Fill in Photoshop compared to Generative Remove in Lightroom, it’s no competition.
Photoshop offers the ability to type text prompts, see generation thumbnail previews, create more than 3 AI variations to choose from, and will soon have the ability to use reference images to more creatively fill areas in your photo.
After testing the Generative Remove feature in Lightroom, it feels like a “Lite” version of the AI tools in Photoshop. It’s a great addition to Lightroom that I’m happy to see, but it’s not making me give up on Photoshop anytime soon.
You can see some of these advanced AI features that I prefer in Photoshop below:
What Do You Think Of Generative Remove In Lightroom?
Do you agree with my concerns about the tool or do you think I’m crazy to complain about such an amazing feature?
Let me know in the comments below!
