
If you’re a long-time user of Canva, you know how annoying it can be to move the position of your layers up and down in your project. Now, things have changed when it comes to how to use layers in Canva. Moving a layer back and forth on your canvas is easy, thanks to the Layers Panel.
With the Layers Panel, you can easily move layers up and down your “stack” in seconds without memorizing keyboard shortcuts. In this ultimate guide, you’ll learn how to move and align your layers using the Layers Panel and how to create, lock, group, and delete layers. Also, you’ll learn how to use the somewhat confusing Overlapping Tab to make it easier to adjust your layers.
Let’s get started!
How To View The Layers Panel In Canva
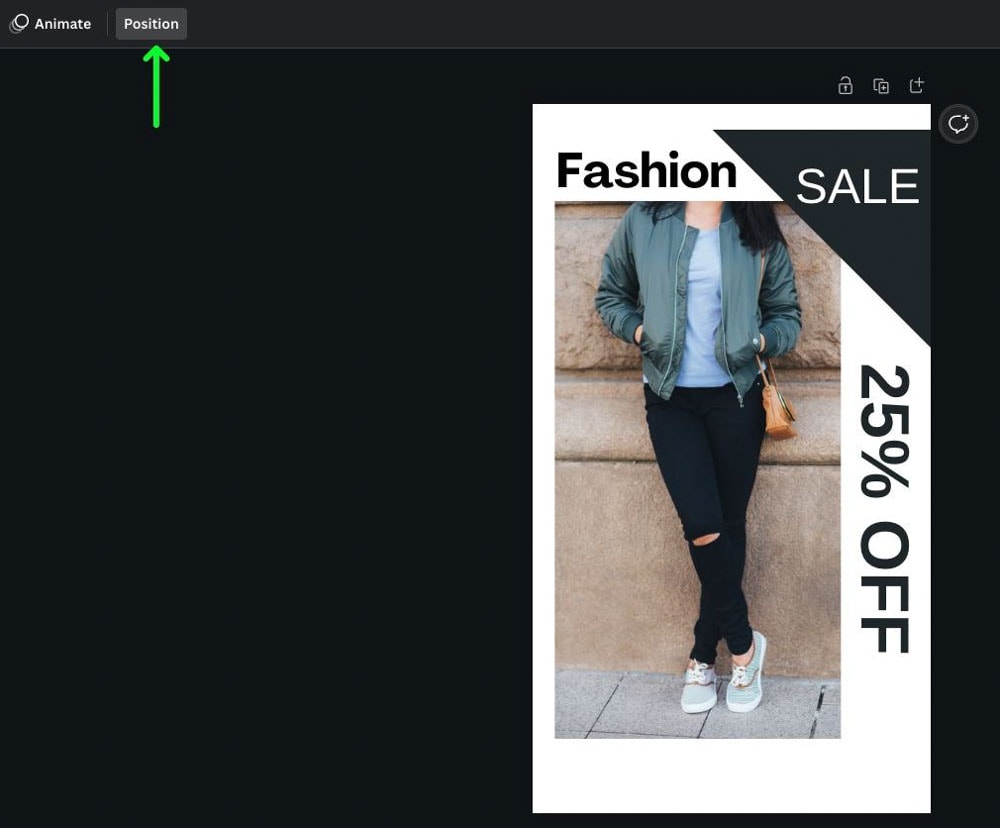
To see the Layers Panel, click the Position button in the top left corner above your canvas.
In the Side Panel, select the Layers Tab to open the Layers Panel.
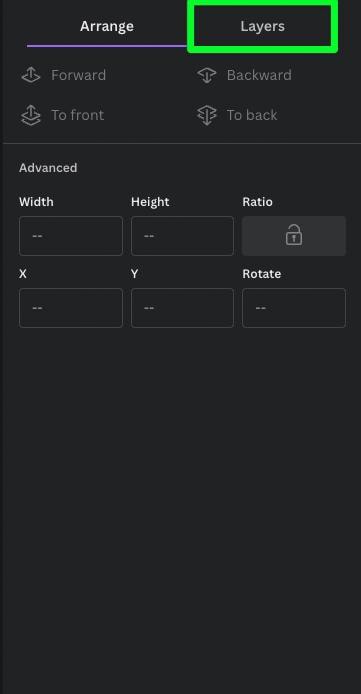
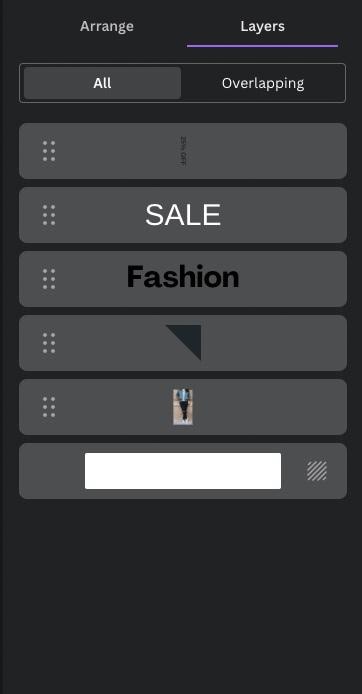
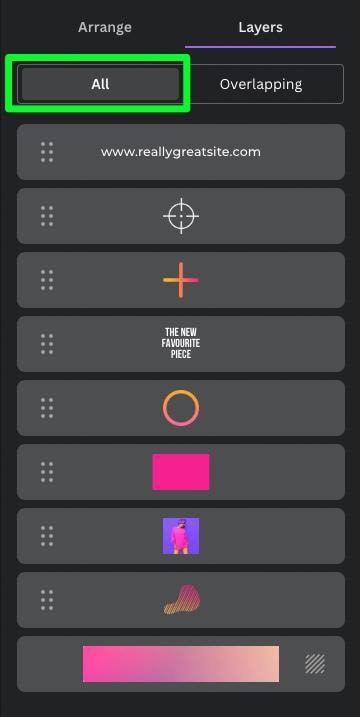
In the Layers Panel, you’ll see every individual layer in your project.
Understanding How To Use Layers In Canva
If you’ve ever used Photoshop or a similar graphic design software, you may think Canva’s Layers Panel is the same. Although this panel is similar to other programs, working with layers in Canva is a different experience.
Selecting Layers To Edit
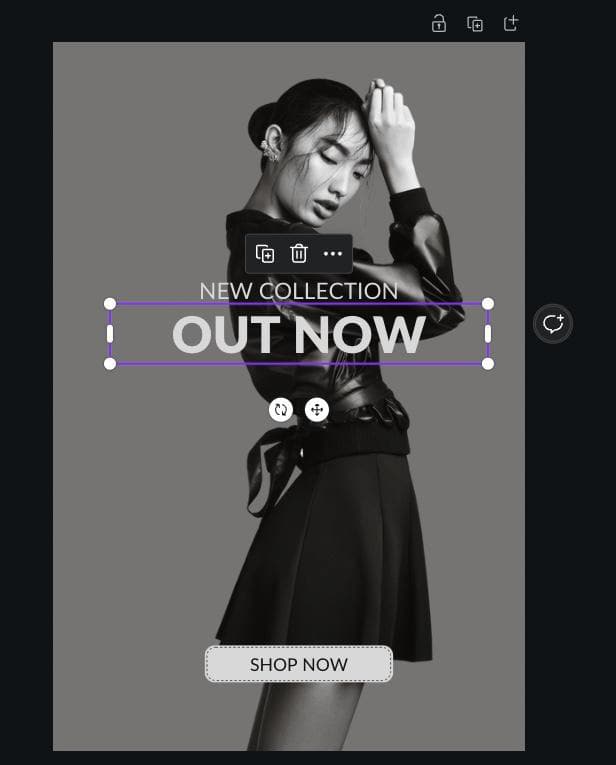
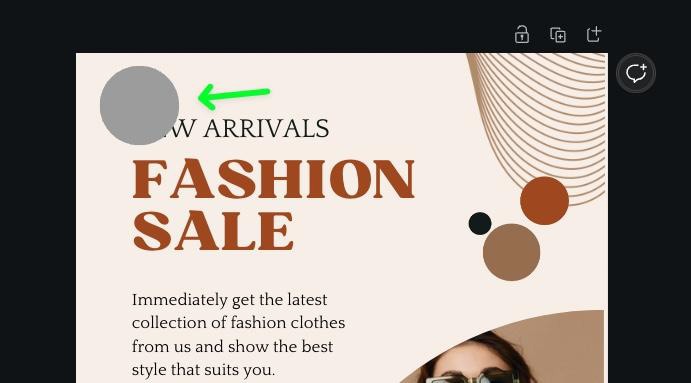
To select a layer to edit, click on the layer you wish to change.
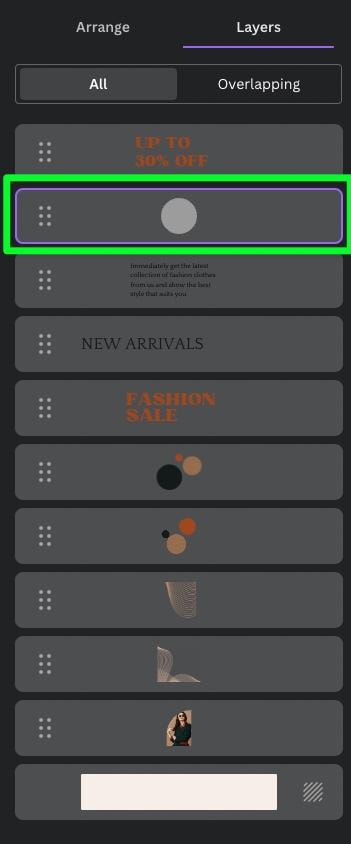
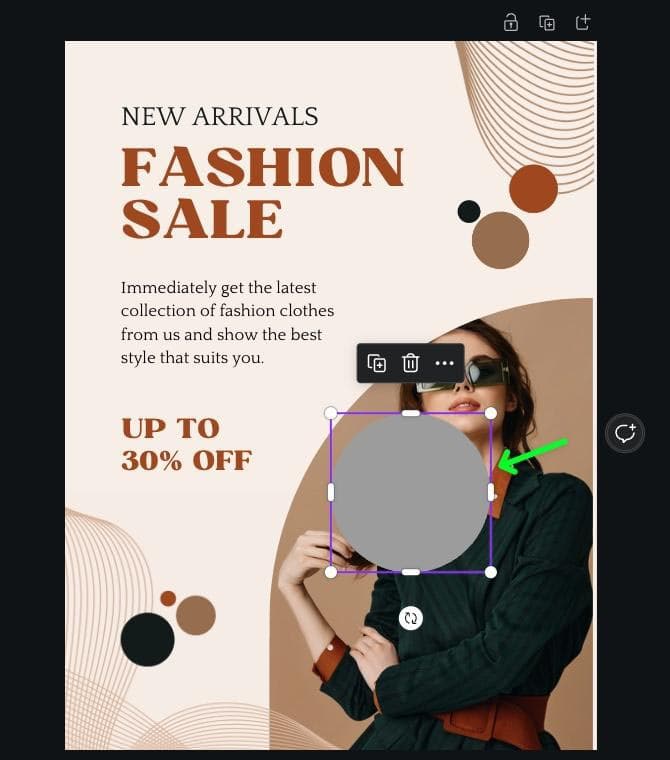
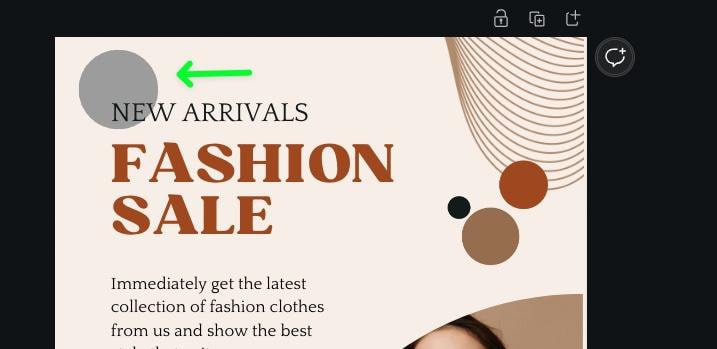
In the Layers Panel, you’ll see a purple glow around the perimeter of the layer you’ve selected.

Back on the canvas, you’ll see a purple box around the perimeter of the layer you selected in the Layers Panel.

Alternatively, when you click on a layer on your canvas, that layer will be highlighted in purple in the Layers Panel.

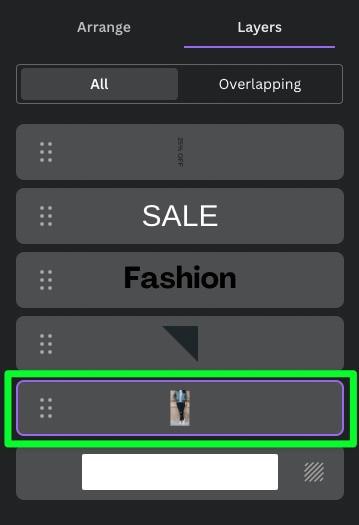
Selecting layers in the Layers Panel is especially advantageous when your layers are too close to each other, making it difficult to select the one you want.
You can make your life a lot easier by selecting the layer in the Layers Panel instead of on the canvas. Using the Layers Panel is also excellent when selecting a layer that is hidden by other elements in your project.
Moving Layers To Front Or Back
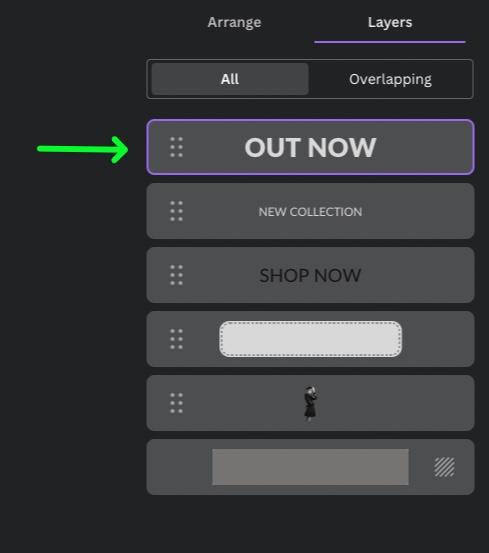
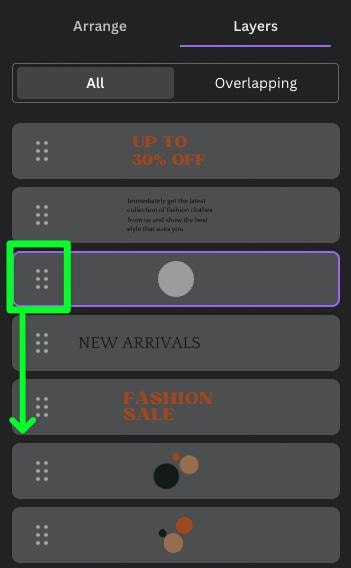
Moving layers up and down your “stack” is much easier in the Layers Panel than on the canvas. You can easily see where your layer will be, and you won’t need to memorize any keyboard shortcuts.
First, let me explain how the layer order works in the Layers Panel.
The top layer in the panel is also the top of your “stack.” This layer will be the front-most layer on your Canvas.
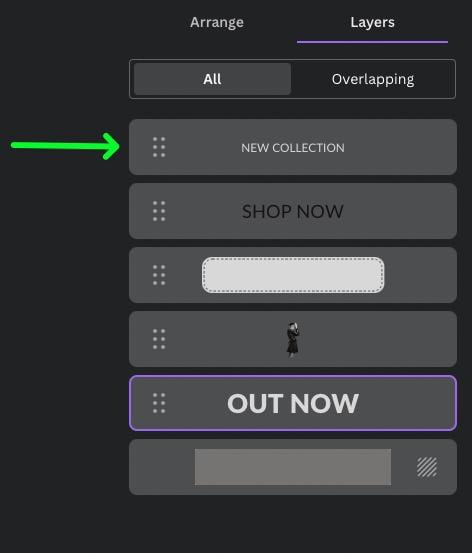
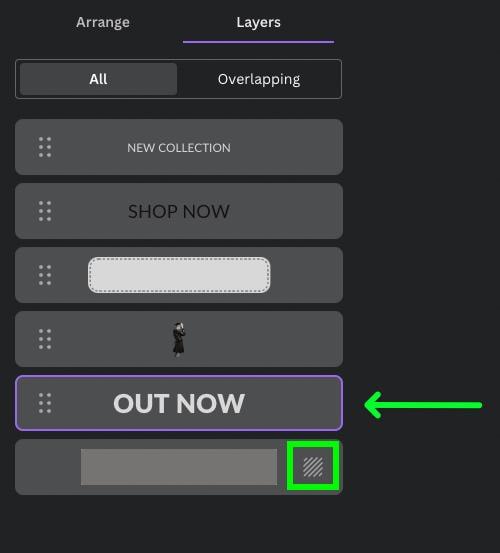
At the bottom of the Layers Panel, you have two important layers.
- First, the layer at the very bottom of the panel is your background layer. This is indicated by the Background Icon to the right of the layer. This background layer can not be moved, and you can not move another layer below it.
- The layer above the background layer is the “farthest layer” that you can interact with.
To move a layer in the Layers Panel, click and hold on the Six Dots to the left of the layer, then drag the layer up to where you need it in your project.
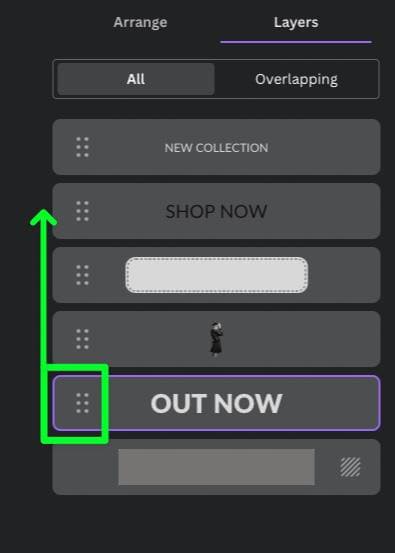
Moving a layer in the Layers Panel will instantly be reflected on your canvas.
The easiest way to move your layers around is using the technique explained above, but there’s an alternative option in this panel as well.
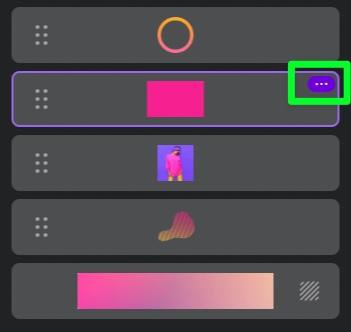
First, click on your layer to select it, then click on the Three Dots in the top right corner of the layer.
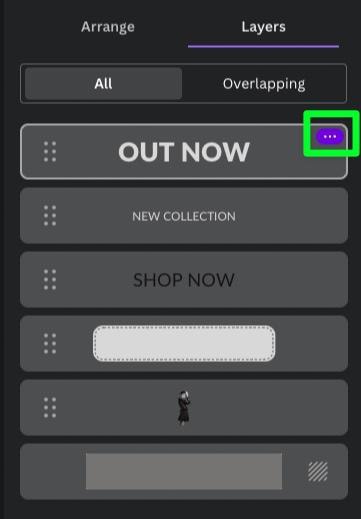
In the submenu that pops up, hover over Layer, then click on one of the directional options.

One more thing about the background layer. It’s true that you can’t move this layer, but you can change the color of this layer.
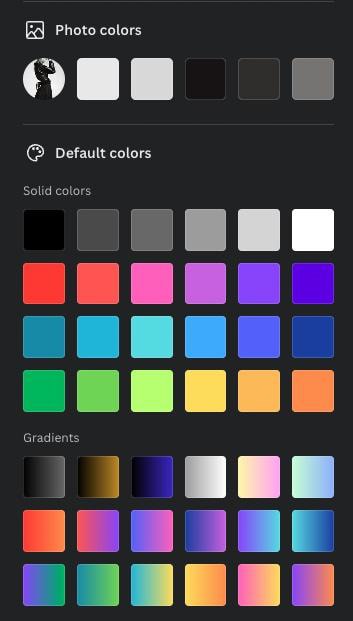
First, click on the background layer to select it, then click the Color Picker above the canvas.
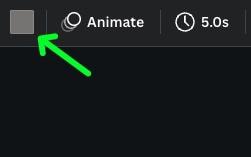
From here, you can choose the desired color for your background.

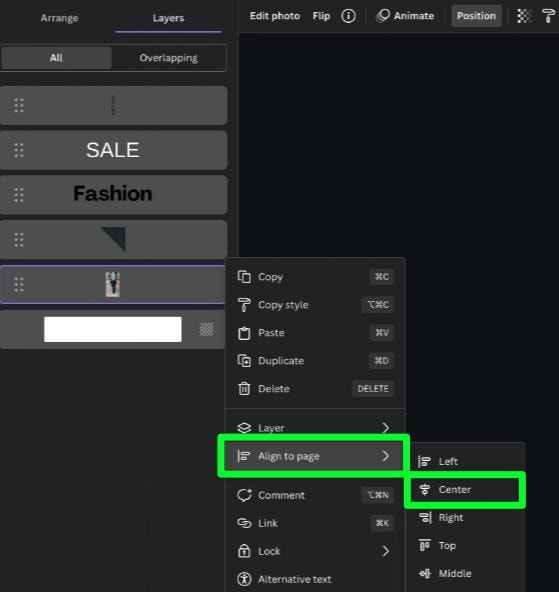
Aligning Layers To Your Design
If you need to center a layer to the middle or one of the sides of your canvas, you can do this easily in the Layers Panel.
First, select the layer you wish to align, then click the Three Dots in the right corner.
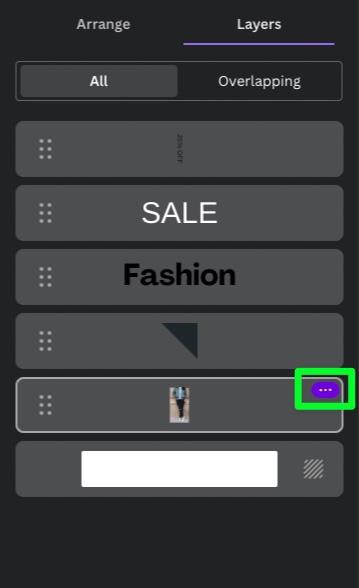
Then, hover your mouse over Align To Page, and select the direction you wish to align it.
Creating New Layers
Creating a new layer in Canva is as simple as dragging a new layer into your project.
You can do this by dragging an element from another window into Canva or opening the Elements Tab and dragging in a new element.

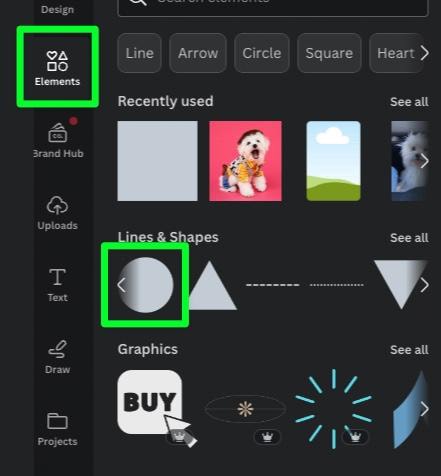
When dragging a new element into your project, sometimes you’ll see it right away, and other times your new element will be hidden behind one of the elements on your canvas. When this happens, it will appear as if there was no change on your Canvas.
Locate this new hidden layer in the Layers Panel, then drag it up to the top of the stack.
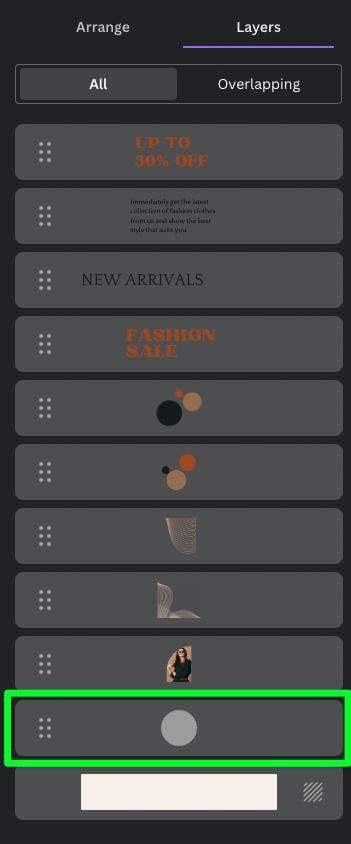
Your new layer will now be visible on the canvas. You can now move this layer where you need it.
Also, remember that you can move layers at any time. So if your new layer is in front or behind a layer, you can adjust it as you see fit in the Layers Panel.
Once your new layer is in the correct place, you can change the color or make any other edits.

Locking Layers
If you keep accidentally moving a layer on your canvas that needs to stay in place, you can lock it in the Layers Panel so it can’t be selected.
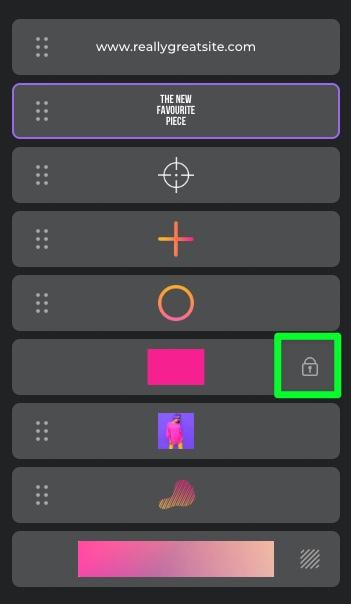
To do this, click on the three dots on your selected layer, then hover over the Lock section.
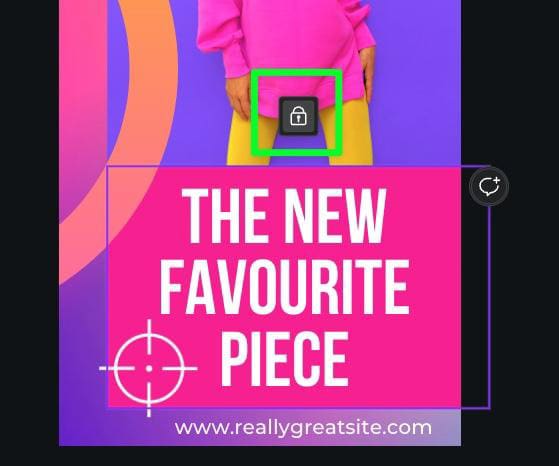
In the Lock section, you’ll be presented with two options: Lock and Lock Position Only.

- Choosing Lock will make the layer on your canvas unmovable, but you will be able to edit the element.
- Choosing Lock Position Only will make the layer unmovable and allow you to edit the layer otherwise.
Once you make your choice, a little lock symbol will appear on the layer.
If you need to unlock the layer, you won’t be able to do so in the Layers Panel itself.
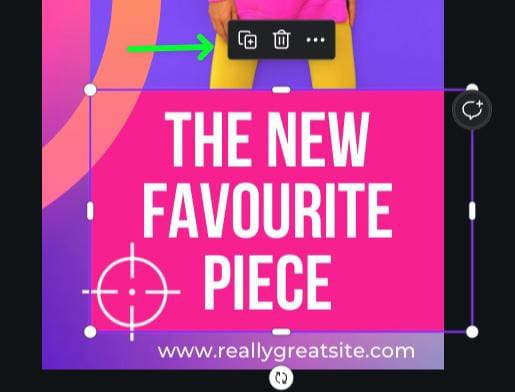
To unlock the layer, select it, then click the unlock button above the layer on the canvas.
You’ll know when your layer is unlocked when you see the Lock button turn into the Mini Options Bar again.
Grouping Layers
When glancing at the Layers Panel, you may get overwhelmed by how many layers there are. You can make things less confusing by grouping some of your layers.
You can group your layers in the Layers Panel by clicking the first layer, holding down Shift, then clicking the other layers you want to group.
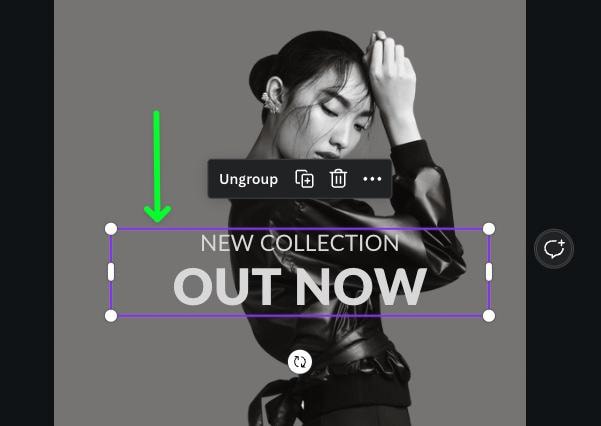
The layers you’ve selected will be highlighted with purple in the Layers Panel.


On the Canvas, each individual layer will be highlighted in purple in its own separate box.
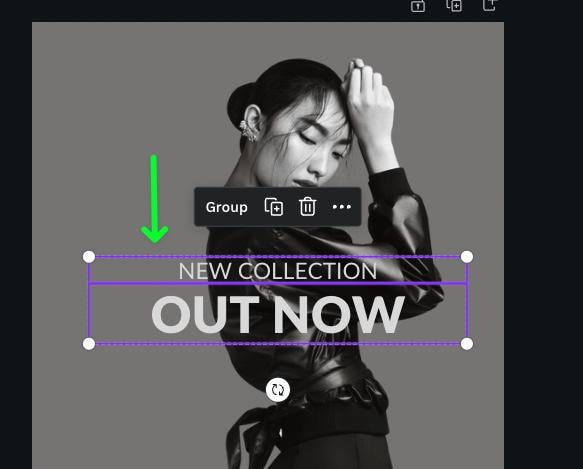
Once you have your layers selected, you can group them by clicking the Three Dots on the topmost layer, then selecting Group.

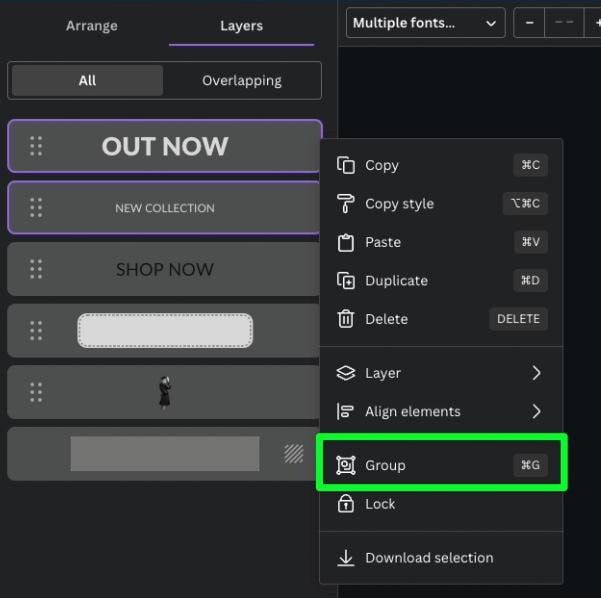
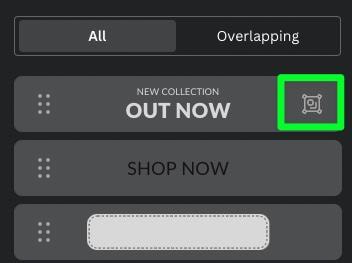
Your grouped layer will appear as one layer in the Layers Panel, with a Grouped Icon on the right-hand side.
You’ll see your grouped layers highlighted in one purple box on your canvas.
Deleting Layers
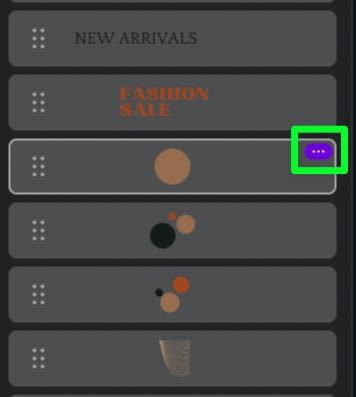
To remove a layer using the Layers Panel, locate the layer in the panel, then click the Three Dots in the top right corner of the layer.

In the submenu that pops up, click Delete.
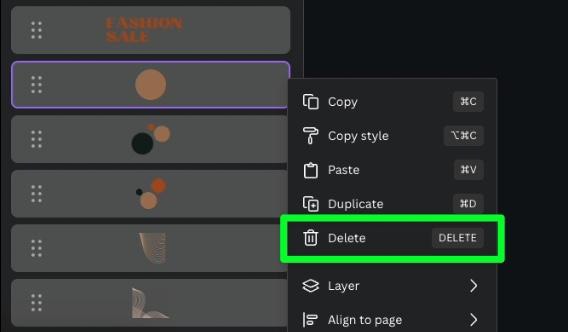
Clicking delete will immediately remove the layer from your project.
What Is The Overlapping Layers Panel In Canva?
Sometimes when working in the Layers Panel, you need to select a layer, but there are so many layers that it’s impossible to find the one you need.
A good solution is using the Overlapping Tab. This tab will showcase only the layers that overlap with a selected layer. This can help you find and edit the layer you’re looking for.
Using the Overlapping tab is slightly confusing, so let me explain this in more detail.
First, you may have over ten layers in the All Tab, but if you click on the Overlapping Tab, you’ll only see the background layer.

The Overlapping Tab only works when one of your layers is selected first.
To use the Overlapping Tab, first, ensure you have the All Tab open in the Layers Panel. Then click on the layer in the area you want to work on.
Once you have your layer selected, click the Overlapping Tab.
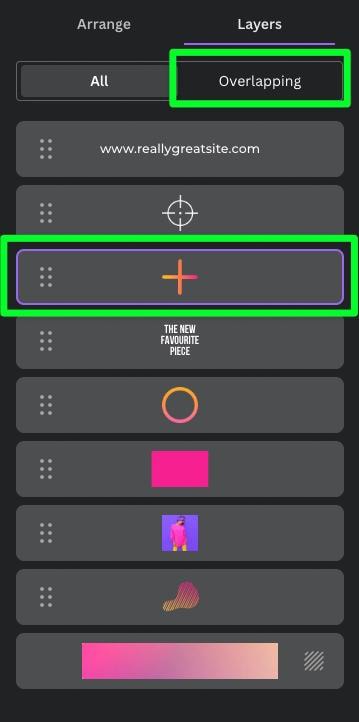
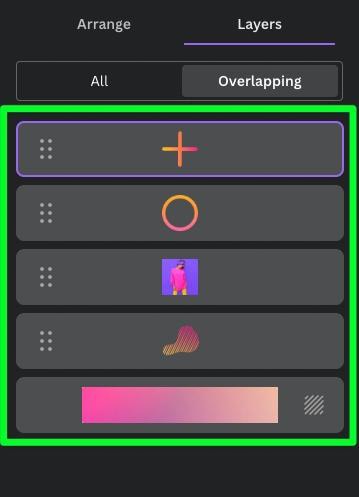
In the Overlapping Tab, you’ll see all the layers that interact with the layer you selected. You can now make all the changes you need for those selected layers without worrying about the rest of the project getting in the way.
Remembering all these tricks in the Layers Panel of Canva will make designing easier and less confusing. Rather than struggling to know exactly what’s happening in your project, your layers panel makes it clear and simple.
Happy Editing!


