
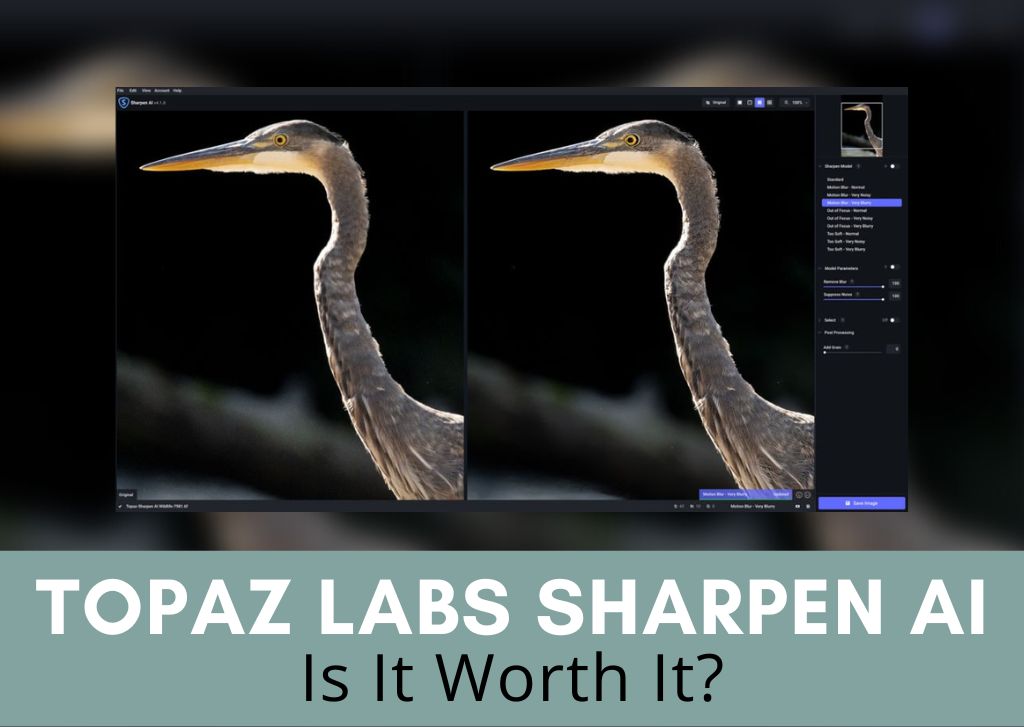

For many years now, I have used Topaz Labs Sharpen AI alongside my Adobe editing software, and in this review, I will show you why. The program aims to correct out-of-focus, blurry, and soft images using AI to automatically sharpen the pixels.
As with any AI software, there are pros and cons, which is why I will explore the features of this program to help you decide whether you should add it to your workflow or not.

A powerful sharpening tool for portrait, wildlife, and action photographers. It works better than most sharpening tools that come standard in Lightroom or Photoshop but don't rely on it to fix extremely blurred photos.
- The widest array of AI Sharpening Models available
- Simple interface making it easy to learn
- Seamless integration with Lightroom or Photoshop
- Can save slightly blurred photos, but doesn't replace the right camera settings
- A helpful tool for in-depth sharpening
What Is Topaz Labs Sharpen AI?
Topaz Labs Sharpen AI is standalone software intended to correct blurry, soft, or (somewhat) out-of-focus images. Using an artificial intelligence interface, Sharpen AI scans the image, detects the subject matter, and sharpens it according to its various models. Although Sharpen AI cannot fix a completely blurry photograph, it can help in many cases.
Utilizing its own patented learning models and tools, Topaz Labs, as a company, sets itself apart from other editing programs by remedying common photo issues. The program does this by generating new content rather than working with existing pixels. So, instead of just determining the edges of an image and making it crisper or sharper, the program creates missing content to sharpen it.
A big problem with many sharpening tools (such as those built into Photoshop and Lightroom) is that they increase the amount of artifacts in an image. ‘Artifacts’ refers to odd dots or sections of an image with pixelation or other weird anomalies. Sharpen AI promises to remedy sharpness without creating artifacts.
Using Sharpen AI is an absolute breeze, with no advanced computer knowledge required. Simply drag and drop your image or images (as the program can bulk process) and let Sharpen AI do the rest.
There is a panel on the right side of the screen with various sharpening models and adjustments that you can tweak to achieve the desired result.
Sharpen AI Key Features Explained
Aiming to be a master of one rather than a jack of all trades, Sharpen AI has some significant features that help it stand out from other programs that only have sharpening built-in as an additional option.
Sharpening Models
Sharpen AI bases its sharpening approach around several pre-built models within the software. These models are trained on AI to process images according to the issues the program discovers within the photo.
The autopilot of Sharpen AI selects the model for you, but you can override this and select the model you want if you find that autopilot didn’t do a great job.
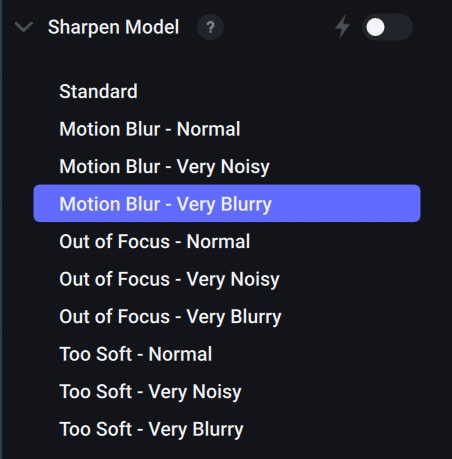
The models are as follows:
Standard
Available in the newest update of Topaz Labs Sharpen AI, the Standard model is a general sharpening model that aims to fix motion, unfocused images, and soft focus all at once in the same image.
I noticed that the software picked Standard out the most, and I feel that this may be because it couldn’t quite sort out what kind of sharpening issue my photo had.
Motion Blur
As the name implies, this model aims to sharpen images that have motion blur. Motion blur is the streaks you see when a subject moves faster than your camera’s shutter speed. This is the most challenging type of sharpening issue to resolve, so even Topaz states that it isn’t 100% accurate.
Motion Blur has three levels that the program chooses between, which are Motion Blur – Normal, Motion Blur – Very Noisy, and Motion Blur – Very Blurry.
Out Of Focus
Likely, the most common reason someone might turn to sharpening software to fix out-of-focus images is just that – the focus was missed. This is where Sharpening AI is said to excel, as only AI models can remedy something like this. The reason is that more traditional forms of sharpening cause a lot of noise and artifacts to appear in out-of-focus subjects.
Like Motion Blur, Out of Focus has three levels it decides from.
Too Soft
Often confused with out-of-focus, softness is when the focus is technically achieved, but the subject looks soft anyway. This is usually because of a lens calibration issue; something got on the front lens element, a damaged filter, or the focus really was missed, but only by a slight margin. In either case, soft subjects are the easiest to fix because the foundation is already there, but the edges need to be clearer.
The same three models as Motion Blur and Out of Focus exist for Too Soft.
Masking Abilities
Like other Topaz Labs programs, Sharpen AI has an autopilot masking ability within its software. Using its signature learning models, Sharpen AI detects your subject (whether it is human, animal, or inanimate) and isolates it using a mask. The program then sharpens the subject independently from everything else in the image.
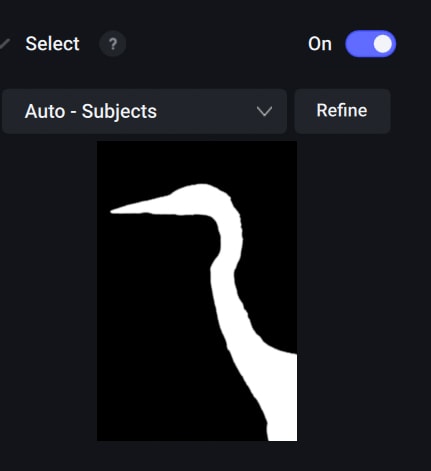
Through the three subjects I used in the example images in a later section, Sharpen AI was able to identify each one very accurately. I am quite impressed with this aspect.
However, if there comes a point where Sharpen AI struggles to figure out the subject, you can manually override the auto mask and create one yourself. Like in programs such as Adobe Lightroom, you can use the brush tool to draw the mask.
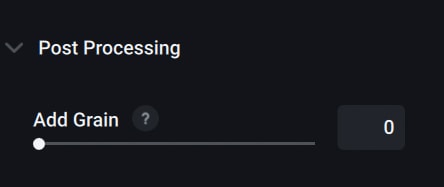
Denoise And Add Noise
Much of the time, softer images are because photographs were shot in darker ambient light – which could be too dark, causing a slower shutter, which leads to blurry photos. ISO levels are often bumped high to account for the ambient light, which produces a lot of noise. Sharpening an image can exacerbate this noise.
As such, Sharpen AI has a Denoise slider to help mitigate this issue.

This being said, sometimes adding noise can be good for a photograph and make it look sharper. The program also has an Add Grain slider for this purpose.
Model Comparisons With View Modes
A nifty tool is Sharpen AI’s various View Modes. For a program that sharpens images, it is best to make sure you can compare the original image version to the processed one. You can find this option in the upper right-hand of the screen.

Sharpen AI has four views to choose from.
Single View
This is the view mode without the comparison; it’s just the image in its processed form.
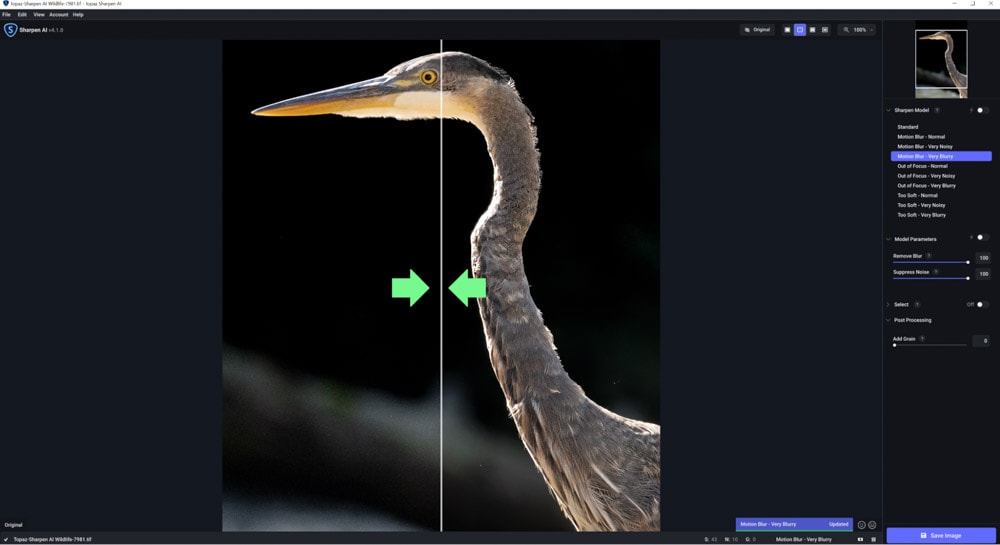
Split View
The original image is kept on the left side, and the processed image is on the right, with a moveable divider line that starts in the middle. This line can be moved back and forth to either show more of the original image or more of the sharpened image.
Side-By-Side View
The classic view, this one shows the original image on the left and the processed image on the right.
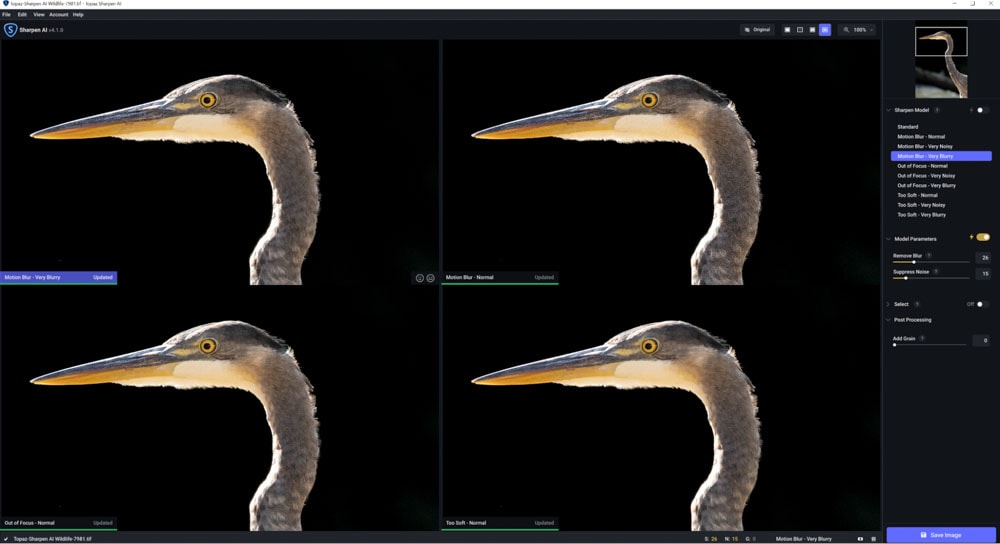
Comparison View
This is the most unique view of Sharpen AI and arguably the most useful. Comparison view sharpens an image using the four different models, allowing you to select the sharpening model that you feel works best for the picture!
Adobe Photoshop And Lightroom Integration
Like the rest of Topaz Labs programs, upon installation, you are automatically granted Adobe Photoshop and Adobe Lightroom integration if you already have these on your system. This helps Sharpen AI become an easy part of your current workflow.
In Lightroom, Sharpen AI is accessed through the Develop module. In the Develop module, in the upper right of the screen, go to Photo > Edit In > Topaz Sharpen AI.
Once pressed, a pop-up asks whether you’d like to use the software on a copy with Lightroom adjustments preserved, a copy without Lightroom adjustments, or on the original file. I recommend going with option two and editing a duplicate copy, as it’s generally advisable to make Lightroom adjustments after ensuring the base image is rendered as you would like.
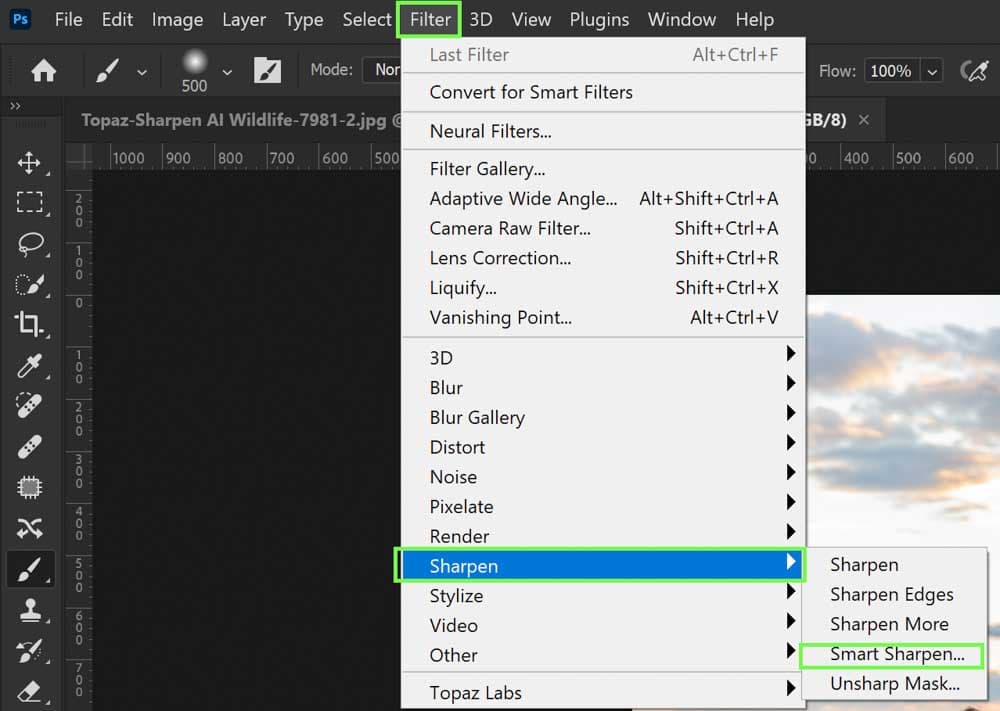
You can find the integration in Photoshop at Filter > Topaz Labs > Topaz Sharpen AI. Once pressed, a message appears before automatically launching the program.
Price
At $79.99, Sharpen AI isn’t the steepest price out there – but it certainly isn’t a steal either. Sharpen AI can also be bundled with Topaz’s other programs for a reduced fee.
Keeping true to Topaz’s other products, Sharpen AI is not a subscription service. The $79.99 one-time fee allows up to two installs within the license. More computer installs (called “Seats” by the company) can be additionally purchased.
Every purchase comes with one year of free upgrades and updates, which can be prolonged for a fee.
System Requirements For Sharpen AI
Sharpen AI has basic system requirements. You are already solid if you can run any editing software (like Photoshop).
Windows Minimum Requirements:
| Windows Operating System | 10 or 11 (Most recent version recommended) |
| CPU | Intel or AMD (with AVX instructions 3.0GHz or above) |
| System Memory (RAM) | 8 GB (16 GB or more recommended) |
| Graphics Card (NVIDIA) | NVIDIA GT 740 or higher, 2 GB VRAM |
| Graphics Card (AMD) | AMD Radeon 5870 or higher, 2 GB VRAM |
| Graphics Card (Intel) | Intel UHD 600 Graphics or higher, 2 GB VRAM |
Mac Minimum Requirements:
| Mac Operating System | 10.14 Mojave and higher |
| CPU | Intel (with AVX instructions 3.0GHz or above) |
| System Memory (RAM) | 8 GB |
| Graphics Card | NVIDIA GTX 740 or AMD 5870 |
| Video RAM | 2 GB |
I will say that out of all of the Topaz Labs programs, Sharpen AI tends to run the slowest and has some lag issues. Oddly, Gigapixel and Denoise do not. Just something to note! This also can depend on how zoomed in you are to your image.
Sharpen AI Example Images
Portraits that have missed focus, grainy wildlife shots, and action photos are likely the most common subjects needing sharpening assistance. Let’s take a look at examples from each.
Blurry Portraits
To see how well Sharpen AI works, I’m testing it out on this soft-focus portrait.
Topaz Labs Sharpen AI used the Standard model to sharpen this one up. You can see a significant improvement!


However, if you zoom in too close, the image falls apart. This is a big testament to the fact that this isn’t a quick fix for missing focus. It’s more passable for just online usage.
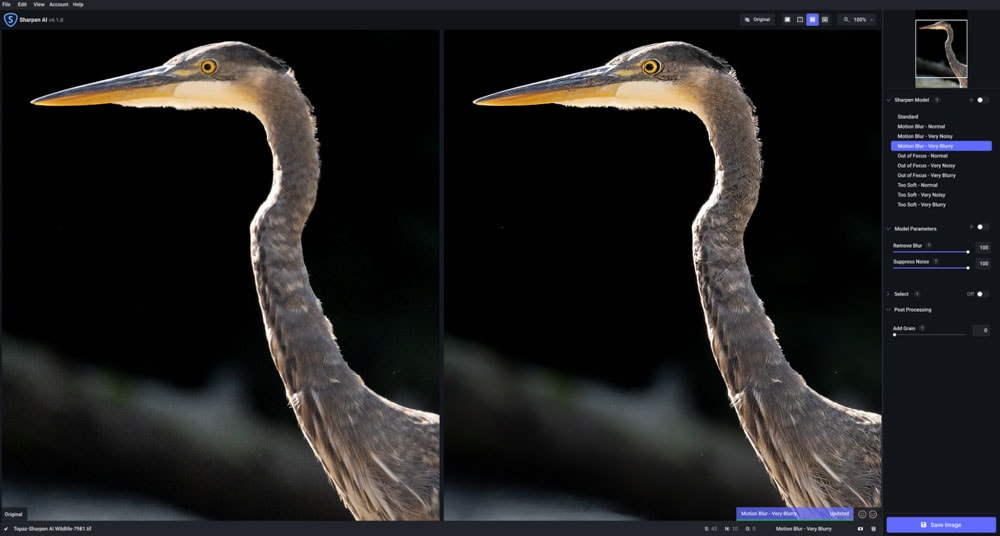
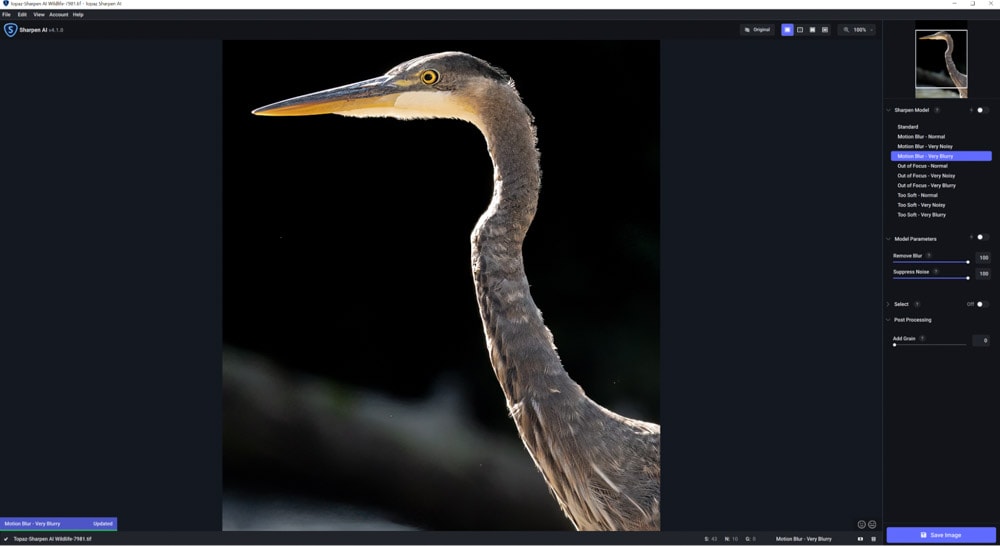
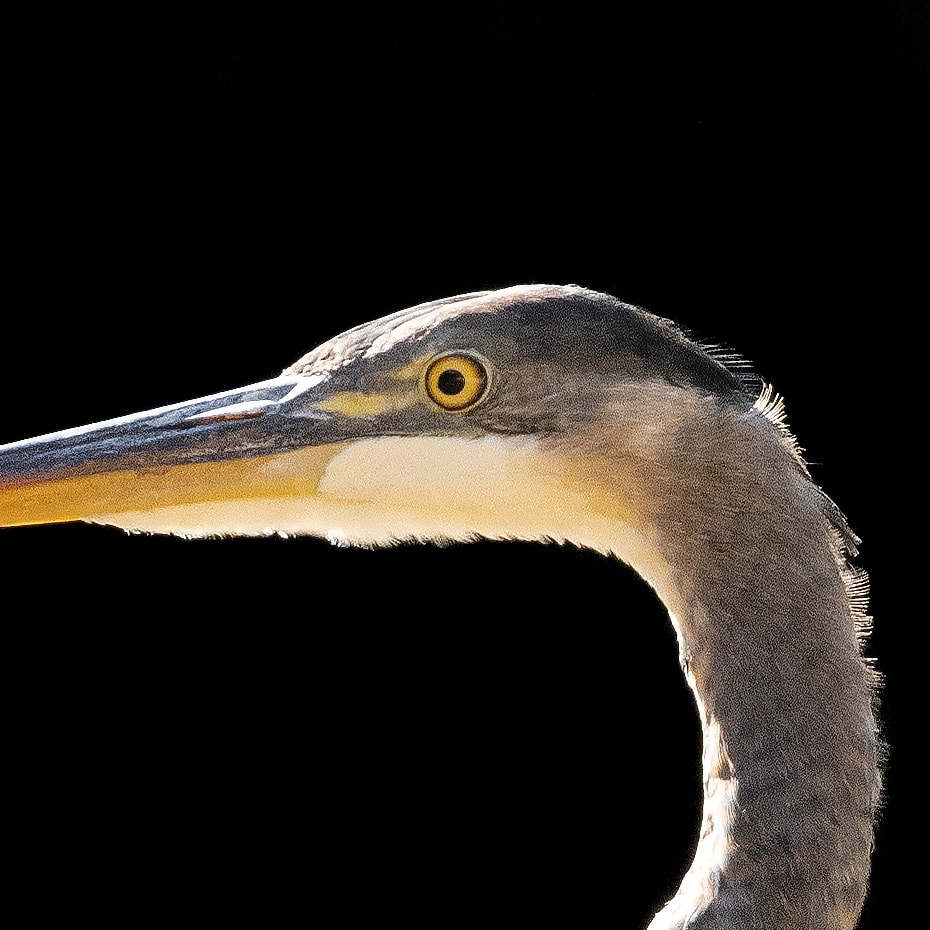
Grainy Wildlife
For my next test, here is a grainy and soft shot of a water bird.
Topaz Labs Sharpen AI used the Motion model to sharpen this one up. The edges are much crisper, and you can see more detail in the feathers.
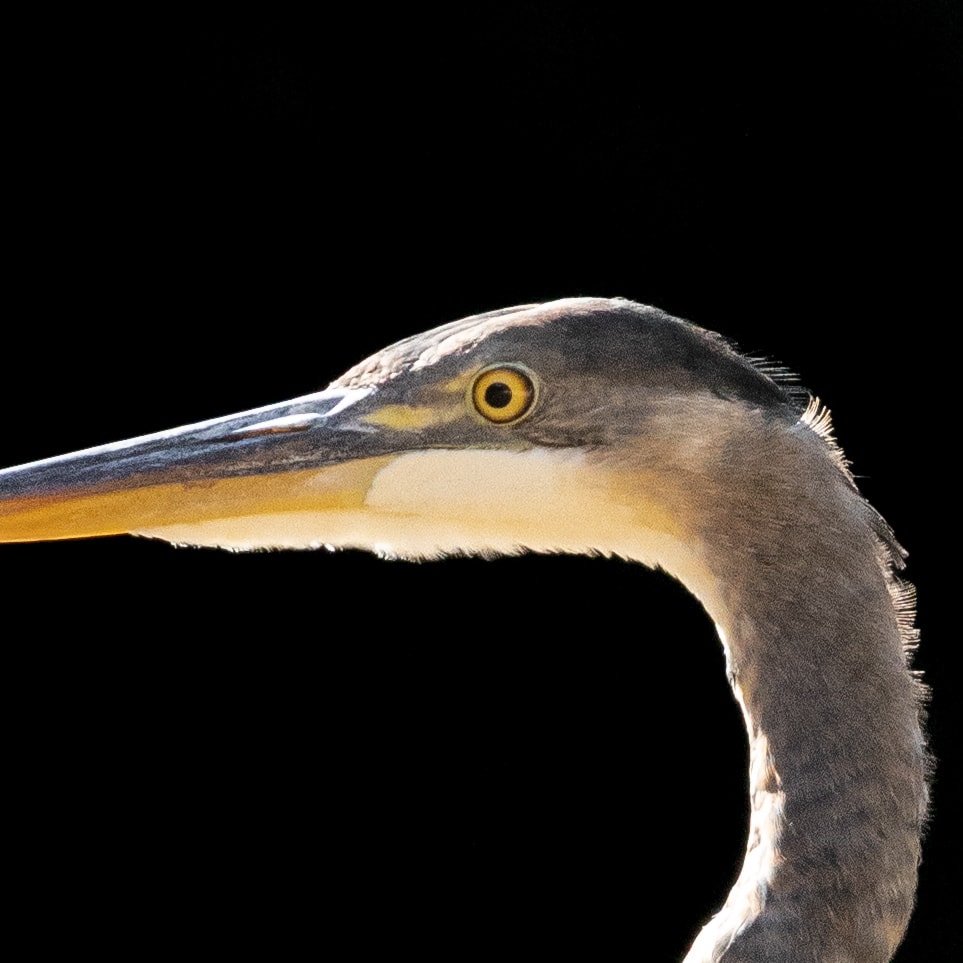
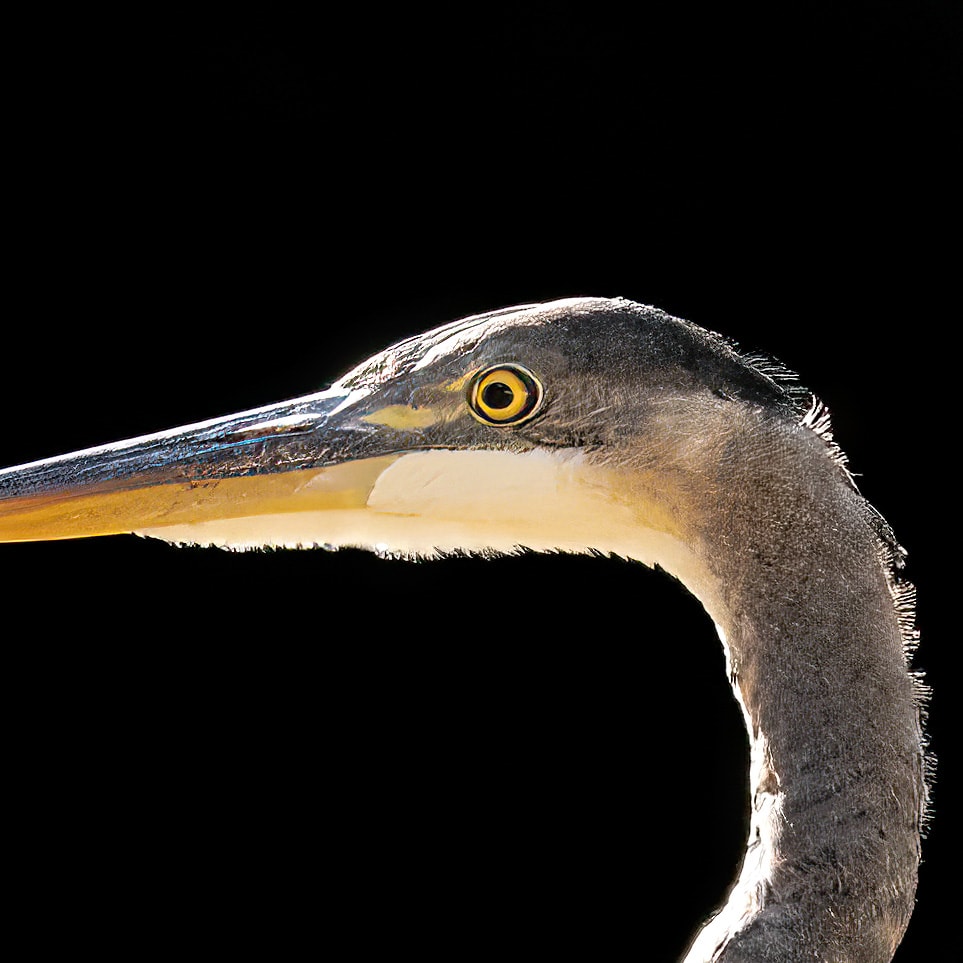
However, if you zoom in too close, the image falls apart, like the portrait above. This is pushing things a bit to prove a point, but it can be reduced for a more subtle sharpen.
Sharpening Action Shots
For my final test, I used an action shot.
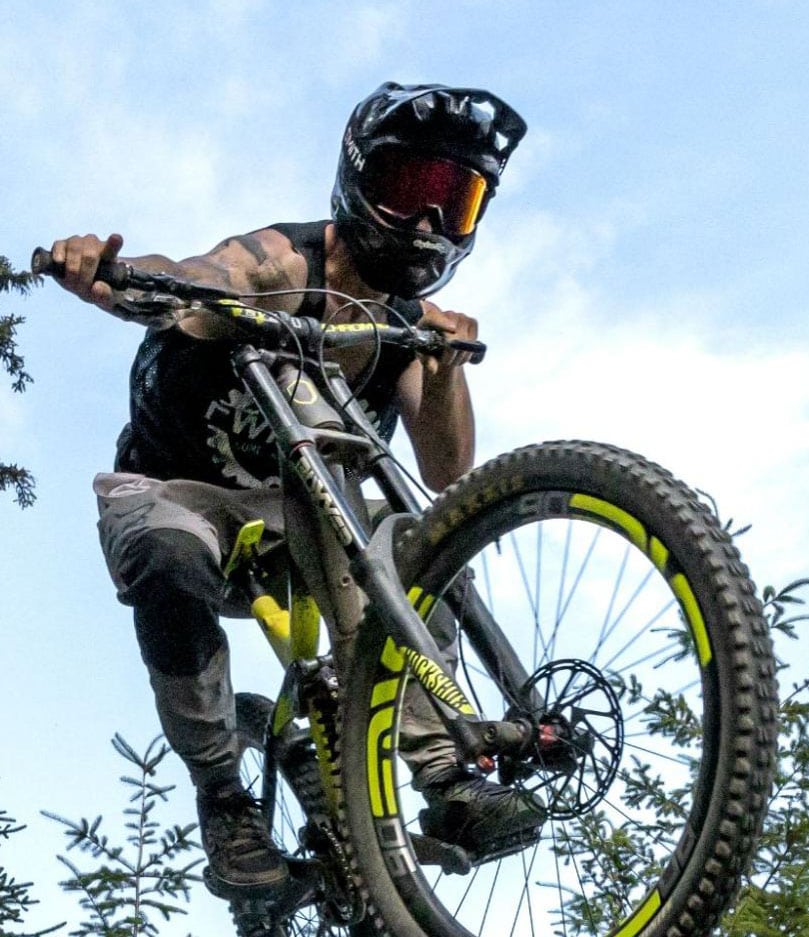

Sharpen AI didn’t make much of a difference, but the shot was already pretty crisp, to be fair! The software opted to use the Standard model. You can see the difference if you look closely, but not enough to really make it worthwhile for an image like this.
Topaz Labs Sharpen AI Vs Topaz Labs Photo AI
Alongside the standalone programs specializing in just one thing, Topaz Labs has a cumulative program called Photo AI. Photo AI sharpens, removes noise, and upscales, all inclusively and simultaneously.
Although each feature has much less control than the standalone counterparts, it aims to achieve the same. However, the results are still quite different despite being made by the same company.
Here is the portrait image sharpened with the two programs:

Here is the bird photo between the two programs:

As you can see, the Photo AI results are decent. The results are more subtle than Sharpen AI, but the fact that the program adjusts the noise and resolution as well helps the result a lot.
Sharpen AI Vs Photoshop
Of course, being the industry standard in photo editing, Adobe Photoshop has a built-in sharpening system that can be found in the Filters tab.
Although there are a handful of sharpening models to choose from, to keep it fair, I am using Smart Sharpen to properly show how the auto functions of Sharpen AI work compared to the auto functions of Adobe Photoshop.
Here is the human subject via Photoshop Smart Sharpen compared to Sharpen AI:
Here is the bird via Photoshop Smart Sharpen compared to Sharpen AI:
As you can see, the results are not great. For the bird image, the noise levels increased tremendously, and the portrait image didn’t improve much at all compared to Sharpen AI.
Is Topaz Labs Sharpen AI Worth It?
As to whether Topaz Labs Sharpen AI is worth the cost, it really depends on the type of photographer you are. If you regularly shoot portraits, wildlife, or action, there will be plenty of opportunities to leverage this program.
I find it does a great job in certain circumstances, but most of the images that popped in didn’t come out as great as I had expected. I often have to tinker to get things perfect, and it’s not a super quick process for large batches of photos. Funny enough, the other Topaz Labs programs (such as Photo AI and Gigapixel) do a much better job saving missed focus or motion-blurred photos!
To me, Topaz Labs Photo AI can often do a comparable job, and it’s a better bang for your buck because that program also reduces noise and can upscale smaller images.
With that said, the major thing that keeps me coming back to Sharpen AI is the 4-way comparison view. It’s extremely handy to know for certain that I’ve chosen the best settings possible. This is something Photo AI certainly lacks.
I also did find Sharpen AI to be better than the Photoshop built-in equivalent, as the AI does seem leagues ahead of Photoshop. This in and of itself may be a significant reason to invest in Sharpen AI for photographers who use sharpening frequently.
Ultimately, I believe it’s still worth giving a shot to decide for yourself. You can grab a free trial of Sharpen AI here.
A powerful sharpening tool for portrait, wildlife, and action photographers. It works better than most sharpening tools that come standard in Lightroom or Photoshop but don't rely on it to fix extremely blurred photos.
- The widest array of AI Sharpening Models available
- Simple interface making it easy to learn
- Seamless integration with Lightroom or Photoshop
- Can save slightly blurred photos, but doesn't replace the right camera settings
- A helpful tool for in-depth sharpening
