
How To Fix The Eyedropper Tool In Photoshop
Nothing is more frustrating than a tool that suddenly stops working, and the Eyedropper Tool in Photoshop is no exception. One moment you’re sampling colors without a care in the world, while the next, you can’t sample a thing. What the heck is going on?
Whenever a tool goes haywire in Photoshop, the causes are often simple and easy to fix. In this post, I’ll break down a few of the common reasons the Eyedropper Tool in Photoshop isn’t working and how to fix it!
A common reason why the eyedropper tool stops working is because of incorrect tool settings. First, make sure that your layer thumbnail is selected and not the layer mask. Second, check that the “sample” type for the eyedropper tool is correct. By pressing “I” to access the Eyedropper Tool, go to the upper settings bar and change the sample setting to “All Layers.”
Video Tutorial
5 Common Reasons Why The Eyedropper Tool Stops Working
Now let’s break down the 5 main reasons why the Eyedropper tool stops sampling colors in Photoshop. Depending on how you use the tool, there are some settings that you may not be fully aware of. You’ll see exactly how to double-check and correct any settings that aren’t looking right in the tips below.
1. Make Sure You’re Sampling The Image, Not The Mask
One of the main problems that occur with the Eyedropper Tool is that it stops sampling colors. No matter where you sample on your image, you can only sample whites, greys, or blacks. This is all because the layer mask is selected and not the layer thumbnail.
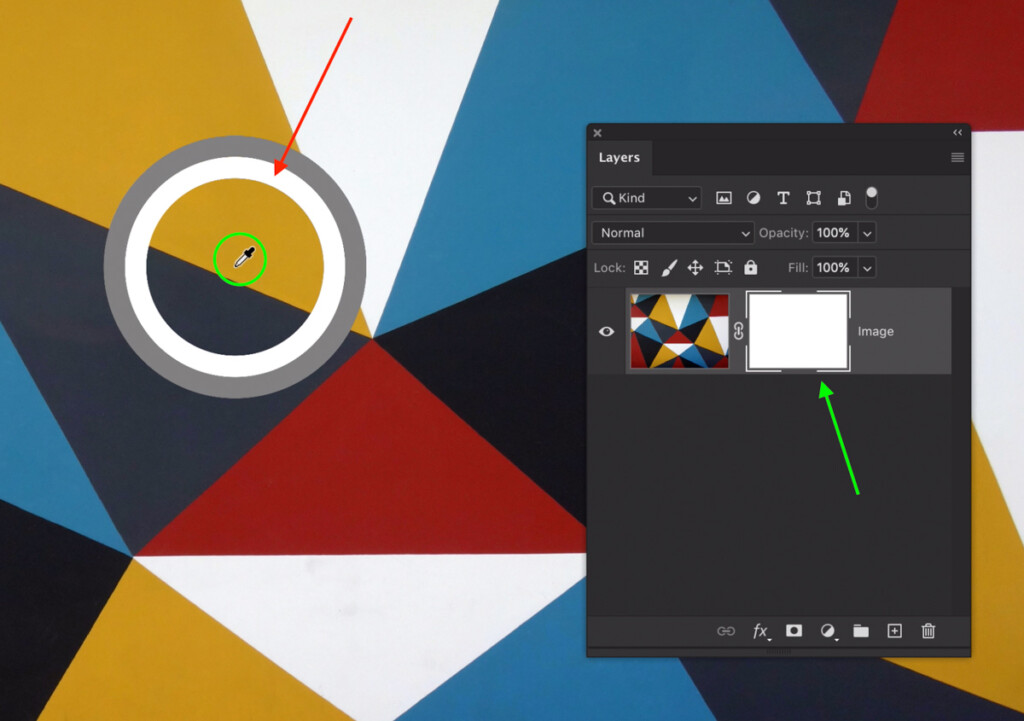
The layer thumbnail is the little icon or image directly beside the eyeball icon. A layer mask, on the other hand, is the white or black box beside the thumbnail.
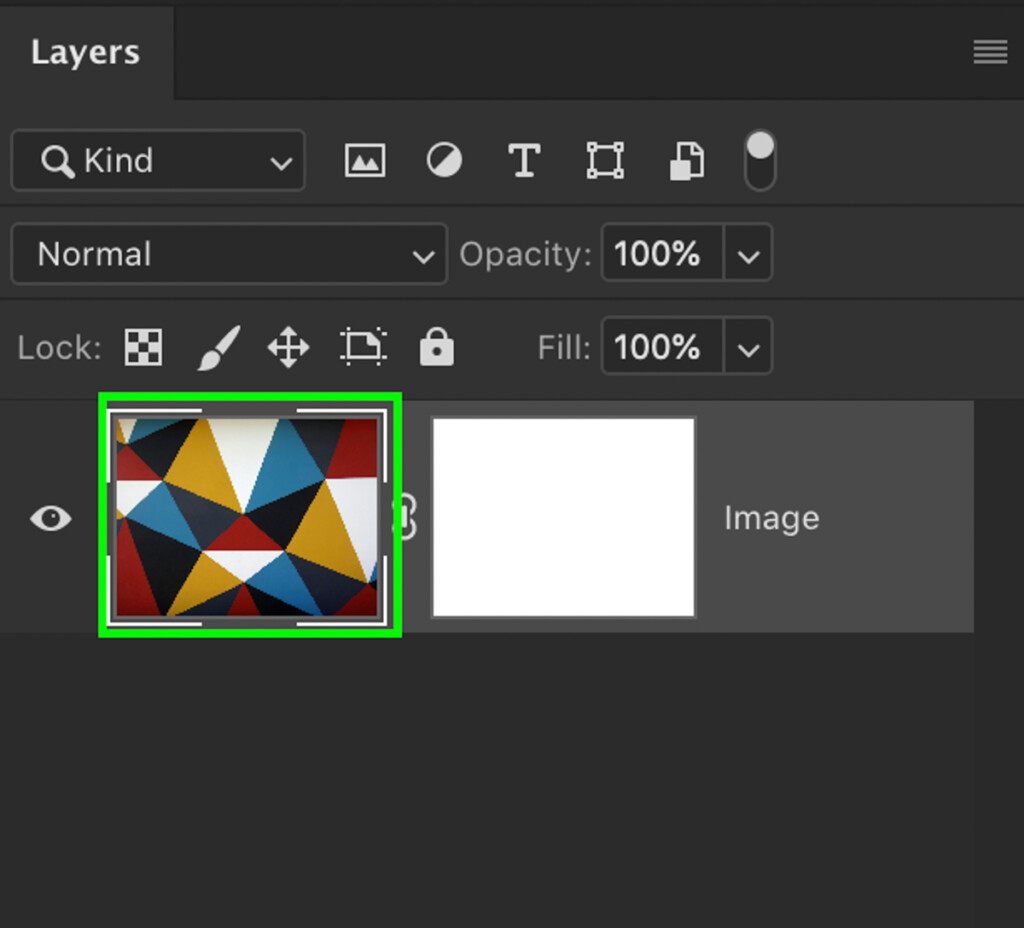
After clicking on a layer to select it, you’ll notice the mask or the thumbnail is selected by the white box around it. By clicking on the layer thumbnail, notice how this white box surrounds the thumbnail. That means it’s being selected, and you’ll be able to sample from that layer.
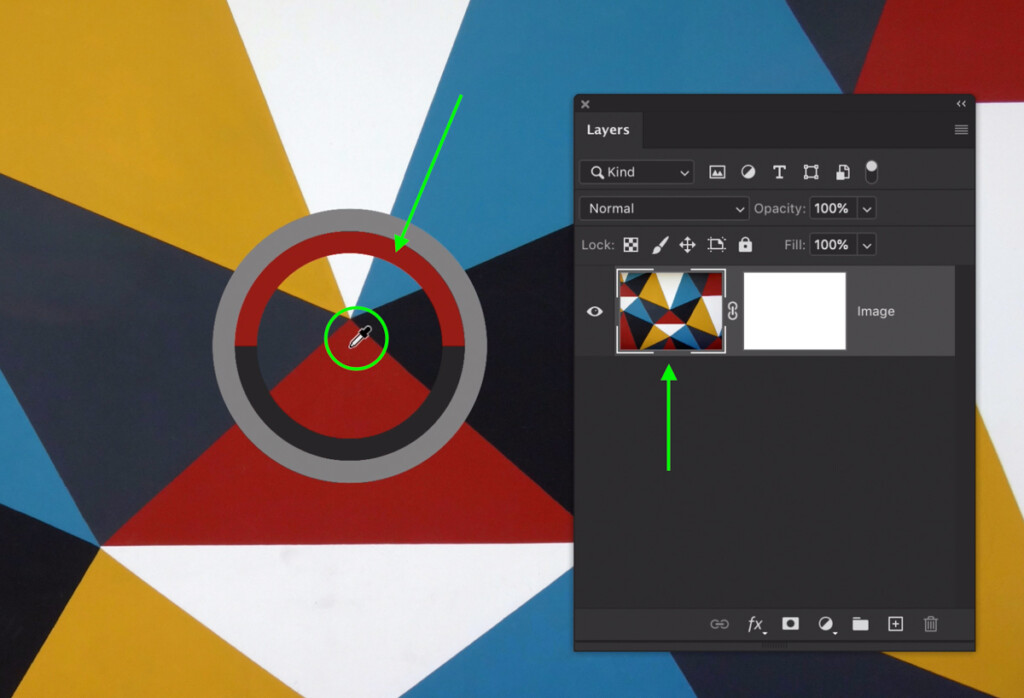
Now when you go to use the Eyedropper Tool, you’ll be sampling the colors of that layer (or other layers depending on the sample setting) and not the mask.
Problem solved!
2. Check The Sample Size Setting
You may be facing another issue because your Eyedropper is working, but it’s not quite sampling the correct color. This is especially common if you try to sample a very small area of your image.
If you’re using too large of a sample size, the Eyedropper tool won’t get a proper sample. Instead, it will take an average of all the surrounding colors and give you something different than expected.
Let me give you an example.
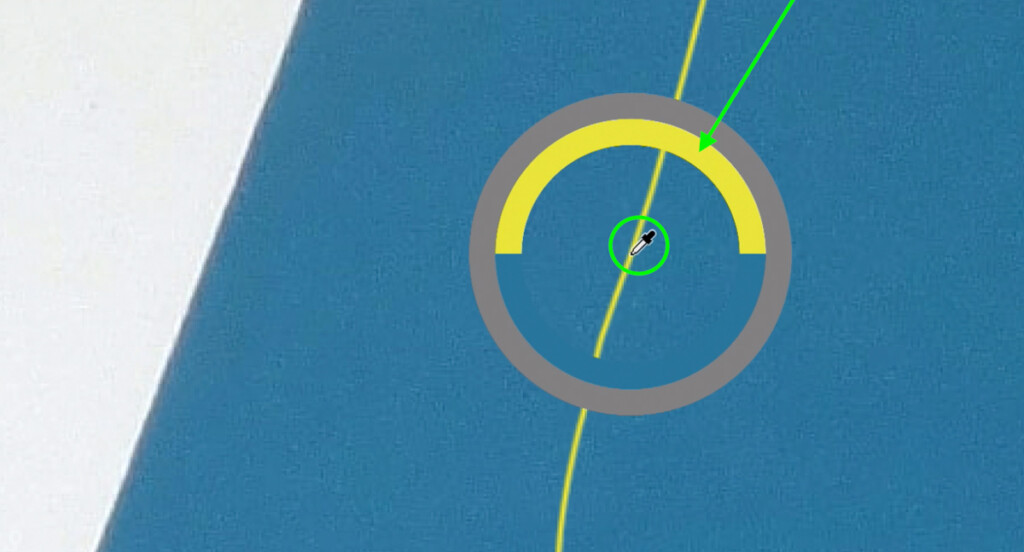
In this image is a very small yellow brush stroke I want to make a sample of. When I select the Eyedropper Tool (I) and click to sample the yellow, my sampled color does not look anything like the yellow I’m clicking on.

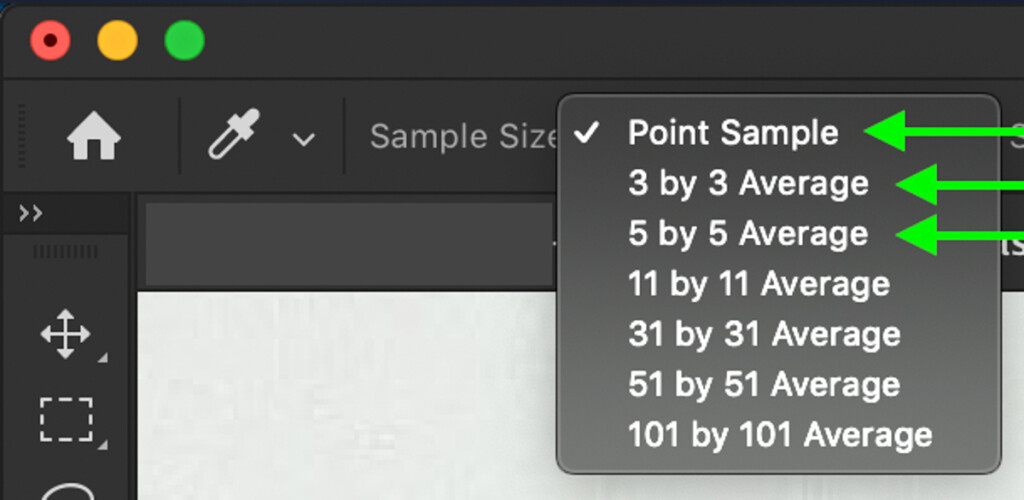
This is because my sample size is set too large, in this case, a 101 by 101 pixel average. That means that the Eyedropper Tool is looking at all of the nearby colors within a 101 pixel square from the original sample. Since there are a few different colors within this range, I get a completely different color than the yellow I’m sampling from.

To fix this problem, all you need to do is change the sample size to 5 by 5 Average, 3 by 3 Average, or Point Sample.
If you want the most specific sample, a point sample will do the best job. This setting will only look at exactly where you click, making it easy to target subtle colors in an image.

The 5 by 5 average also does a good job for general use since it considers some surrounding colors. It ultimately comes down to how specific you need to be.
So if you ever find that the Eyedropper Tool isn’t sampling the right color in Photoshop, double-check your sample size!
3. Check Which Type Of Sample You Are Using
When you’re using the Eyedropper Tool in Photoshop, it will sample your image differently depending on the sample type. Rather than how large of a sample radius like in the previous example, the sample type dictates what layers are actually considered in a sample.
In Photoshop, there are 5 different sample settings to choose from. Below breaks down what each of them does.
– Current Layer
This sample type will only let you sample your selected layer. Depending on which layer you have highlighted in the layers panel, you’ll end up with different sampling results.
– Current & Below
The Current & Below sample considers the layer you have selected, plus the layer directly below it. This other layer could be an adjustment layer, a smart object, or a regular layer, and it will still be added to the sample. Every layer outside of these two layers will not be included in your Eyedropper sample.
– All Layers
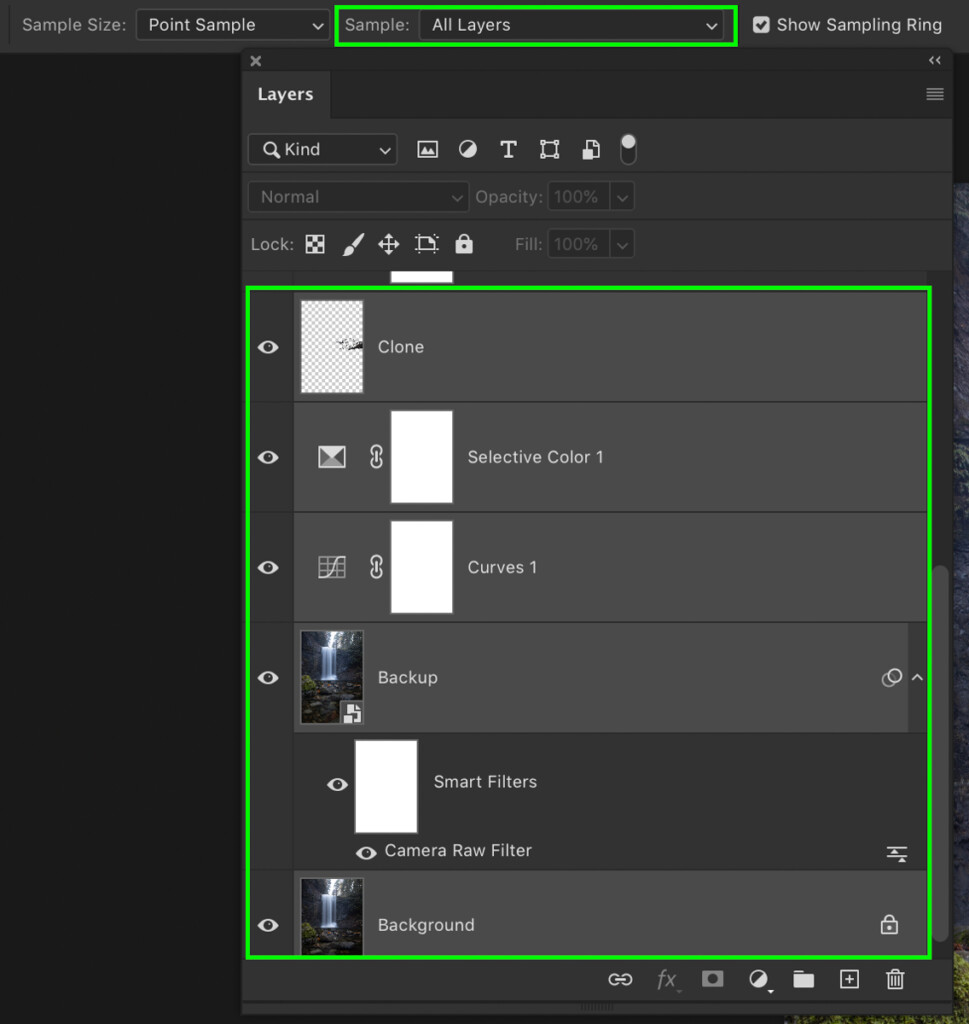
With an All Layers sample type, the Eyedropper will sample every layer in the layers panel regardless of its type. This option is great if you want to sample everything you see in your project at once.
– All Layers no Adjustments
When sampling All Layers no Adjustments, that means the Eyedropper Tool will only look at layers and not adjustment layers. This way, your samples won’t be affected by any color or exposure adjustments made to a layer. Instead, it will only sample your layer’s original color values.
– Current & Below no Adjustments
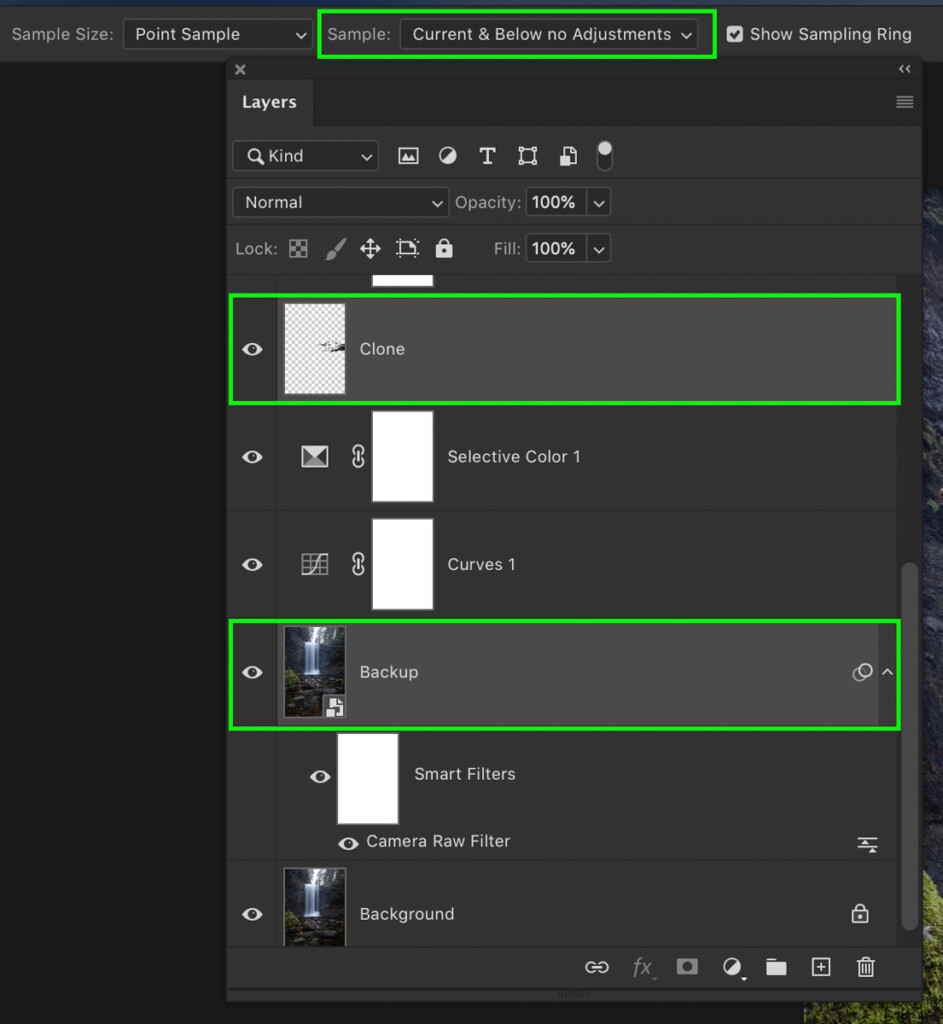
Finally, the Current & Below no Adjustments sample will sample your currently selected layer, plus the layer directly below it. However, the big difference is that it will ignore any adjustment layers between your selected layer and the next closest layer.
Depending on which sample type you are using, you may have a problem with the Eyedropper tool selecting the right colors. To fix this, consider what areas of your photo you want to sample, which layers those adjustments are on and set the sample type accordingly.
If you aren’t sure which one to use, the All Layers setting will typically get the result you’re looking for.
4. Ensure “Show Sampling Ring” Setting Is Checked Off
Whether you’re using the actual Eyedropper Tool or using it alongside the Brush Tool, you may notice that the color sample ring suddenly vanishes. This makes it much more difficult to know what color you have sampled since the only thing you can see is the tools icon.
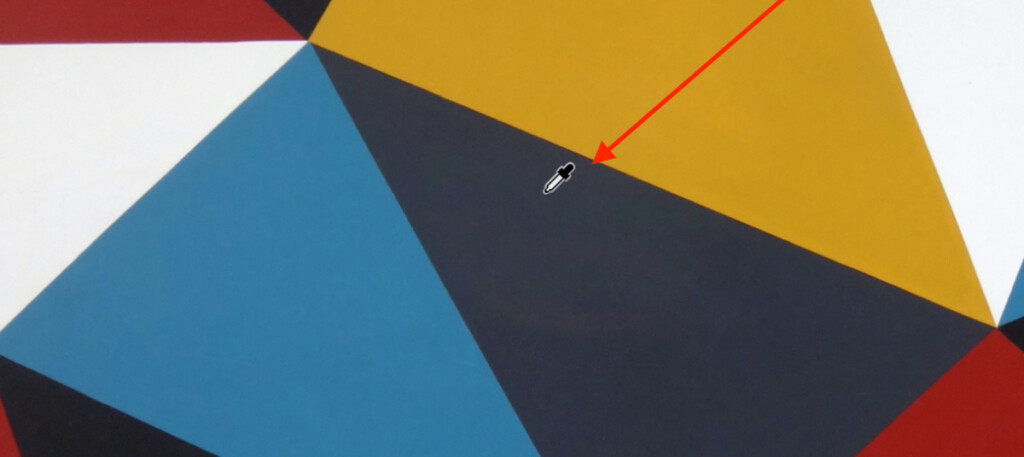
This can happen if you accidentally uncheck the show sampling ring option in the Eyedropper Tools settings bar. If you’ve only been using the Eyedropper with the brush tool, you won’t see any of these settings.
By pressing I on your keyboard to access the Eyedropper Tool, check off the Show Sampling Ring option from the upper settings bar.

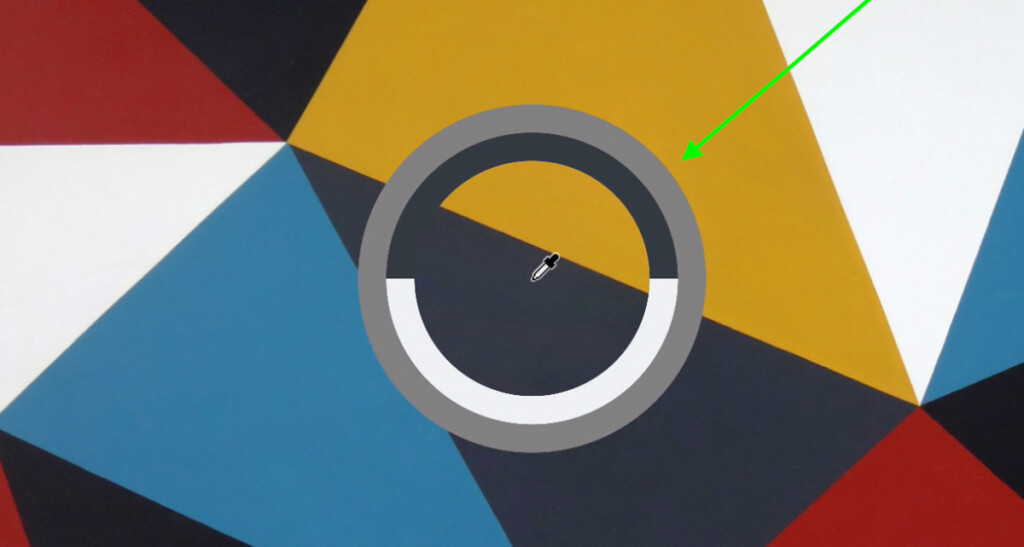
Now when you sample a color, the colored ring will be visible again, and you’re back in action!
5. Double Check You Are Using The Correct Eyedropper Tool
The final common reason why the Eyedropper Tool isn’t working in Photoshop is that you have the wrong version of the tool selected. In Photoshop, there are 3 different kinds of eyedroppers called the Eyedropper Tool, the 3D Material Eyedropper Tool, and the Color Sampler Eyedropper Tool.
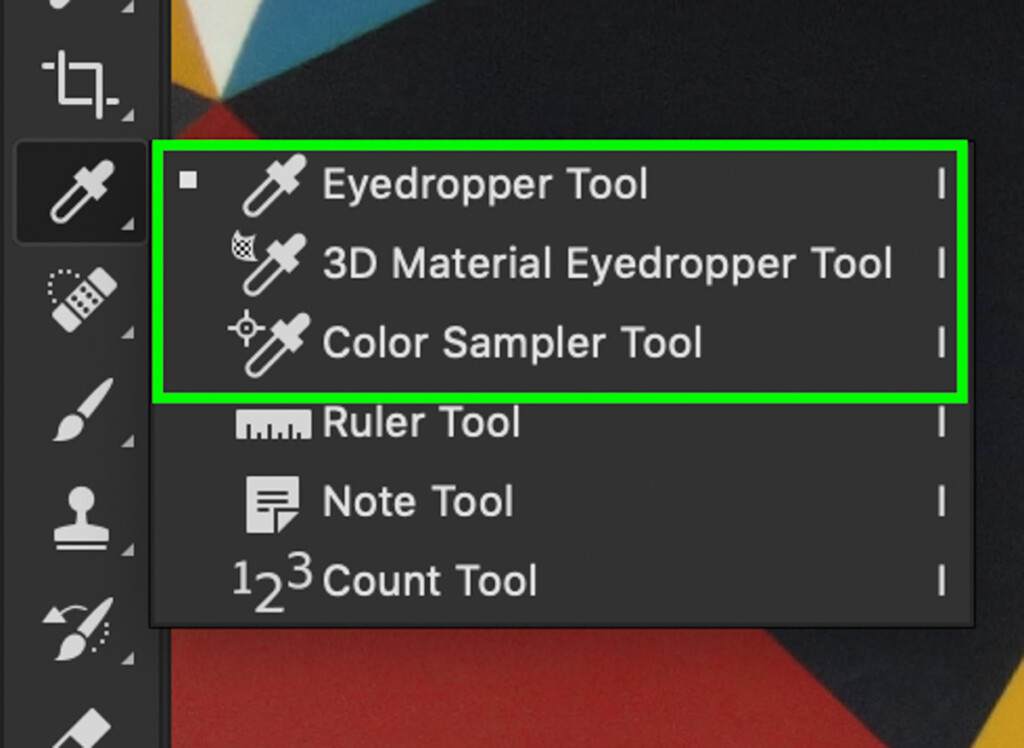
Although each of these tools has completely different uses, it’s easy to get them mixed up when looking at your toolbar. After all, they all have very similar tool icons to one another.
For sampling colors in your photo, the tool you want to use is the Eyedropper Tool. By clicking and holding on the eyedropper icon in your toolbar, you can switch over to the correct eyedropper.
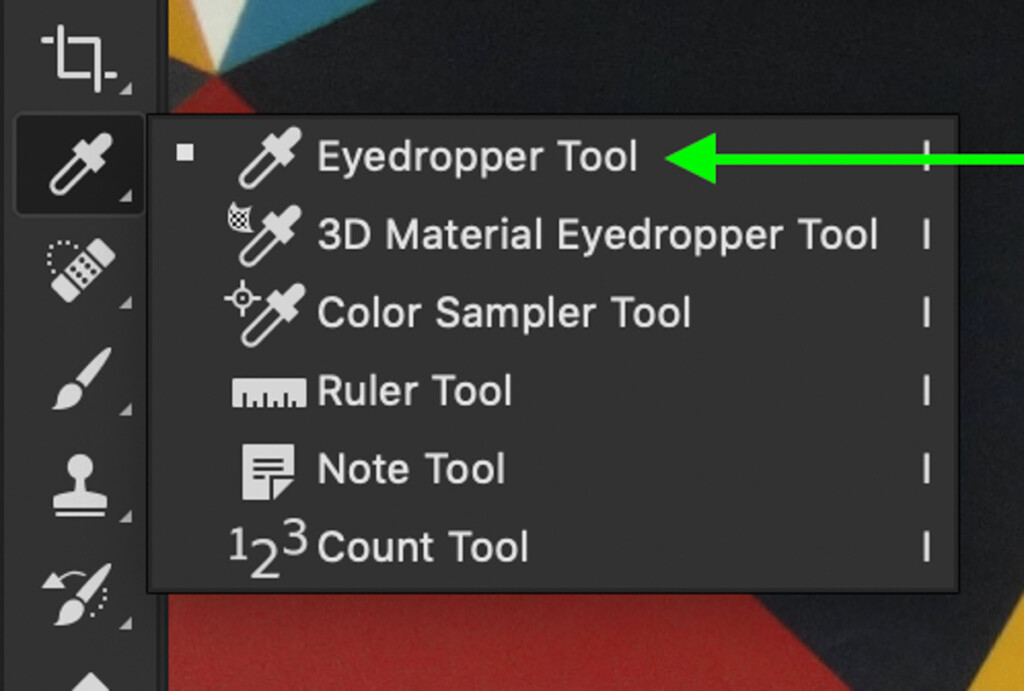
Now you’ll be able to sample colors without any more problems!
So those are a handful of reasons the Eyedropper Tool stops working and how to fix it in Photoshop. As with any tool in the program, they often stop working properly because of a small setting being out of order. By going through all of your settings options as we did here, you can pinpoint exactly where the problem is occurring.
Happy Sampling!
Brendan 🙂


EyeDropper don’t get values to colors. It change values only in preview box and information but sliders not move.
I use photoshop for 23 years and can not to posible found solution.
I tested on diferent PC and same problem, after delete pref. same problem.
I have Photoshop v25.1
I am not totally sure what could be causing that without a screenshot, which unfortunately cannot be added to comments, but a couple ideas are:
– Make sure the image layer is selected so that you are actually sampling those colors and not a mask.
– Confirm your foreground color swatch is selected if using the color palette window in your workspace, otherwise it won’t properly change the color.
– There are no sliders related to the eyedropper tool. It only samples color to set to your foreground or background colors. If you are trying to sample something from a Hue Sat adjustment, that’s a different technique than just the eyedropper tool. This is the only situation I can think of where sliders would be involved like you are mentioning.
I found solution. Helped me downgrade because version 23.1 have issue with eye dropper and showing infoemations.