


Photoshop comes with many fonts for you to use in your projects, but sometimes, the built-in options just aren’t enough. So what do you do when you want to use a font that Photoshop doesn’t have or when the available fonts don’t fit your needs?
Luckily, Photoshop makes it easy to import and use new fonts, which are readily available online and often for free. The process of getting a free font off the web and onto Photoshop for you to use in your projects is quite simple — Photoshop even does half the work automatically.
So, let’s go over how to find, add, and use new fonts in Photoshop.
How To Import New Fonts Into Photoshop
Step 1: Download A New Font
The first thing you’ll need to do before adding a new font to Photoshop is to find a font you like. There are tons of sites around the web where you can browse and download fonts for free.
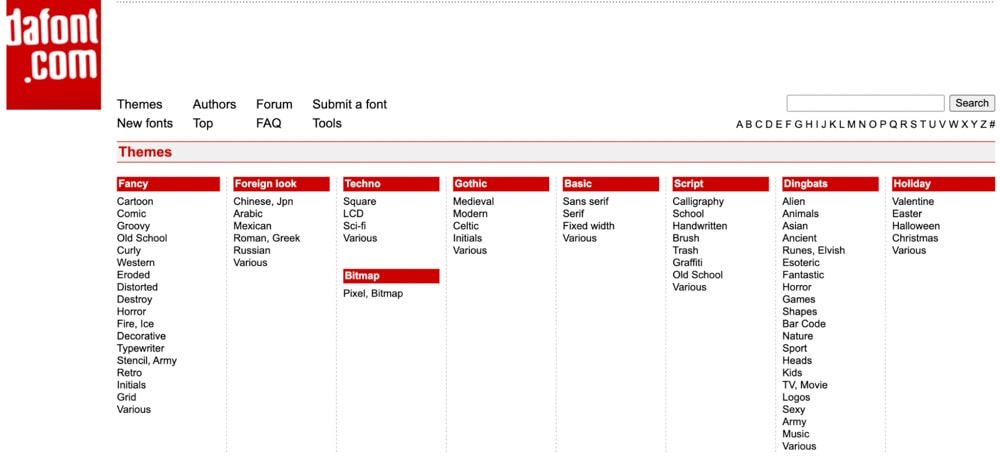
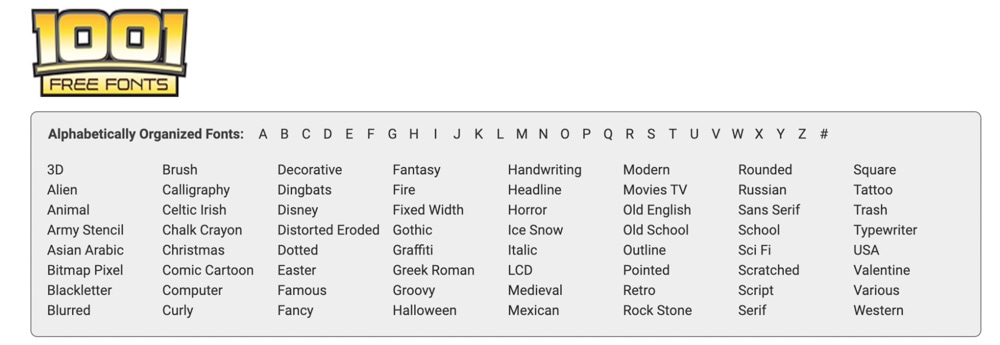
DaFont and 1001 Free Fonts are my personal favorite as both sites allow you to browse fonts from a wide variety of categories. They sort the categories alphabetically, making it easy to find the exact font style you’re looking for. The fonts are all free for personal use, and the sites are secure to use.
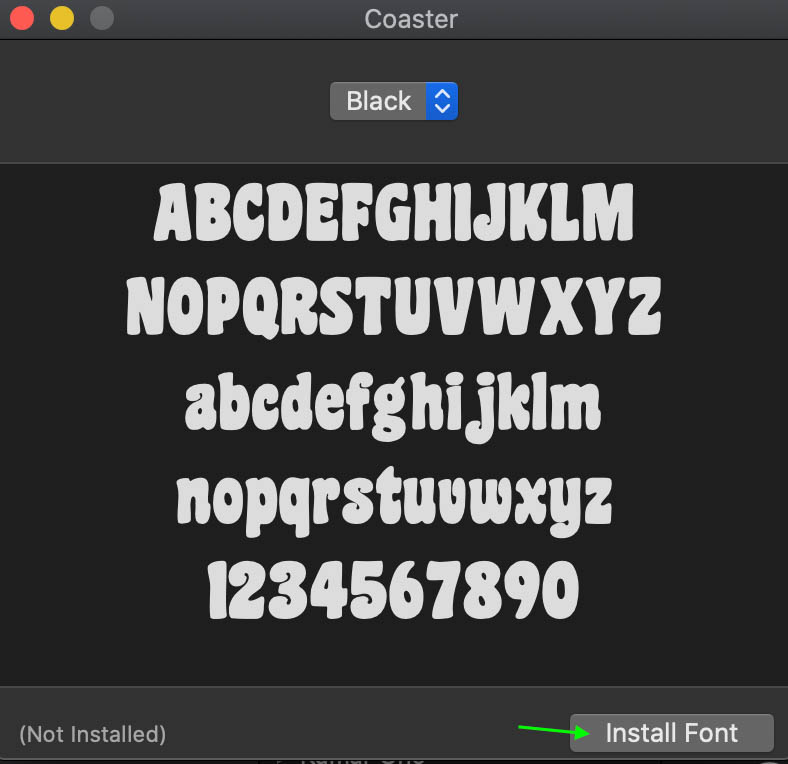
On 1001 Free Fonts, I was able to find a font in the Groovy category called Coaster that I feel would fit well with the 70’s style of the project I’m working on. To download a font you like, click the font, and the download will begin or click the Download button.

The process is the same for Dafont. Just click the Download button, and the download will begin.

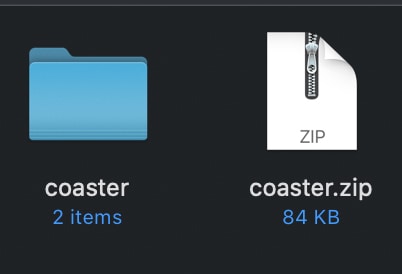
Now, you should have the zipped folder containing the TTF files of the font you downloaded in your files.
Step 2: Double Click The New Font To Install It On Your Computer
Head to your downloaded files and double-click the zipped folder (Mac) or Extract Files (Win) to unzip it. The folder will appear beside it.
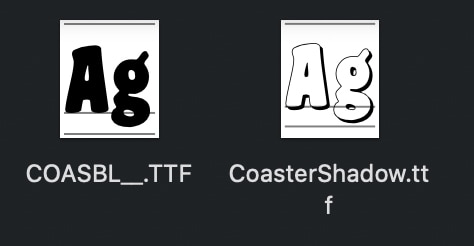
Open the folder and you’ll see the various styles the font comes in — the font I’ve downloaded comes in normal and shadow.
Double-click each of the TTF file font styles you’d like, and in the window that appears, you’ll see the entire font in all the characters. Press the Install Font button at the bottom right of the window.
The font you install will appear in your User Fonts in the files of your computer.
Step 3: Restart Photoshop
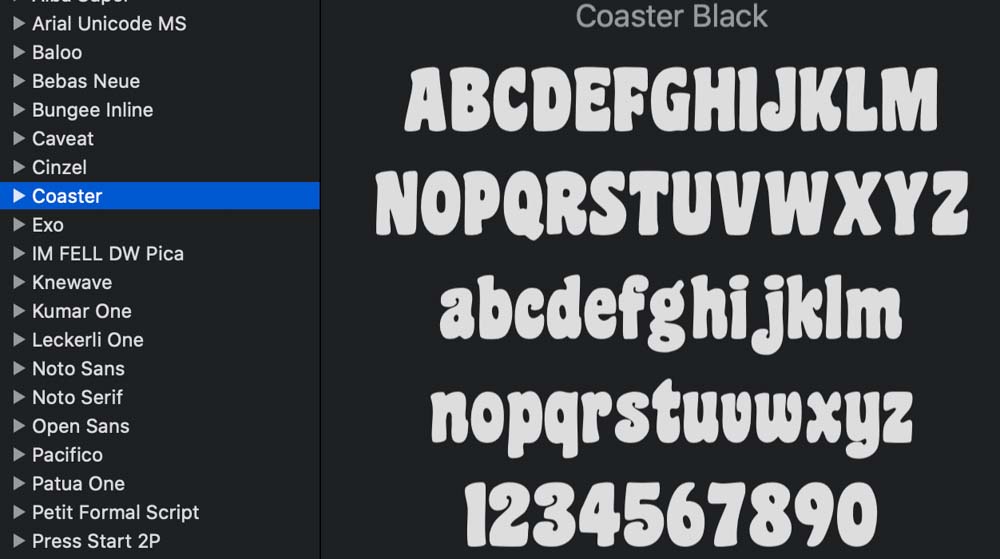
Once you’ve successfully installed the font in your files, you’ll be able to access it across all the applications you have that utilize your system’s font library. This includes Photoshop — the fonts will automatically appear for use in the program the next time you open the program.
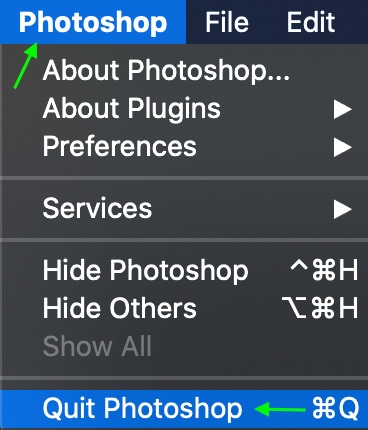
If you already have Photoshop open (even if it’s running in the background), you’ll need to close the program for the changes to take effect.
Save anything you’re working on as a PSD file so you can open it back up in Photoshop later, then head to Photoshop > Quit Photoshop to close the program entirely.
Then, reopen Photoshop however you normally do. The font you downloaded will have been added to the available fonts you can use in Photoshop, so head to the next step to access it.
Step 4: Select The Type Tool & Locate Your New Font
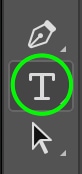
Finally, it’s time to find and use your new font in Photoshop. After opening a new document or project, click the Text Tool icon from the toolbar and then click your document to create a new text box.

The sample text will be selected. Before erasing it, head to the Options bar, where you’ll see the Font drop-down. Click the arrow, and the Font menu will appear.

Scroll through to find the font you downloaded and click to apply it to the selected text, and use it to type.


You can now download whichever fonts you’d like off the internet and use them in Photoshop! If you’re still new to working with text in Photoshop, be sure to read my in-depth guide on working with text in Photoshop here.
