
Texture and clarity adjustments are commonly found in just about every photo editing program, but in Photoshop, they seem to be non-existent. These sliders cannot be found within any adjustment layer in the program, but instead are found within Camera Raw. Here’s how to use them!
To apply texture or clarity adjustments in Photoshop follow these steps:
- Select Your Image Layer In The Layers Panel.
- Right-Click On The Layer And Choose “Convert To Smart Object.”
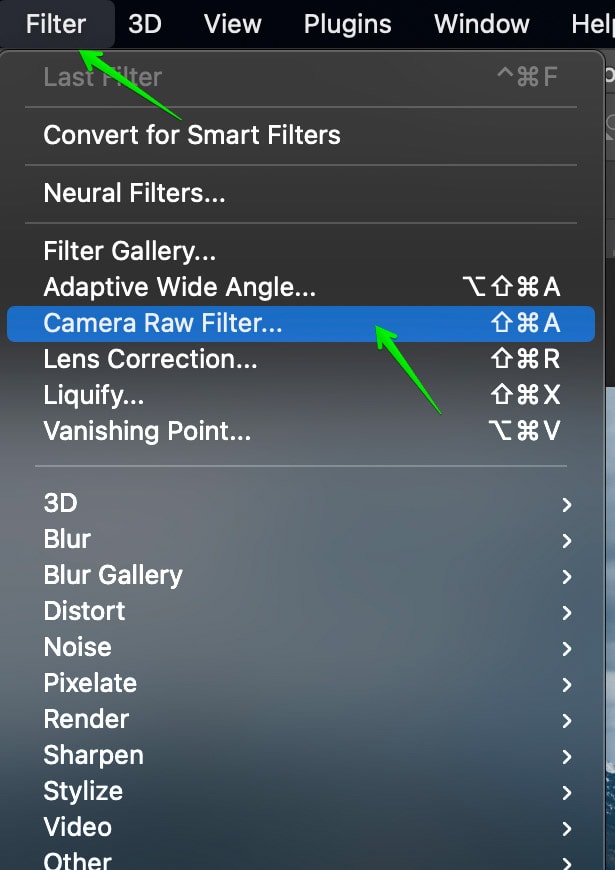
- Go To Filter > Camera Raw Filter.
- Open The Basic Panel In Camera Raw.
- Adjust The Texture Or Clarity Slider.
- Click OK To Exit Camera Raw.
Now if you’re still feeling a little lost, not to worry! I’m going to break down each of these steps more in-depth throughout this post. To start off, let’s apply a general texture and clarity adjustment to an entire photo. Later on, I’ll explain how you can apply these adjustments selectively for more subtle results. Let’s get started!
How To Edit Texture & Clarity In Photoshop
Step 1: Convert Your Image To A Smart Object
It’s a good idea to first convert your image layer to a smart object so that your Camera Raw adjustments don’t become permanent. By converting to a smart filter now, you can take advantage of the Camera Raw adjustment getting added as a smart filter in later steps!
To begin, open your image file in Photoshop using Command (Mac) / Control (PC) + O, or drag and drop an image from your computer onto an existing document.
Now, select the image layer in your Layers panel, right-click and select ‘Convert to Smart Object’.

As I mentioned previously, converting an image to a smart object will help you to edit it non-destructively. Once your layer’s converted, Camera Raw will be applied as a smart filter rather than getting applied directly to the image. If you want to have the option to edit your texture and clarity adjustments later on, using smart objects is essential. You can learn all the important uses of smart objects in this post if you need more answers!
Step 2: Open Your Image In Camera Raw
With your image layer converted to a smart object, make sure it is selected, then go up to Filter > Camera Raw Filter.
Alternatively, you can use the keyboard shortcut Command + Shift + A (Mac) or Control + Shift + A (PC) to access Camera Raw.
Step 3: Adjust The Texture Or Clarity Sliders
By default, you will be within the Edit Module of Camera Raw which may look familiar if you’re a Lightroom user. The overall layout of Lightroom and Camera Raw are strikingly similar.
Now to locate the texture and clarity sliders, click on the Basic Tab to reveal the settings inside. Here you will find your basic exposure, contrast, and color settings. You will also find the texture and clarity sliders in this panel!
In the screenshot below you can see they are located near the bottom of the Basic adjustment options.
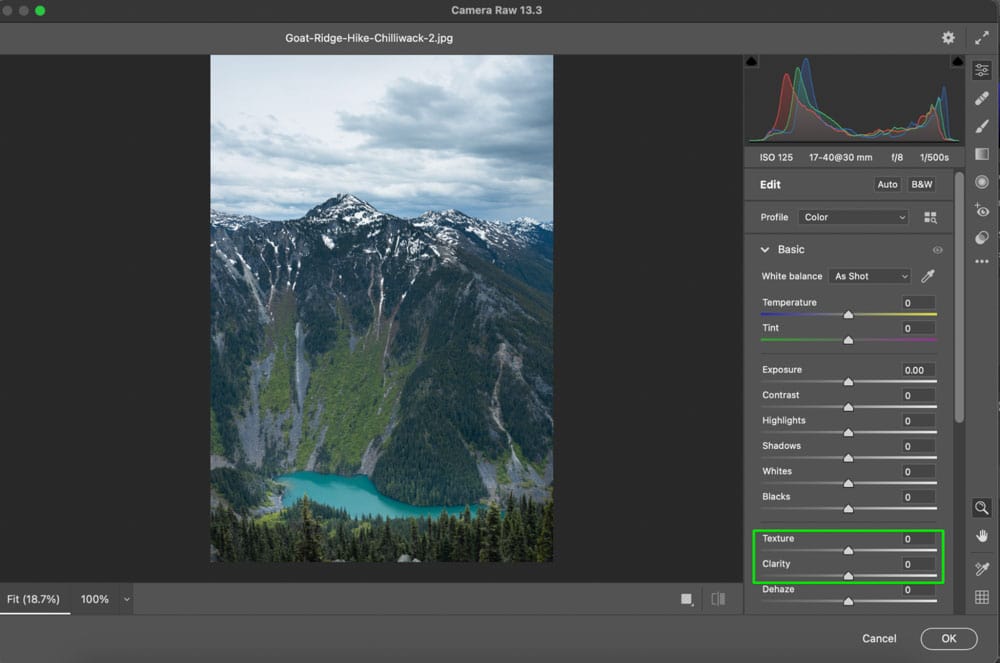
If you aren’t sure which one you should use, let’s quickly break down what each adjustment offers.
The Texture Adjustment controls how much edge contrast surrounds small details in your photos. With a high texture setting, little details like the blemishes on someone’s skin will begin to stand out. With a low texture setting, these same details will become smooth and less visible.
Meanwhile, the Clarity Adjustment controls the mid-tones exposure range contrast. In a nutshell, this means you can boost the contrast of the mid-tones without sacrificing your highlights or shadows. If you want to give your image a more dramatic feel, the Clarity adjustment should be your go-to!
Step 4: Press OK To Save Your Changes
Once the adjustments have been applied, click OK at the bottom of the Camera Raw window. Camera Raw will close and your adjustments will be added to your image. Since the layer we applied these edits to is a smart object, the Camera Raw adjustment is listed as a smart filter directly below. To reaccess and update these Camera Raw adjustments, just double-click on the words “Camera Raw Filter” within your list of smart filters!
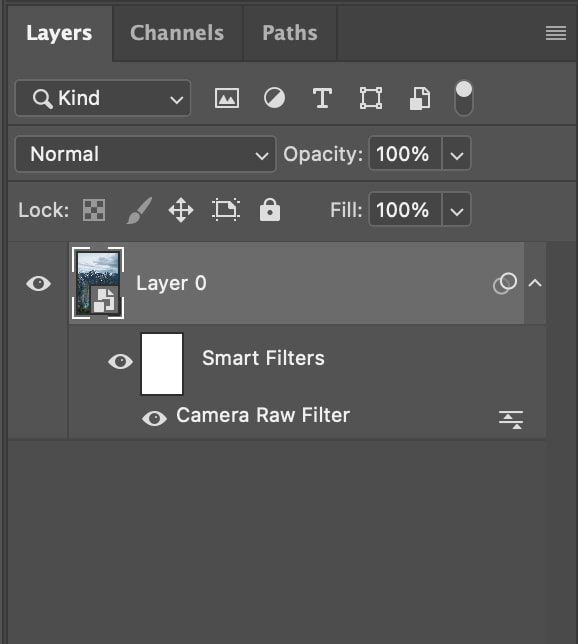
If you want to view the before and after of the texture and clarity adjustments, click on the eyeball icon beside the Camera Raw filter to toggle its visibility.
How To Apply Clarity And Texture Adjustments Selectively
In the last example, the texture and clarity adjustments were applied to the entire photo. Now, what if you want to only add these adjustments to a certain part of your image, like the sky for example? This can be easily done using some similar steps as before, but with a slight variation to the process!
Step 1: Open Camera RAW
Just like before, select your image layer, convert it to a smart object, then go to Filter > Camera Raw Filter to open Camera Raw.
You can also use the keyboard shortcut Command + Shift + A (Mac) or Control + Shift + A (PC) to access Camera Raw instead.
Step 2: Choose A Selective Adjustment Method
Similar to Lightroom, Camera Raw has a variety of selective adjustments. Things such as the Adjustment Brush, Graduated Filter, and the Radial Filter. You can use any of these selective adjustment tools for editing the texture and clarity.
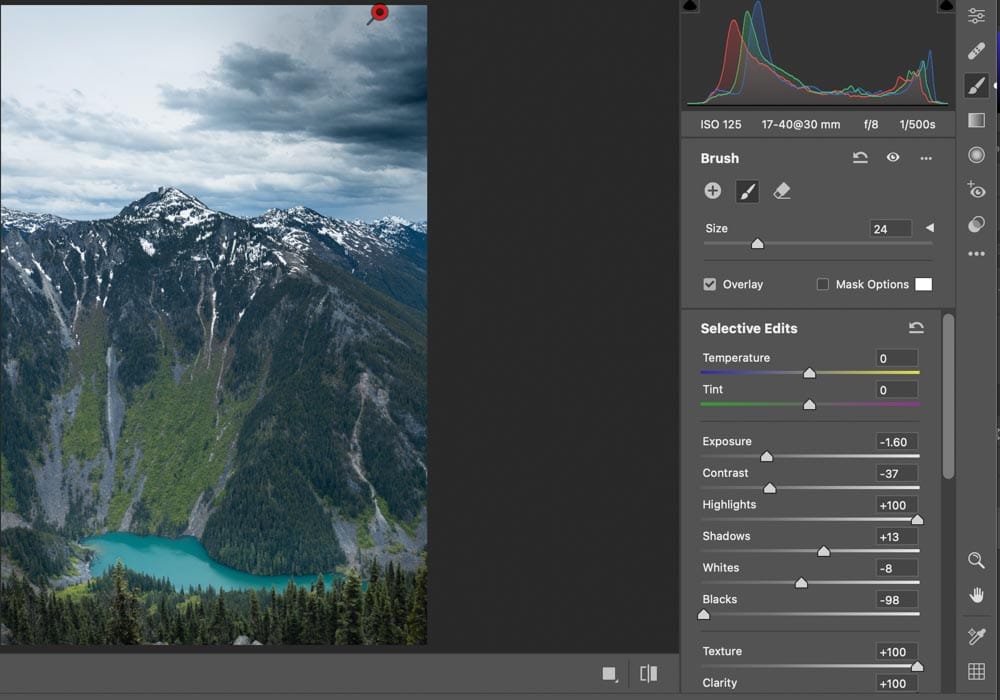
For this example, I am going to use the Adjustment Brush to paint a selective adjustment over the sky. You can press K on your keyboard to access this tool or click on the brush icon in the Camera Raw toolbar.
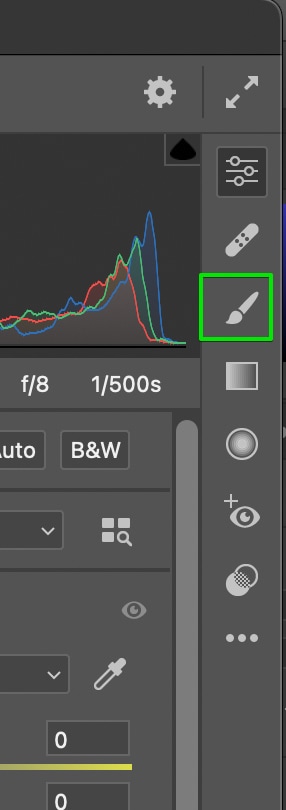
Next, choose the brush size you want by adjusting the “Size” slider. You can also use the [ or ] keys to change the Adjustment Brush size.
Then click and drag to paint over the areas that you want to edit.
After painting, you can use the clarity and texture sliders to edit the area you have brushed over. In the screenshot below I boosted the texture to +100 for a dramatic example of enhancing a sky. In most cases, a more subtle adjustment will do the trick. The red circle icon on my image represents the general location of my selective adjustment.
Step 3: Click OK To Exit Camera Raw
Once you are happy with your edits, click OK at the bottom of Camera Raw to save your changes and apply your adjustments as a smart filter.
Editing the texture and clarity sliders in Photoshop is very easy once you know where they’re hidden. By opening any image layer with Camera Raw you can quickly update the texture and clarity in just a few seconds!
Happy Editing!
Brendan 🙂


