
How To Mask In Lightroom
To make a selective adjustment in Lightroom, you need to first create a mask. These masks define where your adjustments will take place and allow you to further refine your edits. The trouble is, figuring out how to mask in Lightroom isn’t as straight forward as it sounds. Although the basics of the process are simple, there are many additional features that are easy to miss out on. Luckily, this post will break down everything you need to know about masking in Lightroom and how to make better selective adjustments.
You can create a mask in Lightroom using the Adjustment Brush, Gradient Filter, or Radial Filter. These masks define a specific adjustment area, making it easy to enhance certain parts of a photo. All of these tools can be found at the top of your toolbar within the Develop module of Lightroom.
To help you better understand the different uses of these tools, let’s dive into the specific masking tools, as well as settings to further refine your selected areas.
Where Is The Mask Tool In Lightroom?
Unlike Photoshop, there is no such thing as a layer mask or a particular masking tool for adjustments. Instead, Lightroom uses a little something called selective adjustment tools.
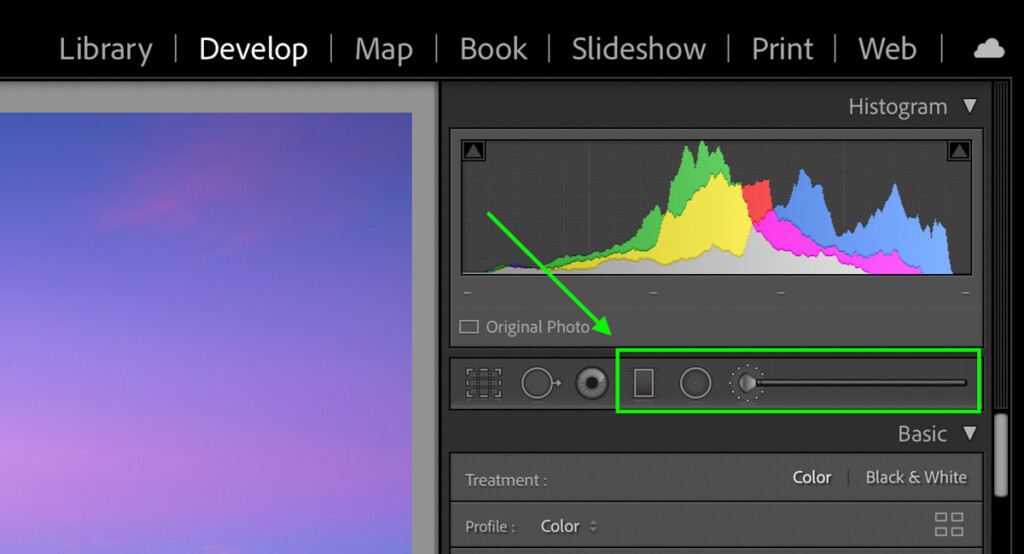
All of these tools can be easily found at the top of your toolbar while in the Develop Tab of Lightroom.

The three masking options you’ll have are called the gradient filter, radial filter, and the adjustment brush. To access any of these tools, simply click on them and set the selection area on your image.
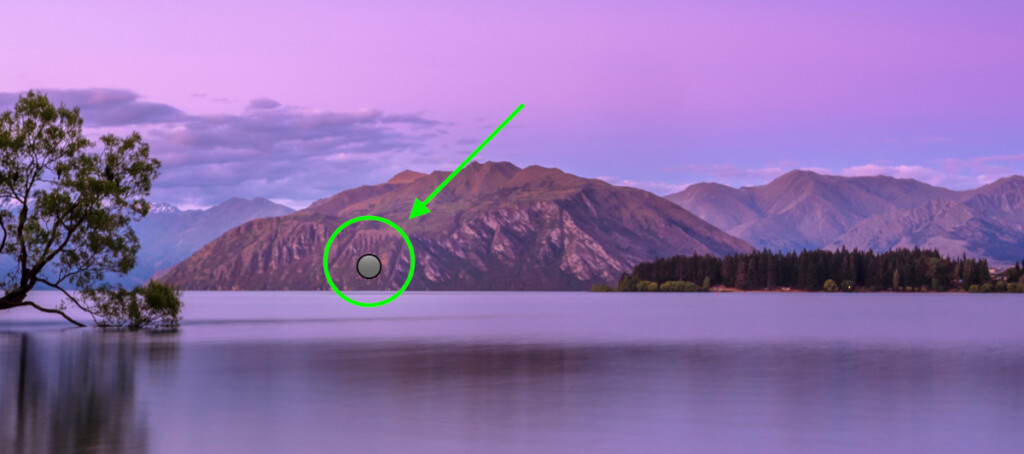
Even though Lightroom applies selective adjustments directly onto a photo, you’re still able to edit non-destructively. That means that you can easily go back to adjust your selection area after an adjustment is made. With each selective adjustment tool in Lightroom, you can re-access any of the tools by accessing the tool, then clicking on the adjustment area you want to alter.
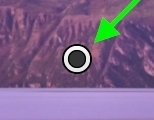
A grey circle indicates each selective adjustment. When you click on one of these circles, it will turn black, meaning that you’re adjusting that specific mask.
With that said, you will only see these masking areas when a particular tool is selected. For example, you will only see your gradient filter adjustments while the gradient filter is selected.
How To Apply A Mask Or Selective Adjustment
Creating a selective adjustment with any of these three tools is quite simple. In short, all you need to do is select an adjustment tool to use, set the masking area on your image, and make your adjustments. There are some differences in how each tool makes selections, so let’s quickly go through each.
Before you start, it’s useful to see where a mask is actually being applied. In Lightroom, a mask is indicated by a red highlight around the selection area. This highlight becomes visible when hovering your cursor over the grey circle or by pressing O on your keyboard. This shortcut will make your mask visible until you press O again to hide the red highlight.

Be sure to use this shortcut to your advantage to have an easier time making masks in Lightroom!
– Gradient Filter
The gradient filter can be accessed by clicking on the tall rectangular option in your toolbar. Once selected, an additional settings bar will drop down where you can make your selective adjustments.

Before you do that, you’ll want to define your selection area, also known as creating a mask.
This tool works by applying adjustments in a general linear gradient across your photo. By clicking and dragging out, you’ll be able to choose how soft or hard the edge of your gradient will be.
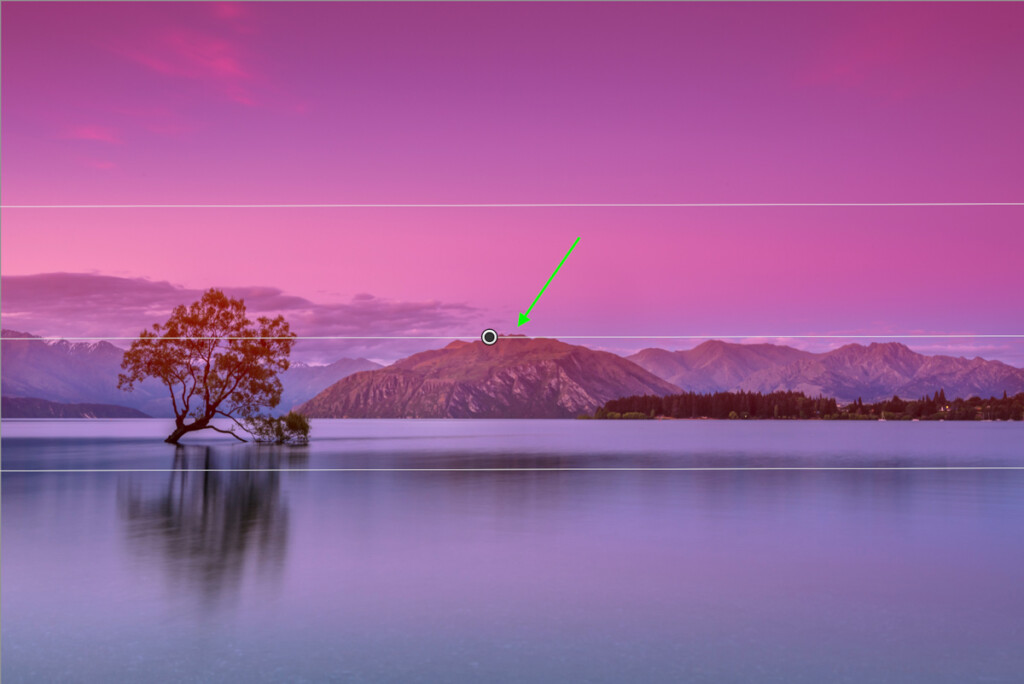
The easiest way to understand the softness is by looking at the two outer lines since they indicate the feather area. That means the further apart these lines are from the centerline, the softer-edged your gradient adjustment will look.
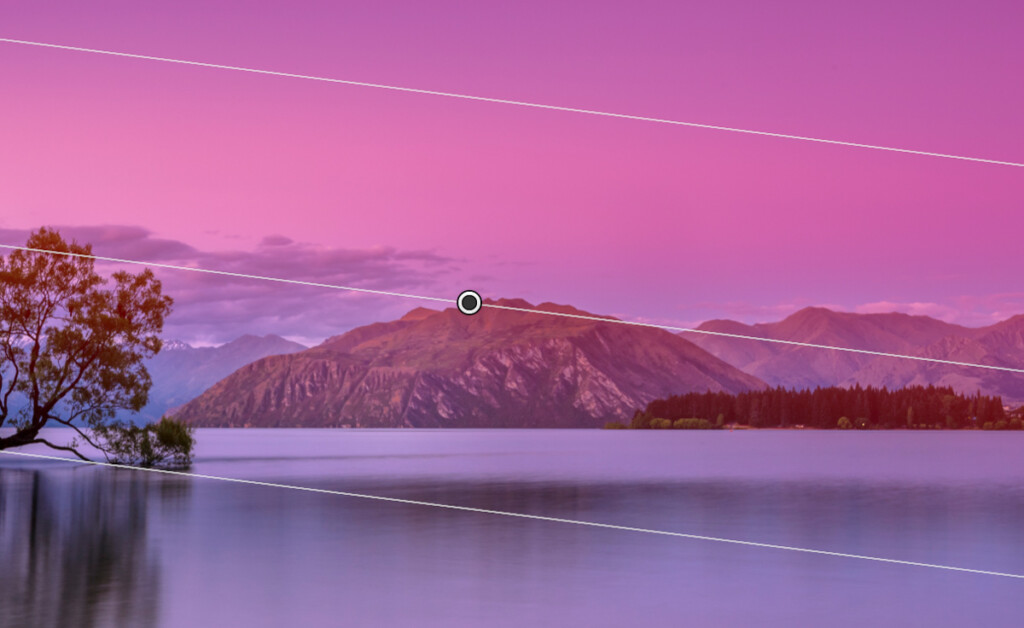
You can further edit your gradient filter afterward by rotating or expanding the gradient. To rotate this filter, hover your cursor near the center circle until your cursor becomes a double-sided U-shaped arrow. From there, simply click and drag in a circle to adjust the angle of your gradient filter.
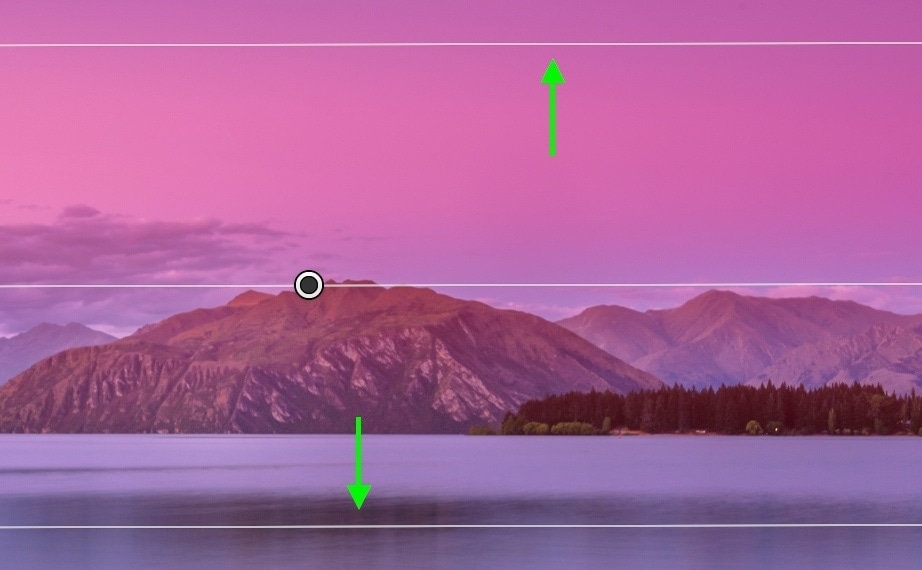
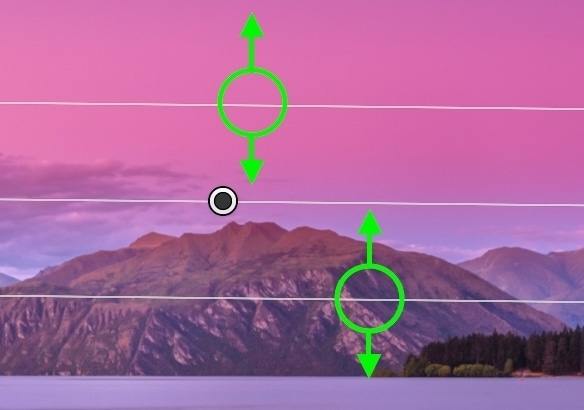
If you’d rather change the feather of your gradient, click on either of the outer lines and drag them in or out. Just remember, the closer together your lines are, the harder your gradient will look!
The gradient filter works best to make adjustments around the edges of an image or edit the color and exposure of the sky.
– Radial Filter
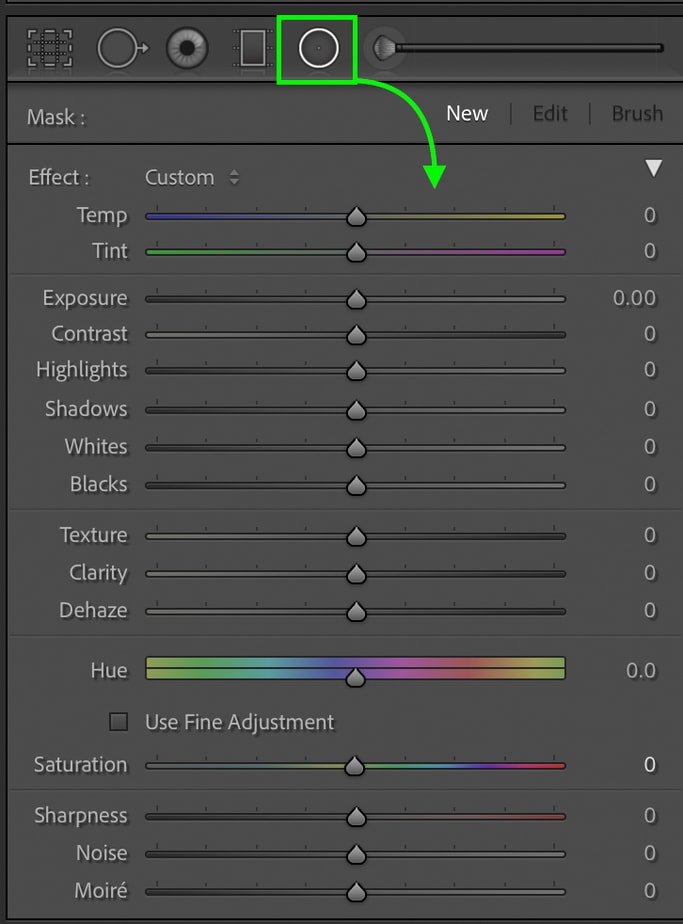
The Radial Filter is similar to the gradient filter, expect it created a gradient radially (in a circle) instead of linearly. This tool can be accessed among the other selective adjustment options, found as the outlined circle icon.

Once you’ve selected this tool, the same settings bar will appear, allowing you to make your selective adjustments. However, once again, there’s no point in adjusting these settings until after you’ve defined your selection area.
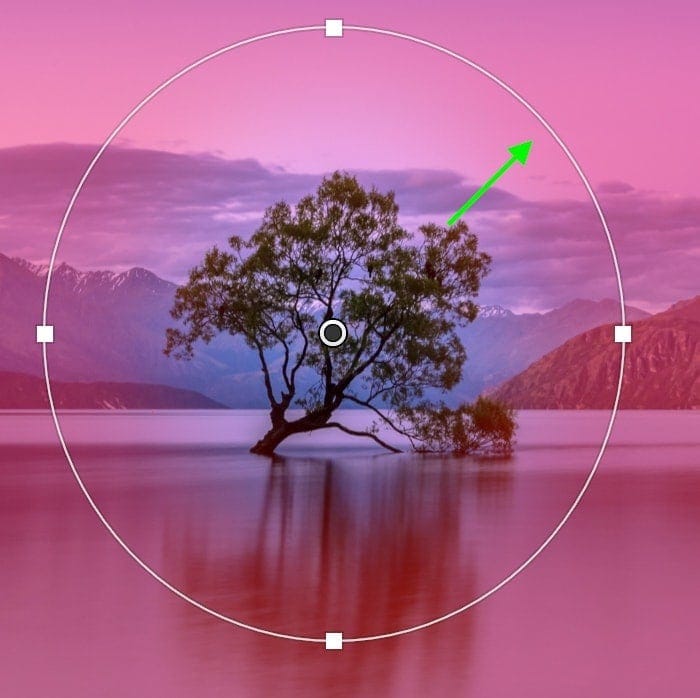
To add a new radial filter, click and drag out around a section of your photo. An outlined circle will appear to indicate your selection area.
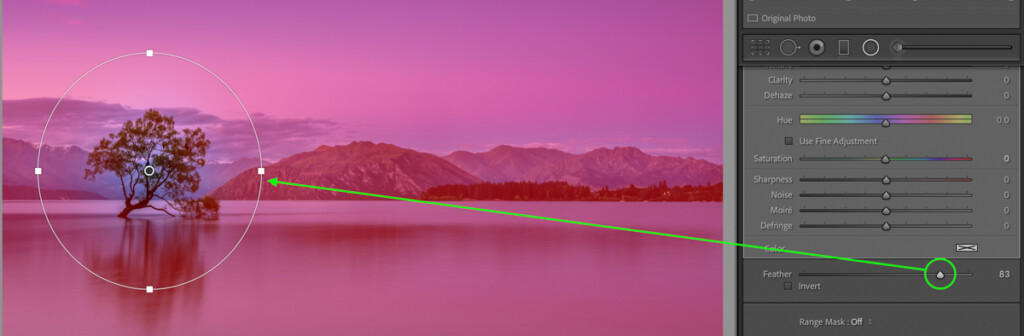
Unlike the gradient filter, the radial filter comes with a few additional settings to work through before making adjustments. The first is a feather slider, and the second is an invert option.
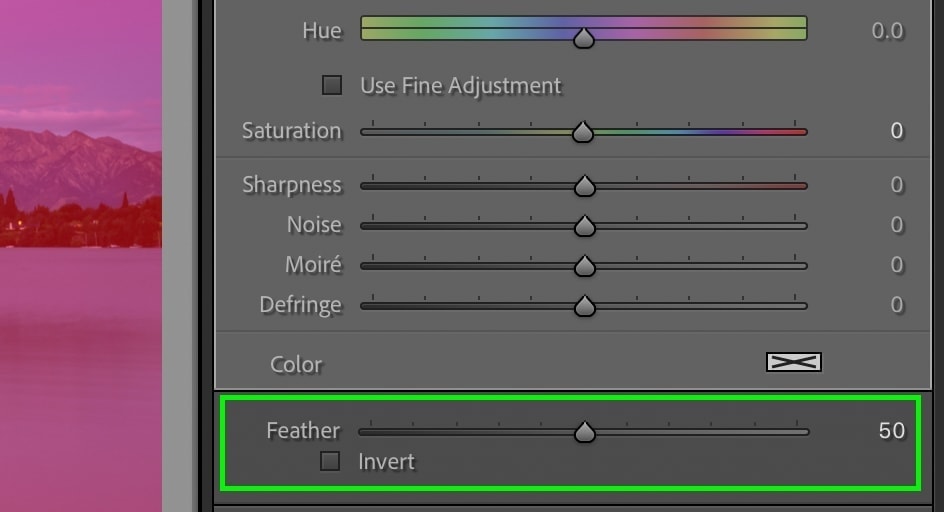
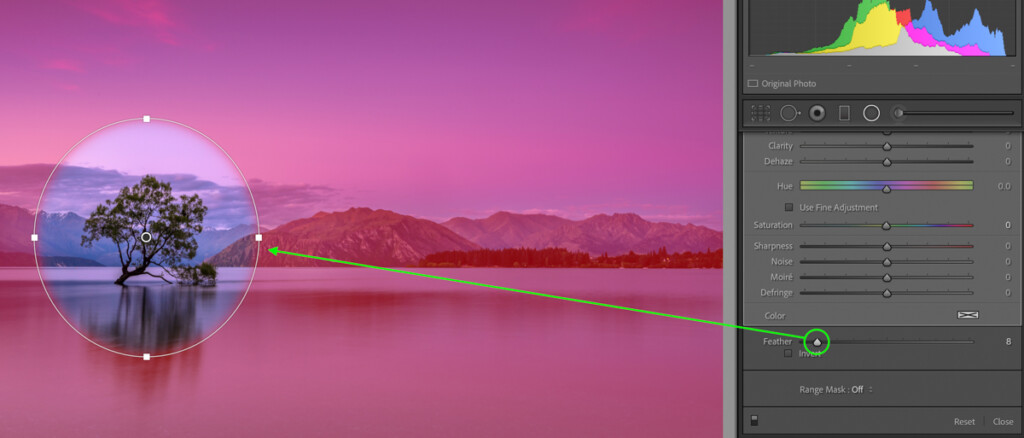
The feather slider dictates how soft the transition is between the center of the radial filter and the outer edge. By default, this is left at 50, but you can further blend the mask by increasing the feather radius.
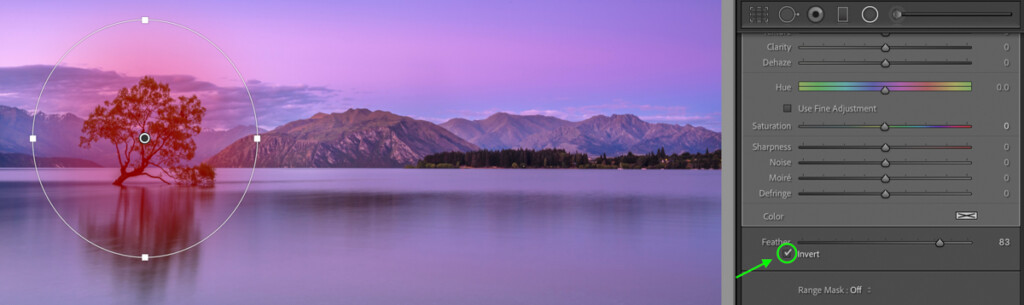
As for the invert box, checking this off will change your masking area from the outer edge to the inner edge of your radial filter. This is extremely useful for getting more specific with the selected area you want to edit.
Once your radial filter is set, simply go through your mask settings to make targeted exposure and color adjustments to your photo. This tool works best for drawing attention to a certain part of your image, such as a person.
– Adjustment Brush
The Adjustment Brush is one of the most versatile selective adjustment tools in Lightroom. Rather than being defined by a specific gradient, you can brush this adjustment anywhere you’d like. With additional settings to alter the brush softness and density, the options are limitless with this tool.

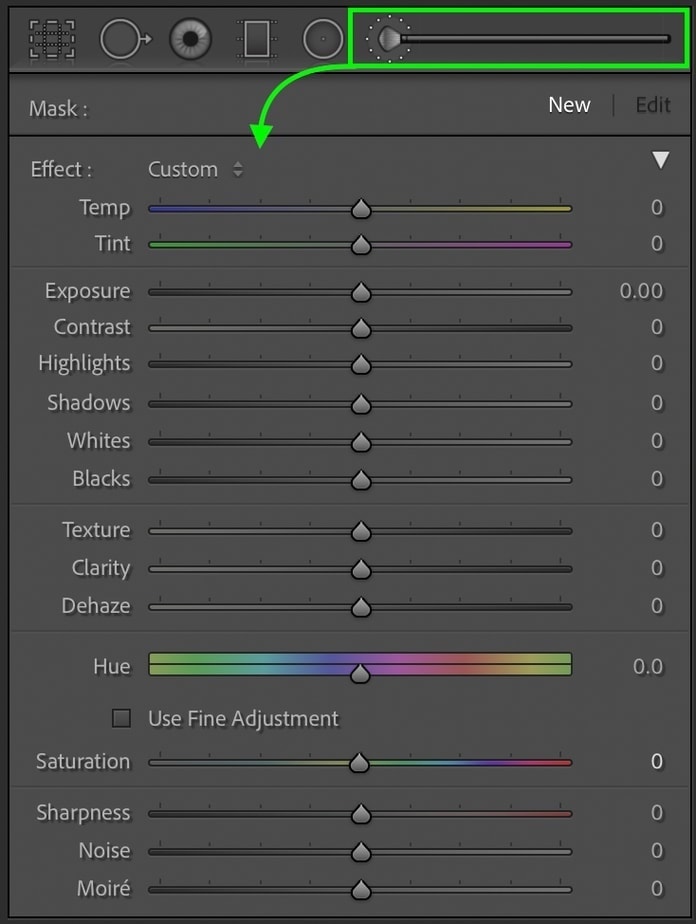
To access the adjustment brush, click on the long brush icon at the top of your toolbar. Just like the other selective adjustment tools, a dedicated settings bar will appear, but you’ll want to define the selection area first.
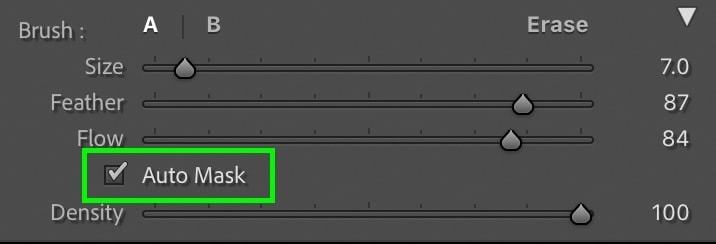
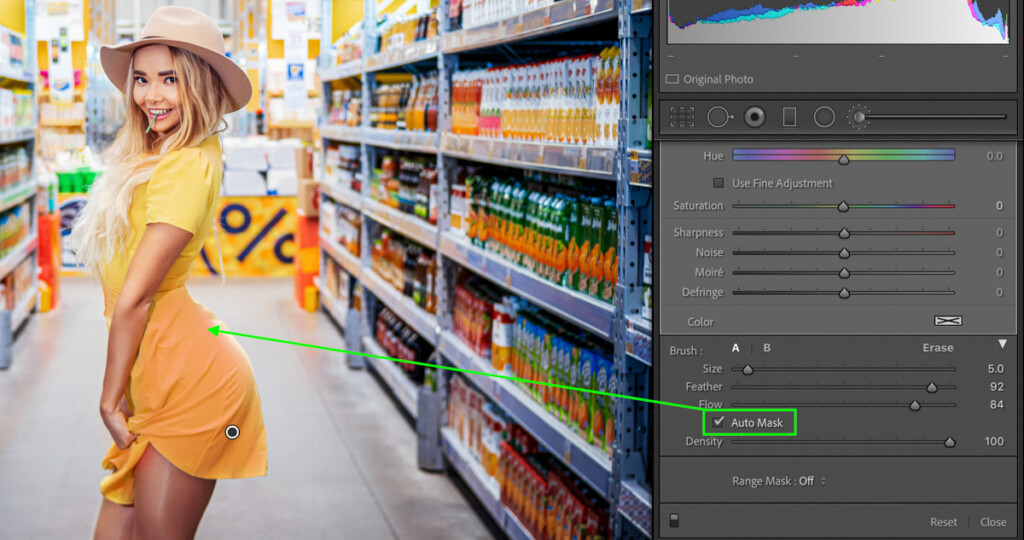
Before you brush the mask onto your image, take a look at your brush settings. Here you can choose the size, feather, flow, and density of your brush adjustments.
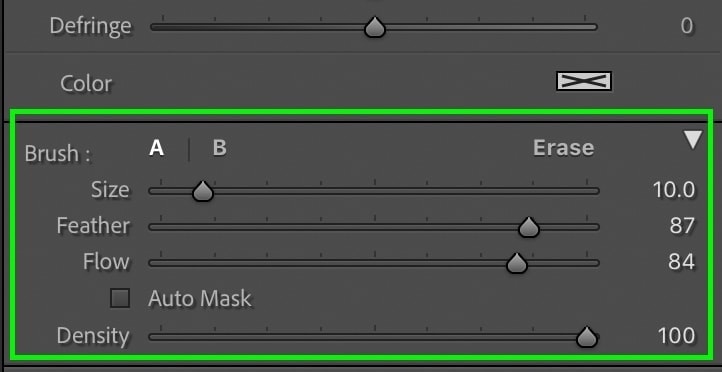
Let’s break down what each of these settings does:
- Size: Changes the overall size of the adjustment brush. You can also scroll on your mouse to change this.
- Feather: Affects how soft or hard the edges of your brush will be. For a more blended adjustment, use a larger feather radius.
- Flow: Changes how your brush is applied to your photo. Similar to pressing harder or lighter with a pencil, flow changes how strong your adjustments are applied.
- Density: Think of this like opacity. With a less dense brush, all of your adjustments will have less of an effect.
Once your brush settings are in order, just click and drag across your photo to create a mask. This will define your selection area and allow you to selectively adjust the parts you’ve painted over.
The adjustment brush works best for general adjustments or more targeted masks around a specific area or subject.
Types Of Masks In Lightroom
No matter what adjustment tool you’re using in Lightroom, there are three different ways to blend your mask into the photo. Depending on the type of adjustment you’re going for, each type offers a unique advantage.
The three types of masks you can create are called general masks, auto masks, and range masks. For now, let’s go over what each of these mask types does for your image.
– General Masks
A general mask is the default setting for any selective adjustment you make. Rather than blending the selection area into your photo, it just applies adjustments equally across the entire mask. This works perfectly for making blanket adjustments like darkening your sky or brightening up your subject.
If you aren’t feeling picky about how an adjustment is blended, a general mask will work well. In fact, in most applications, this type of mask will be all that you need. The caveat is that it’s harder to make some adjustments blend the way you want.
For example, you may want to generally brighten the subject of your photo. The problem is, when you make the brightening adjustments, it makes your highlights too bright or perhaps washes out a particular color.
The other problem with a general mask is that it’s hard to refine what’s selected. If you’re trying to mask around a particular edge in your photo, it can be tedious work to do this all manually.
Your adjustment brush might spill over the edge and end up selecting areas you didn’t want to adjust. To get it perfect, you end up going back and forth with your brush settings to make it right. This ends up being a hugely annoying time suck.
Luckily you can use auto masks or range masks to solve this issue.
Ultimately, general masks are best used in situations where you want to make general selective adjustments. If you need to be more specific, try either of the following options instead!
– Auto Masks
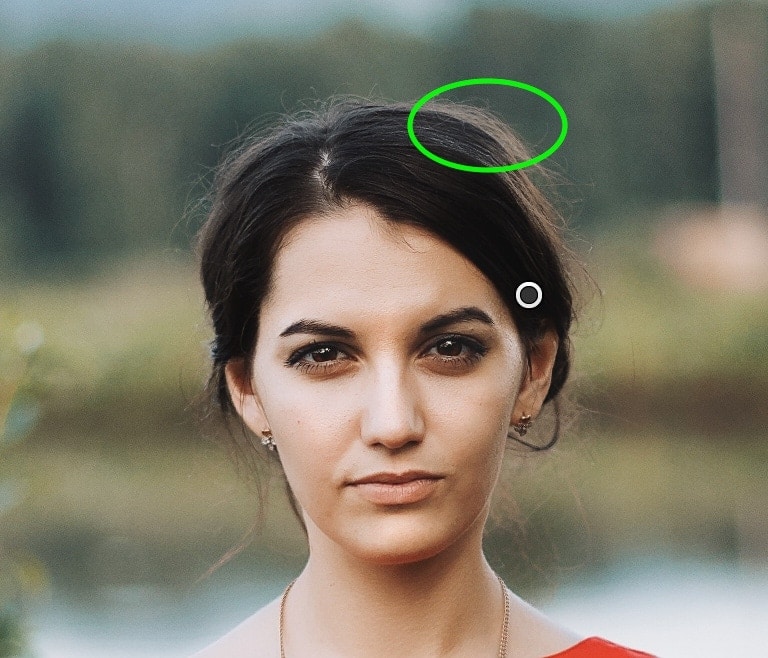
Auto Masks gives the adjustment brush a massive advantage and will make you feel like a masking hero. By sampling similar colors and exposures that you’re painting over, Lightroom automatically decides what you do and do not want to select.
In terms of selecting particular objects and not accidentally adjusting surrounding areas, auto masks are the perfect tool.
The way auto mask samples color and exposure is from the center of your adjustment brush. As you paint on a new selection area, Lightroom continuously samples the brush’s center area to decide where the mask will be applied.
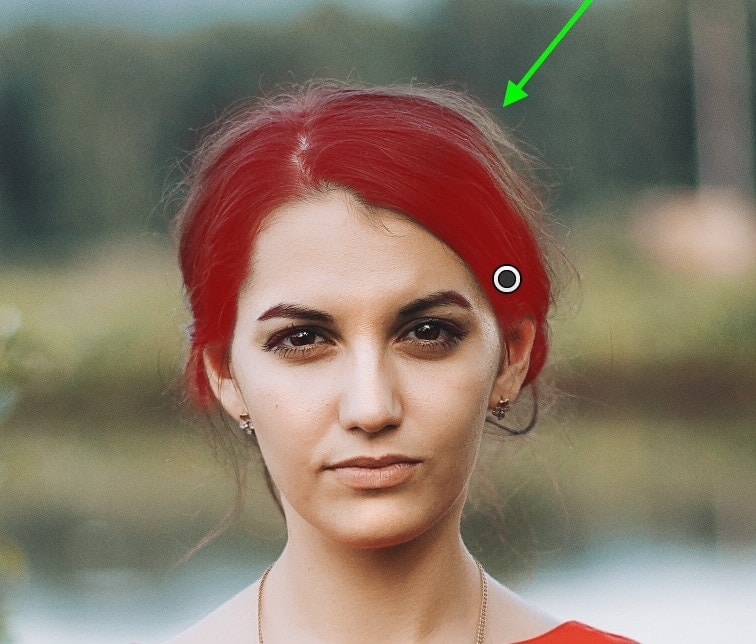
This tends to work best around areas with lots of edge contrast or two drastically different colors.
The auto mask feature is only available with the adjustment brush in Lightroom. To enable it, check off the auto mask option within your brush settings.
– Range Masks

Range masks are a powerful blending option that can be used for all three of the selective adjustment tools in Lightroom. Rather than automatically selecting a general area, range masks use extreme precision to control how adjustments appear in your photo.
Before you can apply a range mask, you need to first define a selection area in your photo. Once you’ve done that, there are three range mask options to choose from.
Color
The color range mask in Lightroom lets you sample a certain color to apply your adjustment to. This works exceptionally well if you want to target something like a colored shirt or the blue in the sky, for example.
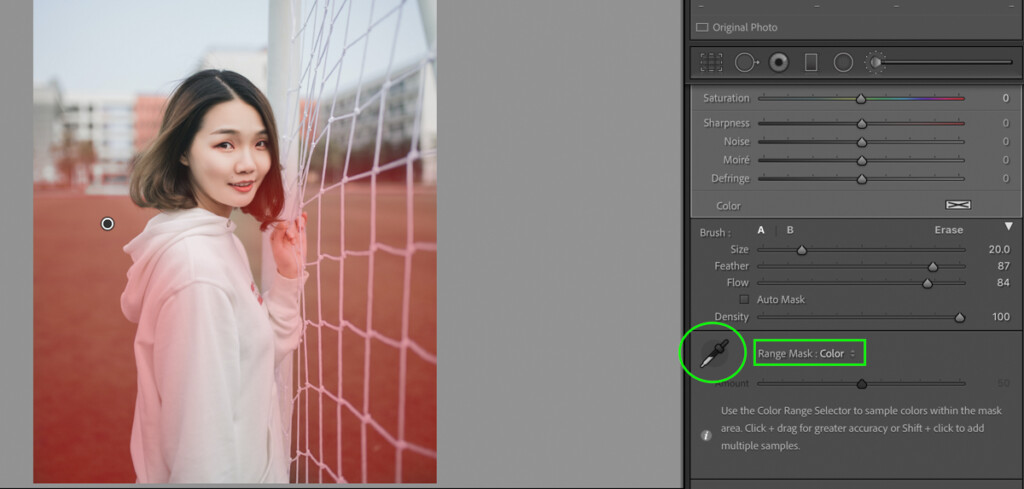
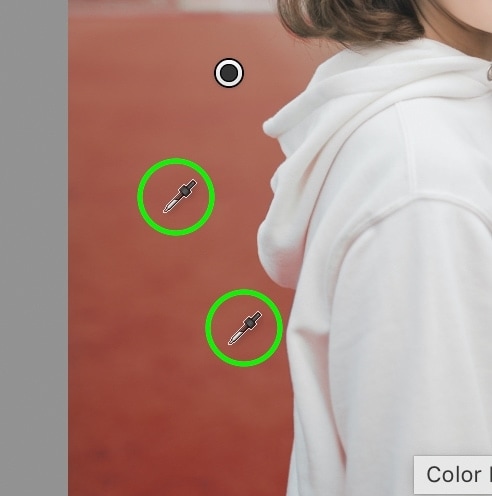
Once you’ve made a general selection around the areas you want to adjust select Range Mask > Color.
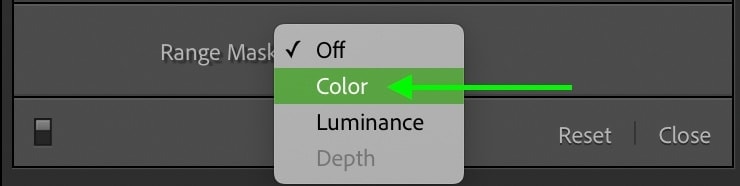
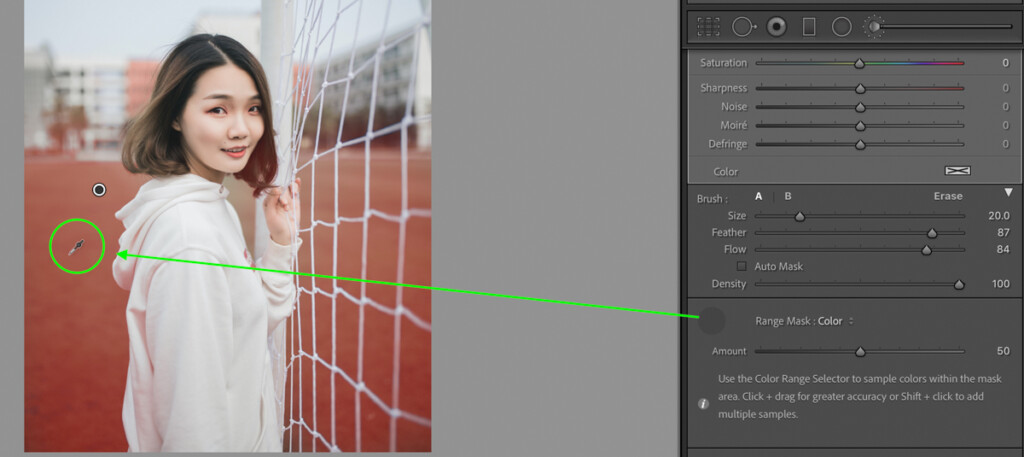
Then click on the eyedropper tool and sample a color in your photo that you want to target.
With a color sampled, your mask will be refined to only affect that color range. Now when you make your selective adjustments, they’ll only be applied to that selected color.
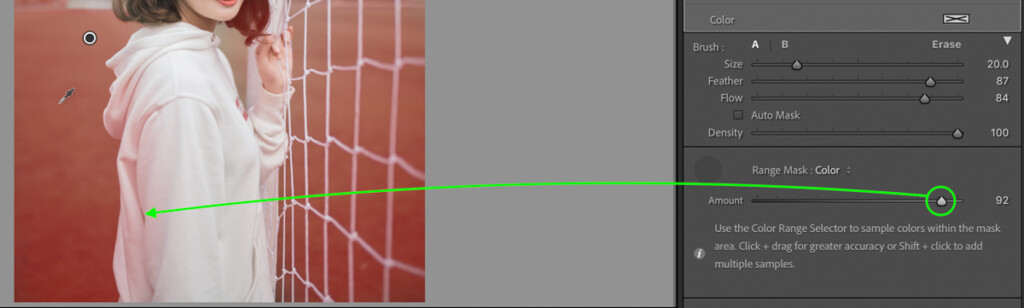
You can further adjust the targeted color range by adjusting the “Amount” slider. By moving this slider to the right, you increase the color tolerance to include additional colors similar in hue to your sample.
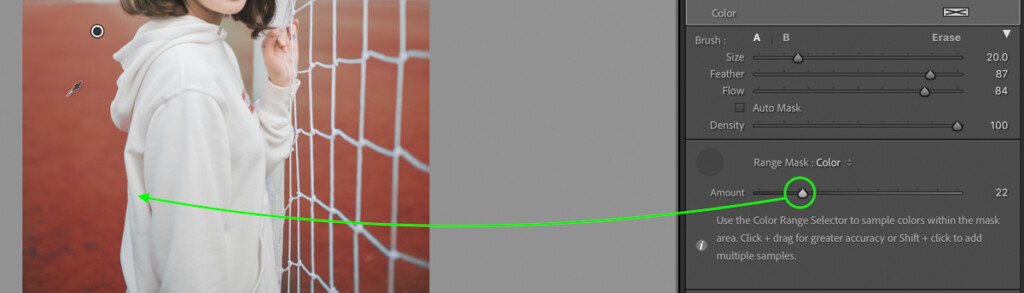
The opposite will happen when moving the slider left, which will make your adjustments only affect the exact color you sampled.
You can continue to add multiple colors to the same selection area by clicking on the eyedropper tool, holding shift, and sampling a different color. This will add the same adjustments to this newly sampled color range.
Luminance
Working in similar ways to the color range tool, luminance range masks use exposure to refine a selective adjustment in Lightroom. Exposure ranges are the changes in brightness between different parts of your photo. For example, white clouds in the sky have a brighter luminance value than the shadow of a tree.
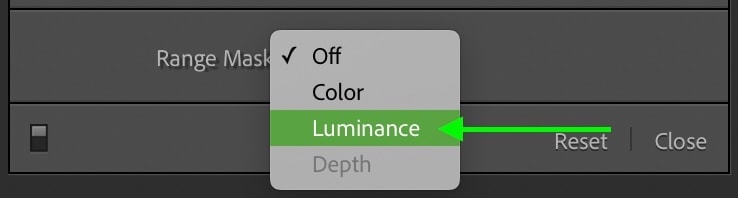
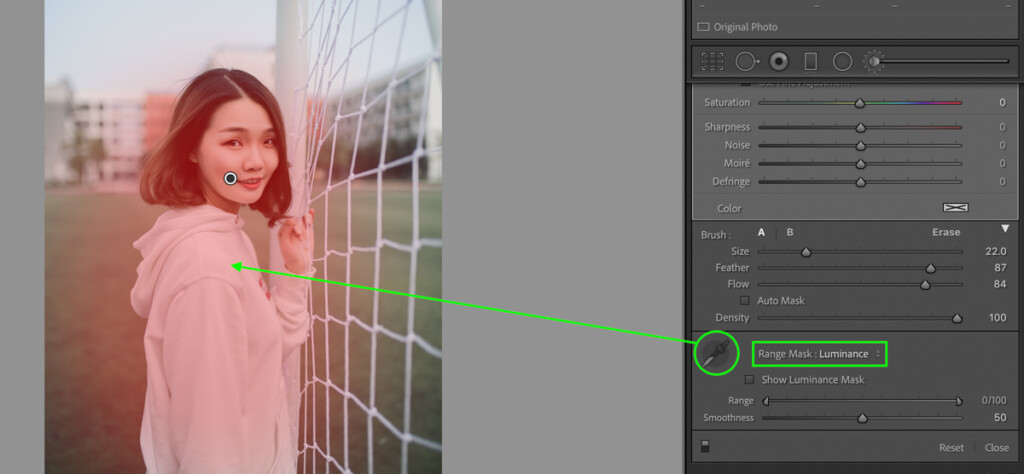
Just like before, you need to first define a general selection area with the gradient filter, radial filter, or adjustment brush. With a mask created, go to Range Mask > Luminance.
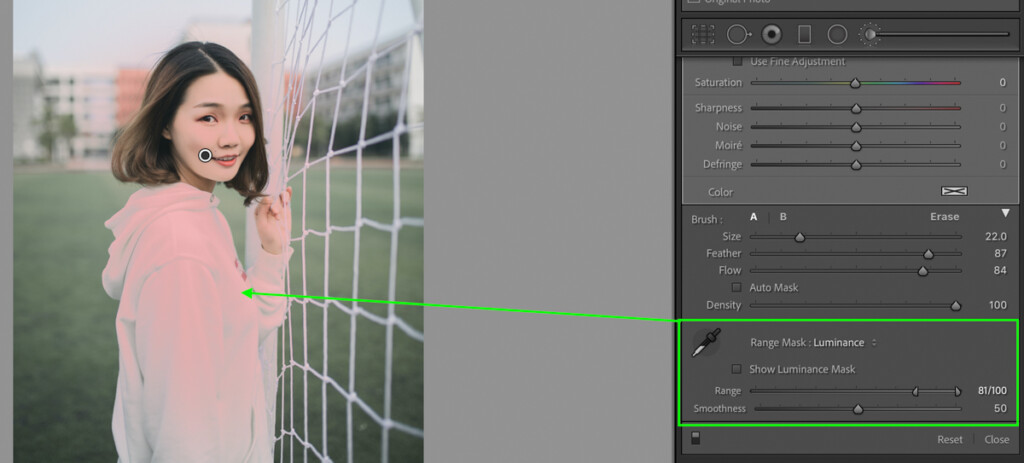
Now it’s time to select a luminance range to adjust. Clicking on the eyedropper tool, click an exposure range in your image to target.
Instead of being applied to a certain color, your mask will be refined to a certain exposure. This works incredibly well for editing highlights or shadows and making things come to life in your images. Best of all, it makes selective adjustment blend more naturally into your images.
You can further blend your sampled area with the smoothness slider to change how contrasty your selective adjustments look in your photo.
Depth
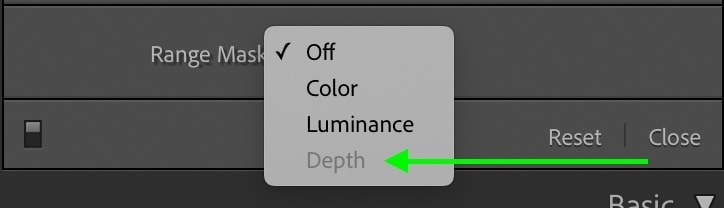
The Depth range mask only works with cameras that record a depth map with their images. For most DSLR cameras, this isn’t the case. However, most new iPhone and Android devices with multiple lenses are able to do just that.
A depth range mask takes note of how close or far different objects are to your lens. Using this information, Lightroom can easily target the foreground, midground, or background, based on the image’s depth map.
By sampling a particular depth, you’re able to make refined adjustments based solely on the distance of an object from the lens. This makes a basic adjustment such as darkening the background so much easier since the background is already selected for you.
Using Masks To Create Selective Adjustments In Lightroom
At this point, you’re starting to get a good handle on the different selective adjustment tools in Lightroom. The next step is actually working with them in an image.
Here you’ll see how to make better masks, and selective adjustments in Lightroom using all three of the methods learned so far.
1. General Mask
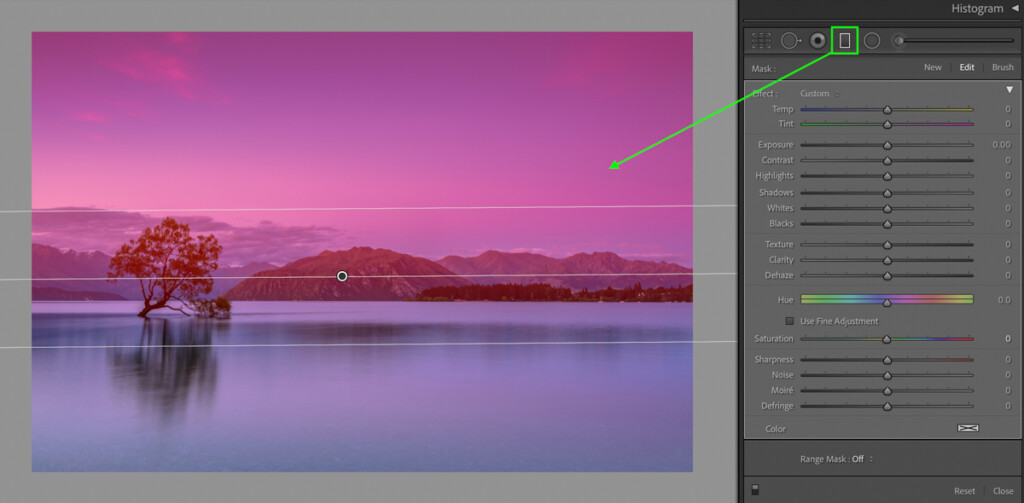
For this general mask, I’ll use the gradient filter to lighten up the sky in my image. Just remember that these masks can be made with the radial filter and adjustment brush as well.
In this case, I don’t need to be too particular about where is affected; I just want everything to look a little brighter. That’s why a general mask will work perfectly.
Starting by clicking on the gradient filter, I’ll click and drag out to create a gradient mask over my sky. If need be, I could further change the feather of the gradient by moving the outer lines.
Now that there’s a defined selection area, it’s time to make the adjustments. Using the mask adjustments, I’ll go through each of the sliders to make the adjustments I’m looking for.
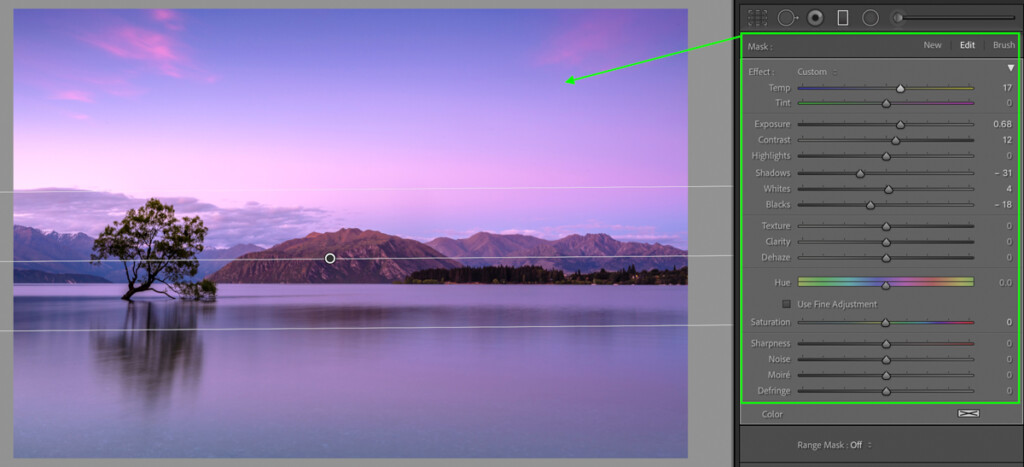
Since I only wanted to do a general brightening, I won’t need to do any refinements.
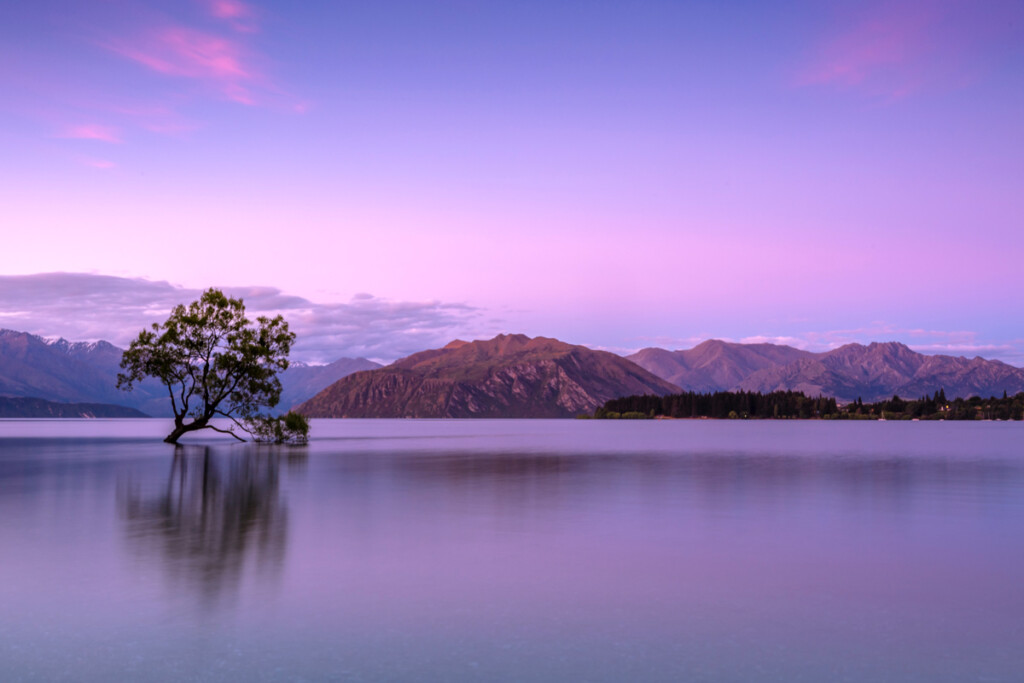
A few seconds later and my sky has been brightened with the help of the gradient filter and some exposure sliders!
2. Auto Mask
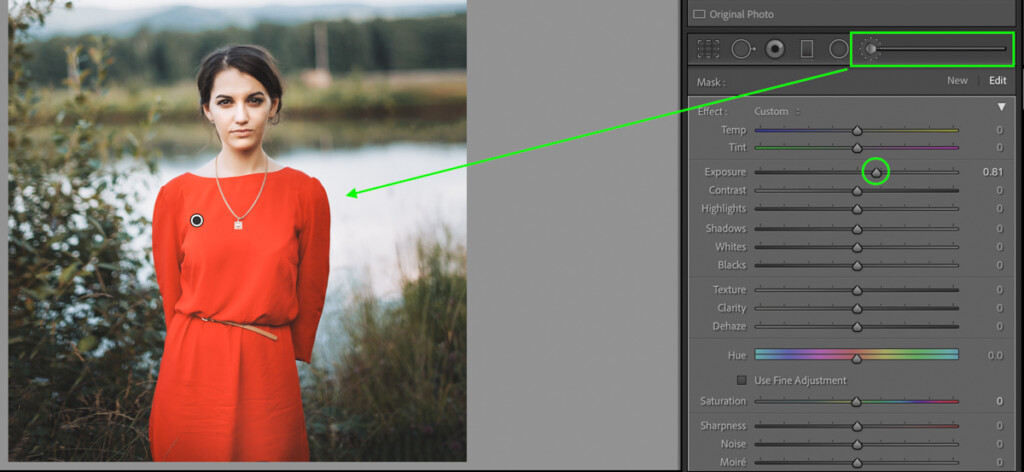
For this image, I want to make a targeted adjustment around the models dress. With the adjustment brush selected, I’ll check off the auto mask option before I begin.
I’ll start to paint over the dress, taking care not to let the center of the adjustment brush go over the side. Otherwise, the auto mask might select an area I don’t want to affect.
Since there is good color and exposure contrast between the model and the background, auto mask has a relatively easy time applying the mask around the edges.
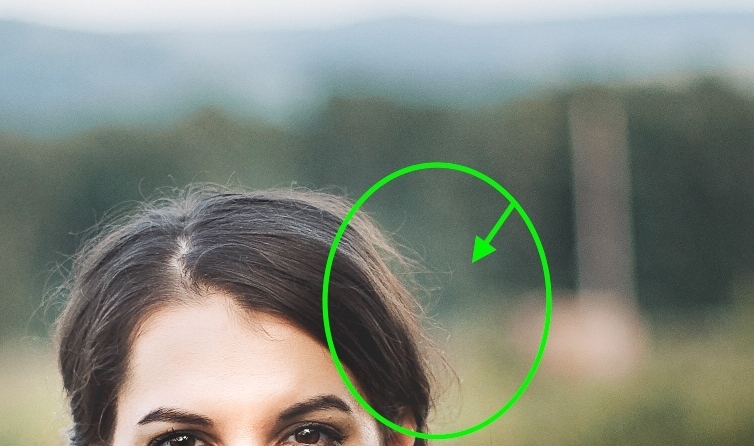
If you realize there is something you don’t want in your mask, just hold the Alt or Option key to switch to the eraser brush. Now you can paint over the unwanted selection areas to perfect the mask.
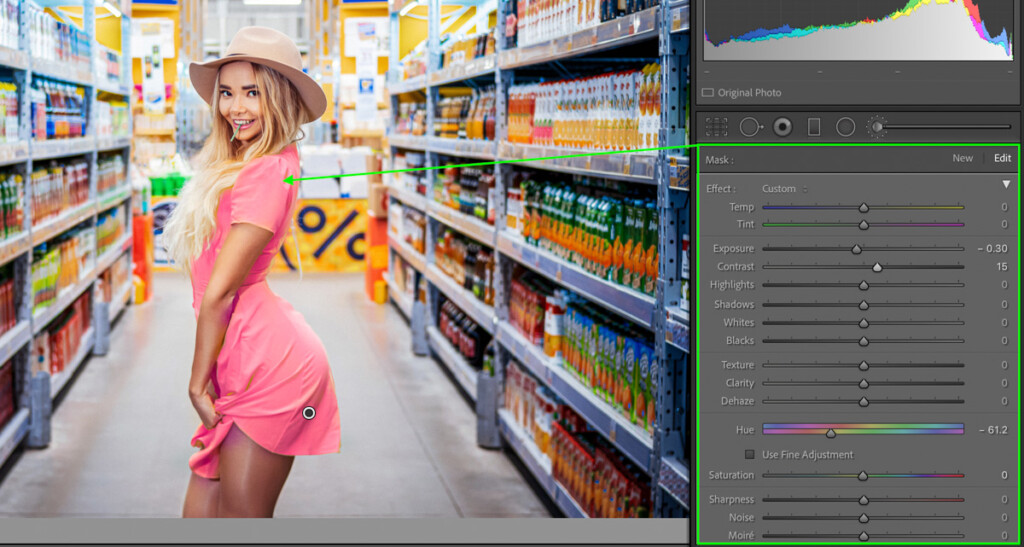
Looking at the red highlight (which indicates the mask), you can see that the dress has been nicely selected. That means it’s time to make my selective adjustments using the mask adjustment sliders.
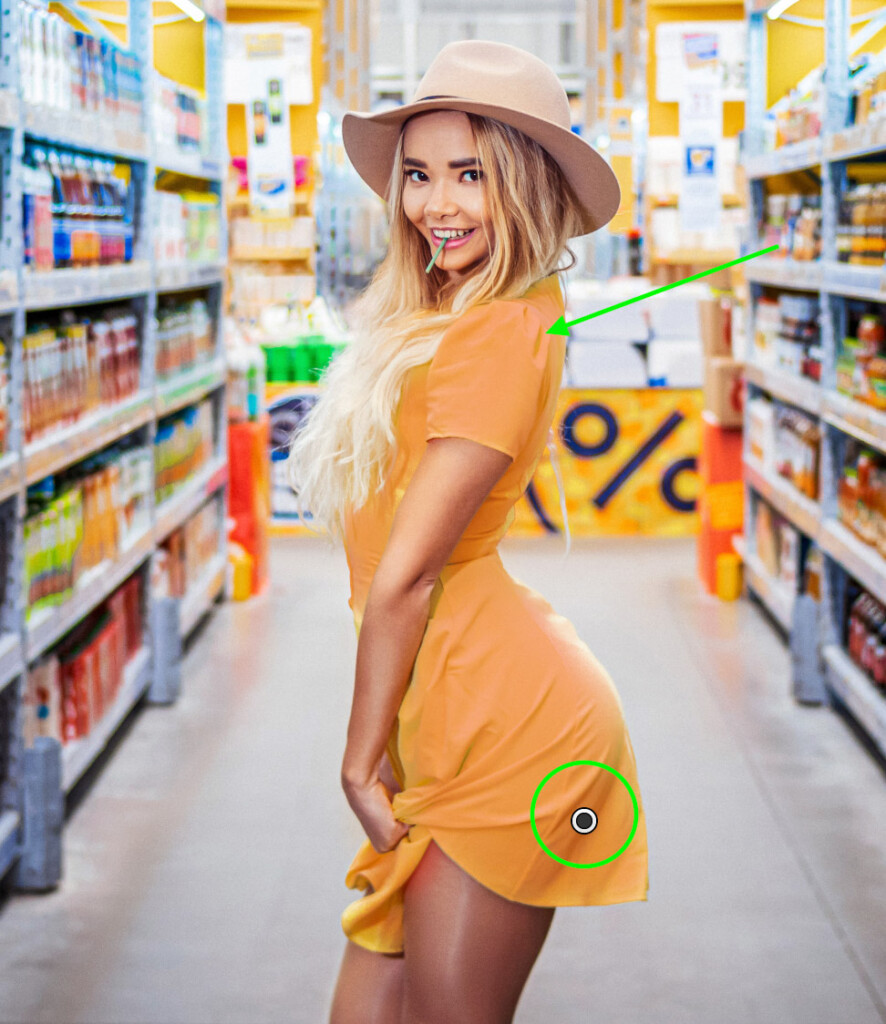
By using an auto mask, I was able to easily target the subject (aka the models dress) and not have the adjustments spill over to unwanted areas. An auto mask is an amazing tool for making more refined selective adjustments in Lightroom.
3. Range Mask
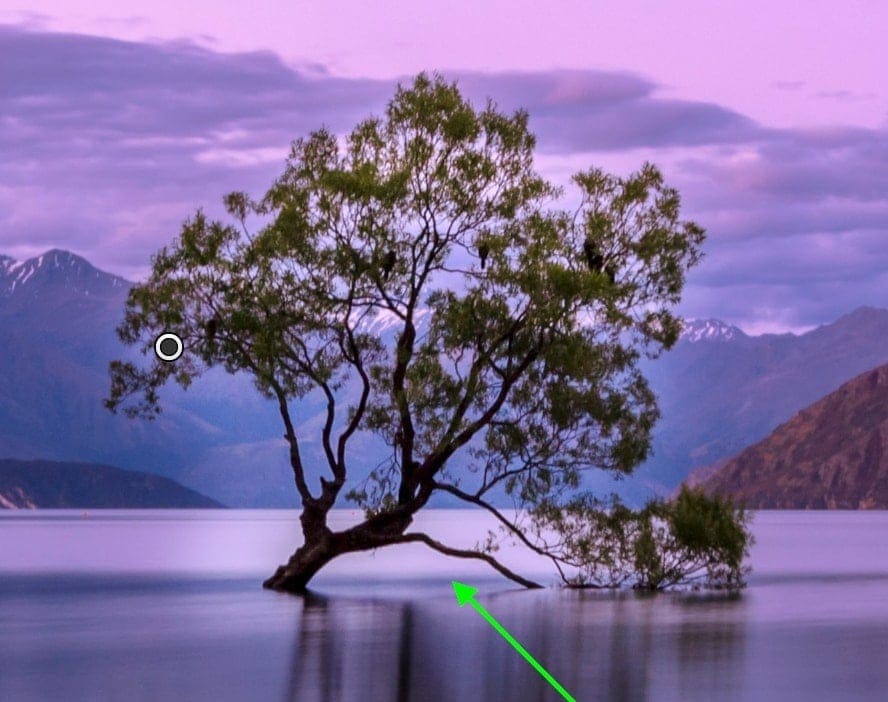
In this final example, I want to make a selective adjustment to the palm tree without affecting the background, or the sky. Since the palm tree has so many complex and tiny edges, it would take me a lifetime to create an accurate mask by hand.
Instead, I’ll use the help of a range mask to target the desired selection area.
I’ll start by using the adjustment brush and paint a large general selection around the palm tree. All that matters in this step is that the object you want to affect is within your selected area.
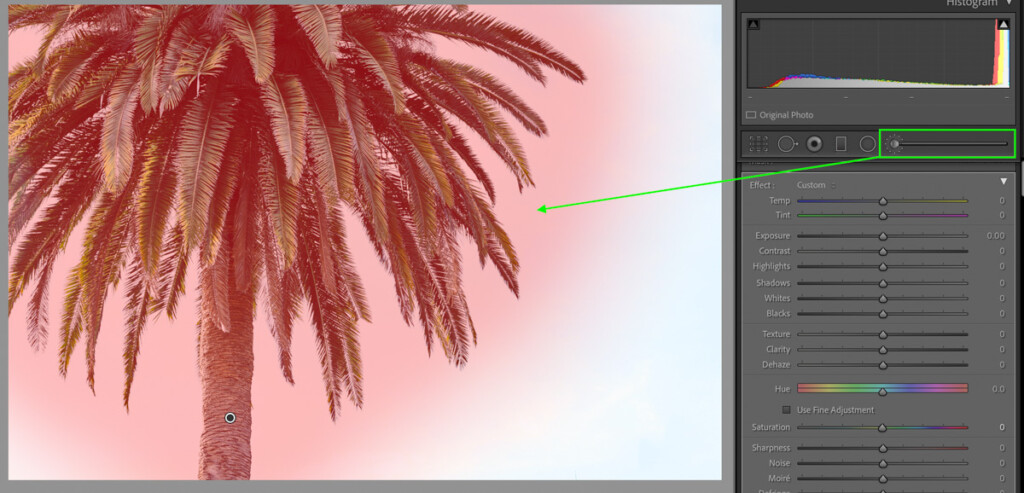
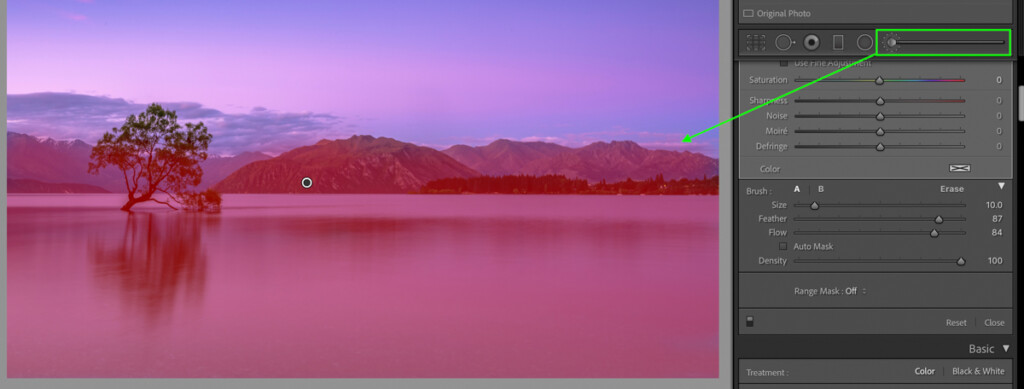
To refine this general mask to the palm tree, I’ll use a range mask. Since there’s a lot of darker tones in the palm tree compared to the rest of the image, I’ll select a luminance range mask.
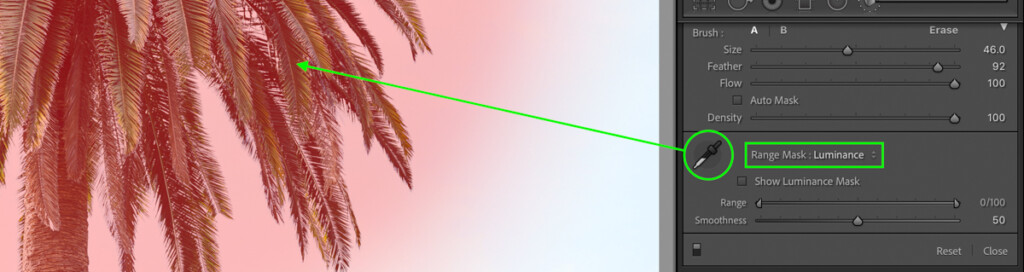
Clicking on the eyedropper tool, I’ll click to sample an exposure range of the palm tree.

At this point, the red highlight (the selection area) has been refined to only affect the palm tree, not the background. Using the mask adjustment panel, I can now apply my selective adjustment to the palm tree.
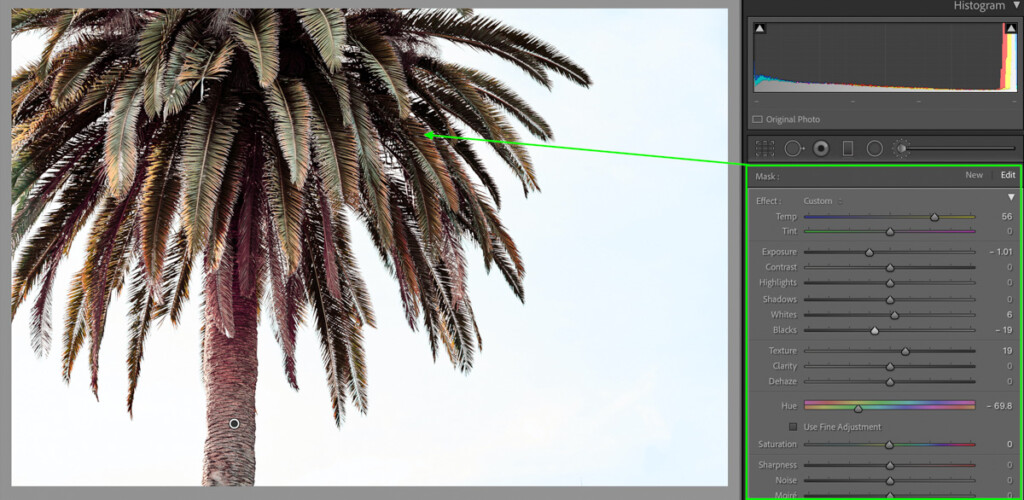
Depending on the type of thing you’re trying to select, the luminance or color range masks provide different advantages. In the case of this palm tree, the luminance mask was more advantageous since it has a much different exposure from the surrounding area.
Learning how to mask in Lightroom is an important part of creating selective adjustments and more creative edits. With the help of the different selective adjustment tools, you can better target certain parts of an image. From there, using mask refinement options such as an auto mask or range masks help to blend those adjustments even further.
This can all seem like a lot of information to digest, but with practice, you’ll start to better understand why you may use one adjustment over another. Eventually, you’ll find yourself using multiple tools together to create very stylized adjustments to your pictures with ease.
If you’re new to editing photos in Lightroom, you won’t want to miss this Complete Guide To Editing Photos In Lightroom.
Or if you’re just looking to further refine your editing skills, check out these other tutorials below:
- The Best Export Settings For Lightroom
- How To Edit Golden Hour Photos In Lightroom
- How To Crop And Straighten Images In Lightroom
- Should You Edit In Lightroom Or Photoshop First?
Happy Masking!
– Brendan 🙂


