

The brush tool in Photoshop lets you get creative with your images or artwork. By knowing how to manipulate the tool in certain ways, you can create new elements for your project.
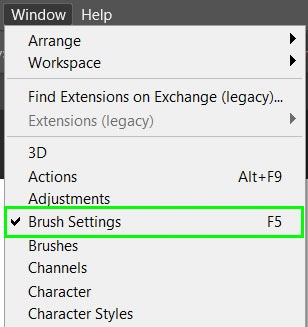
To rotate or flip a brush in Photoshop, select your brush of choice then go to Window > Brush Settings. Within the Brush Tip Setting sections, check off the Flip X or Flip Y option to flip your brush on either axis. Alternatively, type your desired value in the Angle box to rotate the active brush.
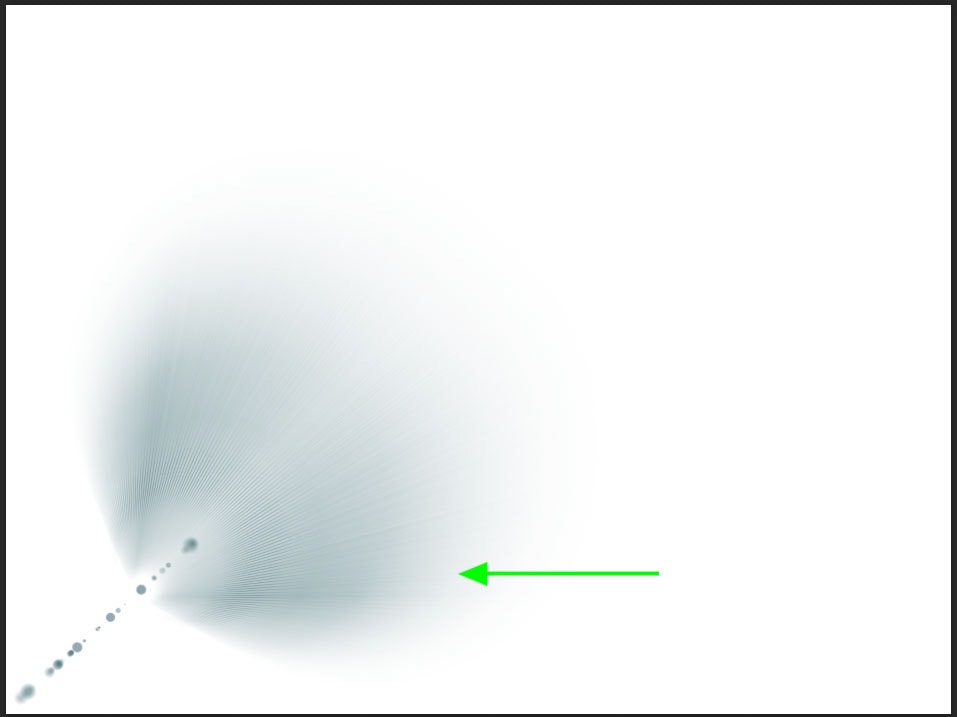
Any brush-based tool can be flipped and rotated which creates a new angle to use the brush. While these methods won’t do anything for circle-shaped brushes, they are useful when using creative brush types such as charcoal or watercolor brushes.
How To Flip A Brush In Photoshop
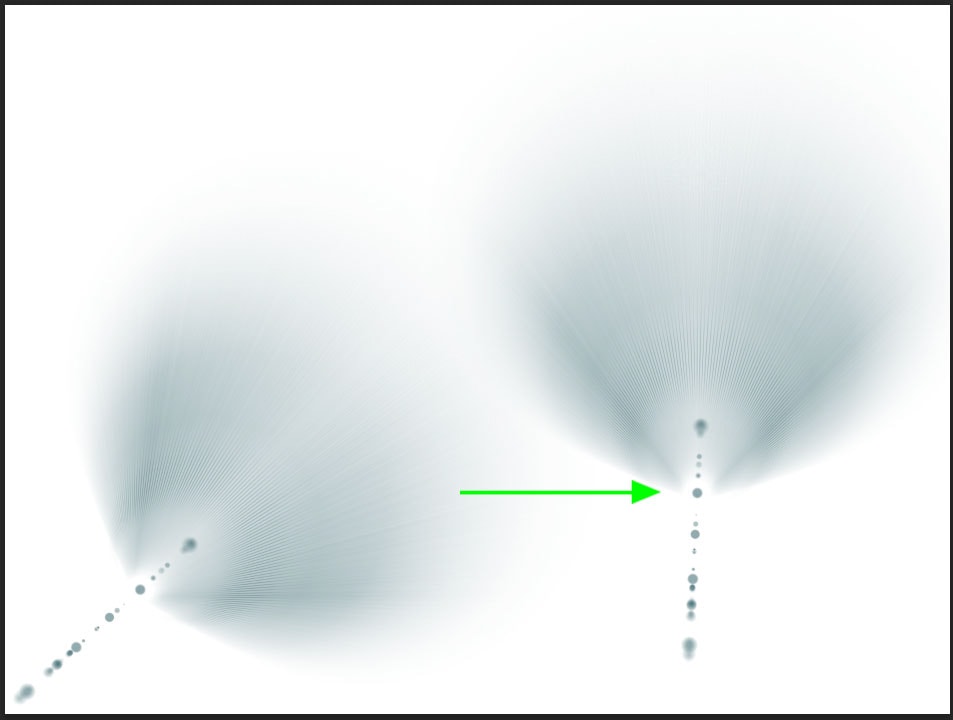
If you are using a stylish brush type and want to angle the elements of the brush differently, you can flip the brush. Once flipped, the brush will create different stroke patterns.
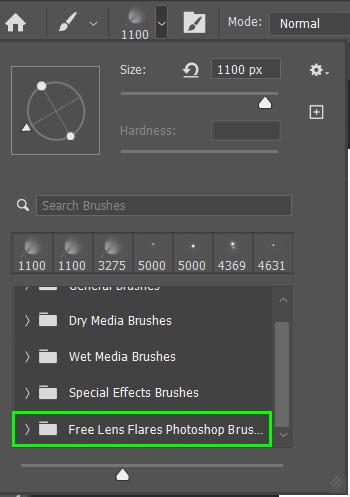
To flip the brush, first, select the brush tool from the toolbar or press B. Once selected choose the creative brush type by clicking on the arrow next to the brush size.

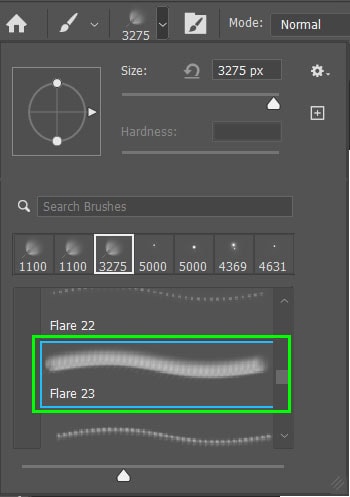
Open the brush folder and select the brush you want to use. Flipping a brush works well when using creative brushes, such as this free lens flare brush set.
Once your brush is selected and you have set the correct brush size, flow, opacity, and other settings in the options bar, you can click on your page to draw with the brush.

To flip the brush, open the brush settings panel on the right of your workspace. If the brush panel is not visible navigate to Window > Brush Settings.
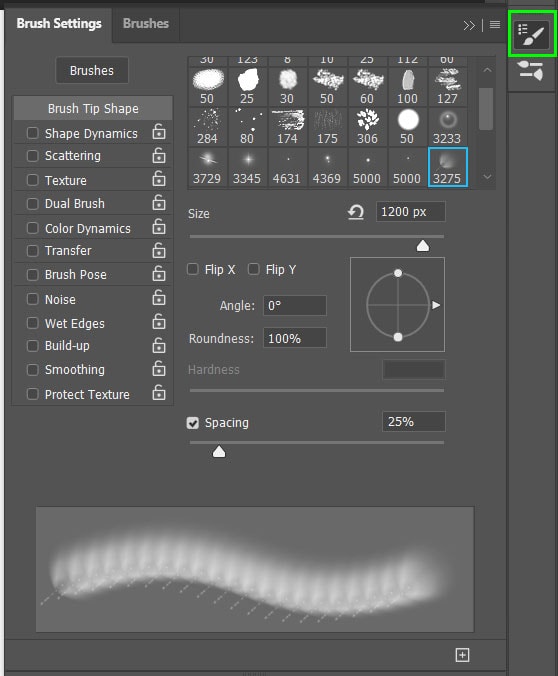
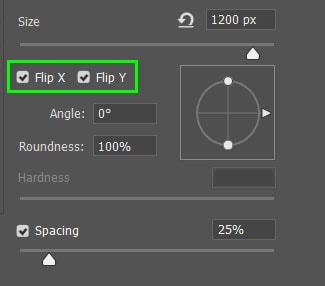
In the brush settings panel, make sure the Brush Tip Shape tab is selected at the top of the panel, then select the check box next to Flip X or Flip Y, depending on how you would like the brush tool to flip.
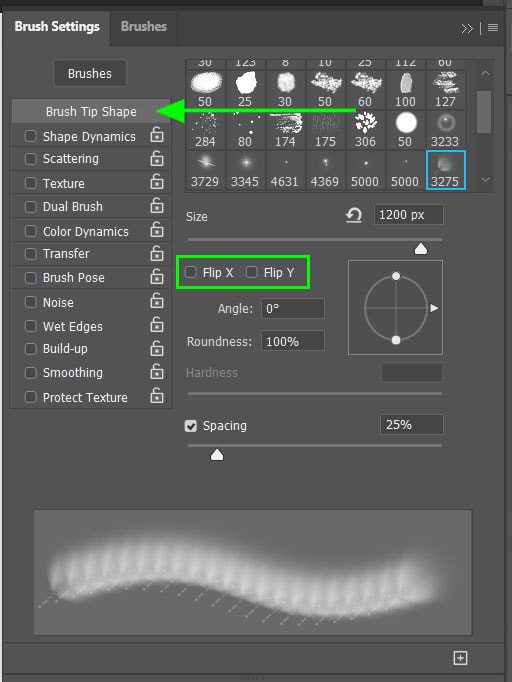
Selecting Flip X will flip the brush horizontally while selecting Flip Y will flip the brush vertically.
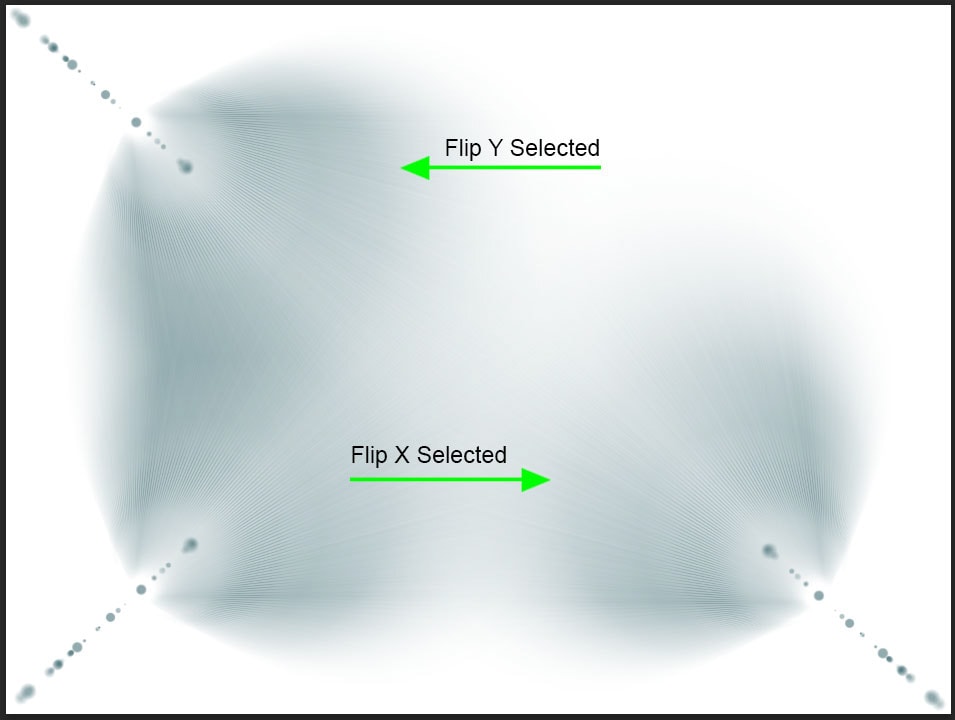
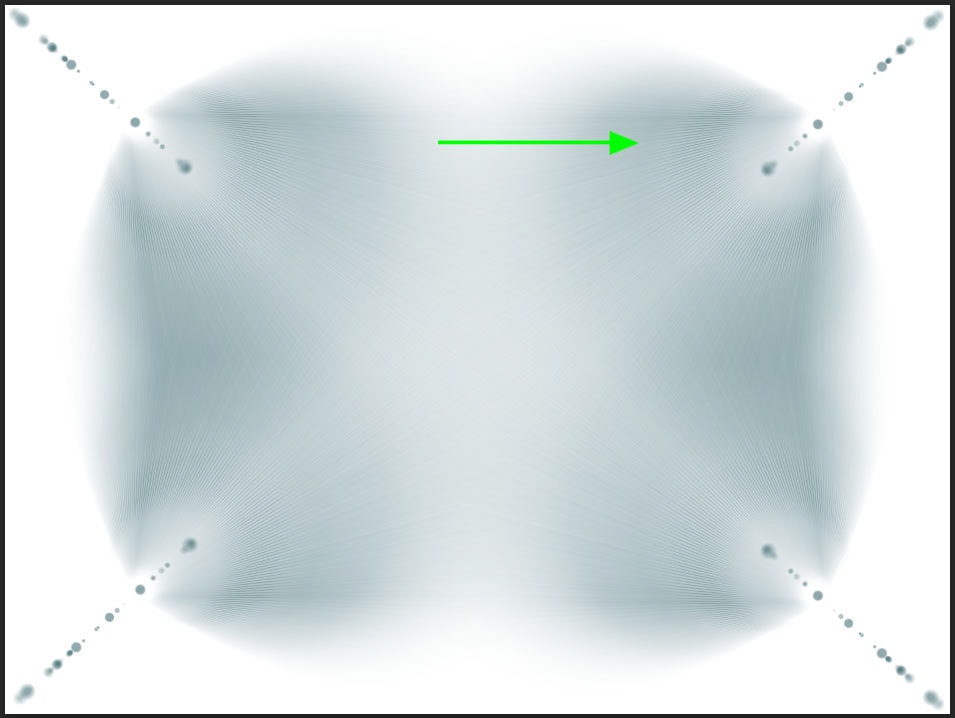
You can also check off both Flip X and Flip Y to flip the brush both horizontally and vertically. This will flip the brush twice to give a new angle to work with.
How To Rotate A Brush In Photoshop
If flipping the brush changes the angle too much, you can rotate the brush to set it to any angle.
To rotate the brush, select the brush tool by pressing B, choose your brush, and then open the Brush Settings panel. If the panel is not visible navigate to Window > Brush Settings.
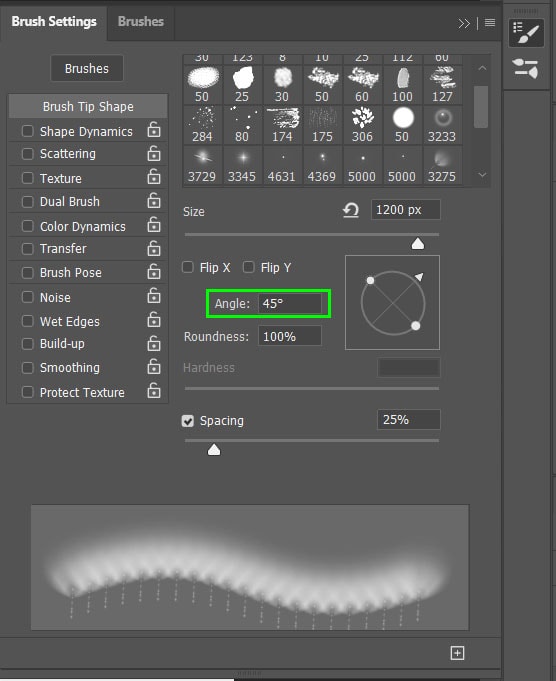
Use the arrow on the wheel icon to rotate the brush in the desired direction. As the arrow is moved, you will notice that the Angle degree changes.
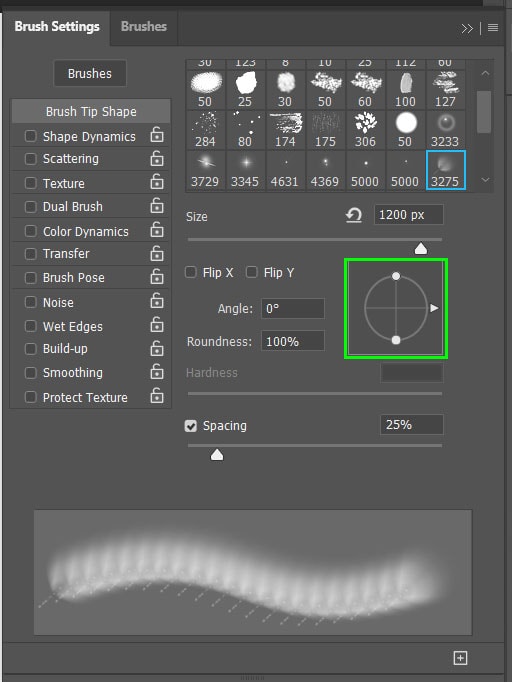
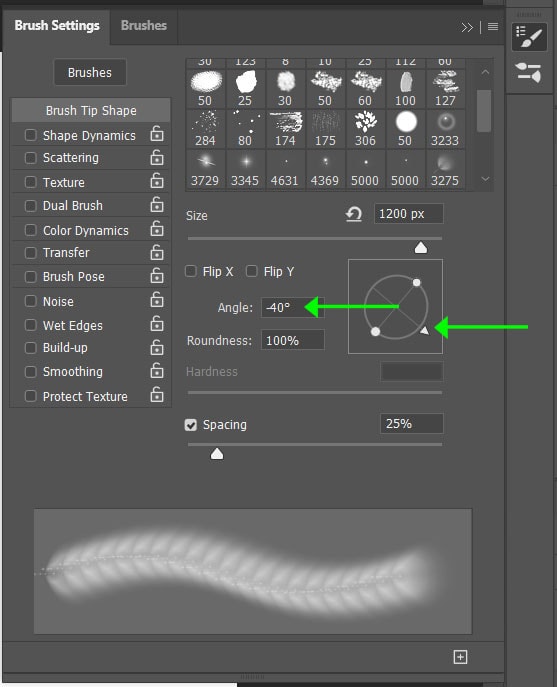
You can also use the Angle degree block to type in a specific angle you would like to set the brush to. The brush will now be set to the specific angle you have selected.
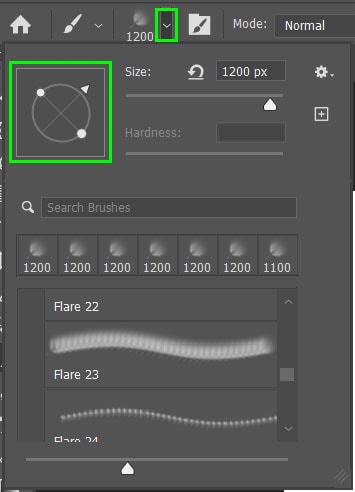
You can also access the wheel icon to rotate the angle from the drop-down menu next to the brush size on the options bar.
To use the keyboard shortcut to rotate the brush, press the right and left arrow keys to rotate the brush.
Pressing the right or left arrow key rotates the brush by one degree per click. This lets you increase or decrease the angle in small increments. Holding in the shift key while pressing the right or left arrow will change the angle by 15 degrees per click.
How To Save Flip & Rotate Settings As A Brush Preset
Once you have flipped or rotated a brush to a specific angle, you can save the brush settings as a brush or tool preset. The later versions of Photoshop allow you to create brush presets, however, in older versions, you can create a regular tool preset for the brush settings.
How To Create A Regular Tool Preset
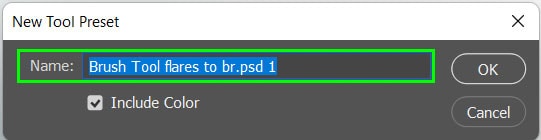
To create a regular preset for the new brush angle, select the drop-down menu next to the brush icon on the options bar.

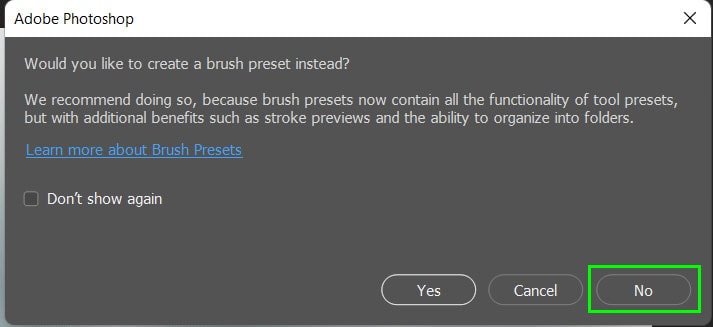
Press the add icon to create a new tool preset and add a name for the preset. On versions with the brush preset available, select No on the prompt that appears.
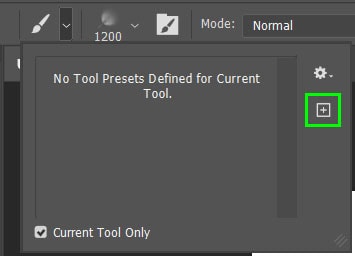
The new brush tool preset will appear in the window when pressing the drop-down next to the brush icon.

How To Create A Brush Preset
Brush presets create a new brush that can be used across any brush-based tool and allows you to save more settings. The regular tool preset is only available for the specific tool that was used to create the preset.
To create a brush preset, open the brush settings panel. Once you have set the correct angle for the brush, select the Create New Brush icon at the bottom of the panel.
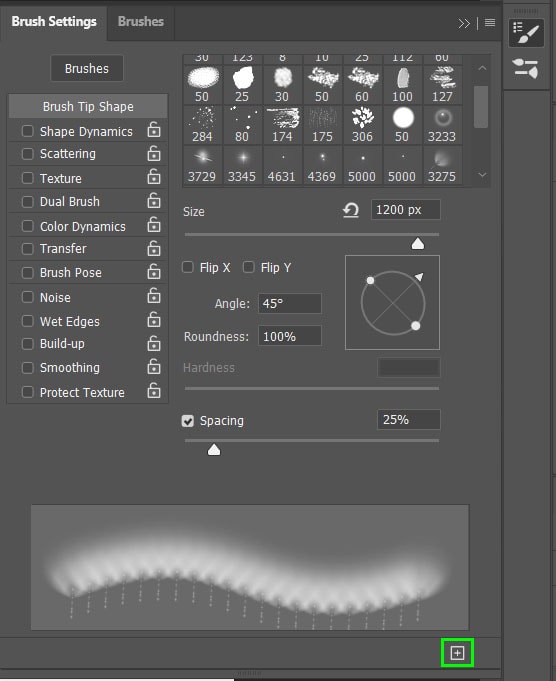
When the New Brush window pops up, enter a name for the new brush and make sure the box next to Include Tool Settings is checked.
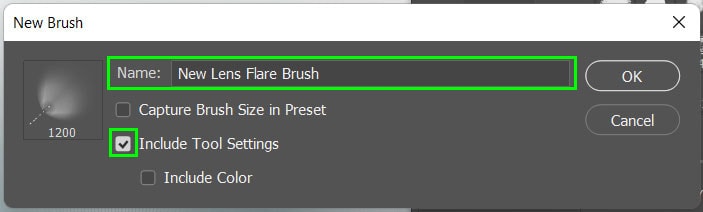
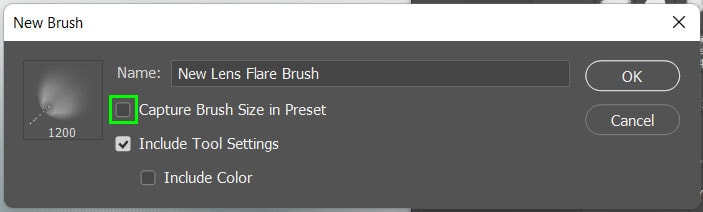
You can check the box next to Capture Brush Size in Preset if you would like to save the size of your current brush in the preset too. Select OK to create the new brush preset.
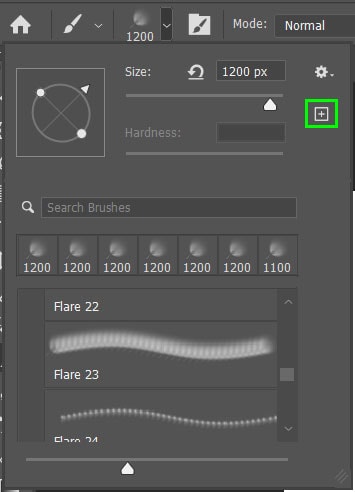
You can also create the new brush preset from the options bar by clicking on the arrow next to the brush size, then selecting the add icon on the right.

Add the name, check the Include Brush Settings box, and click OK to save the preset.
How To Move A Brush Preset Into A Folder
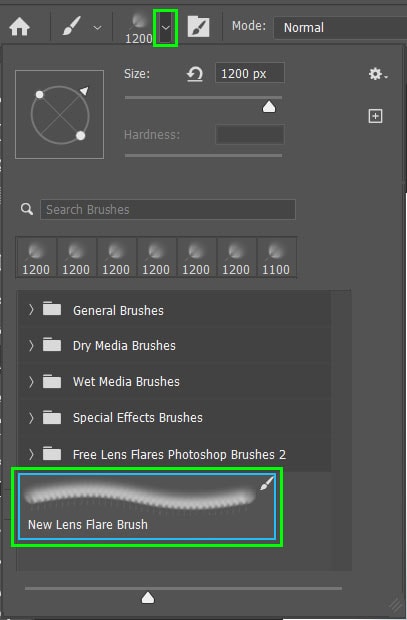
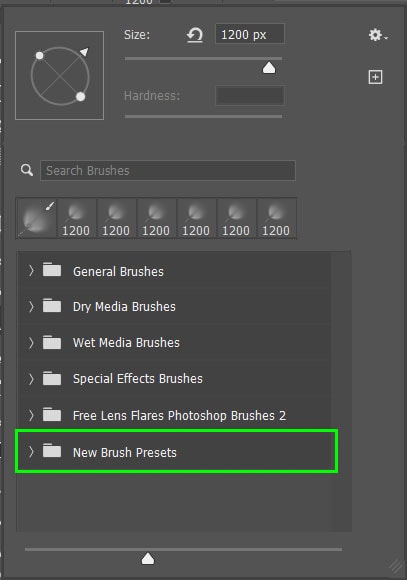
Once a new brush preset is created, it is added to the bottom of the brush options rather than into a folder with similar brushes. You can move the new brush preset into a folder to organize the panel better.
To move the brush preset into a folder, open the brush panel on the options bar and scroll down until you find your new brush preset.
Click on the brush preset, drag it onto the folder you would like to place it in, and drop it over the folder. The brush preset will now be saved in the folder.

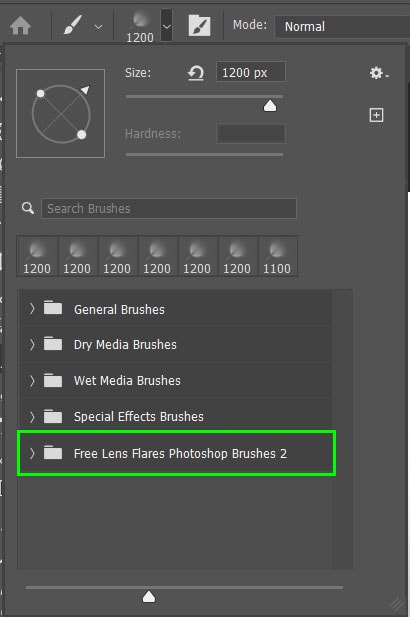
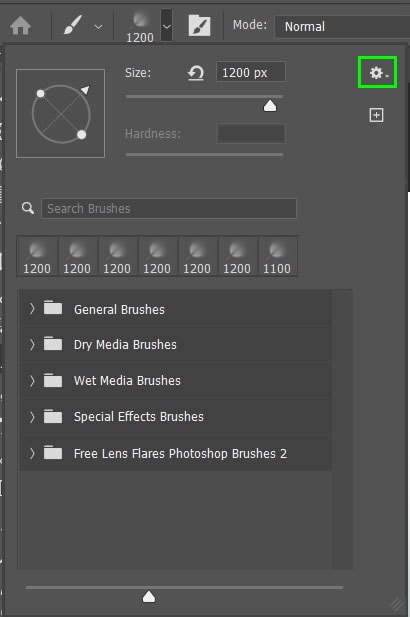
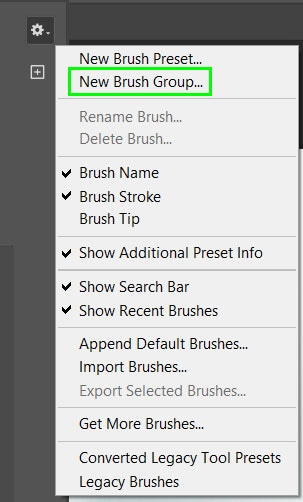
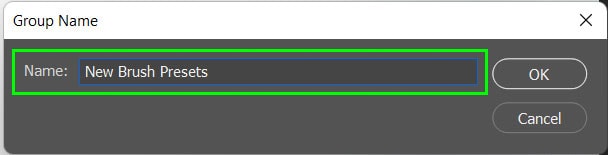
You can also create a new folder for your brush preset by clicking on the gear icon in the brush window and selecting New Brush Group. You will be given the chance to name the group.
The new brush folder will appear below the other brush folders in the brush panel. You can then drag and drop any new brush presets into this folder.
Happy Editing!
