
When you need to make a checkmark in Photoshop you’ll quickly realize that there doesn’t seem to be any way of doing it. That’s because checkmarks are a shape that is only available if you’re using one of the three techniques you’ll learn about throughout this tutorial. With that said, the easiest way to create a checkmark is by using the Webdings Font.
To create a checkmark in Photoshop, select the Type Tool and set the Font to “Webdings Font”. Next, click on your canvas to create a new piece of text, then type a lowercase “a” to create a checkmark.
The Webdings Font is one of the easiest ways to create checkmarks but isn’t always ideal if you’d prefer not to use a text layer. Luckily there are some other options available for creating checkmarks, including adding a custom checkmark shape pack into Photoshop.
Let’s get started!
3 Ways To Make A Checkmark In Photoshop
While Photoshop’s many complex tools can feel overwhelming at times, the three methods you can use to add a checkmark to your project are all fairly simple and user-friendly.
Since Photoshop works in layers, your checkmark will either exist as a text layer or as a shape layer, depending on which tool you use.
Option 1: Using The Webdings Font
In Photoshop, there are some fonts that consist entirely of symbols. The webdings font is included in Photoshop, meaning you don’t have to download it or install it to the program. The font has a symbol corresponding to each letter, so typing specific letters will create different symbols.
One of the symbols in the webdings font happens to be a checkmark, so you can use the font to add a checkmark to your post. To do this, first head to the text tool.
In the text toolbar at the top, click the dropdown arrow to open the font menu, and scroll to find the Webdings font.


Before you add your checkmark, you’ll need to create the area where you can type your text. Click and drag on your blank canvas to create a new text box. By clicking and dragging, we are enabling paragraph text, which means that the text will be confined to a box, starting a new line once it reaches the border. This is great for creating lists or orderly lines of text.
Now, you can erase the text that automatically shows up in the box (as your font should be set to Webdings, it will appear as a series of symbols) and start to create your list. First, add the checkmarks by typing the lowercase “a”. If you’d like to use them in a list format, you can click enter between each to start a new line.

To add words to the list, change the font back to whatever font you’d like, and click the area before or after your checkmarks to type. If you feel your text box is too small, you can adjust the size by clicking and dragging the tiny squares around the border of your text box. You can also make your font smaller using the font size drop-down, or otherwise, adjust the way your font looks in the font toolbar.

2. Using A Glyph
Another easy way to get checkmarks into your project is to use the Glyph panel. Photoshop’s Glyph tool allows you to see a whole library of different characters in a variety of font styles. This includes the default fonts that come with the program as well as font packs you may have installed.
The great thing about the Glyphs panel is that it allows you to not only see numbers and letters, but also symbols, making this a useful tool to find and add a checkmark to your project.
To open up the Glyphs Panel, head to Window > Glyphs.
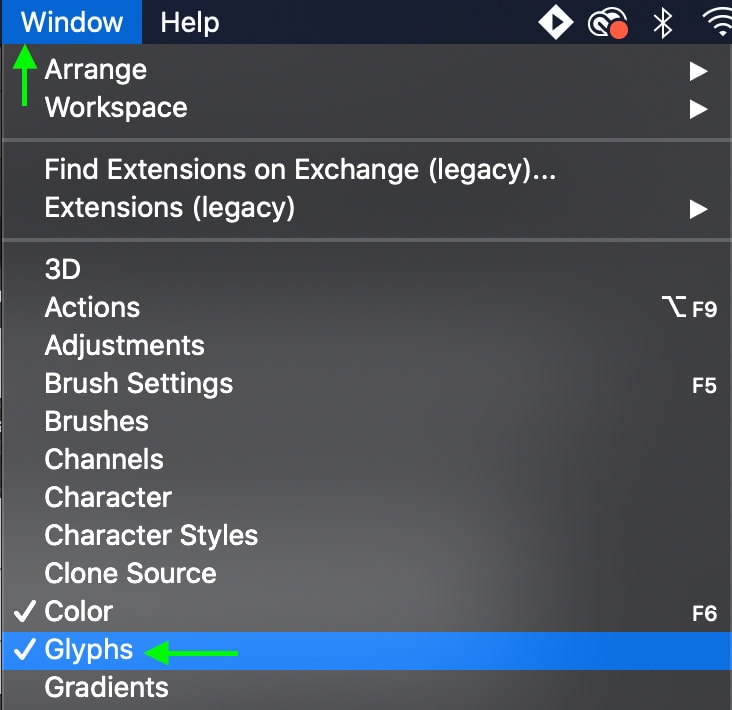
The panel will open, and it’s here you can select the font you’d like to use. Find a font by clicking the drop-down and scrolling through the list. Make sure you have “Entire Font” selected so you can see symbols as well as characters.
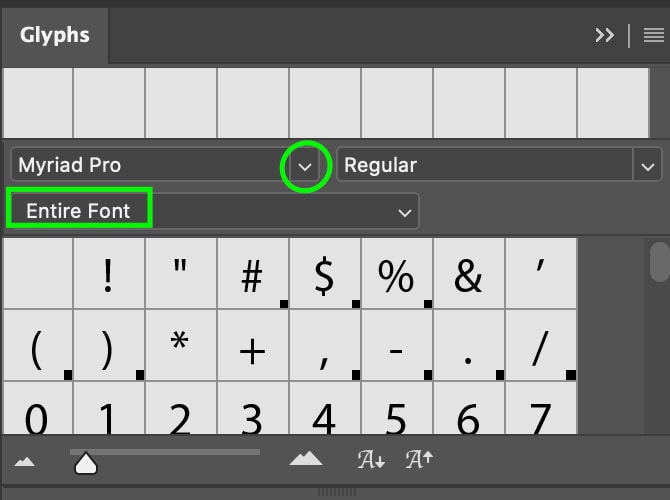
Once you’ve chosen your font, scroll down the list of characters until you find the checkmark. Many different fonts have a checkmark option, but if you don’t feel like looking through each, the fonts Myriad Pro or Verdana both have basic checkmarks you can use (both options are shown below). Make sure the text tool is selected, create a new text box by clicking your canvas, and double-click the checkmark in the glyph panel to add it to your text box. You can type words beyond that using your keyboard.

3. Saving A Checkmark Custom Shape Preset
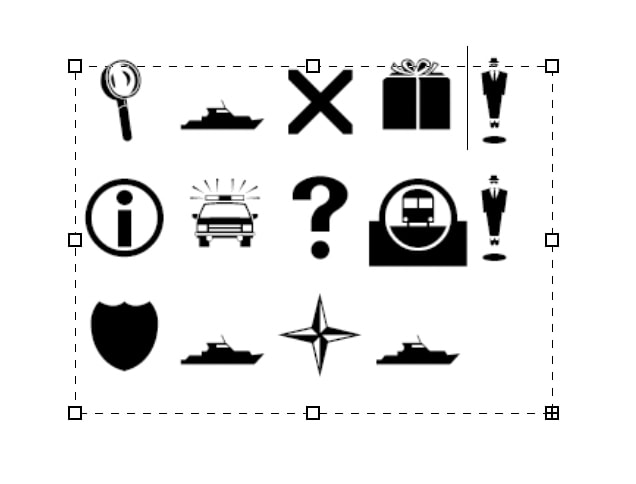
In Photoshop, if you’d like to use specific shapes that don’t come with the program, you can download custom shape packs to use in your designs. Some may cost a few dollars, but there are plenty of free options you can find easily online.
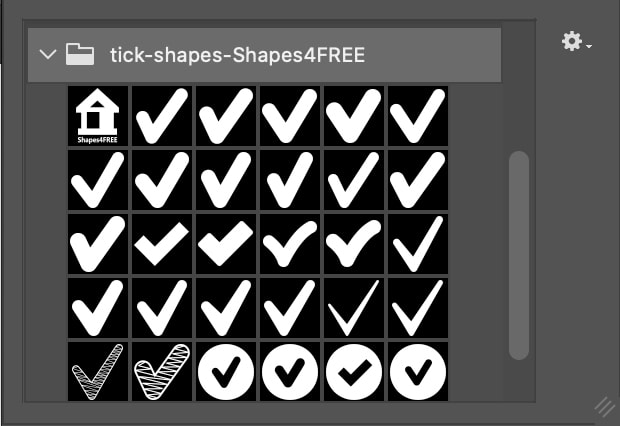
These packs are a great way to find specific shapes like checkmarks. For instance, this pack contains a variety of different checkmarks you can use. Download the pack for free, and once it has been downloaded, unzip the file.
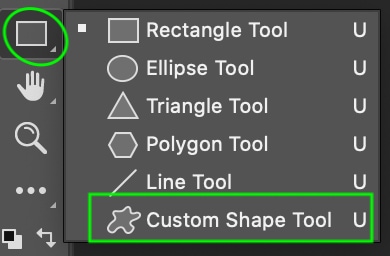
To install the shape pack, first head to the Shape tool. Depending on the most recent shape you’ve used, the icon may appear as a rectangle, ellipse, line, or another shape. Control + click the icon, and in the drop-down, click Custom Shape Tool.
Now, in the top toolbar next to Shape, click the drop-down arrow next to the icon and then click the gear icon in the top right. In the menu that appears, click Import Shapes.

The import window will appear, where you can select the .CSH file from your downloads folder on your computer. Once your pack is installed, you will be able to see all your custom shapes in the Custom Shapes menu.
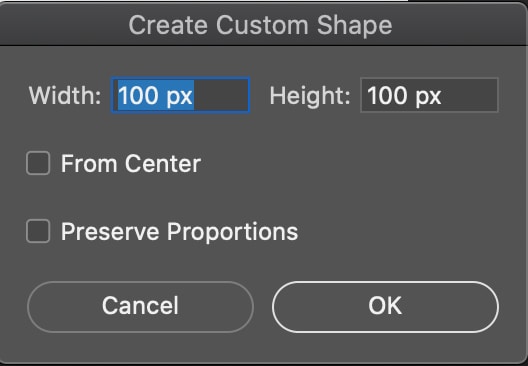
You can insert one into your canvas by selecting a shape, then clicking your canvas. You’ll have to edit the width and height, and then click OK. Alternatively, you can click and drag out to create a new shape on your canvas.
Either way, you’ll see the shape has appeared in your project.
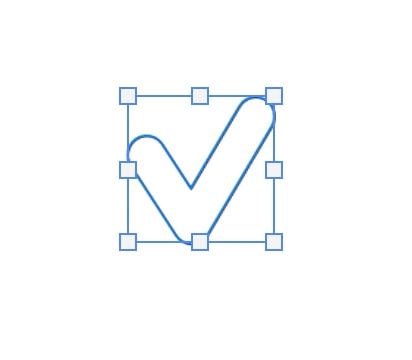
To change the physical appearance like size and color, head to the toolbar at the top and use the options available. Click the size drop-down to change the number of pixels (px) – more for a bigger checkmark, less for smaller. You can also drag the anchor points around the shape’s border to increase or decrease the size. The stroke setting will change the outline of the checkmark, while Fill will change the fill color inside.

Using a Shape Pack is different than the other two methods because, rather than a text layer, you’re creating a shape layer. This can be useful if you’d like to use your checkmark for something other than a list.
Checkmarks may be integral for your project, and depending on what you’re using your checkmark for, one of these three methods will surely work for you. With all of Photoshop’s complex tools, it may seem confusing at first to add a checkmark when there isn’t a proper checkmark tool available in the program. Luckily these methods will allow you to add checkmarks to your project easily and without having to download any paid packs of shapes.
Happy Editing!


