

Many photographers relate to the feeling of opening up Lightroom presets and being a bit overwhelmed at what you see. This is why it is important to keep all your presets well organized. There are several ways to keep your presets organized, from periodically clearing out old and unused presets to categorizing them by groups or favorites.
The easiest way to organize Lightroom presets is to click on the + icon in the Presets panel in the Develop Module. From the drop-down menu, choose Manage Presets. Here you can choose the presets you use on a regular basis while hiding the lesser-used ones without permanently deleting them.
Presets are an easy way to both speed up your editing workflow and try out different creative styles on your images, so it can be easy to get a bit carried away with downloading and trying out different presets.
Let’s take a look at best practices to keep your presets organized in Lightroom.
Ways To Organize Your Presets In Lightroom
Here are 5 ways to keep your presets neat and tidy to prevent a cluttered workspace.
1. Removing Or Hiding Unwanted Lightroom Presets
The first step you should take when you set about the task of organizing your presets is to go through them and remove or hide presets you don’t use or want. First, head to the Develop tab and click the Presets drop-down in the menu on the left.

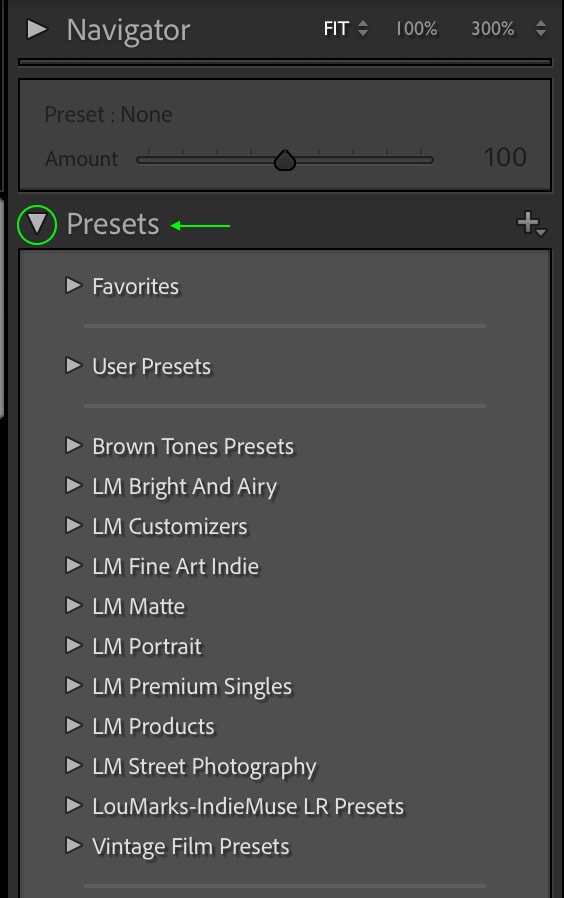
Here you’ll see all your presets. They will likely be organized with your favorites at the top, then the User Presets you’ve created below, and then any presets you’ve downloaded or installed, with Photoshop’s default presets at the bottom.
Now go through all your presets and preset folders and decide which ones you’d like to hide or delete. Click the drop-down arrow next to a Preset Group to see the presets in that group.
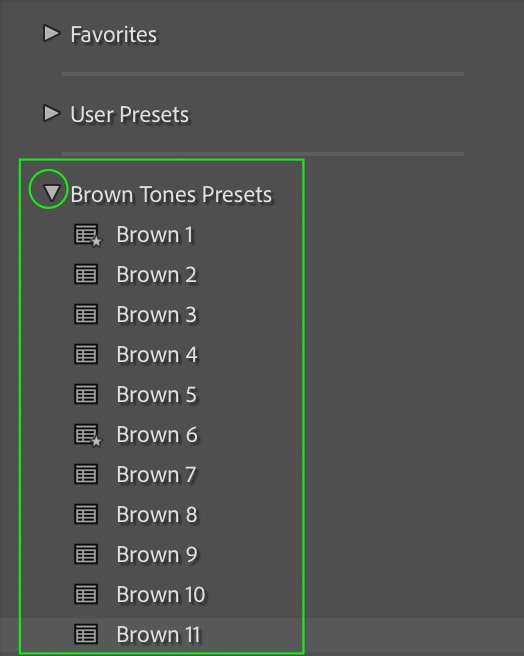
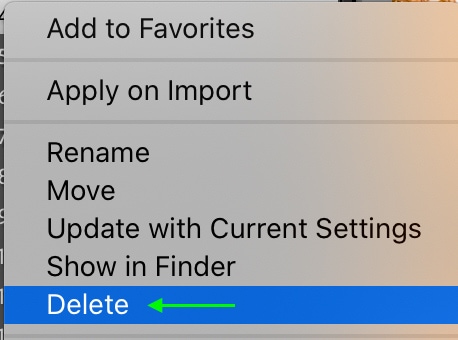
You can delete a preset by right-clicking or control + clicking it and selecting Delete. Keep in mind this will permanently delete the preset and cannot be undone.
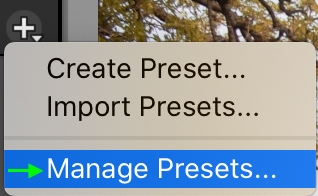
If you’d rather not delete a preset but don’t need to see it visibly in the list, you can hide a preset by clicking the plus sign (+) to the right of the Presets tab.

Then, from the options, click Manage Presets.
The Manage Presets window will appear, and it is here you can uncheck any presets you’d like to hide in the list. You can see all your hidden presets at any time by heading back to the Manage Presets window.
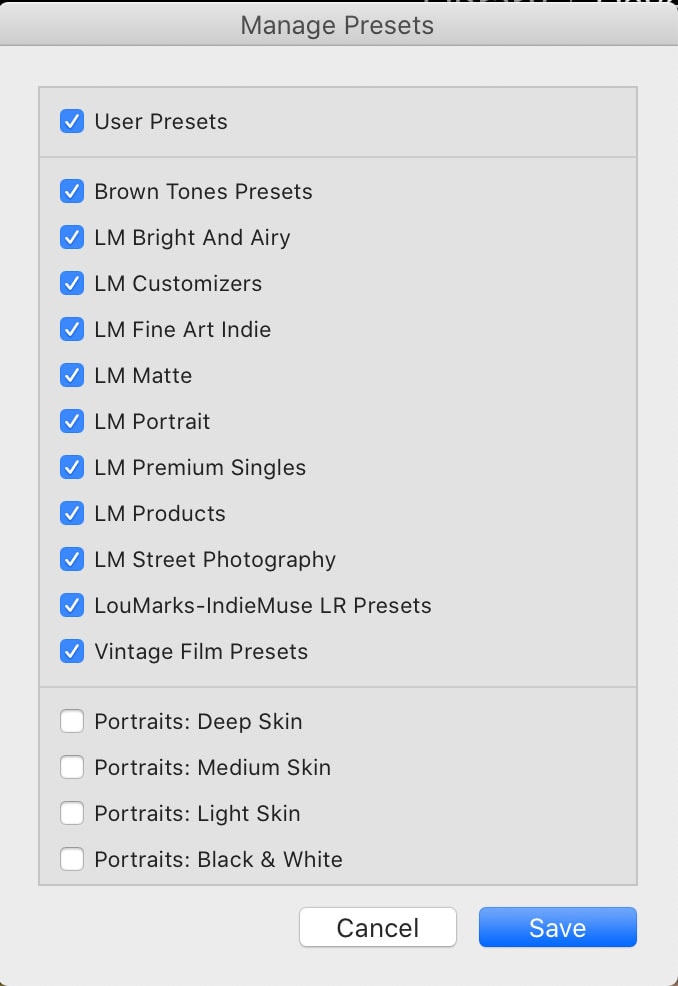
Click Save, and any presets you’ve unchecked will be hidden from the list. Don’t forget to go through any presets that come with Lightroom (normally found at the bottom of the Presets tab), as well as any User Presets you’ve made yourself. There may be presets you don’t often use in these sections, particularly in Lightroom’s default presets.
Once you’ve gone through your presets and cleared out ones you know you won’t use, you’ll likely find your Presets section looks a lot cleaner and organized, and finding the preset you need is less overwhelming.
2. Creating New Preset Groups
Preset Groups are a useful feature that allows you to add presets to different groups. Many presets come in groups, but sometimes Lightroom struggles to keep presets together, or will automatically put a group of downloaded presets into your User Presets.
For this reason, it can be useful to go through your presets and make sure they are grouped in a way that makes sense to you. If necessary, you can even make your own preset groups to ensure your presets stay organized.
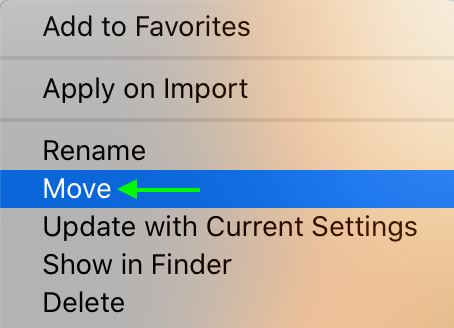
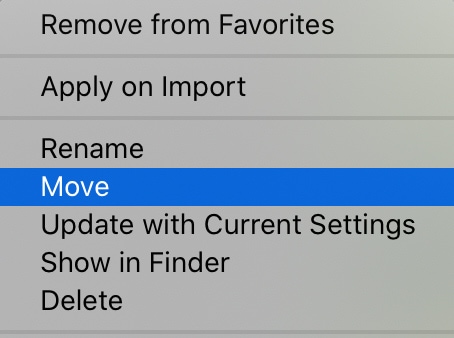
To make a new preset group, first, find a preset you’d like to add to your group and right-click or Control + click the preset. From these options, click Move.
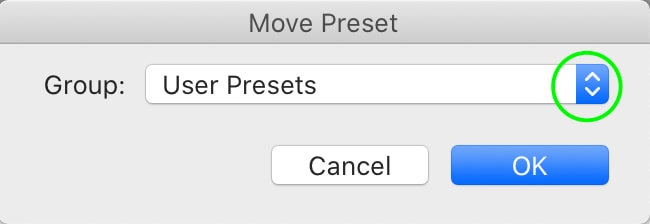
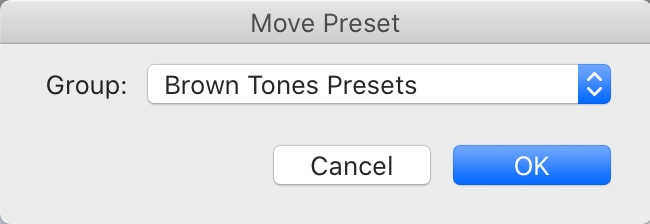
The Move Preset window will appear, and you can click the drop-down to select a preset group or make a new group.
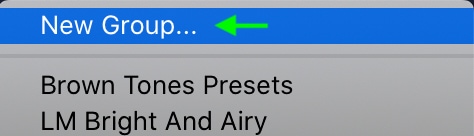
To make a new group, click New Group from the options; it should be at the very top of the list.
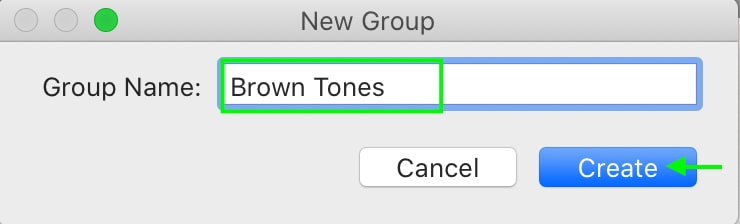
In the New Group window, name the preset group and click Create.
Now, back in the Move Preset window, click the dropdown again, and select the Preset Group you just created.

The preset will be moved to this group. You can repeat this process with any presets you’d like to add to this group, or you can make as many groups as you need to organize your presets.
3. Adding Your Most Used Presets To Your Favorites
Adding presets to your favorites is a trick that will save you tons of time, especially if there are a few presets you use particularly often. Your favorites will appear at the very top of the Presets tab, so you’ll have all the presets you use the most easily accessible right when you need them.
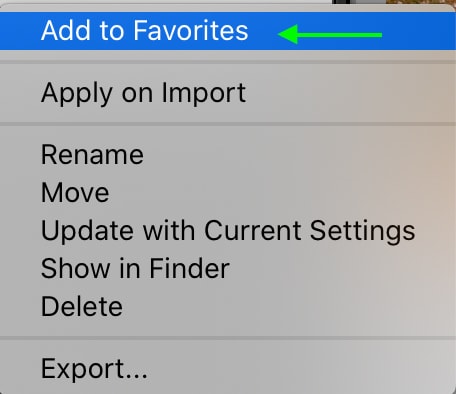
To add a preset to your favorites, locate it in the list and right-click or control + click. Then, select Add to Favorites.
The preset will appear in your Favorites when you need to access it.

4. Move Or Rename Presets As Needed
Sometimes when you download preset packs that come with set preset groups, you may want to reorganize them in a way that makes sense to you. Luckily, you can easily rename or move around any presets.
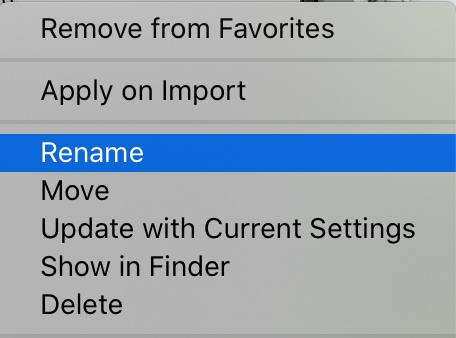
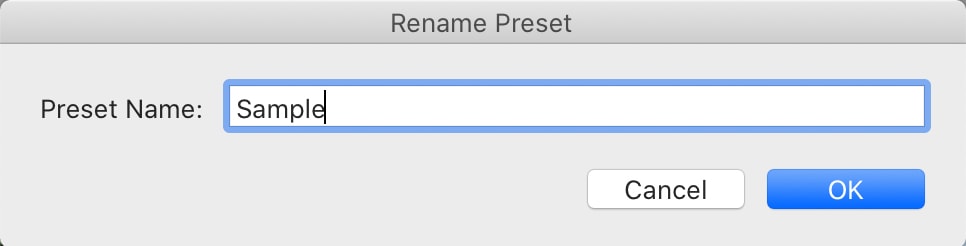
To rename a preset you only need to right-click or Control + click the preset you’d like to rename and select Rename.
In the window that appears, enter the new name of your preset and click OK.
Moving your preset to a different folder or group is just as easy. Right-click or control + click the preset you’d like to move and select Move.
In the Move window, you can click the drop-down arrow and select where you’d like to move your preset. Then press OK to move the preset into the selected group.
This can help you ensure you can easily find your presets based on their names and location in your Presets tab.
5. Back Up Your Presets Just In Case
The most important part of organizing your presets is to regularly back them up, just in case of emergencies.
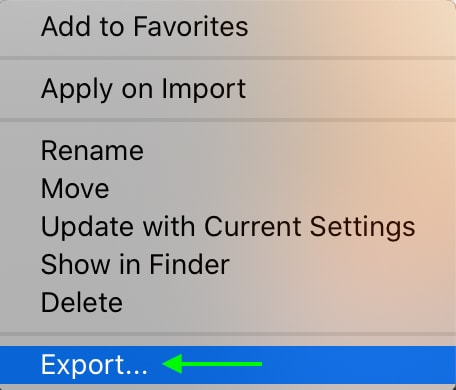
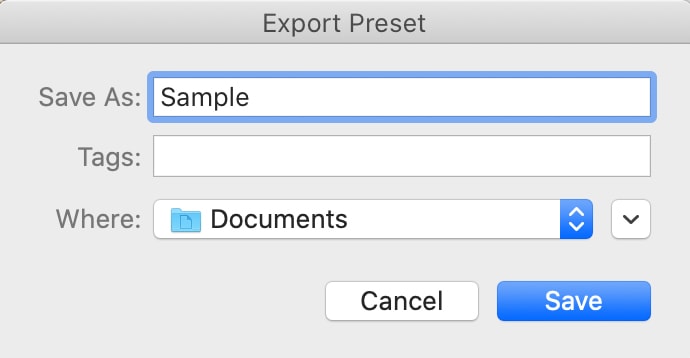
First, export your presets by heading to the Presets tab and right-clicking or control + clicking the presets you want to export, then click Export or Export Group.

You’ll see the export menu appear and here you can create a file name for your preset and select where you’d like the presets to be in your files.
Your presets will now be exported, and it is also recommended to have a backup storage source such as an external drive or a cloud storage account. Saving your presets on an external drive or in the cloud will ensure that you don’t lose any presets if your laptop crashes or breaks.
Now that you know how to organize your presets, chances are you wouldn’t mind adding a few more to your collection. Currently, I have 12 free Lightroom presets available in my Lightroom Preset Starter Kit Bundle that you can access for free here.
