


Knowing how to use the Clone Stamp Tool in Photoshop offers a versatile option for removing unwanted objects from a photo. Whether it be an entire person, a footprint on the beach, or a blemish on your subject’s face, this tool can do it all.
Although this tool is relatively easy to use, it does require a bit of up-front knowledge to know how to use it properly. That’s why in this tutorial I will walk you through everything you need to know so you can easily remove unwanted parts of any photo!
Let’s get started!


Video Tutorial
How To Use The Clone Stamp Tool To Remove Objects In Photoshop
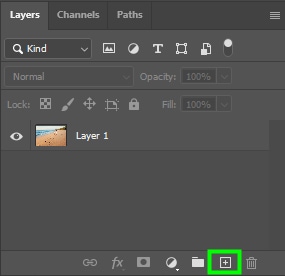
Step 1: Click On The Plus Sign Icon To Create A New Layer
To create a new layer, click the plus sign icon at the bottom of the Layers Panel.
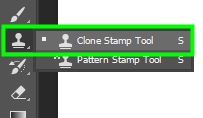
Step 2: Activate The Clone Stamp Tool (S) And Change The Settings In The Options Bar
Next, activate the Clone Stamp Tool (S) from the Toolbar.
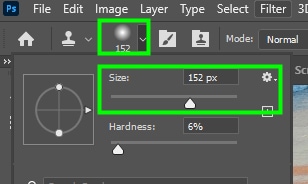
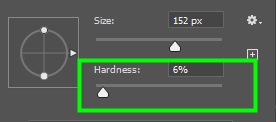
Then, adjust the brush size and hardness using the Brush Preset Picker menu in the Options Bar.
- As for Flow, I set it to 85%. This way, I could paint new pixels at a slower pace, making it easier to control how the clone adjustment appears.
- Next, make sure Aligned is checked so that you don’t clone the same pixels when you paint over the target area.
- Finally, make sure Sample is set to Current and Below. This way, the edits will be placed on the new layer you created, and the pixels to be cloned will come from your original image layer.

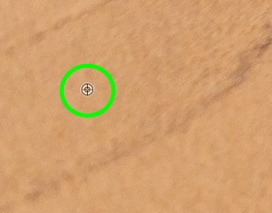
Step 3: Hold Alt/Option And Click On An Area To Set The Source Area
Select pixels near the target object to serve as source pixels. To set your sample, hold Alt (Win) or Option (Mac) and click on the area you want to define as your clone source to set your sample. Now begin to paint over the areas you want to remove from the image.
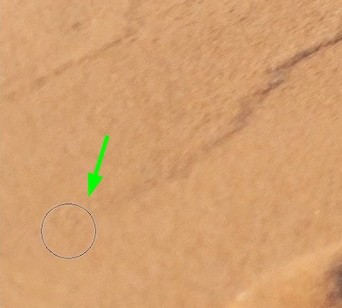
Step 4: Continue Brushing Over The Area To Replace The Pixels
As you clone, you will also see a little cross icon positioned near the brush. This cross icon tells you what pixels are being sampled to cover the unwanted object. When Aligned is checked, this crosshair will move with the brush to sample new pixels as the brush moves around the image.
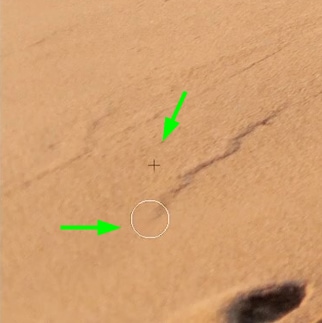
Note: your sample will only get you so far until it samples something you don’t want. In that case, once again hold Alt/Option and reset your sample before continuing your clone adjustments.
In the end, you will likely have to sample multiple sources to cover an unwanted object. In addition, depending on the complexity of the elements you want to remove, you will need to adjust brush hardness and opacity several times as you proceed.
Clone Stamp Tool Settings Explained
Brush Preset Picker

The Clone Stamp Tool is a tool that copies and pastes pixels using a brush. This means that adjusting brush settings is essential for getting excellent results. The most important settings in the brush preset picker are size, hardness, and type.

You can change the brush size using the Size slider or press [ to decrease and ] to increase the size. A smaller brush will allow you to copy fewer pixels at a time, which will give you greater precision. As a general rule, making your brush slightly larger than the object you want to remove is your best bet.
Setting brush hardness to a low value makes the pixels you sample blend smoothly with pixels from the area they will be painted into. A high hardness value, on the other hand, creates well-defined edges.

For type, you can pick any brush you want. But for best results, I recommend you choose a soft round or a hard round brush. The soft round brush applies a slight blur/feather to pixels. The hard round brush, on the other hand, samples and paints pixels with a defined outer edge to the brush.
Clone Source
In the Clone Source panel, you can change many additional clone stamp tool settings. For example, you can rescale the area you cloned, change its orientation, and much more.
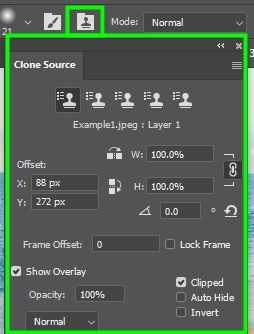
Mode

In Mode, you can alter the Clone Stamp Tool blending modes. The blending modes available for the tool are the same as those available for layers.
Opacity
Opacity changes the visibility of pixels.

Brush Pressure Opacity, Flow, And Airbrush

- Brush pressure Opacity changes according to the pressure you put on a pen while drawing on a tablet.
- When you decrease Flow, you will need to paint over the target area more than once to apply the sampled pixels completely.
- The Airbrush icon, causes the tool to behave like an airbrush, rather than a regular brush.
Brush Angle

Changing brush angles can be useful for selecting difficult areas or when using a shaped brush other than a round brush.
Aligned

The Aligned option acts in sync with the movement of your cursor when you clone pixels. It does this by supplying you with new pixels when you continue painting over the target area.
For most cases, you will want to leave Aligned checked, since it often makes your job easier. But if you want to clone pixels from a single source repeatedly, leaving Aligned unchecked is ideal.
Sample
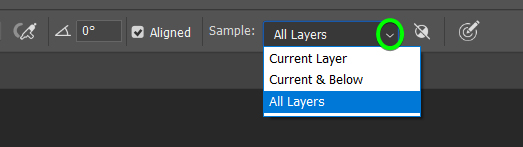
In Sample, you determine which layers will be affected by the clone stamp tool.
- If you choose Current Layer, the clone stamp tool will affect your active layer only.
- If you choose Current & Below, the tool will affect the active layer and the one below it. This option is ideal for when you create a blank layer to make edits and are using an image layer as the source of your cloning.
- If you choose All layers, all layers in the Layers panel will be affected, regardless of their position in the layer stack.
Ignore Adjustment Layers When Cloning And Brush Pressure Size

The second last icon in the Options Bar, allows you to sample raw pixels, with no effects applied to them by adjustment layers. The last icon is only useful when you’re using a drawing tablet. When you enable it, the brush size will change according to the pressure you put on the pen while painting with the tablet.
Cloning Vs. Healing In Photoshop
The Clone Stamp Tool copies the exact pixels in an area and pastes them in another region of the photo. For pixels from different sources to blend well, you will have to adjust the tool settings such as the brush type, opacity, and flow.
On the other hand, the Healing Brush Tool uses artificial intelligence to blend pixels from different sources. Consequently, pixels tend to blend well after you apply such a tool, especially when it comes to tone and color. An easy way to think of this is that the clone stamp “copy and pastes” pixels, while the healing brush “blends” pixels.
To make life easy, here’s which situations you would opt to use the Clone Stamp Tool or the Healing Brush Tool:
Clone Stamp tool: for removing people and large objects, dealing with patterns, or removing objects near a defined edge such as a building or person.
Healing Brush Tool: For correcting textures with small imperfections, such as grass, rugs, and walls, treating minor skin problems such as acne, dark circles, and blemishes, and removing stains.
Now to help you better understand how the Clone Stamp Tool can be used in a full photo editing process, check out this next tutorial I wrote on 10 easy steps to editing photos in Photoshop.
Happy Cloning!
