


Knowing how to import photos in Lightroom is a quintessential part of a workflow. Although importing images into Lightroom may seem simple, there are important settings and valuable tools to know. Understanding these settings and how to use them to your advantage is helpful as a photographer and editor.
Let’s look at the various steps in the import process and learn their uses and functions.
How To Import Photos In Lightroom
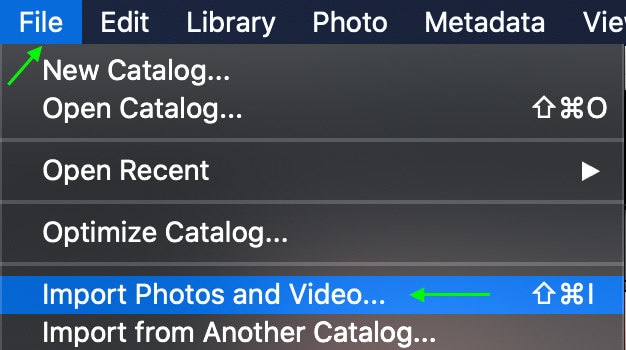
Step 1: Go To File > Import Photos and Video To Open The Import Dialogue Box
After removing the memory card from your camera and saving your images in your files, open Lightroom Classic. From any screen in Lightroom, go to File > Import Photos and Video. This will open the Import Dialogue Box.
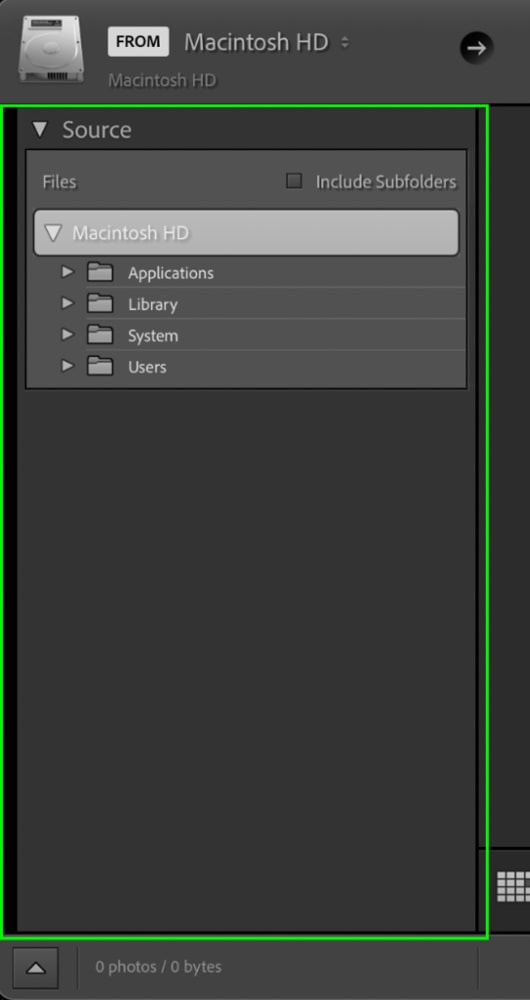
Step 2: Locate Your Files In The Source Panel
First, head to the Source panel on the left of the Import Dialogue Box. In the Source panel, you’ll see the different file folders you have on your computer. Locate your images in the folder you put them in. When the folder opens, you’ll see all the images appear in the center of the import window.
Step 3: Choose Your Import Method Into Lightroom
There are four different import options, each affecting what happens when your images are imported.

- Copy as DNG: This option allows you to plug in your memory card, import your files to a hard drive, and convert them to DNG files in one move.
- Copy: This will copy the images from a memory card to a new location in your files and add them to the Lightroom catalog simultaneously.
- Move: The move setting will move the images from a memory card, so they won’t be there anymore once you finish, and add them to the Lightroom catalog.
- Add: This is the best option when importing from a hard drive, as it creates a replica of the folder you’re importing from and places it into Lightroom.
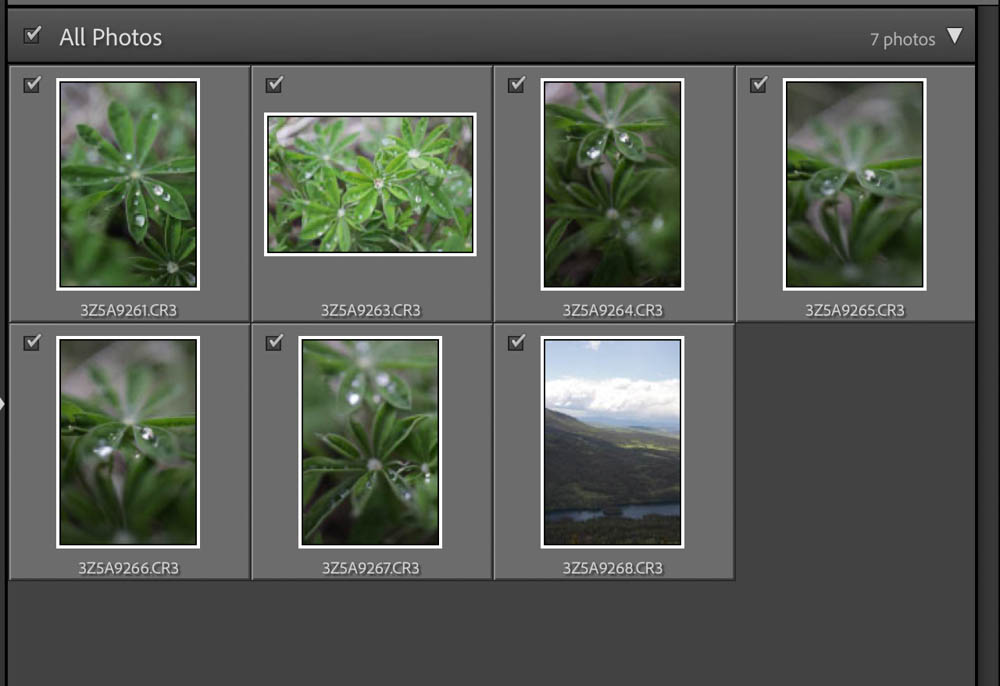
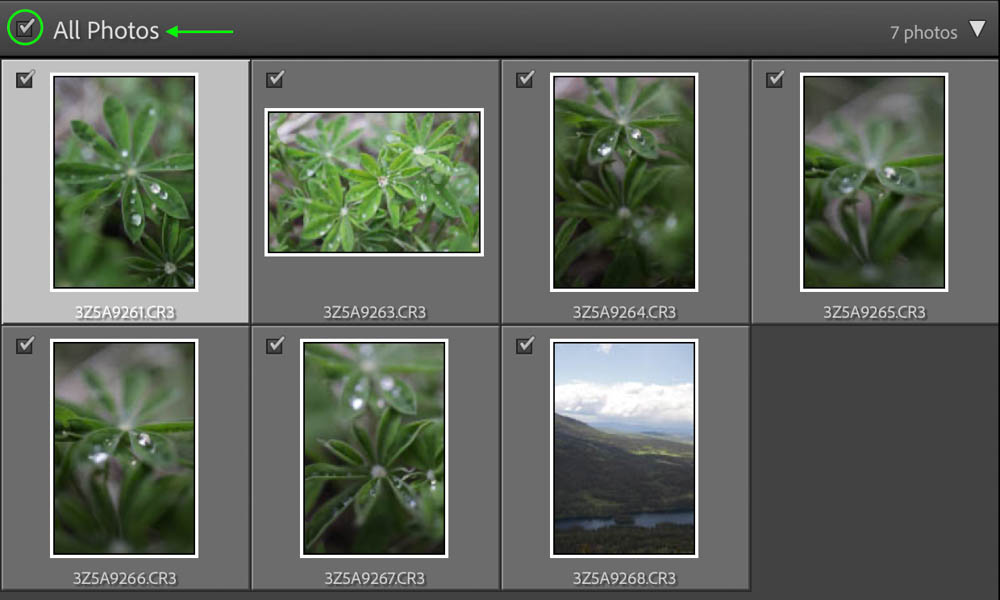
Step 4: Select The Photos You Want To Import And Press Import
Now, you can select the images you’d like to upload to Lightroom. Selected photos will become a lighter gray, and a checkmark will appear in the box on the top left. To upload multiple images simultaneously, hold the Control (Win) or Command (Mac) key while clicking the box at the top left of one of the images to check all selected images. You can also select all the images at once by clicking the box next to All Photos. This option selects all of the pictures in the folder.
Note: If an image is grayed out and you cannot click it, you cannot import it. This usually happens because the image is already imported into Lightroom or the file type isn’t accepted.
Now, you can click the Import button on the bottom right of the window. Your images will appear in your Lightroom Library.
Additional Import Settings Explained In Lightroom
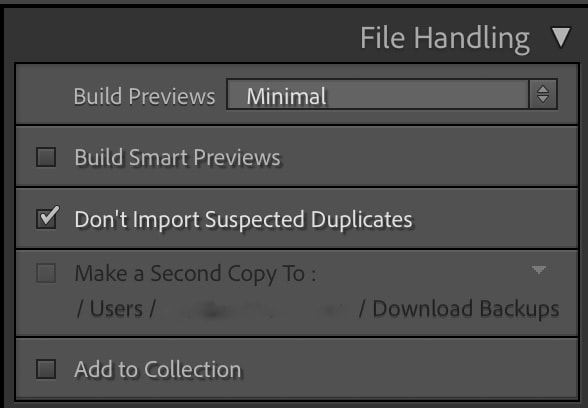
The File Handling Panel
In the Build Previews menu, you can select how Lightroom should render previews for your images. Minimal will result in the fastest import since Lightroom only uses minimal resources to make the previews. Embedded & Sidecar will be even faster, but the previews may be low-quality. Standard will make a standard preview, while 1:1 will create full-size previews, which will take quite a long time.
You can also check Build Smart Previews, which will select the best settings for your images. If you want Lightroom to ignore images already in its library, check Don’t Import Suspected Duplicates. If you’d like another copy somewhere in your files, check the box next to Make a Second Copy To and then select the location in your files.
Finally, you can check Add to Collection to add the file to a specific collection.
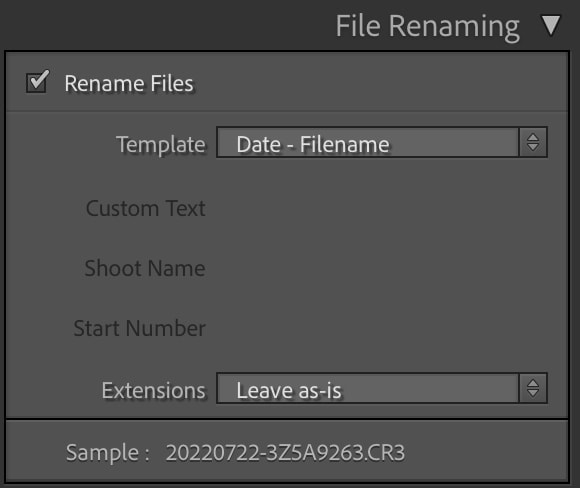
The File Renaming Panel
As its name suggests, this panel allows you to rename files. If you plan to rename them, it is best to do so while importing, as you will likely find it easier to locate the images in your Library. Check Rename Files and select one of Lightroom’s renaming templates.
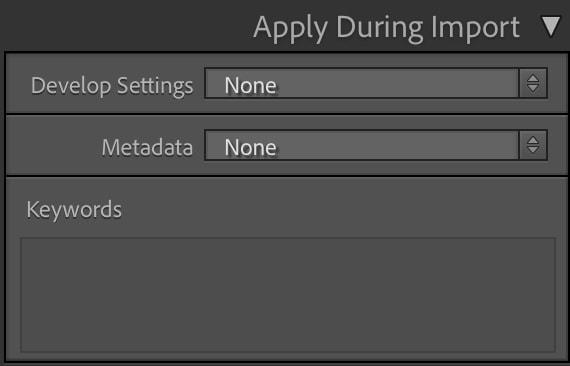
The Apply During Import Panel
This panel contains adjustments and presets you can apply to your images upon import. They will arrive in the Library with the adjustments already made, and you can edit them further later.
You can apply a set of preset Develop Settings by clicking the drop-down menu and selecting any presets you might have added. You can use the Metadata drop-down menu to select any preset metadata you saved to add to your images. Under Keywords, you can add keywords to help you find your images in the library.
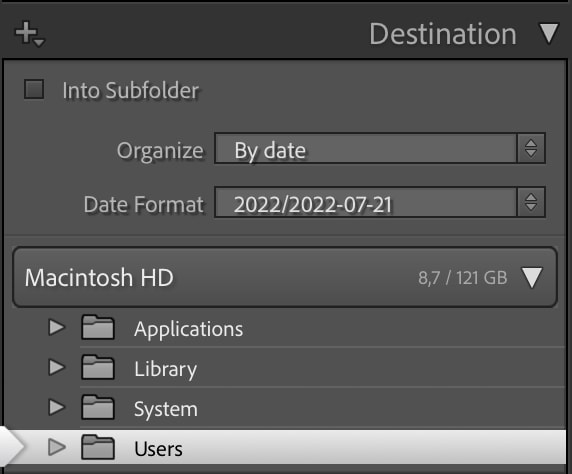
The Destination Panel
The destination panel only shows up if you’re importing using the Copy as DNG, Copy, or Move settings, as you’ll have to select the location where the copy of the image will go in your files. Here, you can also set how to organize the images once they’re added to the folder and what date format you’d like to use.
What To Do When Your Photos Are Greyed Out?
If an image is grayed out, you may be unable to upload it or even click it during the import. This means Lightroom doesn’t accept the format, or the photo has already been imported into Lightroom. You can solve this quickly by heading to the File Handling panel, and unchecking Don’t Import Suspected Duplicates.
If this doesn’t solve the problem, another issue could prevent you from importing the photos into Lightroom. I share the other common reasons that Lightroom can’t import your images here.
Once your images are imported into Lightroom, the organizing and culling process is the next phase. In this next tutorial, I share my step-by-step method for sorting thousands of images in just a few minutes.
