
How To Quickly Cull Photos In Lightroom
So you’ve just finished a shoot and need to start culling your photos in Lightroom. The trouble is, you have hundreds (maybe even thousands) of photos to sort through. Nobody wants to spend a whole week sorting through a shoot, so how can you speed up the culling process? With the help of the flagging, rating, and color systems in Lightroom, quickly culling photos is easily done with a few simple shortcuts. What matters most is that you follow the correct steps to save yourself time.
To cull photos in Lightroom, follow these steps:
- Switch to ‘Loupe View’ in the Library Module.
- Select And Flag The Best Images By Pressing ‘P’
- Reject The Images You Don’t Like By Pressing ‘X’
- Filter Your Library To Only Show Flagged Images
- Edit The Flagged Photos
- Delete The Rejects
Culling photos is an essential skill for any photographer. To help you get a better handle on the process, let’s go through the different ways you can cull photos in Lightroom.
What Culling Tools Should You Use?
To speed up the culling process, it’s important to take advantage of a few keyboard shortcuts for culling. Use ‘P’ to flag images you like, ‘X’ to flag images you don’t, and numbers 0-5 to further organize photos with a star rating.
Especially when you’re editing a large shoot, time is money, and the last thing you want is to spend more time culling and editing photos than necessary. In Lightroom, there are 4 different tools to help cull your images. Using Flags, Reject Flags, Star Ratings, and Color Labels, you can keep track of photos from the import to export process.
– Flags
Flags are the easiest way to cull images in Lightroom. By adding a flag to an image, you can later filter the Lightroom library to only show those specific images. That way, it’s easy to know exactly which photos you want to keep.
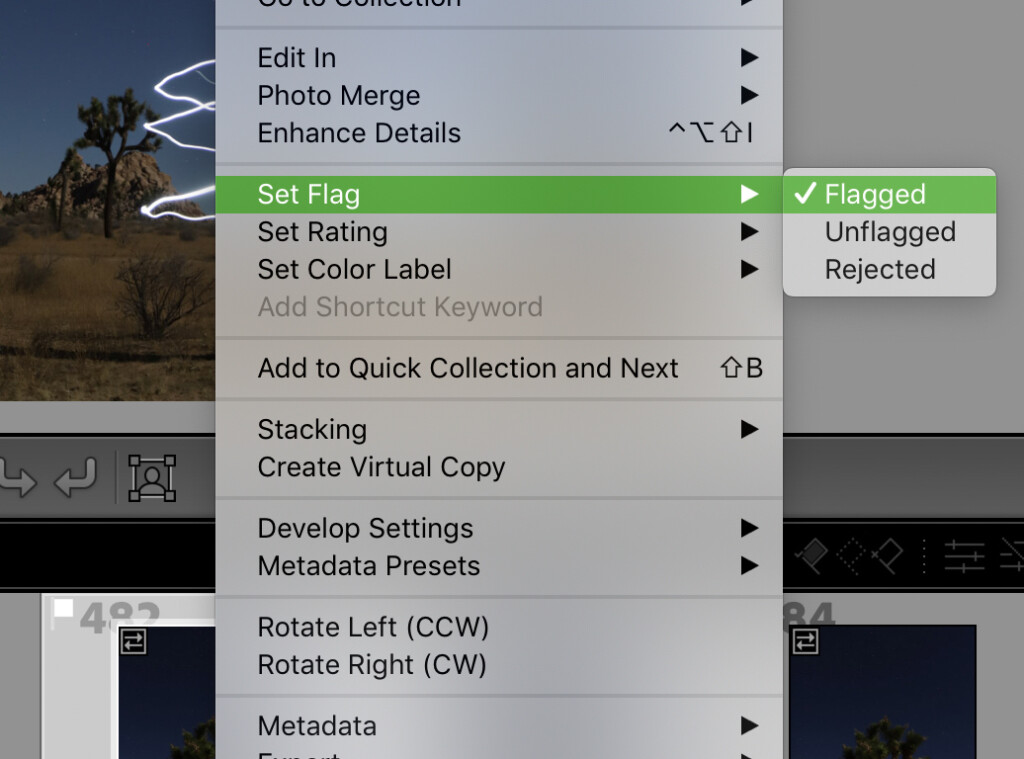
There are two ways to add a flag to a photo in Lightroom. The first is the right-click on the image and select Set Flag > Flagged.
The second way is to simply select the image and press P on your keyboard. This is a far more efficient way of doing things.
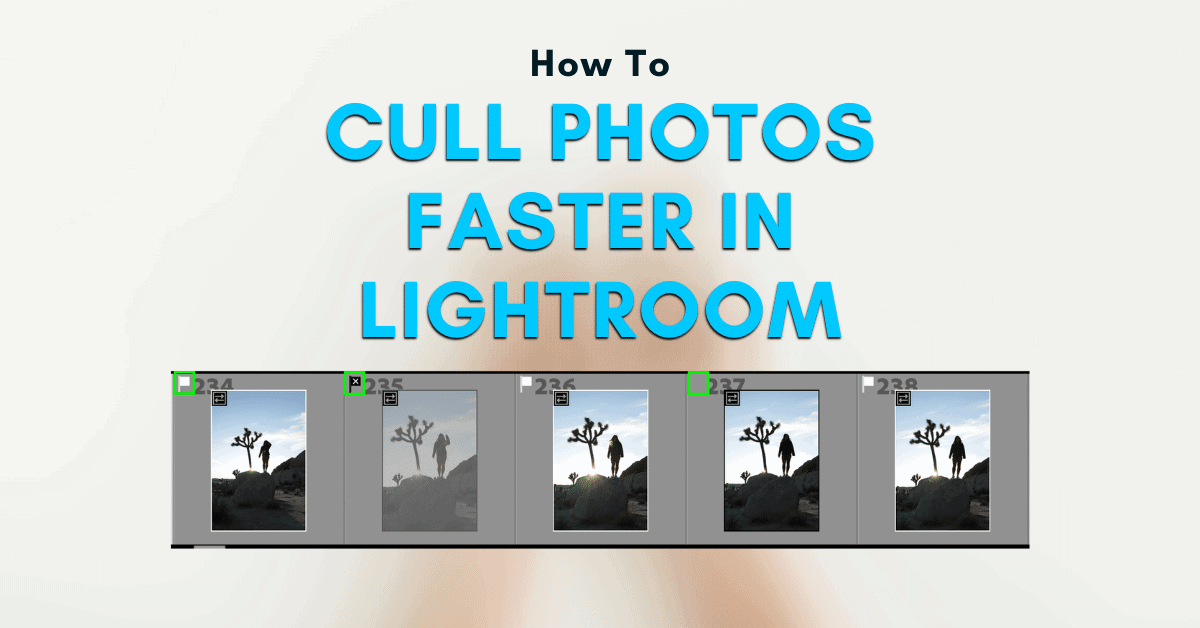
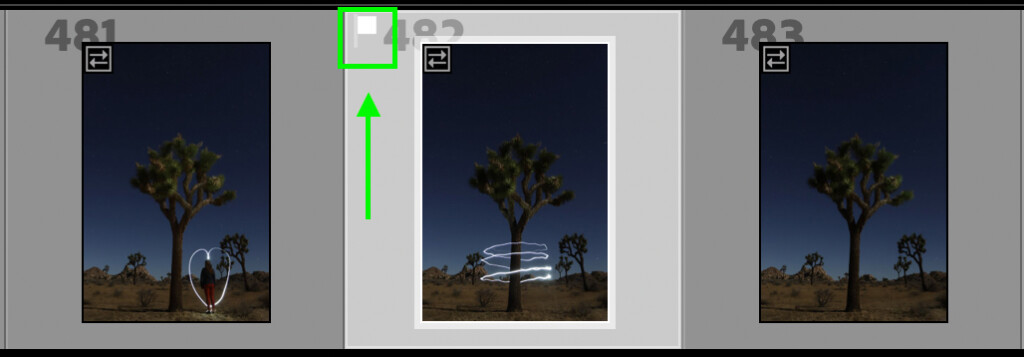
Once an image is flagged, you’ll see a small white flag icon in the top left corner of the image thumbnail.
– Reject Flags
Like a flag, reject flags help you mark the photos you do not want to keep. If you have multiple photos, a blurry shot, or an image you simply don’t like, adding a reject flag makes it easy to get rid of photos later on.
To add a reject flag, you can right-click on a photo and select Set Flag > Rejected.

Alternatively, you can select the image from your library and press X to add a reject flag.
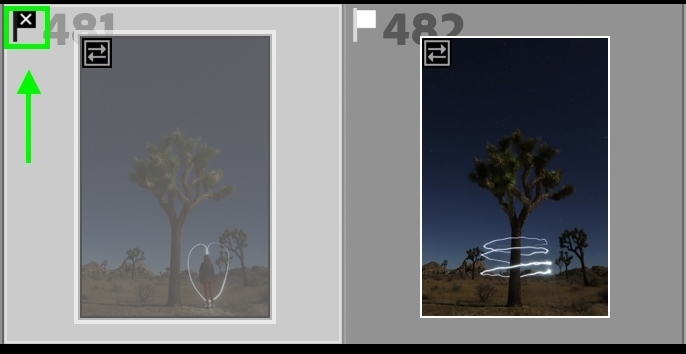
Once applied, your photo will appear slightly grey with a black flag in the upper left corner. Later on, you can filter these rejected images to delete all at once.
If you accidentally reject a photo, you can reset the flag to unflagged by pressing U on your keyboard.
– Ratings
Another way to organize images in Lightroom is with star ratings. Ratings can be given to images based on a 0-5 star rating. These can be extremely helpful for culling images since you can sort your library to only view certain ratings or only see images above a certain number of stars.
To add a rating to your image, you can right-click and choose Set Rating > Desired Star Value.
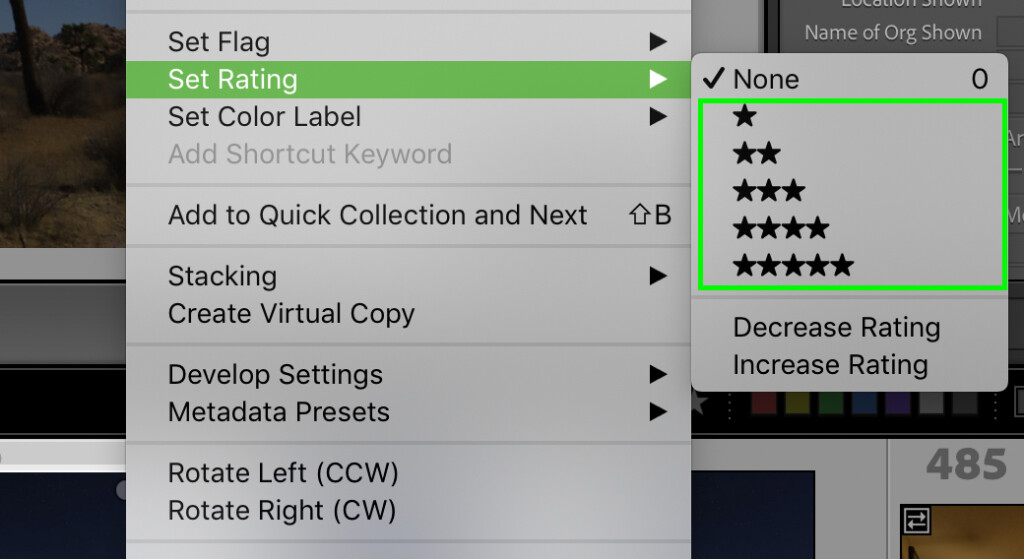
You can also use the number keys 0,1,2,3,4,5 on your keyboard to rate your selected photo. For example, pressing 2 will give your photo a 2-star rating.
There are many ways you can use star ratings, but the way I like to use them is for separating my complete edits, exported images, and re-edits from one another. More on that later.
– Color Labels
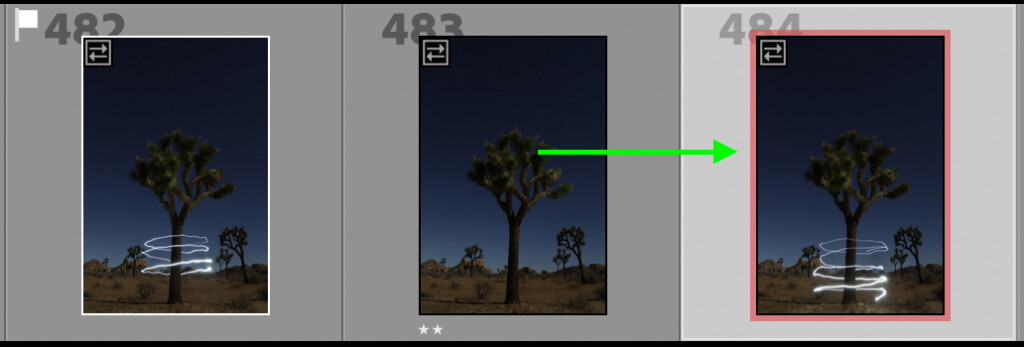
The fourth way to cull photos in Lightroom is with color labels. Like a color label on a computer folder, these add a specific color to different images to help with grouping the photos later on. For example, all the red images can be viewed at the same time.
There are 5 different color labels available in Lightroom ranging from Red, Yellow, Green, Blue, and Purple. To change the color label of a photo, right-click on the image and press Set Color Label > Desired Color.
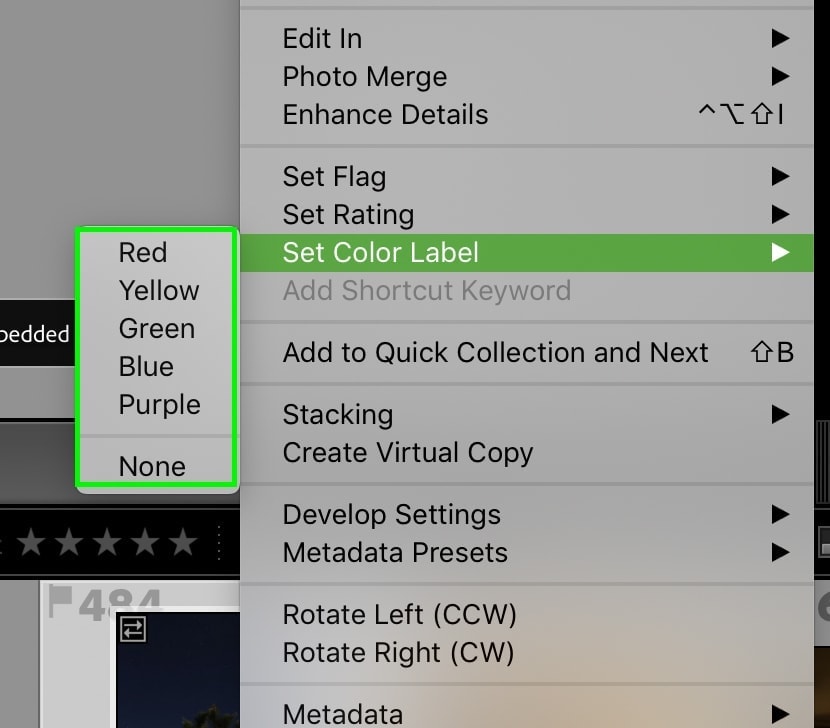
To help speed up the process, you can use the number keys 6-9 to set specific color labels in Lightroom. Here’s what each number means:
- 6 – Red Color Label
- 7 – Yellow Color Label
- 8 – Green Color Label
- 9 – Blue Color Label
As for purple, there is no shortcut available. You’ll have to right-click and manually set the color label if you want to add a purple tag.
Additional Tools To Speed Up Your Culling
Now that you understand the 4 main ways to sort through images, there are a few additional features you’ll want to take advantage of. Before we go through a culling workflow, make sure you’re using each of the following tools. Without them, you won’t be able to cull images as quickly in Lightroom.
– Using Auto Advance
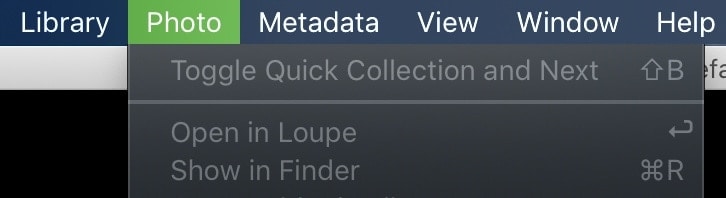
The key to quickly culling photos is to reduce the number of clicks required to get from point A to B. By using auto advance, you don’t have to manually move to the next image in your catalog. Instead, Lightroom will automatically move to the next image after you’ve set a flag, rating, or color label.
By default, the auto-advance feature won’t be turned on. Luckily, it’s pretty easy to find if you want to begin using it. Just go to Photo > Auto Advance to activate it.
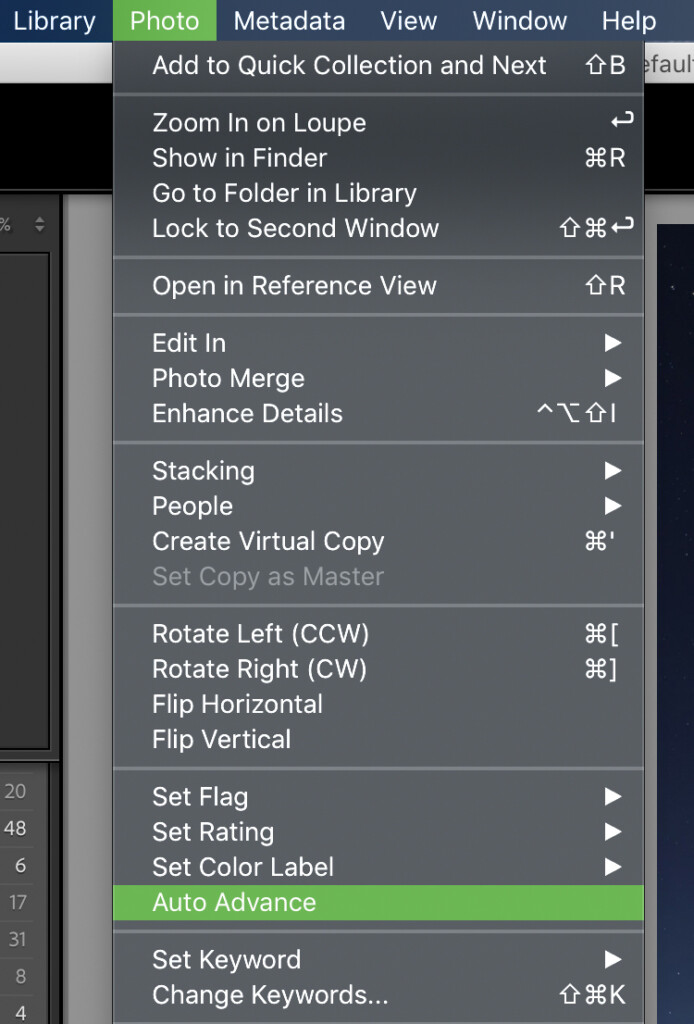
Now when you add any type of rating to your image, you’ll move ahead to the next photo without having to use your arrow keys.
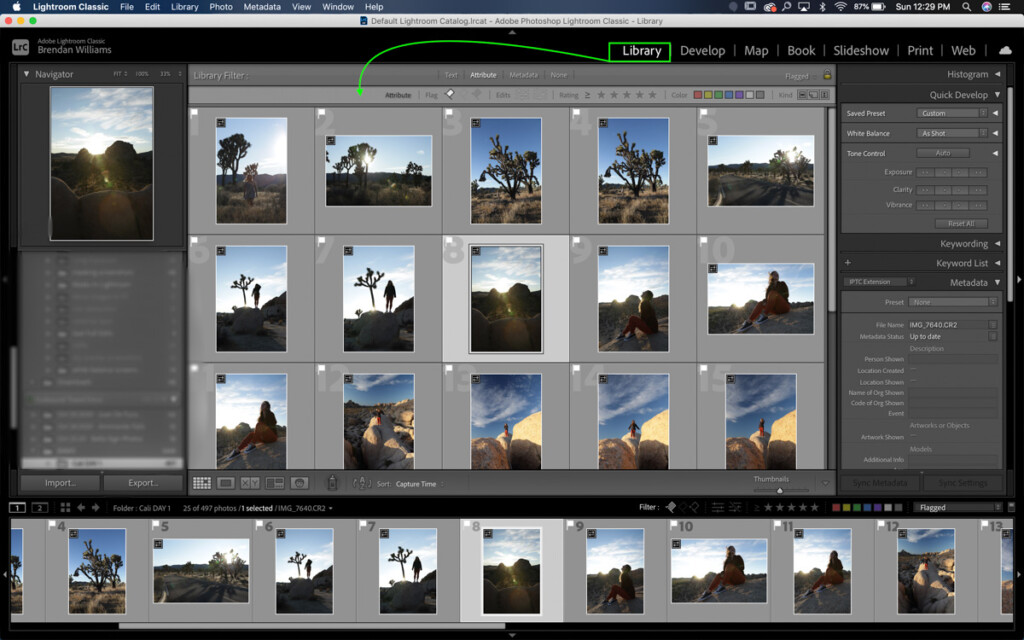
– Use The Library Module When Culling

While you’re working in Lightroom, you’re constantly moving back and forth between the Library and Develop modules.
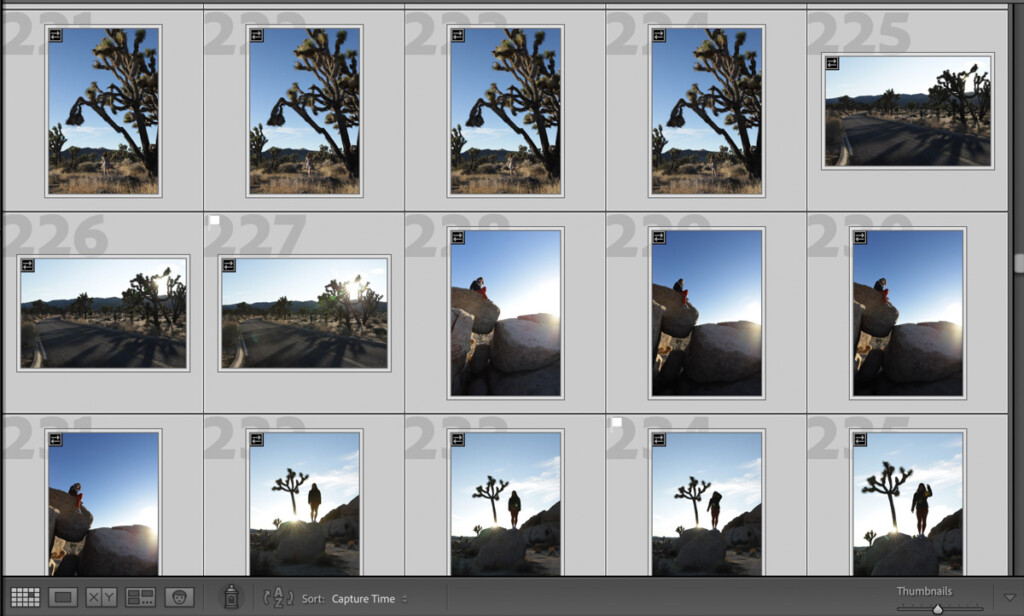
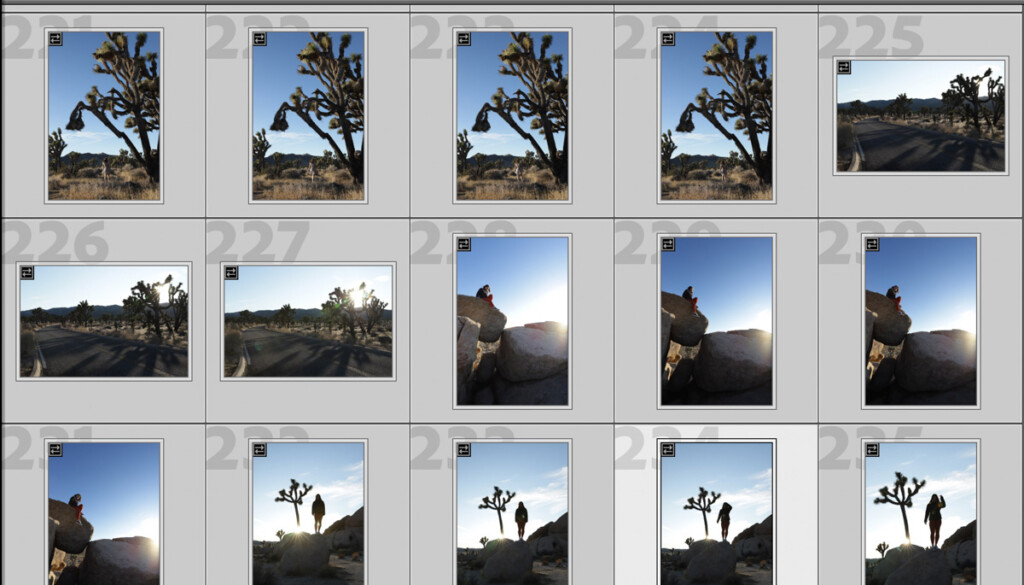
In the Library module, you have access to all your images in a specific folder or catalog. Here it’s much easier to see all your images at once since there are multiple gird view options, as well as the film strip at the bottom.
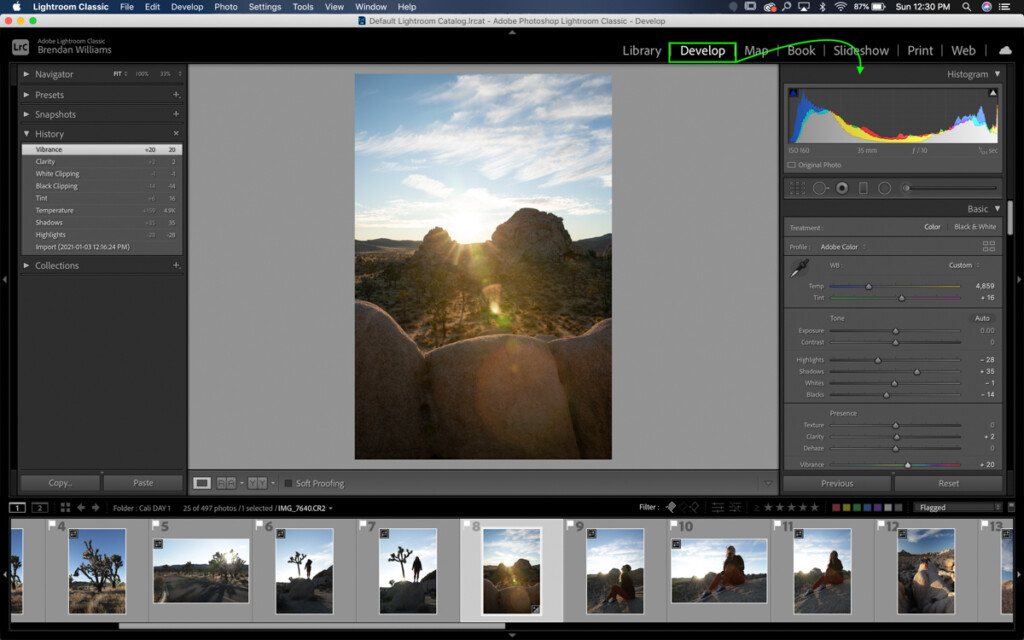
In the Develop module, you only can view photos from a selected folder in your filmstrip. This module is where you have access to all your adjustment tools and other settings to make edits to your photos.
Although you can technically cull photos in either module, it’s best to use the Library module for culling. The reason being is the Library Module uses different image previews that are much faster to load. That means you can quickly go from photo to photo with far less lag than you’d experience with the Develop Module.
Besides the speed advantage, the Library module offers more viewing options than what’s available in the Develop tab. With more display options to choose from, you can drastically improve the efficiency of the culling process.
– Loupe View
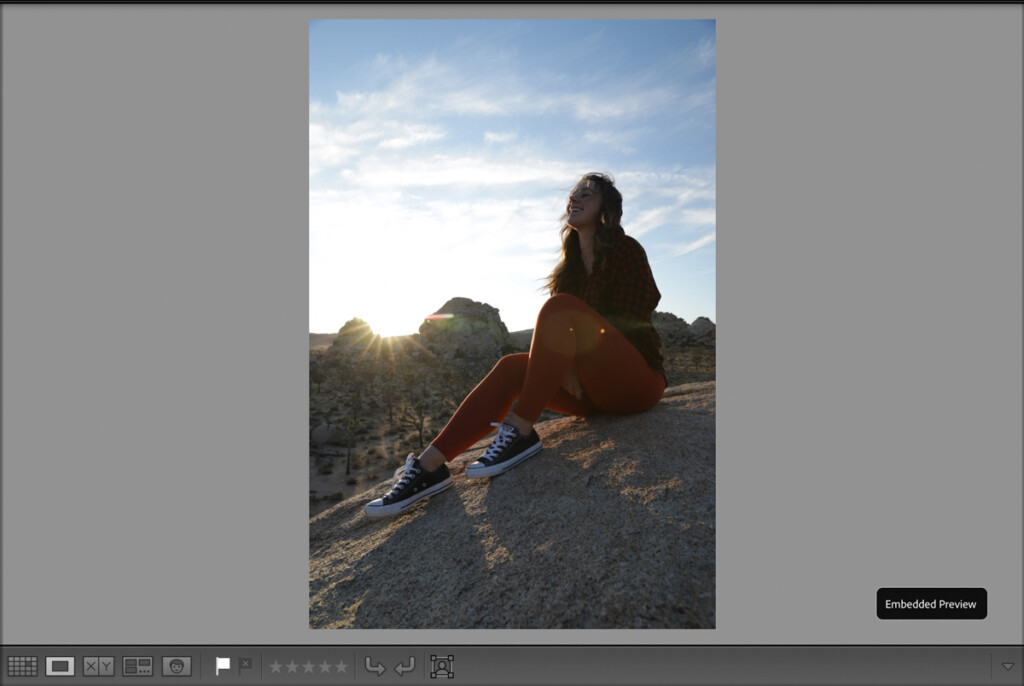
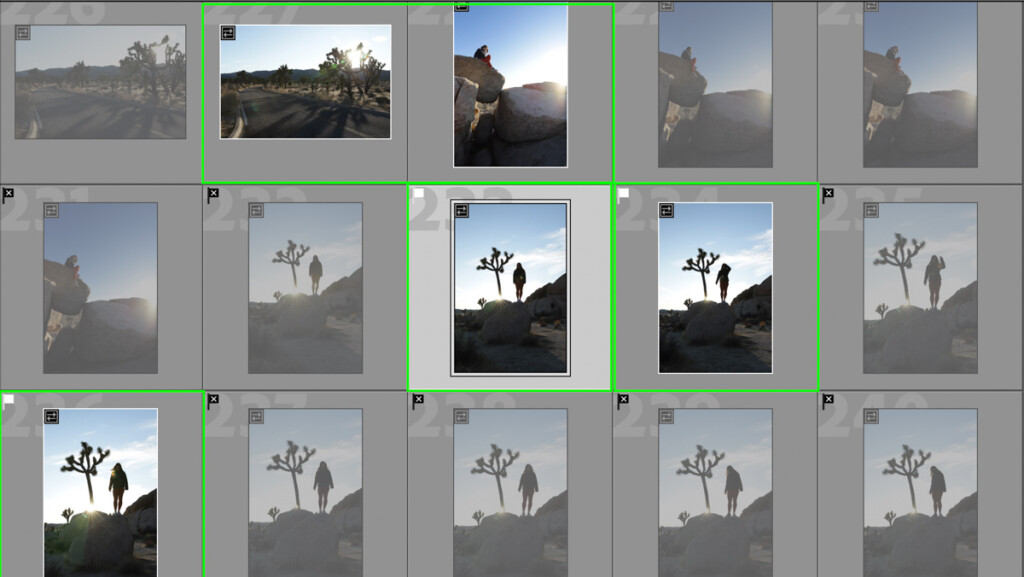
While you’re culling photos in Lightroom, you obviously want to see the photo before you decide what to do with it. While in grid view, it’s hard to see the details of a photo or differentiate the differences between duplicates. With Loupe View, you can see each photo as a full preview, making it much easier to pick the keepers from the rejects.
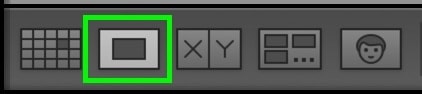
You can access Loupe View by pressing on the Loupe View icon found within your toolbar. If your toolbar is hidden, just press T to make it visible again. The Loupe View icon is represented by two rectangles, with a small darker rectangle in the middle.
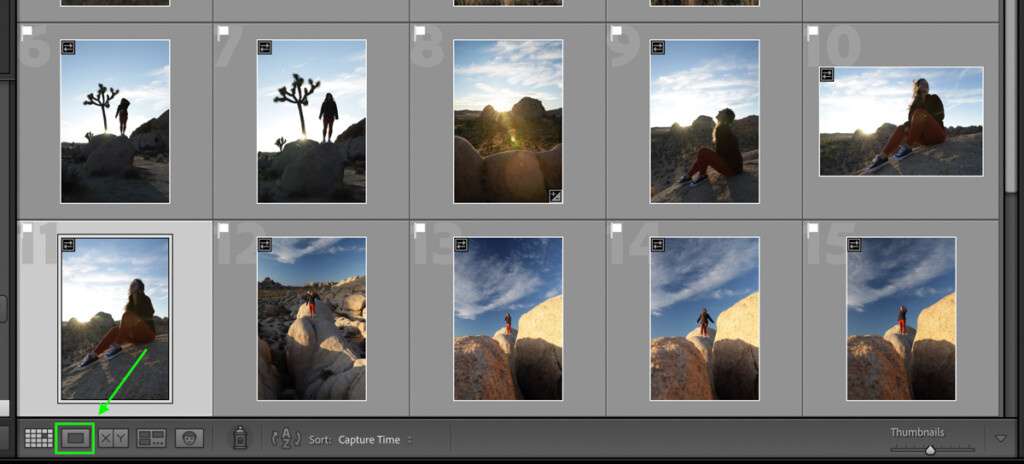
Once selected, your image will become full size, and it’s much easier to cull.
6 Steps To Quickly Cull Your Photos In Lightroom
So you have a general rundown of what it takes to cull photos in Lightroom and the tools you have to speed up the process. The thing is, even with an understanding of the tools, that doesn’t guarantee that you’ll end up culling faster. To guarantee you speed up your culling, you need to implement a workflow.
This workflow is one I use for culling my own shoots, as well as many other professionals. To make it easy, I’ve broken it down into 6 digestible steps that you can follow along with. Going from step 1 to 6, you’ll end up with a well-organized catalog and have an easier time exporting your favorite images. Let’s jump in!
Step 1: Clear All Ratings, Flags, Or Color Labels (Pre-Existing Folders Only)
This first step only applies if you have a pre-existing folder with culling adjustments made. Rather than getting confused by other ratings you’ve made in the past, it’s best to start fresh. If you’ve freshly imported a new batch of images, you can skip this step since no flags, ratings, or color labels will have been applied.
To start, access your Library Module and select grid view from the toolbar.
Then press Command + A (MAC) or Control + A (PC) to select all the images in the folder.
Next, you want to reset all your flags and star ratings. First, press U on your keyboard to unflag all images, then press 0 to reset the rating.
Lastly, to reset the color labels (if you have any), right-click on your images and go to Set Color Label > None.
Now your entire folder will be back to square one without any organization methods applied. This way, you can continue with the following steps without any confusion.
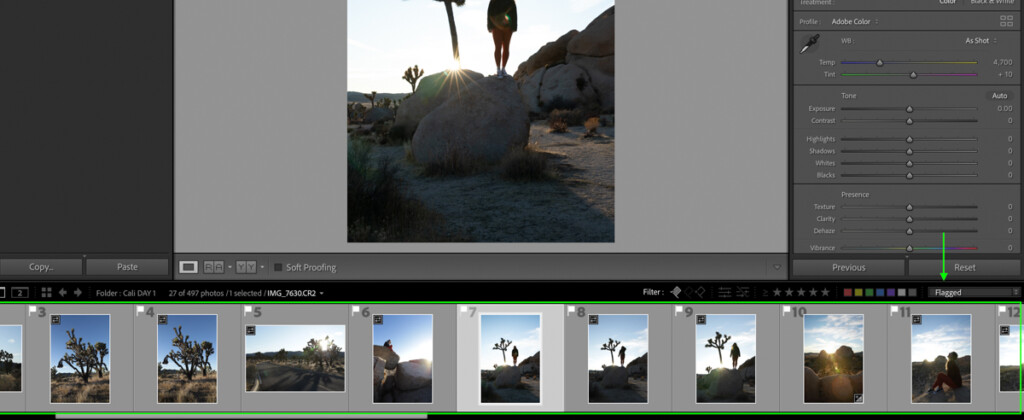
Step 2: Access Loupe View In The Library Module
Before you start culling, you need to see your photos better. While in the Library module, click on the Loupe View icon in your toolbar. Once again, if you don’t see your toolbar, press T to make it visible. Now You can view your images full size as you cull.
Step 3: Flag Or Reject Your Photos
The first step to culling photos in Lightroom is to make a basic selection of all the photos you want to keep. The easiest way to do this is by using flags. You can add a flag to your image by pressing P.
If you’re using auto-advance, Lightroom will automatically jump to the next photo in the folder. Otherwise, you have to use the arrow keys to manually switch from one photo to another after adding a rating.
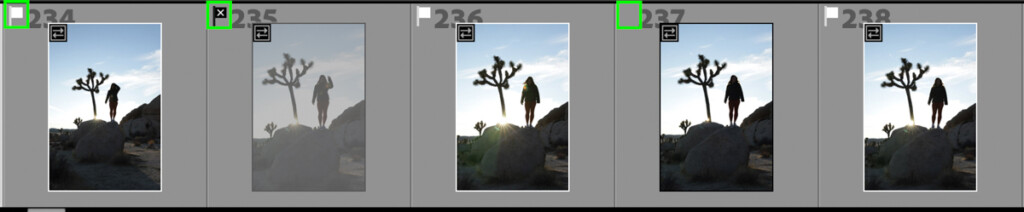
While you’re going through your images, you not only want to take note of the ones you like but also the ones you don’t. While you’re adding flags, make sure to add reject flags to any undesirable photos in the bunch. By pressing X, a reject flag will be added to help separate the photos you don’t like from the ones you do.
Don’t worry; rejecting photos doesn’t delete the image right away but puts it in a separate area for deletion later—more on that in a later step.
With that said, there are times when you can’t decide whether you want to keep or delete a photo. In that case, you can skip an image and leave it unrated by using the arrow keys. Although it’s best to give everything a specific flag or rating, there’s no point in wasting time if you truly can’t decide. After all, you can always come back to it later!
Lastly, if you accidentally flag or reject a photo, you can unflag it by pressing U. This will reset the image, so it’s neither picked nor rejected.
Step 4: Filter Your Library To Only Show Flagged Images
Now that all your images are sorted, you need to see only the images you’ve flagged. You can do this while in the Library Module or the Develop Module.
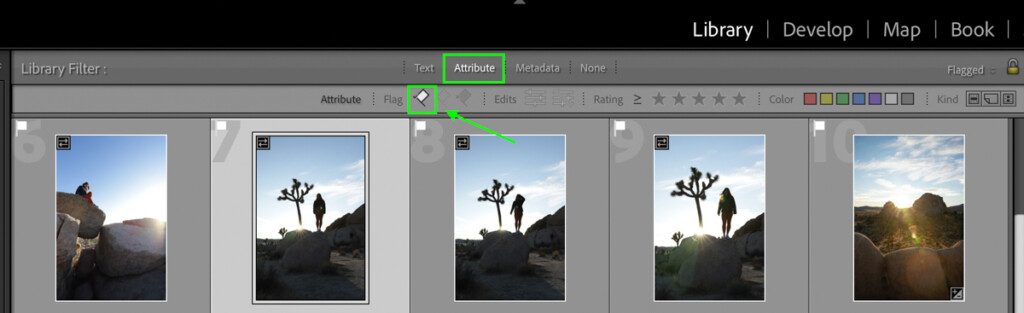
In the Library Module, you can filter your results by selecting Grid View, then going up to Attribute, and selecting the flag icon with the checkmark. Now the only images you’ll see are the flagged photos in the folder. All the rejects or unrated images will no longer be visible.
If you’re ahead of the game and already back in the Develop Module to begin editing, you can still filter results via the filmstrip. Simply click on the drop-down filter tab and change it from No Filter to Flagged.
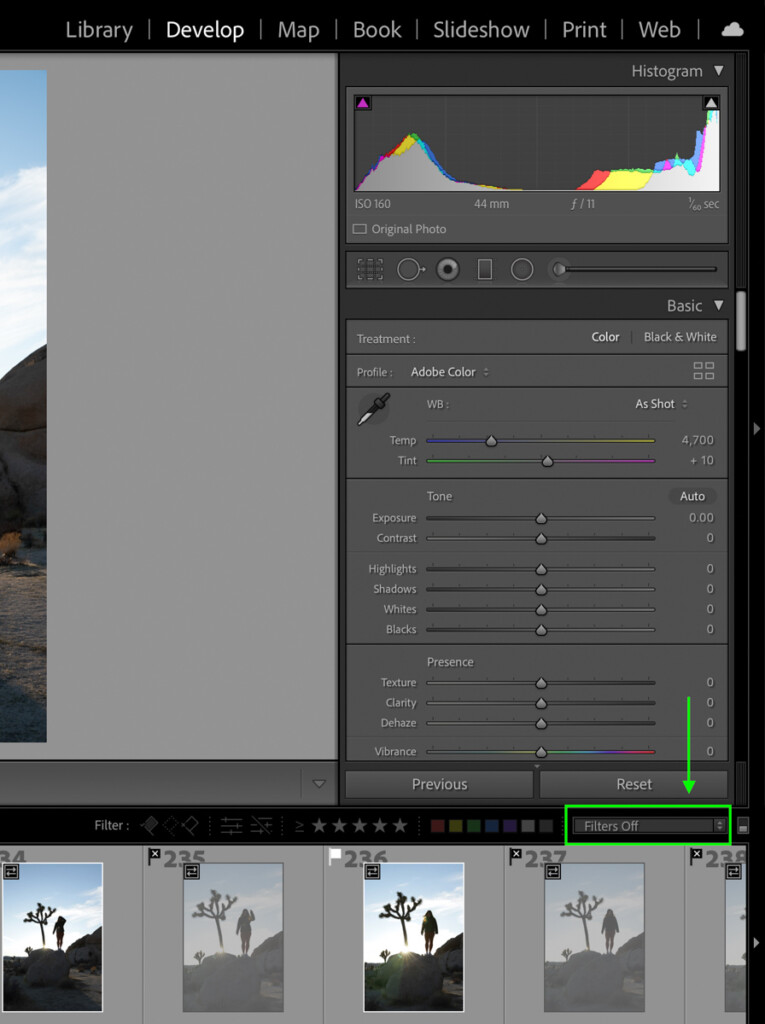
Now the only images you’ll have access to are your flagged photos.
From here, you can go through all of your selected photos and edit them. Even if you switch over to Photoshop and save back to Lightroom, the updated images will still be found amongst the flagged selects.
Step 5: Add Star Ratings To Edits And Exports
The culling process doesn’t stop after you’ve made your first selects. When you start editing photos and working between Photoshop and Lightroom, it’s easy for things to get disorganized again. That’s where star ratings come into play.
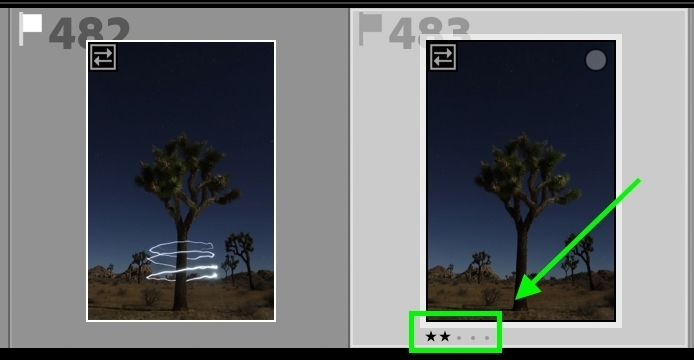
I like to add a single star rating (1) to every image that has a finished edit. That way, if I spend multiple days working through a set of photos, I know exactly which ones are left for me to do.

Once you’re finished with the editing process, obviously, the next step is to export your photos. After exporting, add a 2-star rating (2) to all the images you’ve successfully exported and delivered.

I love doing this because I can easily see if I missed a photo or haven’t exported every image from a set.
In some cases, especially if you’re working as a photo editor, re-edits may be requested. In this situation, I’ll add a 3-star rating (3) to help me separate the re-edits from the completes.
You can mix and match star ratings or color ratings to fit your editing needs with something that makes sense to you. This is simply how I like to go about things and is a great starting point if you’re not sure how to quickly cull photos in Lightroom.
Step 6: Delete Rejected Photos
Now that you’ve culled your photos, edited the keepers, and exported your edits, there’s one thing left to do. Saving rejected photos is something best left for last, just in case you have a change of heart or realize you accidentally rejected an important photo.
After spending the time culling and editing images, if you’re not thinking about any of the rejects, then it’s probably safe to delete them.
First, you need to filter your library to view rejected photos only. While in the Library Module grid view, set the Attribute to Reject Flags by clicking on the darker flag with the X. Now you’ll only see the rejected photos from before.

With rejects, you have two options for deleting. The first is to delete them from Lightroom, while the second is to delete them from Lightroom and your hard drive. The one you choose depends on whether you want to keep the photos in some way or want to say goodbye for good.
Although I talk about deleting photos from Lightroom more extensively in this post, here’s the rundown.
First, go up to Photo > Delete Rejected Photos.
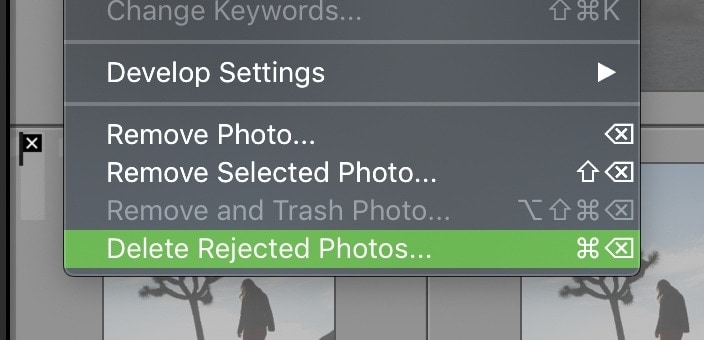
A dialogue box will appear, prompting you to choose whether to delete from Lightroom or delete from your disk. Click whichever option suits your needs, and say goodbye to those unwanted photos.
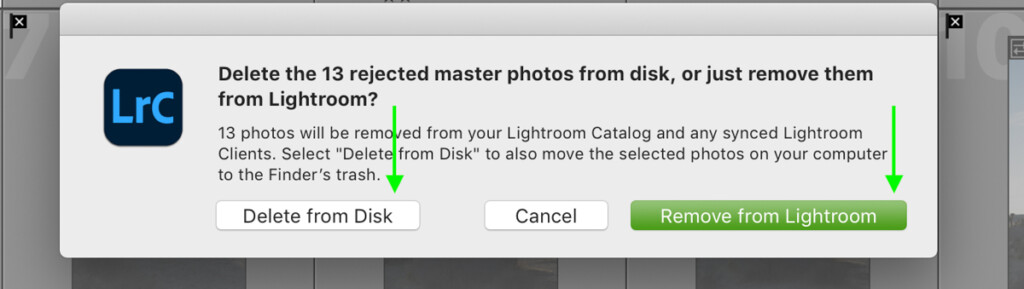
Deleting unwanted photos not only helps Lightroom run faster but leaves more space on your hard drive for the photos that you actually do like.
Using this simple 6 step workflow, you can begin to quickly cull photos in Lightroom and save yourself a bunch of time. Even with an understanding of what culling methods are available, it’s important to implement an efficient means of sorting through the photos.
As you continue to cull and get more experience, you may refine this workflow to fit better with your specific needs. After all, we are all different and have different preferences when it comes to organization. With that said, this is a great starting ground if you aren’t sure where to begin, and is the culling workflow I’ve grown to use over the years in my own work.
Happy Culling!
Brendan 🙂


