


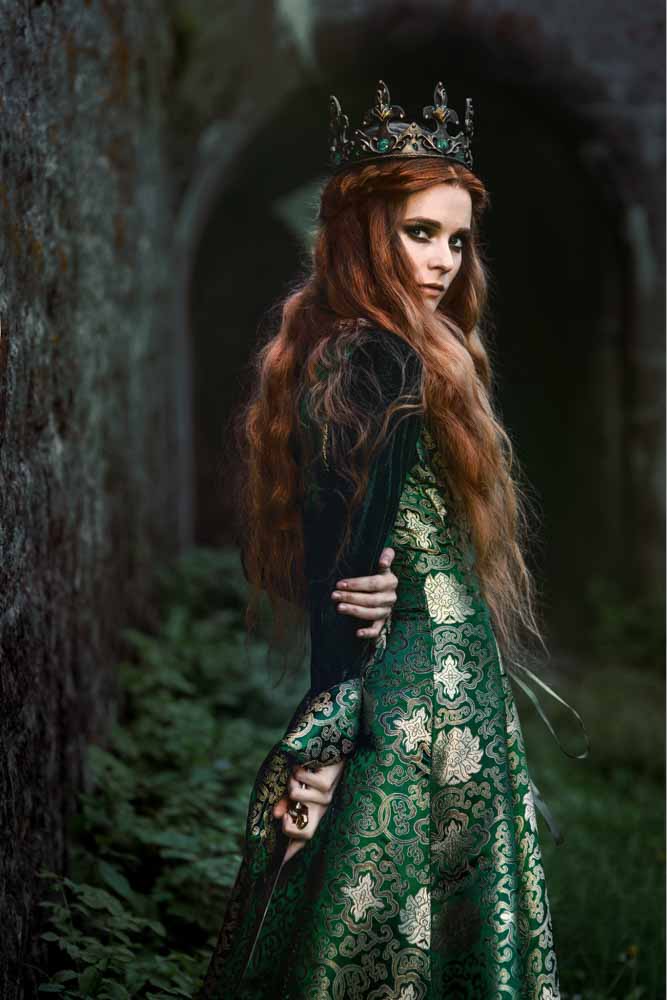
Gradient maps change the colors of images in various creative ways. In this article, you will learn how this adjustment layer works and how to use gradient maps in Photoshop correctly. The key to creating a good gradient map is blending the colors into the image using opacity and blend modes. Luckily, it’s all very simple to do!
Video Tutorial
How To Use Gradient Maps In Photoshop For Color Grading
Step 1: Add A Gradient Map Adjustment Layer And Change The Gradient Map Colors
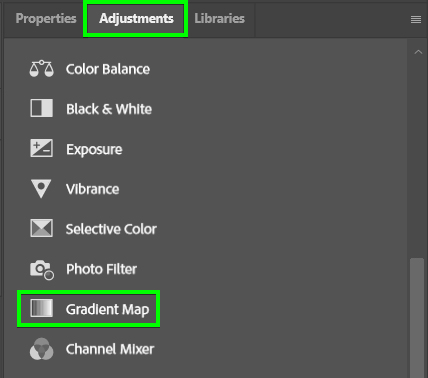
When adding a gradient map, the first step is to add the adjustment layer to your image. To do this, click the Gradient Map icon in the Adjustments Panel.
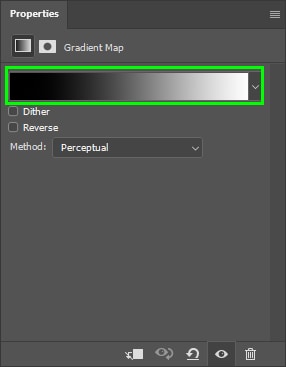
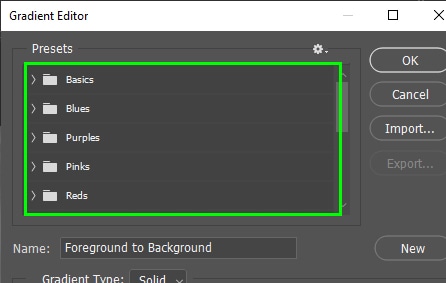
When you add the adjustment layer, the Properties Panel pops up, containing a gradient map bar. Click the gradient map bar twice to select new colors. The Gradient Editor panel contains several gradient map presets.
You can also create your own gradients using the gradient map bar. The boxes at the bottom of the gradient bar represent the gradient colors. You can change any color by clicking its corresponding box (color stop). To add more colors to your gradient, click the part of the gradient to which you want to add colors. This will create a new stop.
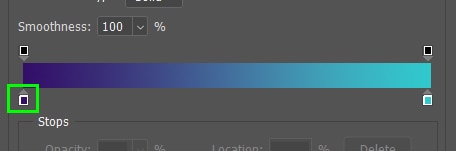
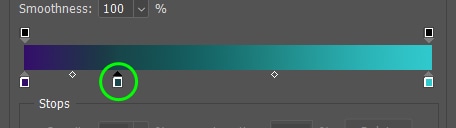
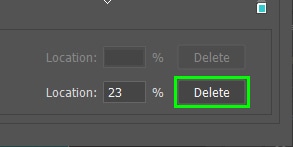
To delete a stop, select it and then click Delete at the bottom of the Gradient Editor panel. When you are done choosing your gradient colors, click OK.
Step 2: Change The Blend Mode Of The Adjustment Layer
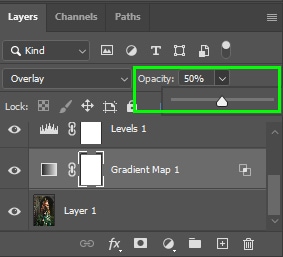
Now, choose a blend mode for your gradient map. To do this, select one of the options available in the Blend Mode drop-down menu. In my case, I chose Overlay.
Blending modes blend pixels of two layers, controlling where there is more or less light. For instance, choose the Color blend mode to preserve your image’s original luminance values. For an image with more contrast, use Overlay. This blend mode lightens bright areas and darkens dark areas.

Step 3: Adjust The Opacity Of The Adjustment Layer
Finally, adjust the opacity of the gradient map layer to lessen the effect of the colors and create a more realistic result. The lower the opacity, the more the original layer colors appear, and the gradient will be more blended with the image. I set mine to 50%.
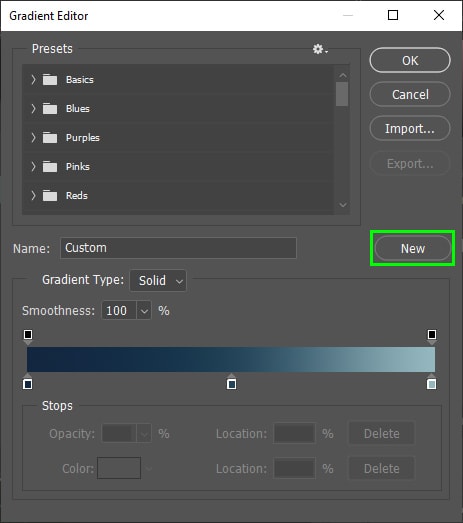
Step 4: Click On New In The Gradient Editor To Save It As A Preset (Optional)
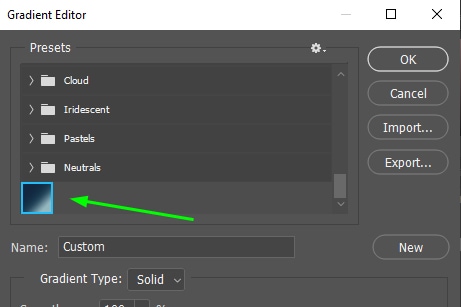
After creating your gradient map, it’s a good idea to save it for later use. To do this, keep the Gradient Editor panel open after creating your gradient. Then click on New. Your new gradient preset will be saved successfully and appear at the bottom of the gradient map presets. The new preset will be there when you open the Gradient Editor panel.
Ultimately, gradient maps are a great way to color-grade images in Photoshop with extreme control over the color. Then, with the help of blending modes and opacity settings, you can refine your gradient maps to blend more realistically into your photos!
Happy Editing!
