

When you have a big stack of images to get into Photoshop, it can take you way longer than you’d like to finally get started on your project. Fortunately, there are a couple of ways to add multiple images to Photoshop that will save you time, as you’ll learn here.
An easy way to add multiple images to a Photoshop project is by going to File > Scripts > Load Files Into Stack. In the window that appears, choose Browse and locate the files you’d like to open. With your files loaded into the Load Layers window, click open to add the images to your active project.
Now let’s dive into some of the details behind this process, along with some useful settings found in your preferences to get your files imported faster.
How To Open Multiple Images As Layers In Photoshop
Did you know that you can open up to 8000 layers in a single Photoshop file? I would only recommend doing this if your computer has enough RAM to handle it. Knowing this tells you how many images you can add to your project.
I’m only going to show you how to add three images to your project, but remember, it could be as many as you need (up to 8000).
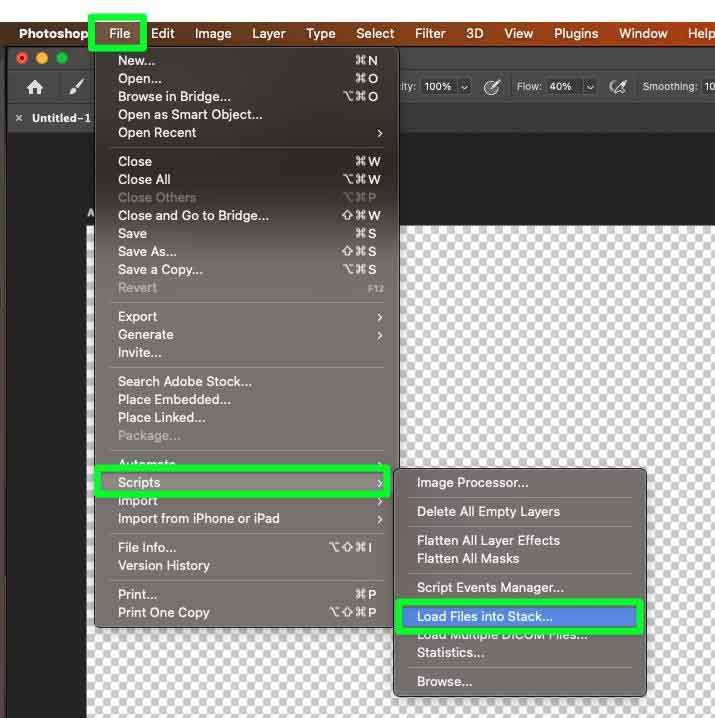
Step 1: Go To File > Scripts > Load Files Into Stack
If you’re having trouble finding the option to load multiple images into your project, you’re not the only one. This option is tucked away in a tab that many users will never end up clicking on.
To find this option, go to File > Scripts > Load Files Into Stack.
Step 2: Choose Your Images
Now pick the images that you wish to load into your project.
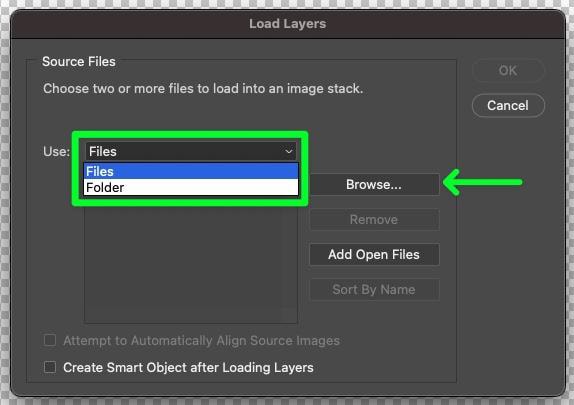
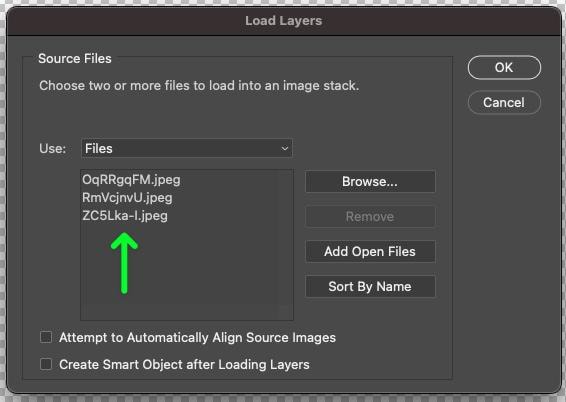
In the Load Layers Panel, you should first deal with the Use option. Click on the drop-down menu, and you will have two choices:
- Files – Choose this option if you plan to select multiple images from the same folder.
- Folder – Choose this option if you plan on importing an entire folder of images.
When you’re ready, click on Browse.
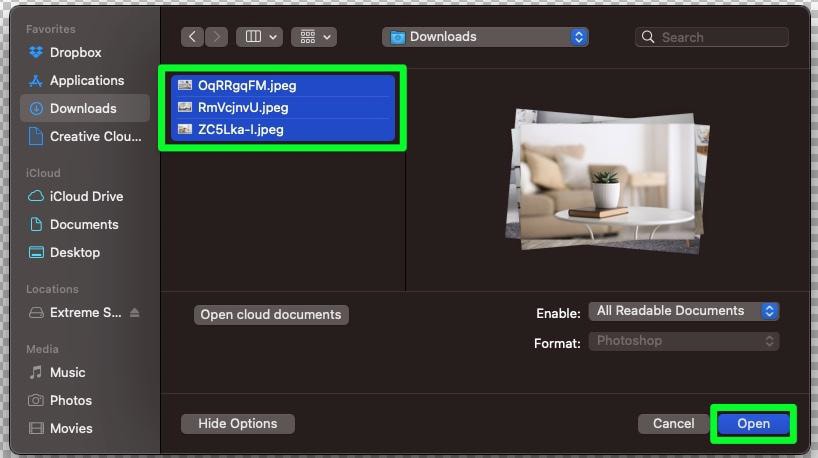
Once you hit Browse, you will be prompted to choose the images you wish to add to your project. Navigate through your hard drive and find the pictures you want to import. When you’re ready, click Open.
You will now see the images you chose appear in the Load Layers panel.
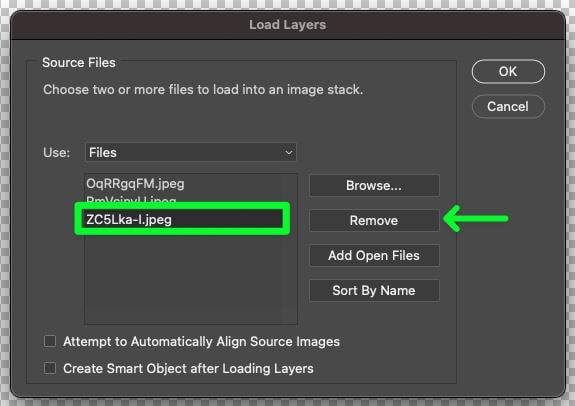
If you feel like you’ve made a mistake with one of your choices, or if you change your mind about one of your images, it’s not too late to delete the image from the list.
To delete one of your images from the list, select it, then click Remove.
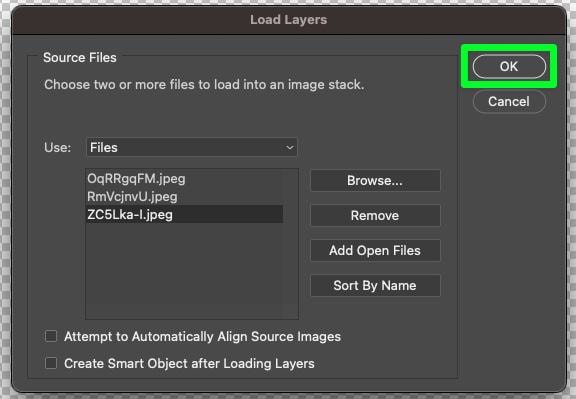
When it comes to the two options at the bottom of the window, make sure to leave those options unchecked.
When you feel like you’re good to go, click on OK.
Step 3: Resize And Organize Your Images
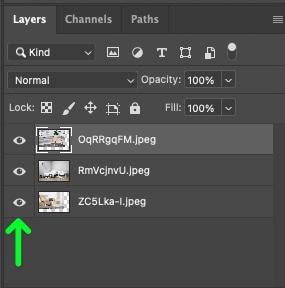
Once you complete the last step, all the images you chose will end up in the Layers Panel. Each photo will be represented with its own layer.
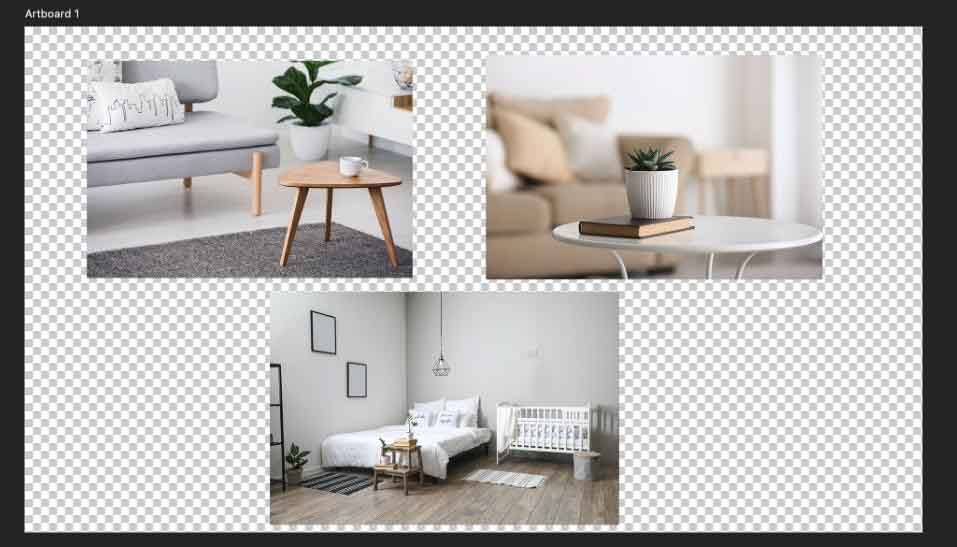
All your images will be stacked on top of each other on the canvas. You must select each image and resize it manually to fit your project.
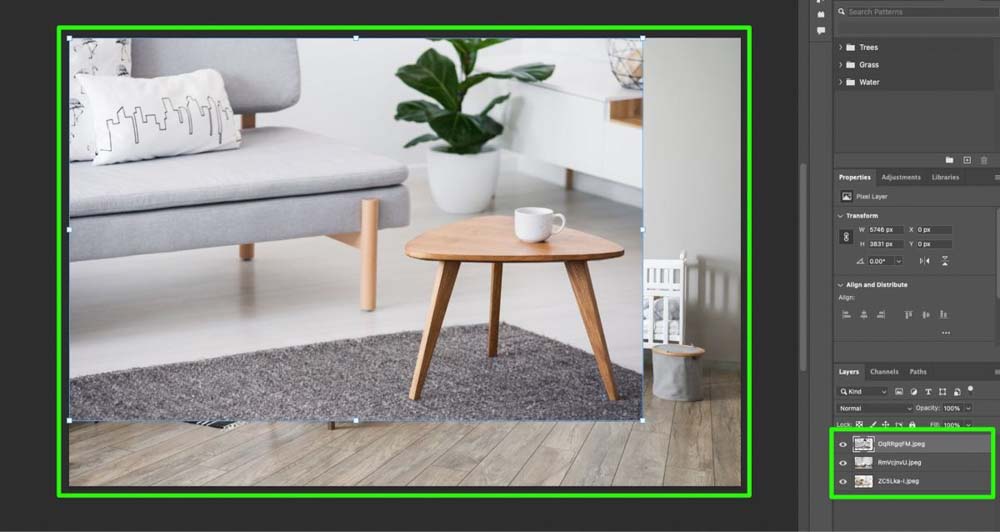
To help you organize your images on the canvas, you can turn off the layers that are in your way by clicking on the Visibility Icon next to each layer in the Layers Panel.
How To Save Time When Loading Multiple Images Into Photoshop
Now that you know how to open multiple images into your project simultaneously, what if you need to add additional images to your design?
You can add new images by “placing” them into your project.
The only problem with placing images into your project is the extra time it takes to transform and confirm each image you place. Whether you are embedding one image at a time or dragging and dropping multiple images into your project, this step will save you time.
To help speed up your workflow, let me explain how you can change your preferences so you can just place your image and continue designing right away.
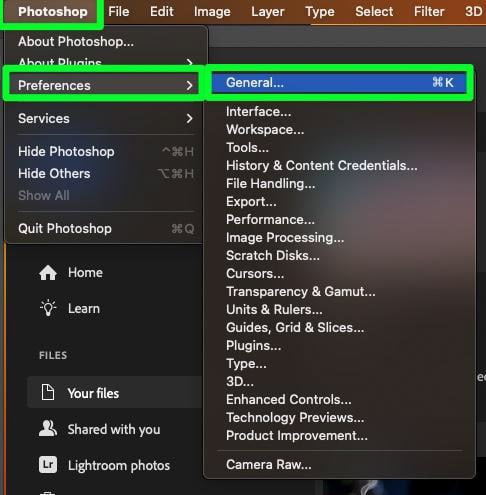
To start, go to Edit > Preferences > General (Win) or Photoshop > Preferences > General (Mac).
In the Preferences Window, you will find a list of tabs and many options you can check on and off.
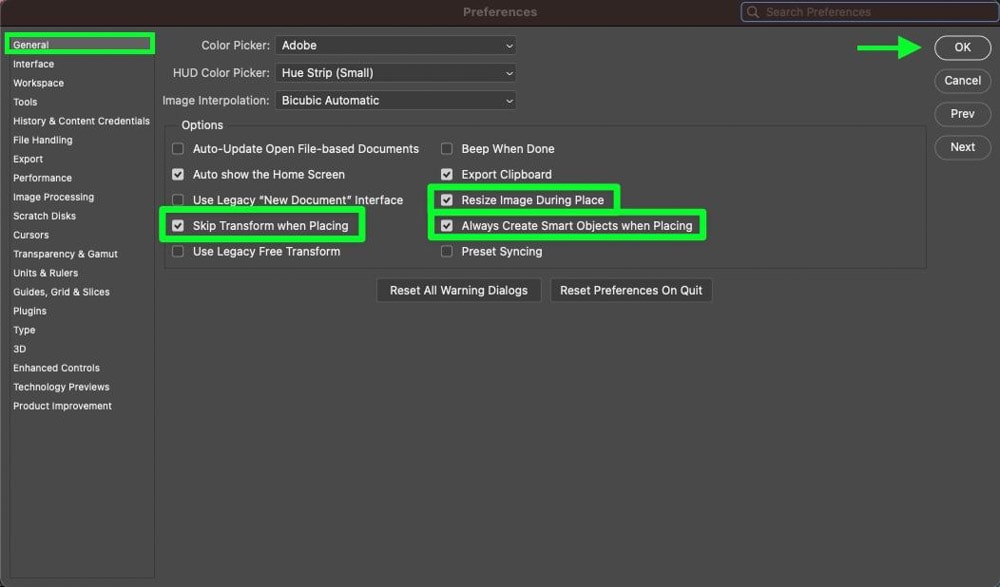
Make sure to stay in the General tab. All of the options required for this setting will be here.
There are three settings that you need to make sure are checked on:
- Skip Transform When Placing – This is the main setting you need to ensure is enabled. Having this setting checked on will make it so that each time you place an image, you no longer have to deal with transforming the image and confirming your transformation.
- Resize Image During Place – Checking this option will ensure that your image will resize itself to fit inside your current canvas.
- Always Create Smart Objects When Placing – This option depends on your personal workflow. A Smart Object will retain its resolution as you resize it. If you often convert your images into Smart Objects, you can check this option to save yourself a reasonable amount of time in the long run.
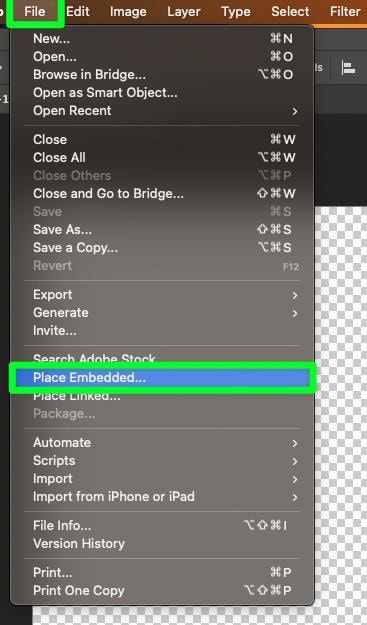
Once these options are checked, you can place an image into your project by going to File > Place Embedded.
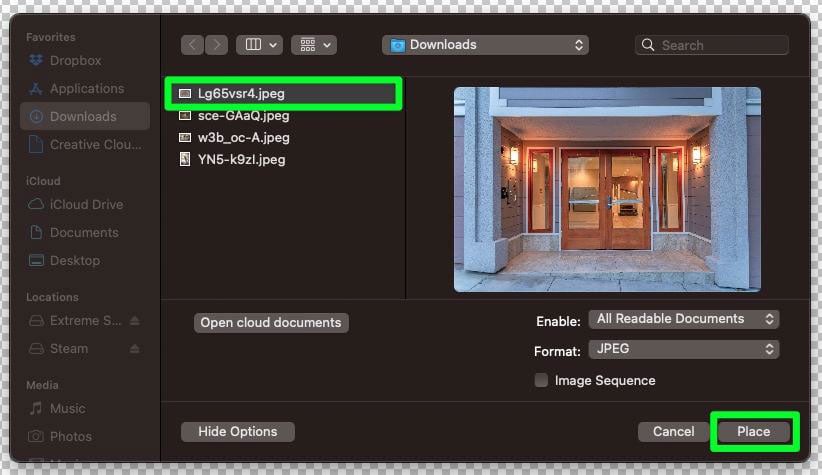
You will then be instructed to navigate your hard drive and find the image you want to add to your project.
Select your image, and then click Place.
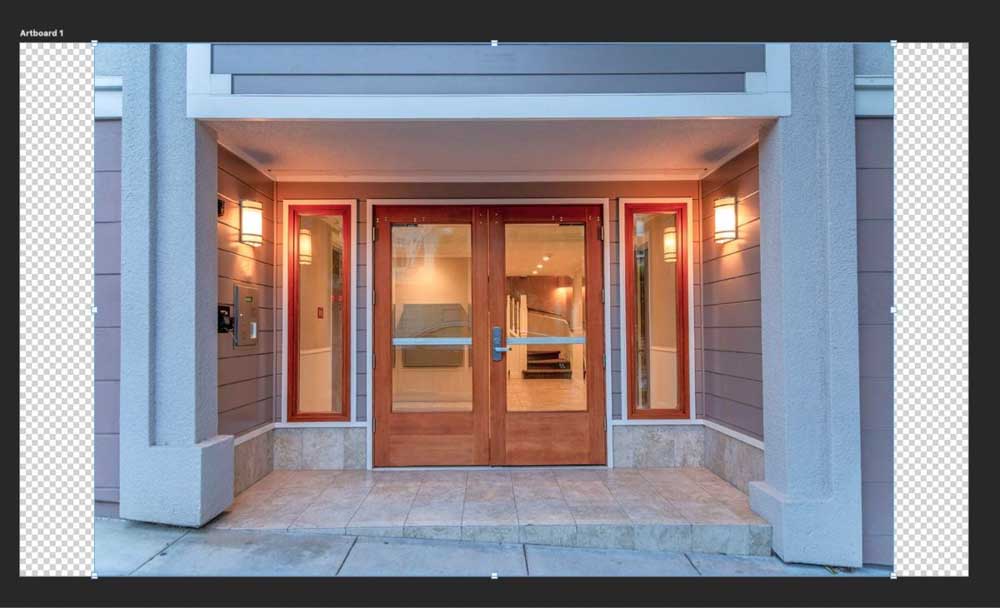
Once you click Place, your image will appear in your project without the need to transform it or confirm the transformation.
Also, the image will not adjust the size of your canvas. Instead, your image will fit inside the space of your canvas.
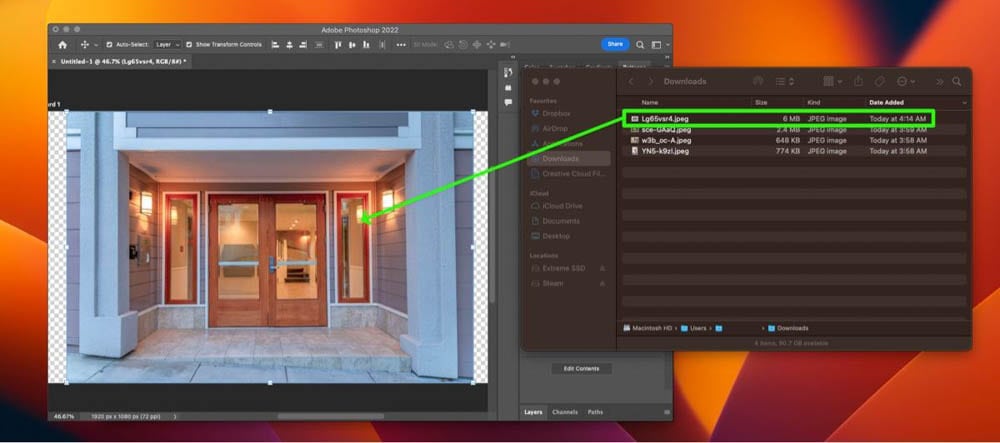
If it takes too much time to go to File > Place Embedded, you can always open up a separate window and drag and drop your images straight into Photoshop.
Now that you set up your preferences, you won’t need to transform or resize an image every time you drag it into the program.
These settings also significantly speed up your workflow when dragging and dropping multiple images since Photoshop doesn’t need to open the transform function and resize elements when loading them into the program.
Now, this drag-and-drop method can also be useful for adding multiple images to existing projects. Just by highlighting your desired files on your computer, then dragging them into your Photoshop project, they will be imported and ready for action!
