
One of the most constant actions Photoshop users will do on a daily basis is to take one or more layers and resize them manually or to an exact dimension. Thankfully, it’s never been easier to learn how to resize a layer in Photoshop.
Today, you will learn how to resize your layer while maintaining the aspect ratio and the image quality. You will also learn how to resize your layer to the exact dimensions that you need in both pixels and inches.
Video Tutorial
How To Resize A Layer In Photoshop
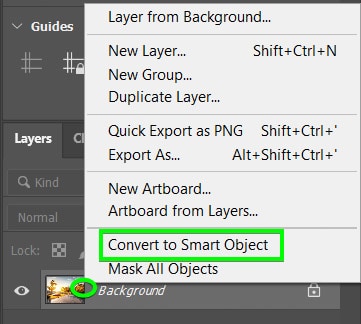
Step 1: Right-Click On The Layer And Select Convert To Smart Object (Optional)
To prevent quality loss when resizing the layer, convert the layer to a Smart Object. In the Layers Panel, right-click on the layer that needs to be resized and click on Convert To Smart Object.
This step allows you to shrink a layer as much as you’d like and keep the original quality if you enlarge the layer later on.
Step 2: Select The Move Tool (V) And Select The Layer
To start the resizing process, select the Move Tool (V) and click on the layer you wish to resize.
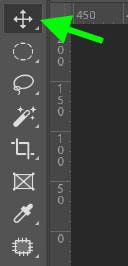
To automatically see the transform handles and resize the object quickly, enable Show Transform Controls in the Options Bar.

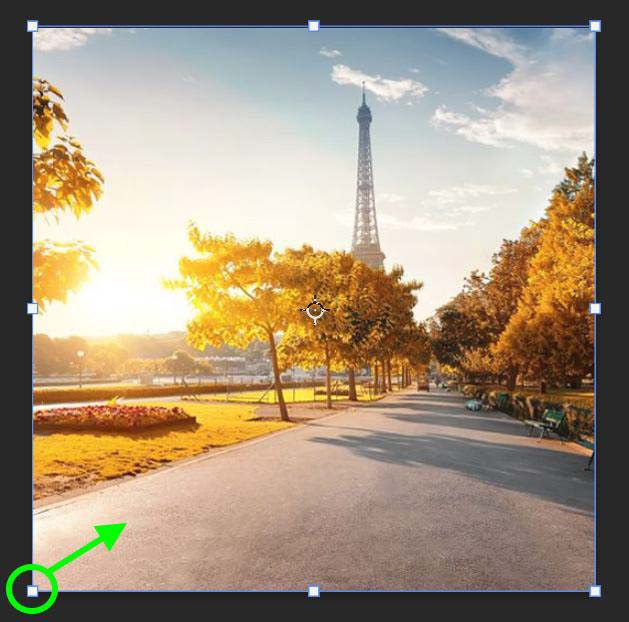
Step 3: Press Control/Command + T To Activate The Transform Tool
If you don’t like constantly having the transform controls visible on a layer whenever you select it, you can access the Free Transform Tool by pressing Control + T (Win) or Command + T (Mac).
To resize the image without distorting it, click and hold on any of the handles and drag toward the direction you want to resize your image. If the Aspect ratio isn’t locked, make sure that the Link Icon in between the Width and Height boxes is checked in the Options Bar.

Step 4: Click And Drag A Corner Handle To Resize The Layer
If you drag your image from one of the corners, the layer will retain its aspect ratio toward the opposite corner.

If you drag from one of the middle handles, the aspect ratio will lock toward the opposite middle handle and shrink your image from the top and bottom.
Step 5: Resize A Layer To Specific Dimensions (Optional)
Once you have activated the Free Transform Tool, you will see the option to change the Width and the Height of your layer in the Options Bar. Let’s say you want your layer to be 250 x 250 pixels. Simply double-click inside the Width and Height and type 250 px. Your layer will snap to that size.
Note: The resize value might change to a few decimal points outside of your input value based on what Photoshop deems to work best for the picture.

If your desired size is the same amount of pixels for both the Width and Height, you can make things even easier by clicking the Link icon in between the Width and Height boxes (which is usually activated by default). Then, you just need to type in one value in one box, and the other box will change to that exact value.
Note: To resize your layer to exact inches, instead of typing “px” for pixels, type “in” for inches.
How To Resize Multiple Layers At The Same Time
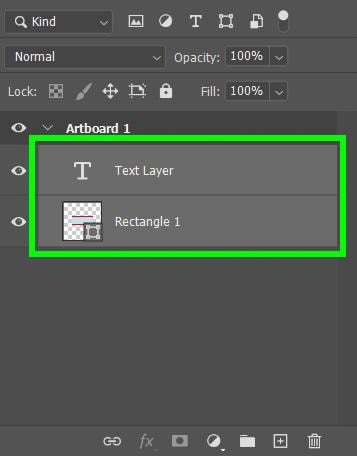
If you wish to resize two or more layers simultaneously, you can do this by linking the two layers together before you resize them. In the Layers Panel, select the top layer, hold down the Shift Key, and select the bottom layer so that both layers are now selected.
Then click the Link icon at the bottom of the Layers Panel. This will link the two layers so that if one layer is altered, the other layer will be altered as well.

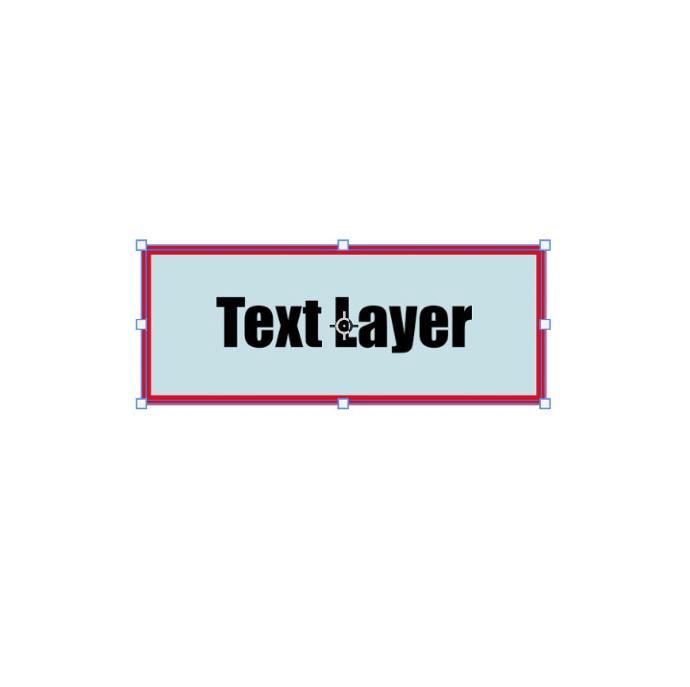
Now that the two layers are linked, shrink down the shape layer, and the text layer will shrink down proportionally with the shape layer.

Now that you know how to resize layers in Photoshop, the process is a little bit different when working with images. For example, scaling up a photo to prepare it for print or to fit on a larger document. I explain those techniques in this next tutorial on how to resize images in Photoshop without losing quality!


When scaling the size of the object or image by using the transform box, why call it scaling the layer size? Although the size of the object or image changes, is the layer size keeping the original size? Thank you for your tutorials!
I say scaling the layer because all images or objects you place in Photoshop are individual layers within the Layers Panel. By clicking on your desired layer, you are choosing which element of your project you are trying to scale. So although you are visually scaling an object or image, these are all actually layers in the layers panel. This is why I use that wording. Hopefully that makes sense.