


Of the many adjustments you’ll make to your photos, the white balance is one of the most important. White balance sets the standard for what colors look like in your image. Luckily, adjusting the white balance in Lightroom is easy and can significantly affect the completed picture.
Surely, you’ve noticed when taking photos that the amount of light, as well as other factors like time of day and whether you’re shooting in natural or artificial light, can all influence the tone of the colors. This may lead to color imbalances or odd-looking images. Here is how you can fix these issues.
The white balance adjustments are in the Develop Module in Lightroom. You can access the White Balance Selector by clicking the selector icon and clicking a part of your image meant to be true white. Alternatively, with the white balance adjustments open in the Basic or Color tab, you can click the Presets drop-down to see the available preset white balance settings. Otherwise, you can use the Temp Slider and Tone Slider to adjust the white balance.
The white balance adjustments are in the Develop Module in Lightroom. You can access the White Balance Selector by clicking the selector icon and clicking a part of your image meant to be true white. Alternatively, with the white balance adjustments open in the Basic or Color tab, you can click the Presets drop-down to see the available preset white balance settings. Otherwise, you can use the Temp Slider and Tone Slider to adjust the white balance.
Video Tutorial
How To Adjust White Balance In Lightroom
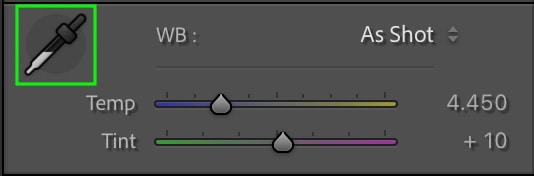
Option 1: Using The White Balance Selector In Lightroom
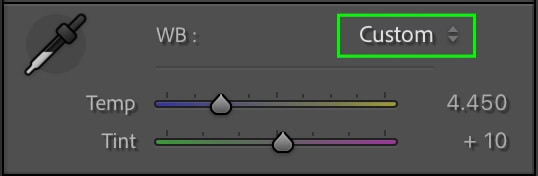
A useful way to adjust the white balance is to use the selector tool to sample an area of your image and set the white balance based on the sample. You can access the White Balance Selector by clicking the selector icon.
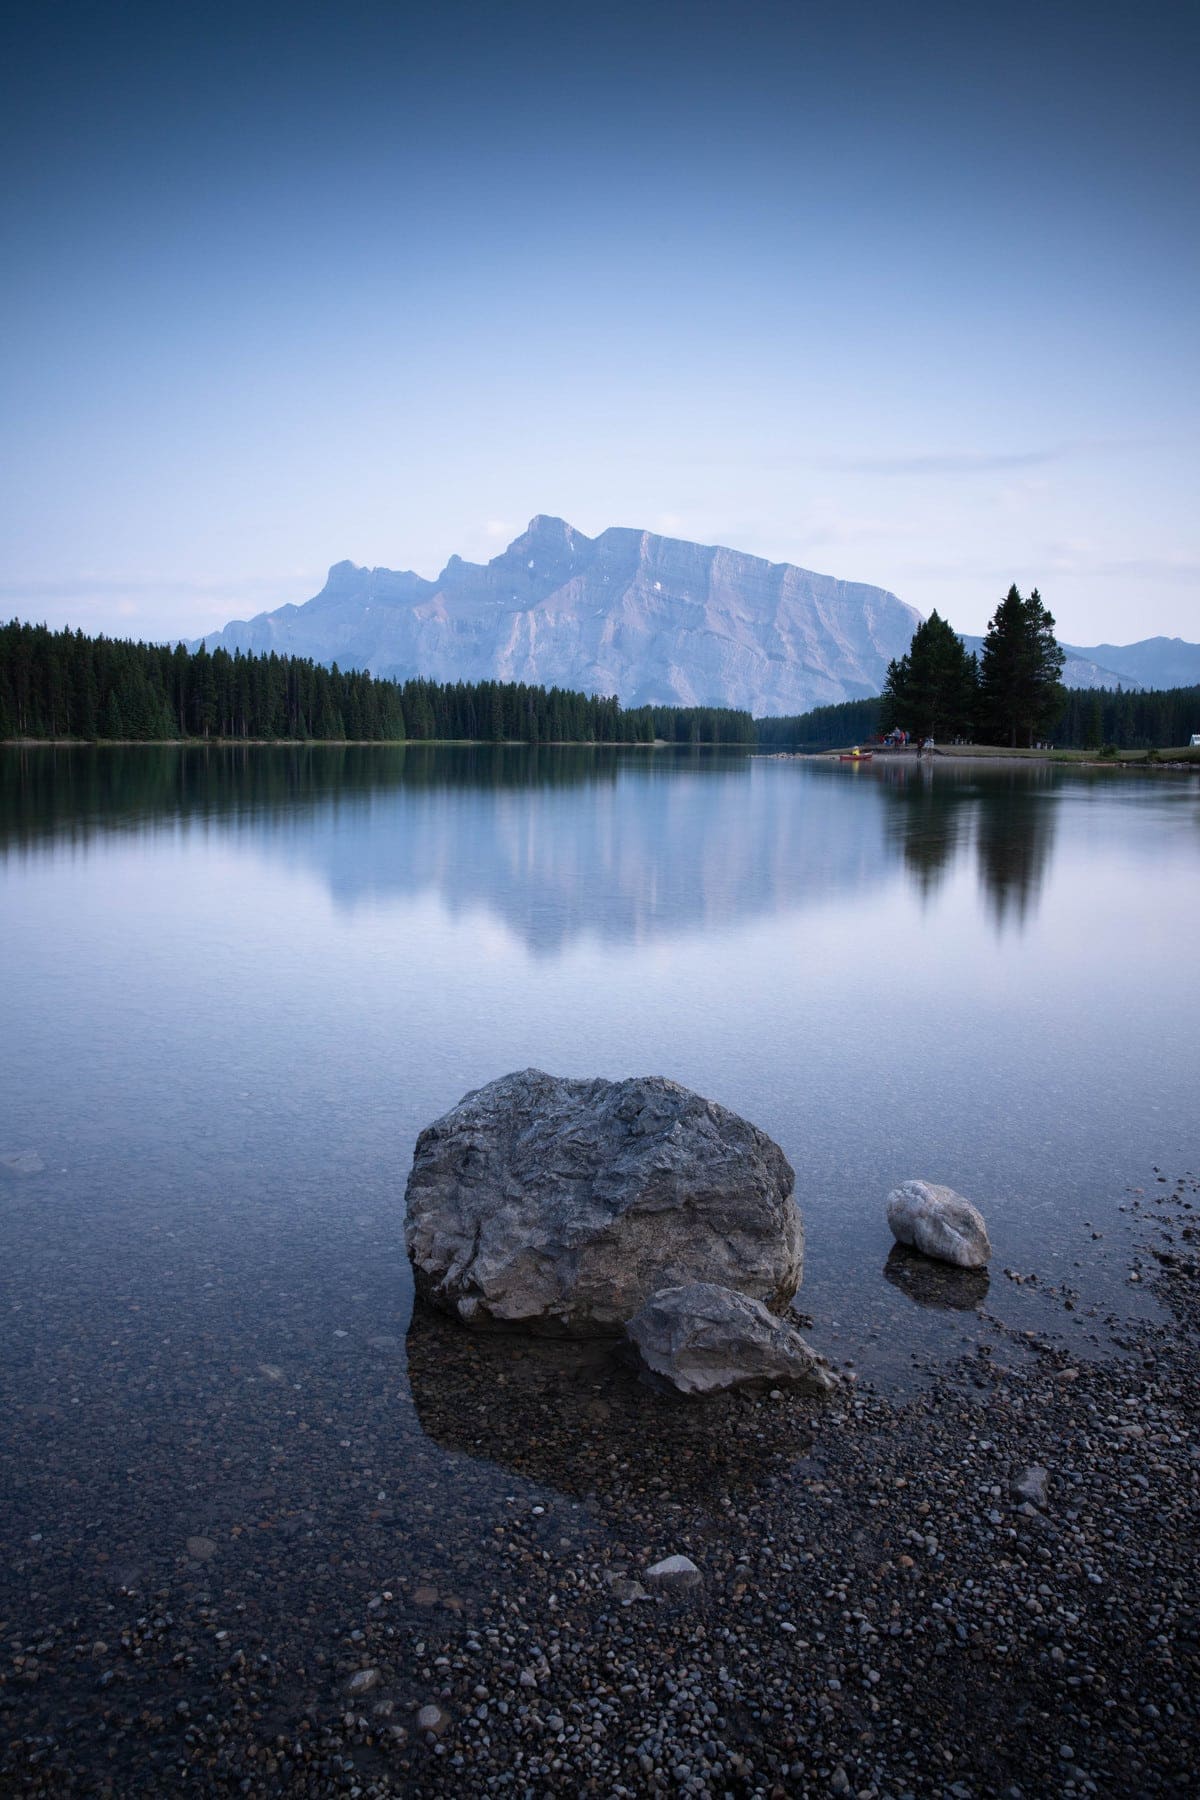
From there, click a part of your image meant to be true white. Once you click the photo, the white balance will automatically adjust the colors based on the white sample. For my example, I’ll click the brightest area of the clouds in the image below, which is a bit too cool-toned.


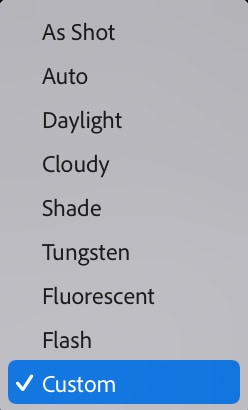
Option 2: Using Preset White Balance Settings
Lightroom has a few white balance presets that apply certain white balance adjustments to your image with just a click in the Develop Module. With the white balance adjustments open in the Basic or Color tab, you can click the Presets drop-down to see the available preset white balance settings.
The presets represent the effects different lighting conditions can have on the image. For instance, the below photo was shot on a cloudy day. Therefore, the white balance will automatically adjust when I click the Cloudy preset.


You can try out different presets based on your image. Each image may look best with a different preset.
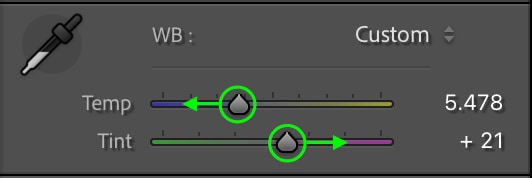
Option 3: Refining The Temp & Tint Sliders Manually
The Temp slider controls the amount of yellow and blue in the image – in other words, the warm and cool tones. The Tone slider controls the amount of green and purple, which can be used to correct or supplement the adjustments made with the first slider.
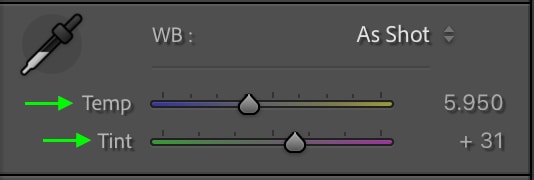

For instance, after applying the Cloudy white balance preset in the first example above, I noticed the image is now a bit too warm and has a slight green tint that I’d like to reduce. So, I can adjust the Temp slider more towards a cooler tone and the Tint slider away from the green tone. This makes the colors in the image look much more true to life.

How To Apply The Same White Balance Setting To Multiple Photos In Lightroom
To save time, you can edit the white balance of one of these photos and sync the adjustment to apply to the whole set.
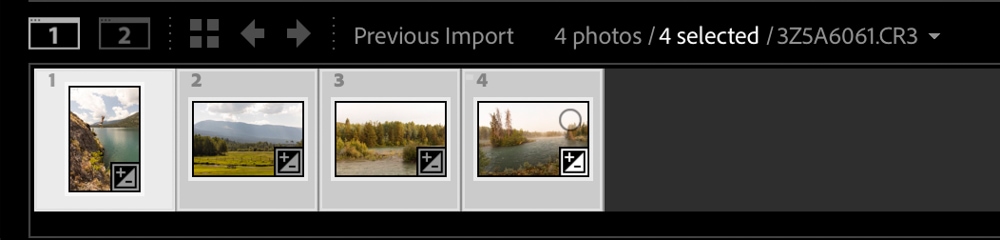
After adjusting the white balance in one image, go to the filmstrip of the Develop Panel, hold Control (Win) or Command (Mac), and click all the images you’d like to match the photo’s white balance. Once all the images are selected, head to Settings > Sync Settings.
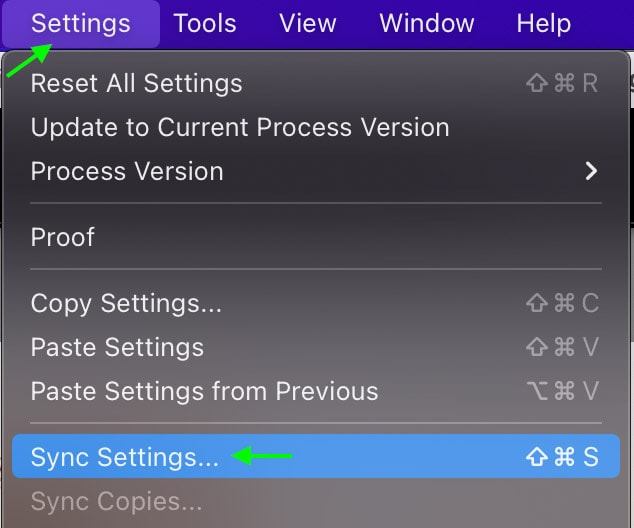
The Synchronize Settings window will display all the adjustments selected. Make sure that only the White Balance box is checked under Basic; otherwise, all of your checked settings will apply. Once you’ve checked the White Balance, click Synchronize.
The selected photos will change to match the white balance you copied in the first photo.
When To Adjust The White Balance Of Your Photo
The White Balance will affect the appearance of most of the other adjustments you make, so it is important you set this early on in the editing process. This is especially important if you plan on heavily color-grading your photo.
You can also use the white balance to edit your images creatively. Some pictures may benefit from a warmer white balance, such as a photo of a sunset on the beach, while a cooler tone can give images a certain moodiness.
Happy Editing!
