
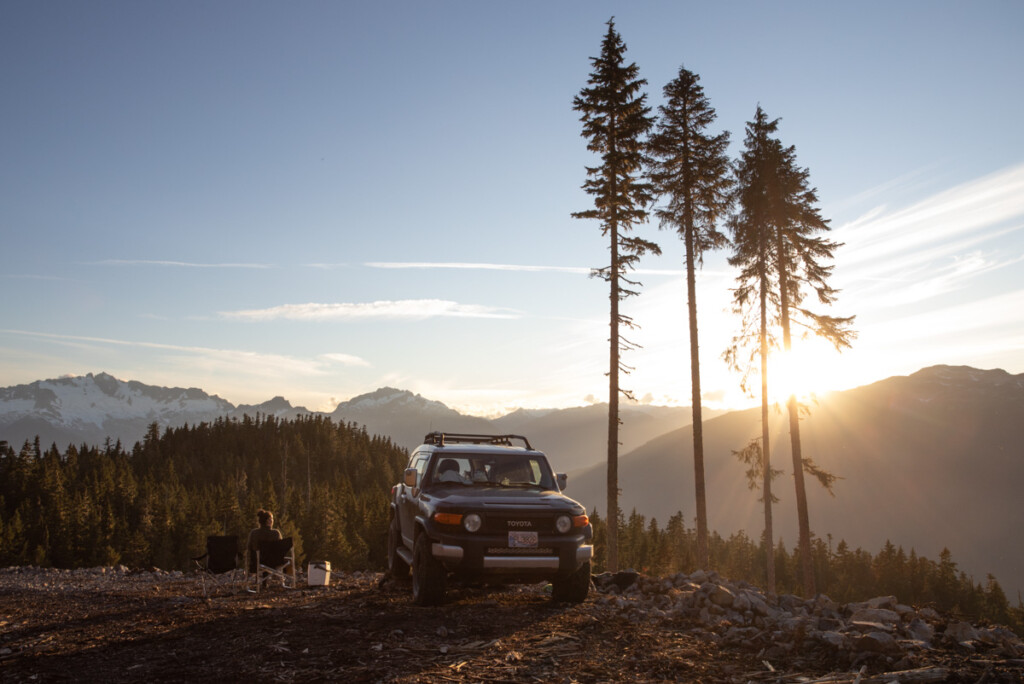
Dark images happen sometimes, but luckily it isn’t too difficult to make your photos brighter in Lightroom. With the various tools available, you can quickly brighten the dark areas of a photo while keeping all the important details in other exposure ranges. Aside from just using the Exposure slider, I’ll explain how brightening each exposure range will offer far better results.
Let’s get into the step-by-step of brightening a photo in Lightroom!
To brighten your photos in Lightroom, start by increasing the Darks and Shadows sliders to soften the shadows. Then, decrease the Whites and Highlights to bring back details in brighter areas.
Adjust the Exposure slider until you’ve found the desired brightness to balance out the brightness further. Lastly, use the Tone Curve to add contrast and make your photo come to life.


How To Brighten An Image In Lightroom
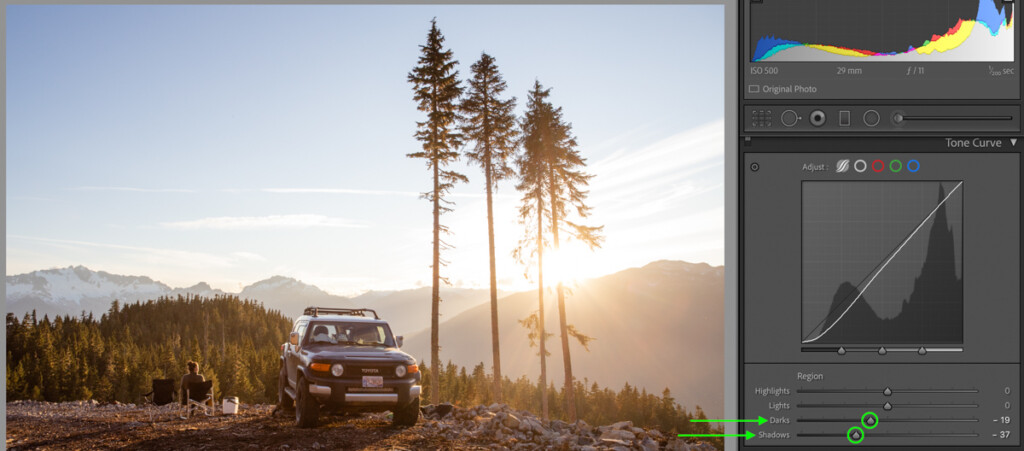
Step 1: Slide The Blacks & Shadows Sliders To The Right
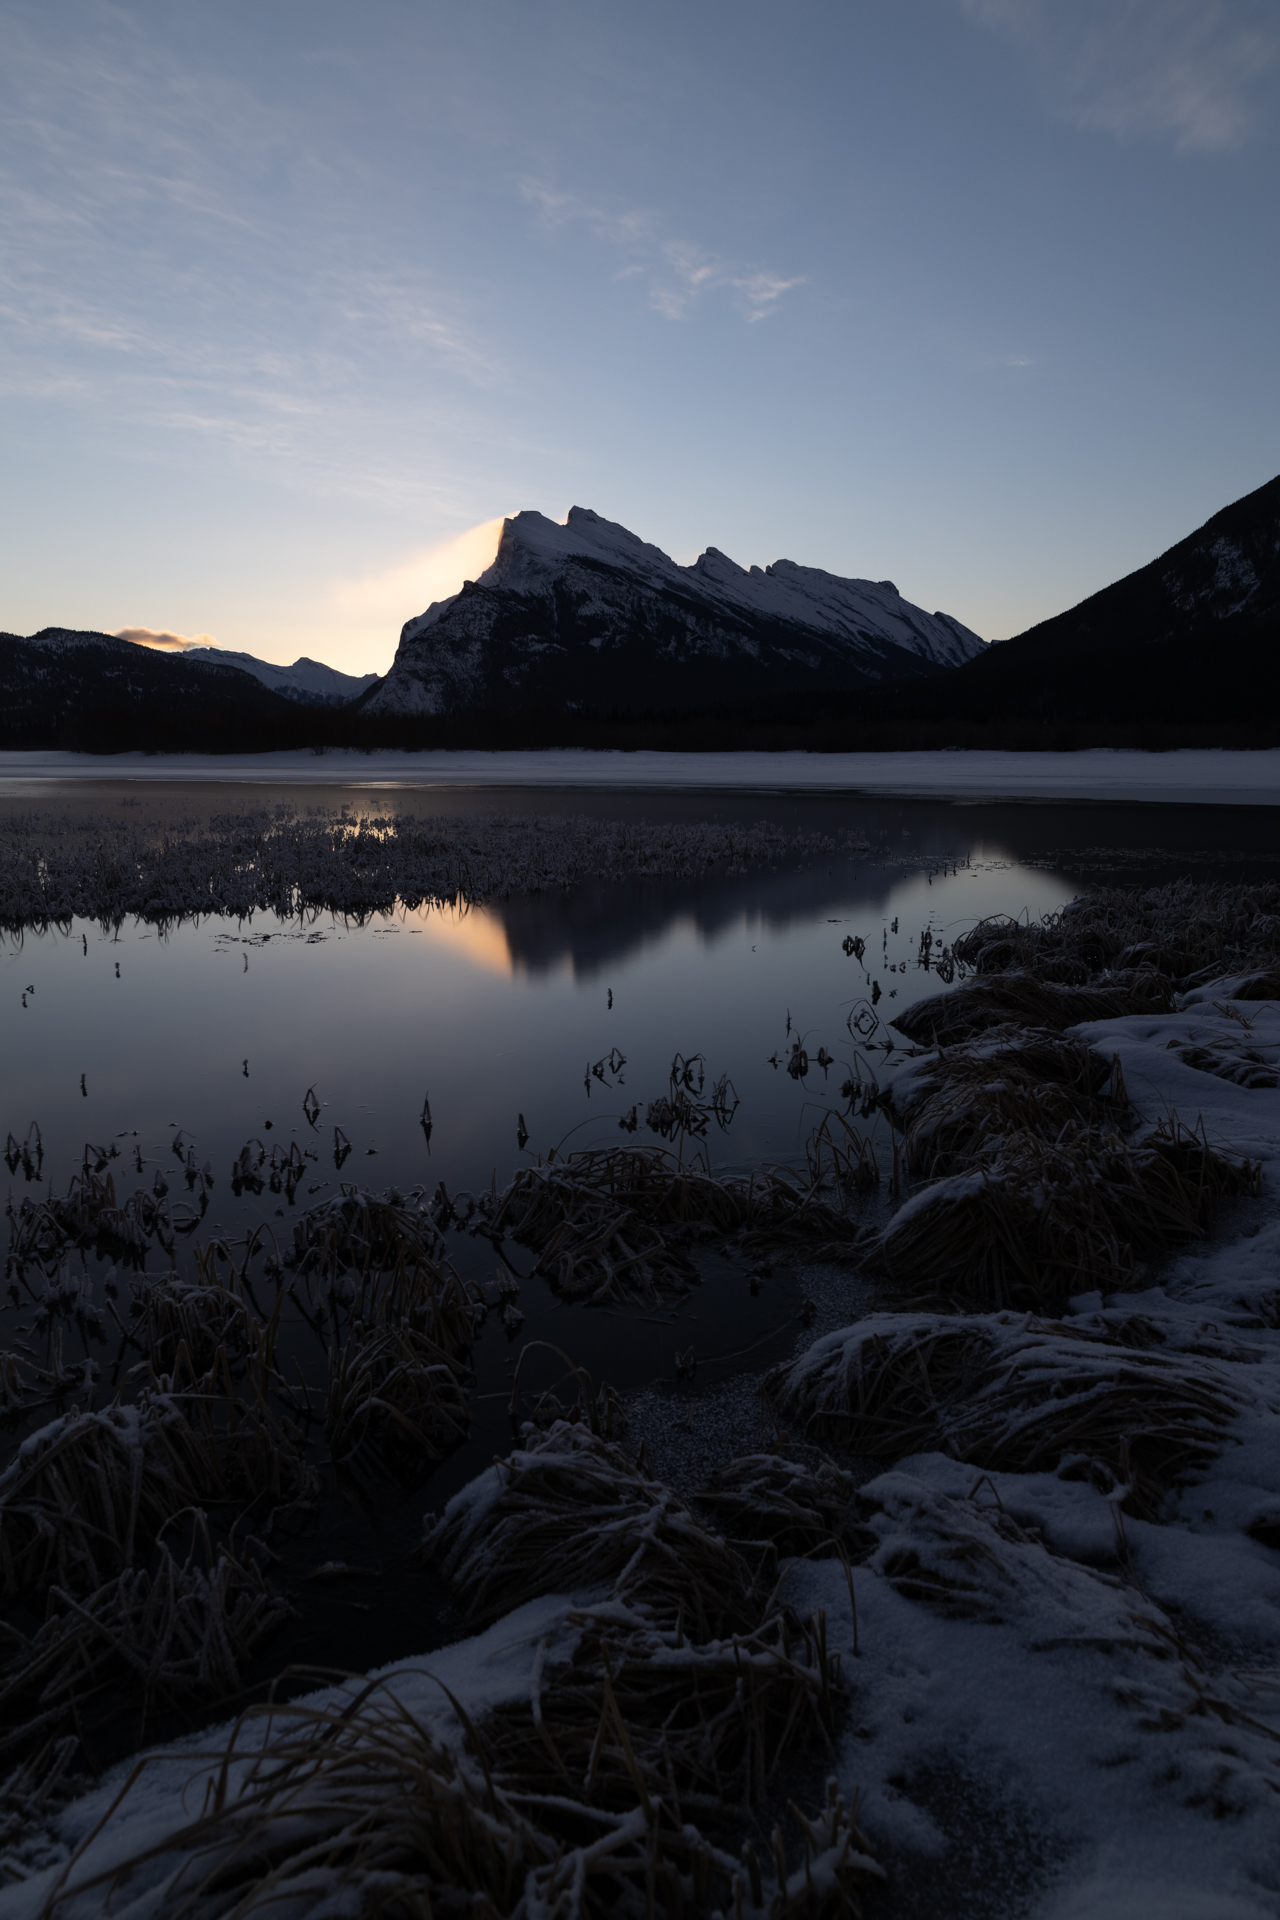
Within the Develop Module, you’ll first start in the Basic Panel. The first two sliders to adjust will be the Blacks and Shadows sliders. These control how bright the dark areas of your photo appear.
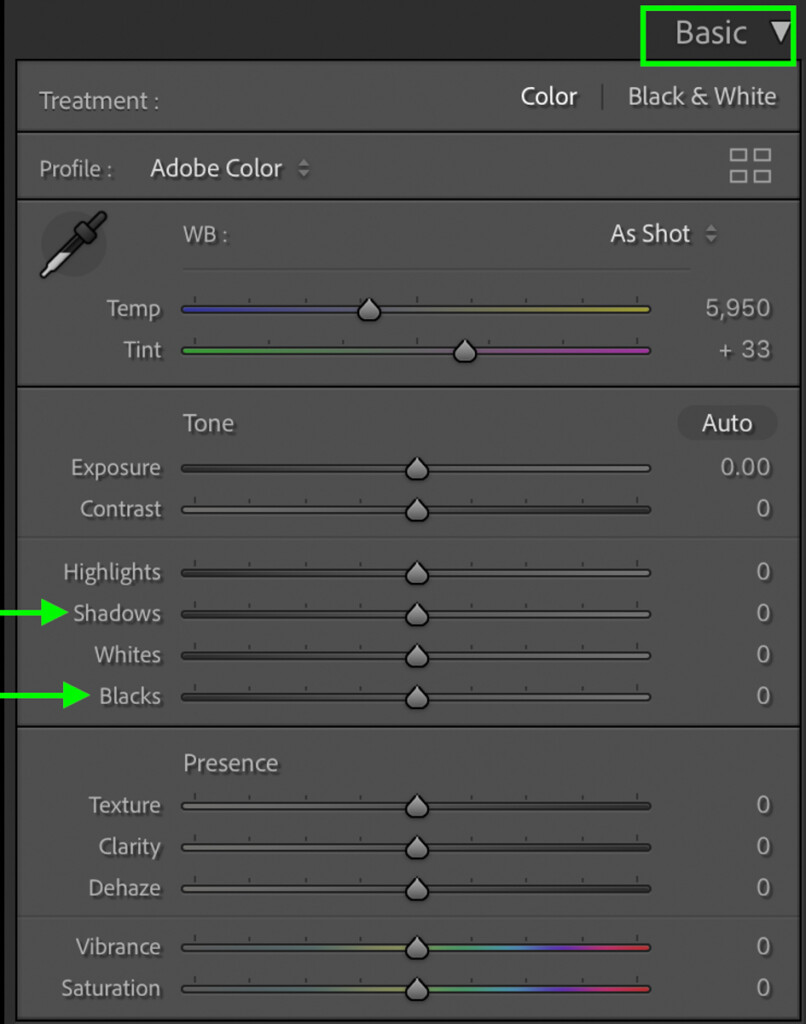
Since you want to brighten your image, drag these sliders right to brighten the shadows. There isn’t a perfect setting to use, as it varies for every image. The goal is to bring back some details that weren’t easily visible in the original photo.
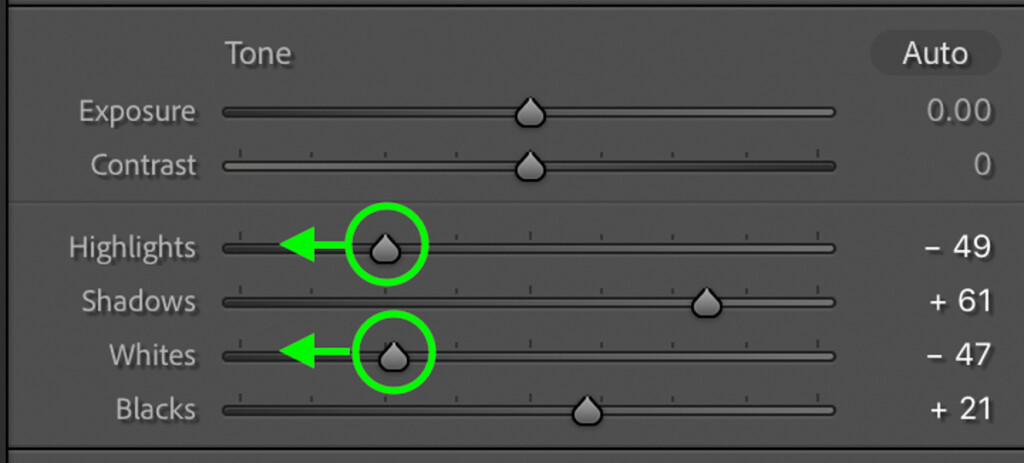
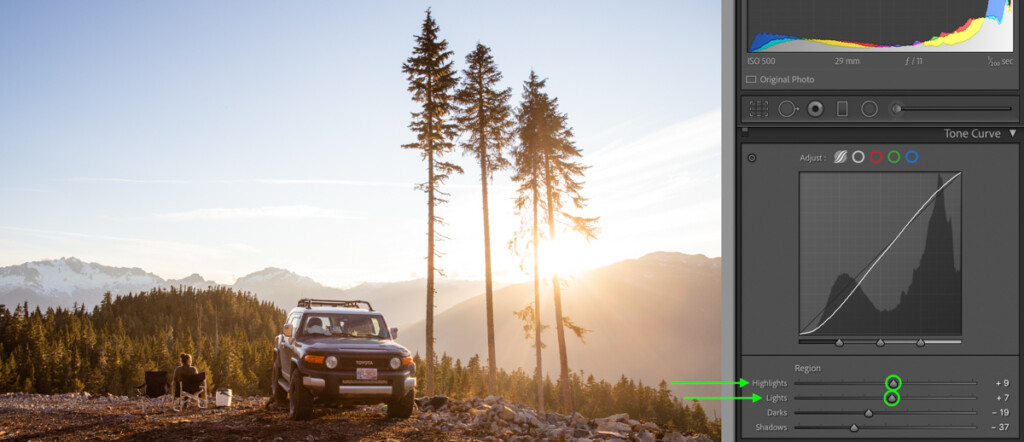
Step 2: Move The Whites & Highlights Sliders To The Left
Now that the shadows have been brightened, let’s ensure you have as much detail as possible in the highlights. This can be done by darkening the Whites and Highlights sliders. Move these sliders to the left to darken the highlights and bring back more information from the photo’s bright areas.
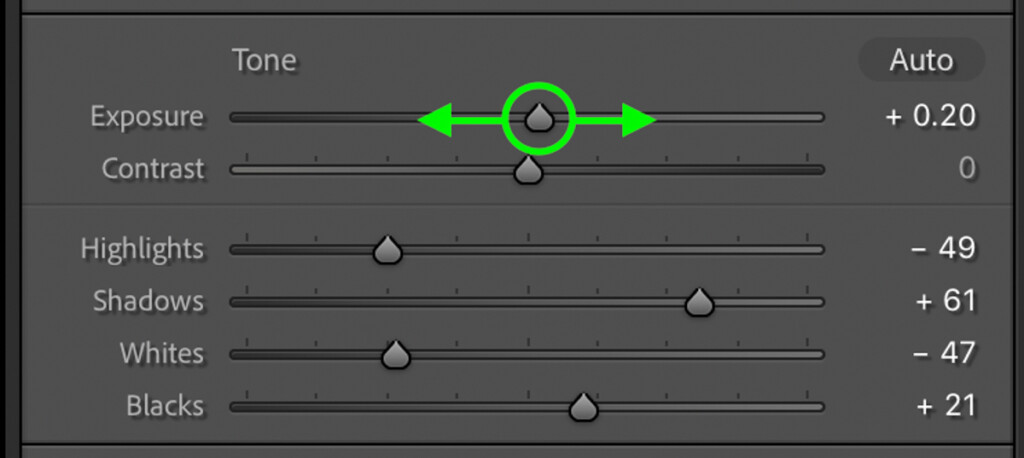
Step 3: Adjust The Exposure Slider To Balance The Brightness
After adjusting the shadows and highlights sliders, your photo may still appear a little too dark. In that case, you can use the Exposure slider to solve this issue. By clicking on the exposure slider at the top of the Basic Panel, you can move it right to brighten or left to darken. The exposure slider brightens all the exposure ranges equally, making everything brighter at once.
Step 4: Add Back Contrast With The Tone Curve
After the exposure slider, your photo may appear a bit “flat” and boring. That’s because there isn’t much contrast left in it. You can selectively add back contrast with the Tone Curve. The Tone Curve can be found directly below the Basic Panel.
To make life easy, make sure you’re working with the Region Curve. This breaks down the curve into four manageable sliders rather than dealing with anchor points. To darken the image’s shadow areas, start by decreasing the Darks and Shadows sliders slightly.
Next, increase the Whites and Highlights sliders to make the brighter areas of the photo pop a little more.
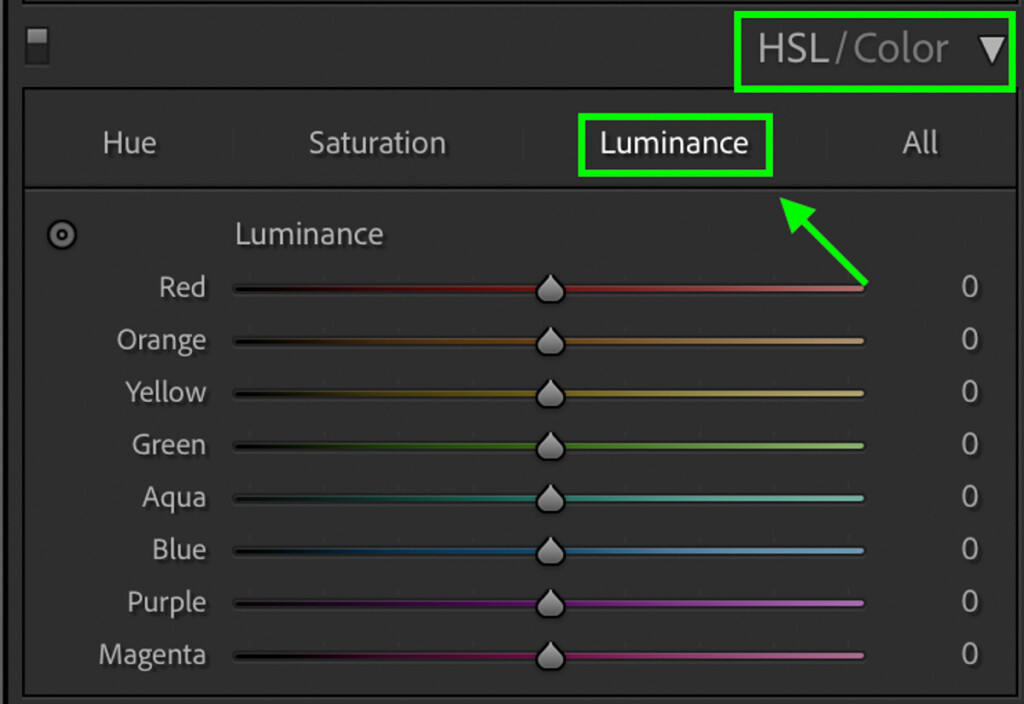
Step 5: Selectively Brighten Using Luminance In The HSL Panel
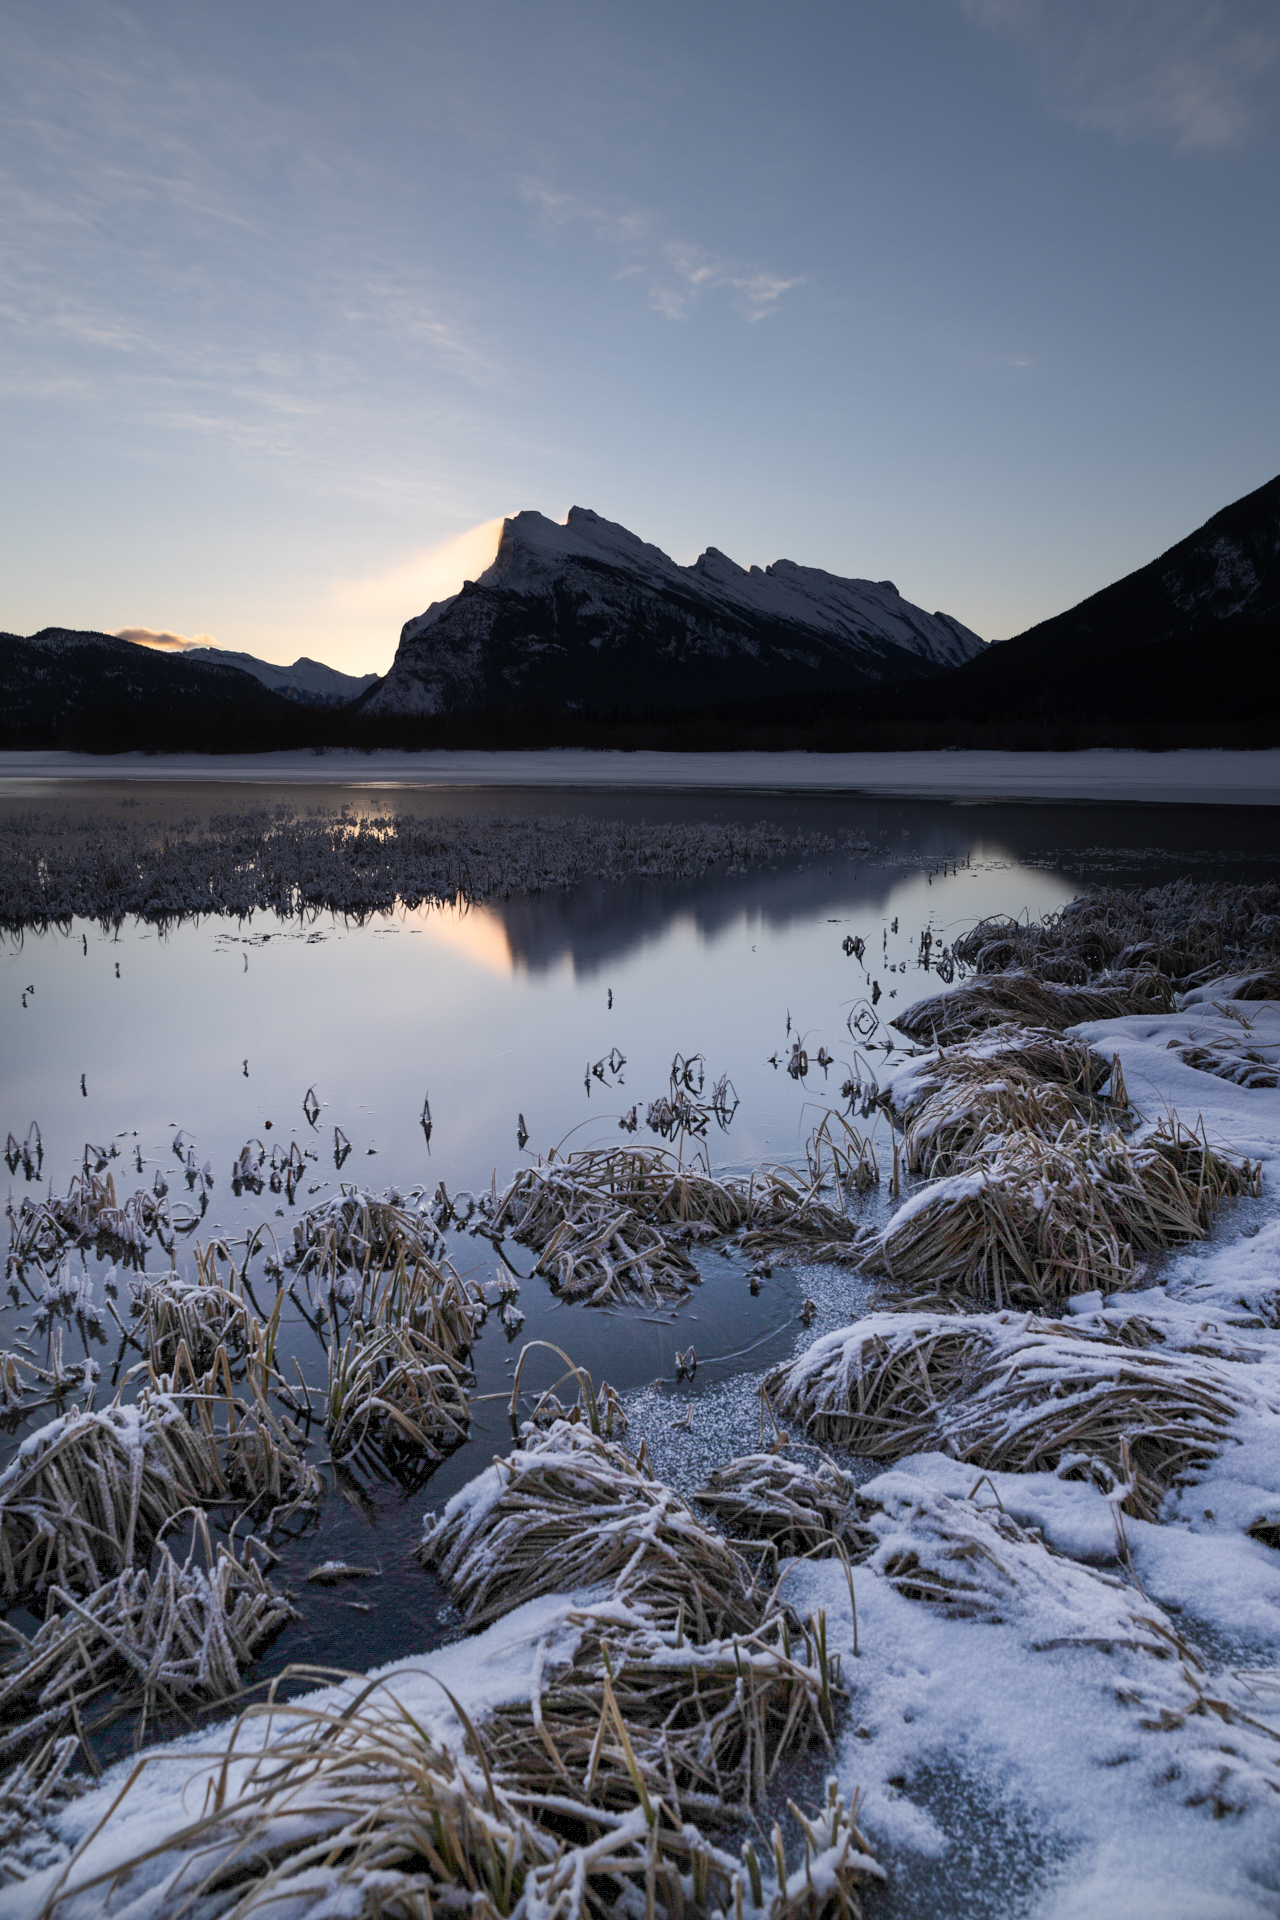
Within the HSL Panel is an option called Luminance. This setting lets you edit individual colors’ brightness and can work wonders for selectively brightening a photo. By adjusting a particular color range, you can either brighten or darken that specific color. Depending on the colors in a particular image, some sliders may prove more useful than others. In this case, I’ve used multiple luminance sliders to brighten the sunset, the sky, and the foreground parts.
Now the brightening adjustments in Lightroom are complete, and there are way more details visible than in the original photo.
How To Selectively Brighten An Image In Lightroom
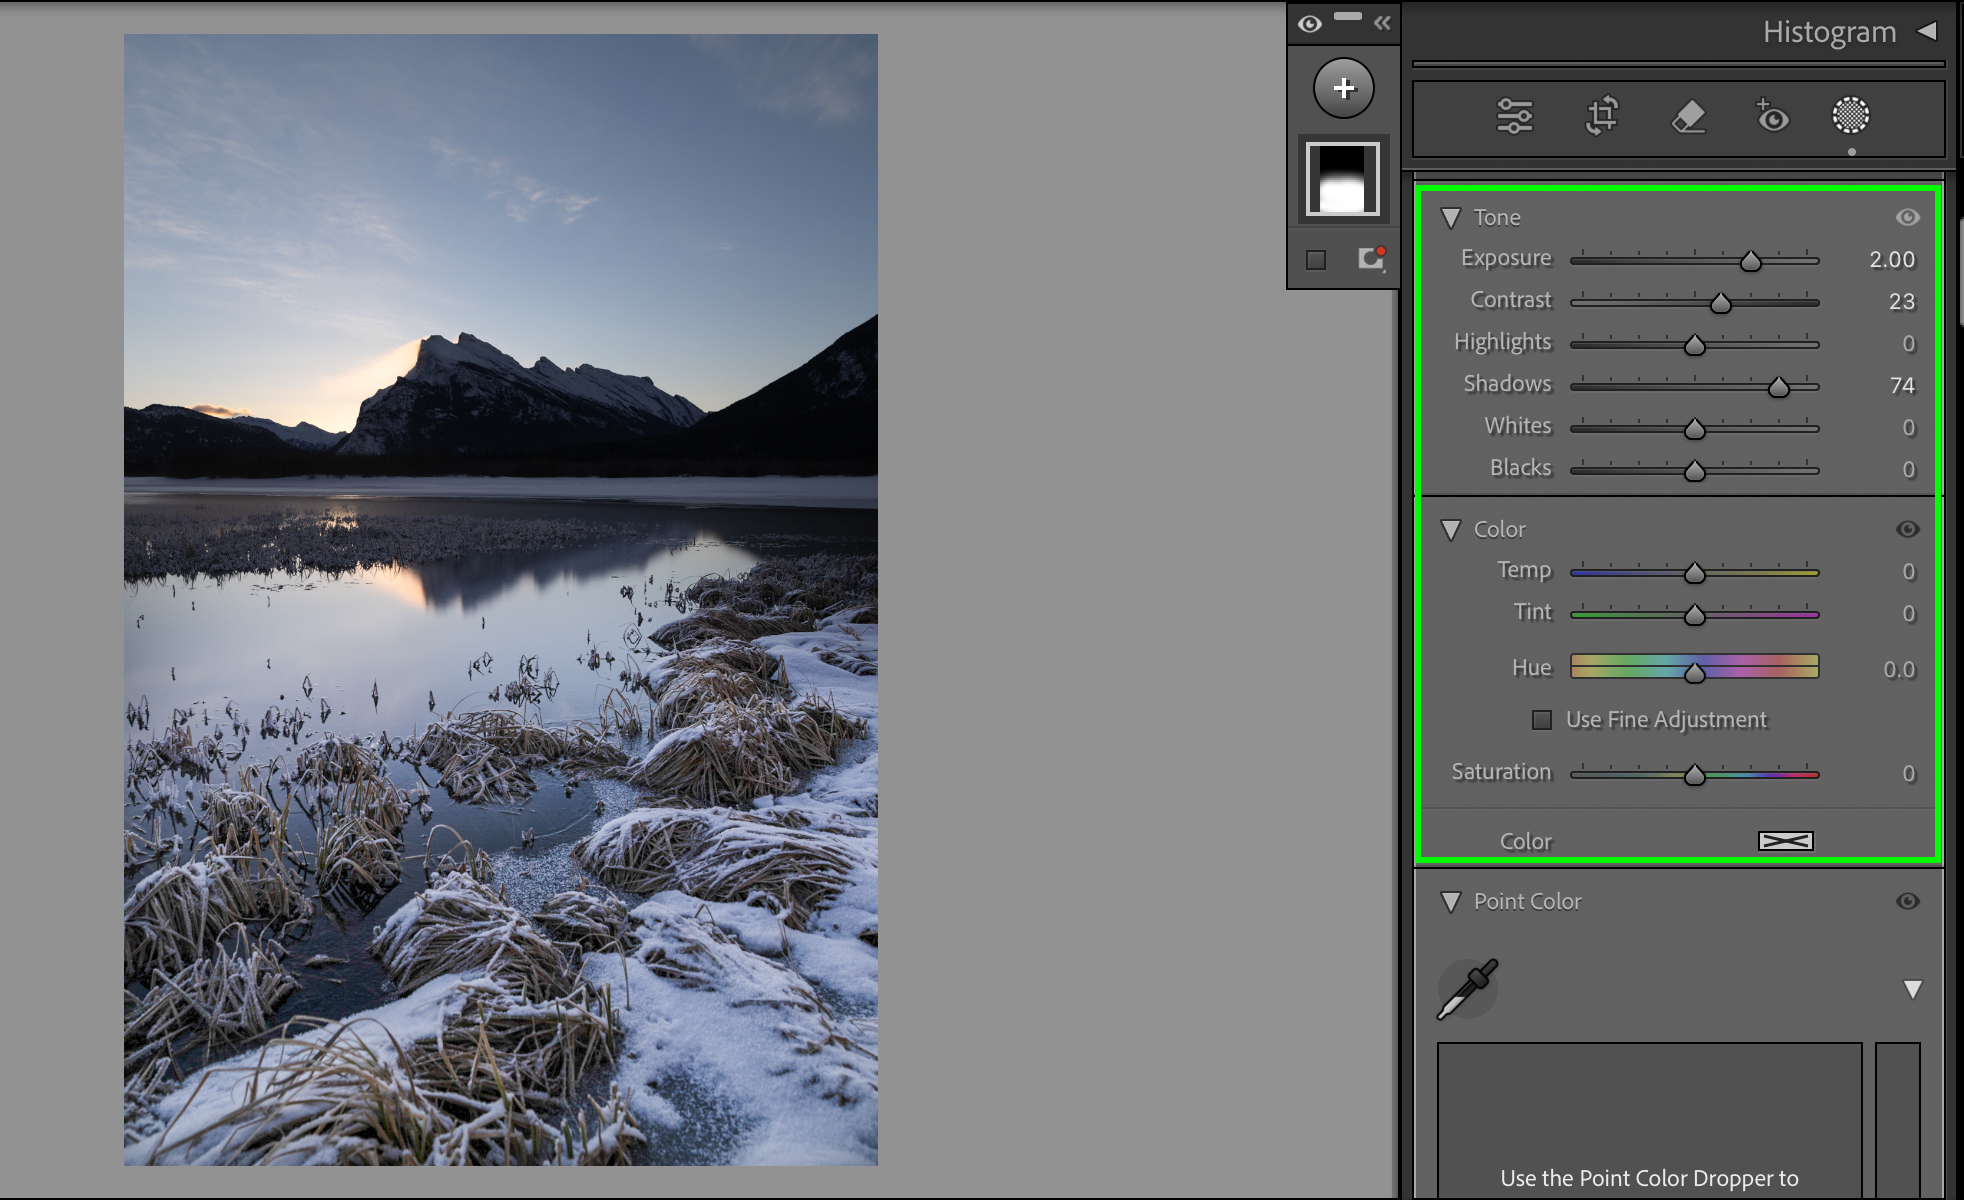
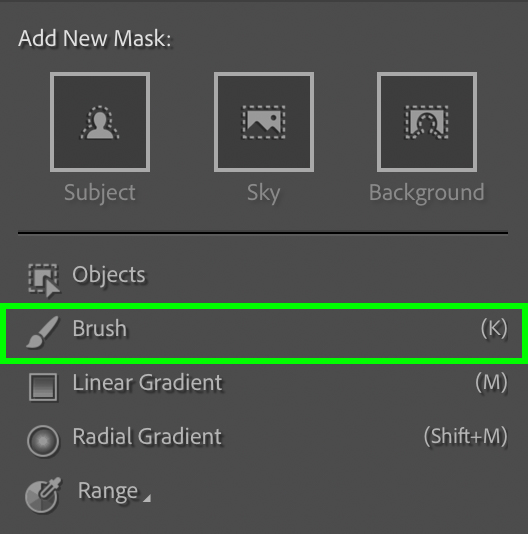
Step 1: Click The Mask Icon To Bring Up Mask Options
You can use Masks to brighten only a part of your photo rather than the entire image. After opening the photo in Lightroom, click the Mask icon (located below the Histogram Panel and above the Basic Panel) to bring up the Mask options.

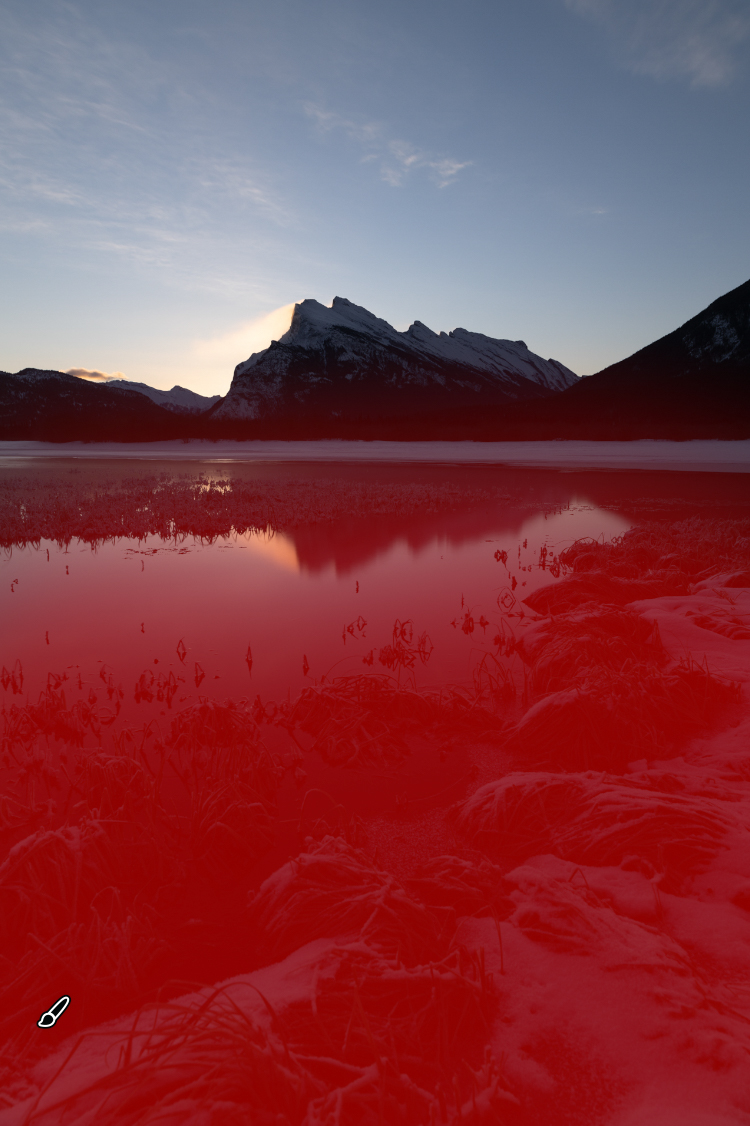
Step 2: Create Your Mask Using The Different Mask Options
The different features within the Mask panel allow you to select individual parts of your photo. Because I’ll be selectively brightening a landscape photo, many AI features won’t work for my needs. As such, I’ll use the Brush Tool to draw on the part of my landscape that I want brighter. I made sure that my Brush was feathered so the edges blended in. The red on the photo denotes where I used the Mask Brush.
Step 3: Use The Adjustment Sliders To Adjust The Brightness
Once my mask was selected, I used the same sliders on the right-hand side as you normally see. However, these sliders now only apply to the selected Masked area rather than the entire photo.