


Photographers use a wide variety of camera brands and models, and each has a unique way of displaying colors. This means that the colors in an image taken on a Nikon D850 might look slightly different than the same image taken on a Canon 350D. The same goes for different editing programs—moving an image between programs or from a program to a different device like a printer or projector, can slightly alter the appearance of the colors in the image.
Most of the time, the difference is barely noticeable. But over time the differences can add up, and you may think your image looks a bit off compared to when you had first edited it to perfection. Understanding how color profiles work, and how you can make them work for you, can help you make your images have flawless colors on any device.
Let’s look at how to change color profiles in Photoshop to get more accurate colors across any device.
What Is A Color Profile?
Every camera has a slightly different range of colors that make up the images, and the way these colors are measured and standardized is called a color profile. Color profiles are the numerical values that represent the specific colors in an image. They help devices and programs read the color in an image to create the most accurate representation of the colors picked up when the image was originally captured.
Color profiles are important sets of data throughout the editing process. Like devices, most photo editing programs come with their own color profiles that are set automatically—an example would be Adobe RBG. However, color profiles are often set automatically to the lowest common denominator standards. So, if you’d like to optimize the quality of the color your image shows, you can do so by working with color profiles in the editing process.
Tiny differences in color may not seem like anything to fret about, but without an accurate color profile, an image you’ve edited to perfection may appear slightly off in a different program or device. Over time, the changes made could cause you to “correct” an image that you’ve already edited the way you’d like. If the profile were accurate, the program could correct any differences between programs or devices and show the image’s actual colors consistently.
Types Of Color Profiles In Photoshop
Photoshop offers several different color profiles you can set to automatically apply to your images. Here is an explanation of each.
RGB
RGB stands for Red, Green, and Blue, and displays color using values that express the intensity of those three colors. RGB is a large color space, with millions of available colors, and thus is commonly used on television and computer screens. This means RGB is the best color profile to use if you plan to display your image on the web or otherwise present it digitally—for instance, on a projector.
Note, however, that RGB is simply a standard color profile, and each device and program will have its own specific form of RGB. The RGB color profile used in Photoshop can vary depending on what you set in the Color Settings window (more on this below).
CMYK
CMYK, which stands for Cyan, Magenta, Yellow, and Black, is a color profile used primarily in printing as these are the standard colors for printer ink. If you plan to print your image it is suggested to use this color profile as the transition from an RGB profile to print can change the colors slightly.
Grayscale
Grayscale is pretty self-explanatory. This color profile reads your photograph in ranges of black, white, and gray. No matter where you display your image, this color profile will ensure the colors in your black and white photograph remain the same.
Lab Color
Lab Color is a bit different from the rest of the color profiles, as it specifies colors on a 3-axis system. The three ranges are L, which stands for lightness; a-axis, which measures colors on a scale of green to red; and b-axis, which measures colors on a scale of blue to yellow. These specific ranges work a bit like the human eye and make Lab Color an extremely accurate color profile.
Lab Color is also device-independent, meaning the color will be the exact same regardless of the media used to display. For this reason, Lab Color is commonly used when printing logos for businesses, and in the plastics and textile industries.
Index
The Index color profile uses up to 256 colors, and can drastically reduce the file size while maintaining most of the image’s color quality. When you convert to Index, a color lookup table (CLUT) is created to index the colors in your image. If one of the colors in your image isn’t found within the 256 available options, the most similar one is chosen or simulated.
The Index color profile is a good option for presentations and web pages due to the small file size, though you’ll want to edit your image in RGB mode before converting to Index as the editing options are limited while working in this color space.
Bitmap
Bitmap is arguably the most unique of the color profiles as it only uses two colors: black and white. Each tiny individual pixel takes on one of the two colors to create the image. The result is an interesting, graphic appearance that is often used as an alternative to vector graphics.
How To Change Color Profile In Photoshop
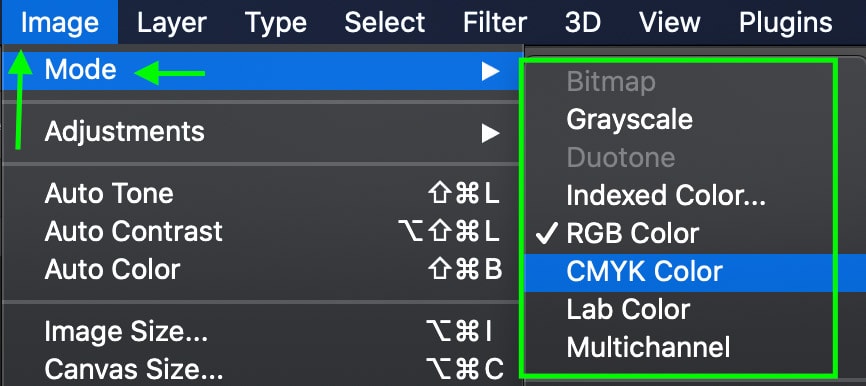
To change the color profile of your opened project in Photoshop, go to Image > Mode and choose your desired color profile. Here you can choose between RBG, CMYK, Grayscale, Lab Color, Index, and Bitmap profiles.
Option 1: While Creating A New Document
You can change your color profile right from the New Document window. To do this, head to File > New. You can also hold Control + N (Win) or Command + N (Mac).

In the New Document window, select the Color Mode you’d like to work in from the available options.
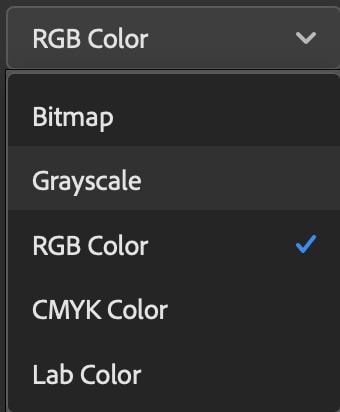
Once you’ve done this, you can further specify the exact color profile you’d like to work with from the Color Profile options. Simply click the drop-down arrow to see all the available options; this allows you to specify the colors for a specific device, but this is not a necessary step.

With everything set, click Create to open your new document.
This method makes the most sense to use if you plan to add more elements to your images, such as text or graphics. Note that you’ll still have to add your image to the new document, but you can add it as a new layer. This way you can choose the right color profile while also starting completely fresh.
To add an image to your project, simply open your computer’s file window and drag and drop an image into the project. It will automatically appear as a new layer.
Option 2: In An Existing Project
To change your color profile in an existing document, head to Image > Mode. Here you’ll see the various color spaces you can choose from. Select the one you’d like to use for your project.
Why Your Colors Still Don’t Look Right In Photoshop
1. Check Monitor Color Calibration
While RGB is a standard for monitors, the color might veer off alignment after a while. You can correct this by re-calibrating your monitor according to the RGB standards to ensure the color appears the same on your screen as it will on others.
To do this, you’ll need a colorimeter, a small device that attaches to your screen and optimizes your monitor’s display colors.
To do this process, you’ll first want to allow your computer to warm up for about a minute, and ensure there is no harsh light – the device makes judgments based on the ambient light in your room, so you want the lighting to be the same as what you’d normally use while editing.
Once you set your monitor type and target settings, the colorimeter will perform tests to check your monitor’s colors compared to industry standards. The result will be a unique color profile specifically for your monitor to ensure accuracy in the colors presented and communicated to other devices.
2. Export Settings
In some cases, your color might look different when exporting from Photoshop to a JPEG. This is easily fixable with a quick check as to which color profile you’re using.
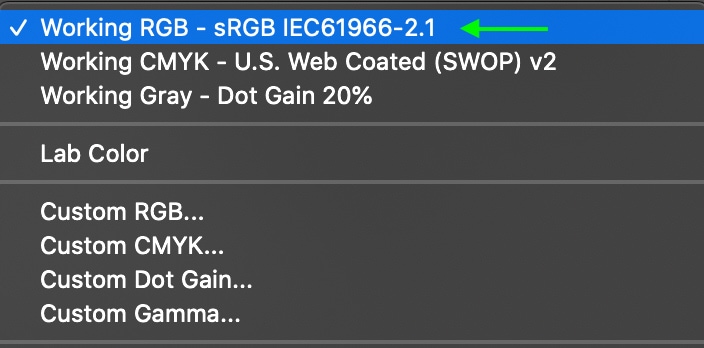
In Photoshop, go to Edit > Convert to Profile. In the window that appears, under Destination Space, click the drop-down arrow next to Profile.

Select Working sRGB IEC61966-2.1. This will ensure your color is accurate upon export.
Color profiles may seem like an advanced photography skill, but any professional or amateur photographer is more than capable of figuring out how color profiles work. Doing so can have a positive effect on your work, giving you the most accurate possible color across devices and ensuring that your color looks great when you print or present your work.
Happy Editing!
