
If you want to take your photography to the next level, photo editing is the answer. There’s simply no way around it, especially if you want to turn photography into a career.
With that said, there are a ton of desktop-based photo editing software out there. It seems like every few months; there’s a new feature here or a whole new program there. I used to get all wrapped up in these new features, but I realized it doesn’t need to be that hard to choose. You need a photo editing program that’s simple to use, efficient, and has all the tools you need. Along with that, it’s helpful to go with a widely used program by the vast majority of photographers in the industry. That’s why I’ve narrowed it down to only three options on this recommended editing programs list.

In a nutshell, my top 3 picks for photo editing programs are:
- Adobe Lightroom – Is an incredible stand-alone software that can organize and edit any number of photos effortlessly. There’s a clear reason why this is the most popular editing program amongst photographers.
- Adobe Photoshop – Photoshop is one of the most powerful editing software on the market, allowing you to cut out, manipulate, or redesign any image you work with. Although it’s not meant as a stand-alone editor, it’s a must-have tool built into the adobe creative cloud Photography Plan.
- Skylum Luminar – If you want an affordable, ready-for-action program that’s extremely easy to use, this is your choice. Luminar uses powerful AI technology to streamline otherwise complicated tasks into single sliders.
My Top 3 Editing Software Picks Explained
1. Adobe Lightroom
![]()
Lightroom is one of the most commonly used editing programs amongst all photographers. Whether you’re shooting highly specific client projects, a multi-day event, or photos from vacation, Lightroom has you covered. This program lets you easily organize, cull, edit, and export your photos exactly how you need them.
I could spend a whole week talking about Lightroom and why it’s my favorite tool for editing. However, you nor I have 7 days allotted for that kind of detail, so I’ll do my best to summarize the most helpful aspects. To see the program in action, check out this post on how to edit photos in Lightroom!
– Organization
What I like the most about Lightroom is how simple it is to deal with hundreds (or thousands) of photos at a time. By copying the file hierarchy from your computer, it’s simple to locate any file from any date. You can further sort images within each folder by adding ratings and tags to quickly figure out which ones you want to keep or get rid of.
Now, if you’re like me, having endless heaps of folders starts to get overwhelming. Luckily, Lightroom has a little thing called catalogs to help sort entire batches of images by their date or theme. For example, if you just went on a road trip, then had a giant client event to shoot, you wouldn’t want all those lumped together. Instead, you can create two different catalogs. One would only show your road trip pictures, while the other would only show the event photos—an easy way to think of this like having a separate photo album to store your pictures.
The organizational aspect of Lightroom is what I’ve always loved about the program. It’s simple, matches with your computer, and works well no matter the number of photos. I can’t imagine trying to edit thousands of pictures at once with any other tool.
– Photo Editing With Lightroom

Lightroom has everything you could ever need to transform your photos. From basic exposure and contrast adjustments to color, sharpening, profile corrections, and more. Better yet, you can easily make selective adjustments in your photo with the help of an adjustment brush, gradient tool, and radial adjustment. Between all of these settings, you can make broad adjustments or refine certain details without worry.
If you’re new to photo editing, Lightroom is very beginner-friendly, with each adjustment clearly labeled. It takes a bit of time to figure out each tool’s exact uses, but luckily you can learn how it all works in this comprehensive guide!
– Advantages To Lightroom
The biggest advantage of Lightroom is its vast user base. Especially when you’re stuck with an issue or want to learn how to do something, there is always a tutorial online waiting to help you. Each year Adobe comes out with incredible new updates that completely redevelop certain aspects of the program. It’s refreshing to see a company wanting to constantly improve upon their programs, and Adobe does just that with their Creative Cloud.
Lightroom offers a professional-grade editing program with room to grow no matter your experience level. I first started using Lightroom when I first got into the world of photo editing. It’s since been with me as I’ve turning photography from a casual hobby into a career path and still checks off all the boxes. I can guarantee you won’t be disappointed with this program, even after years of development and change in your work.
– Disadvantages To Lightroom
The one glaring disadvantage to Lightroom is that it’s a subscription-based software. You cannot buy it outright and have it forever. Instead, it’s a monthly subscription to get access to different programs in the creative cloud suite. You can get Lightroom and Photoshop as a package deal for a fixed monthly rate in Adobe’s photography package. There are also a variety of options if you’re interested in video editing software as well.
Although it’s nice to have access to multiple programs under one subscription plan, it can be a pain if you’re tight on cash and want to keep your spending to a minimum.
How Much Does Lightroom Cost?
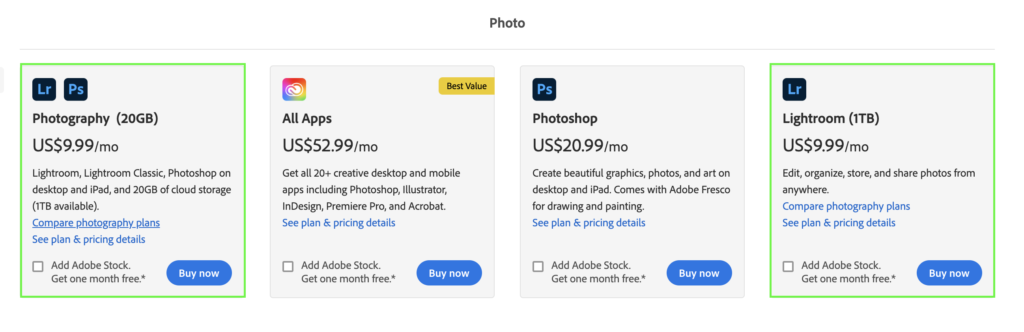
Since Lightroom is a part of Adobe Creative Cloud, it’s a part of a monthly subscription. There are various options to choose from, but the starting price for Lightroom is $9.99/month with 1TB (1000GB) of cloud storage included.
This a pretty sweet price point to get started with an effective and beginner-friendly photo editing software. The only downside is that monthly fees can suck in the long term. So you’ll need to weigh the pros and cons!
You can check out the different plans Lightroom is included with by clicking here.
2. Adobe Photoshop
![]()
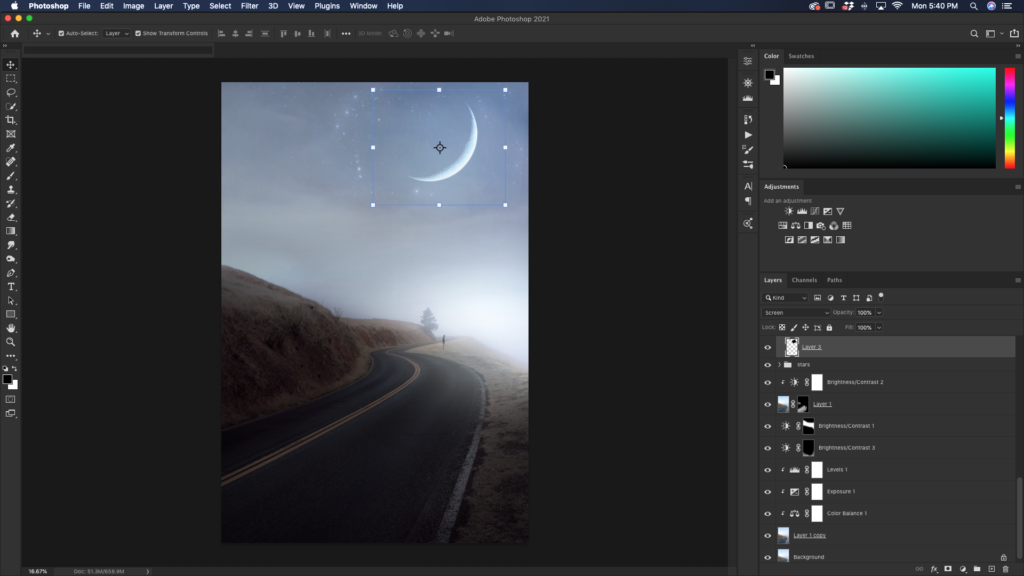
Adobe Photoshop is your one-stop-shop for advanced photo editing needs. Whether it be graphic design or photo manipulation, Photoshop makes it easy. Unlike other editing programs, Photoshop isn’t meant to work with large batches of images or organize photos. Rather it’s meant for more in-depth adjustments such as cutting out images, merging photos or creating graphics.
As a photographer, Photoshop offers tools that you won’t find anywhere else. With a wide array of selection tools and design options, it’s almost overwhelming how much you can do. Whether you want to simply change colors, replace skies, or cut out a photo, Photoshop has the tools to make it happen.
– Organization In Photoshop
If you’re looking for a stand-alone software to cull and organize hundreds or even thousands of photos, then look somewhere else. Photoshop has very limited organization options in terms of dealing with multiple files.
Since each image is opened as a new document or project, they are added to different tabs in the Photoshop window. If you are trying to edit several hundred photos, this is nothing short of a nightmare.
Photoshop is not meant as an organization tool itself but rather an add on to a software that can already organize photos for you. What it lacks in file management capabilities, it makes up for in editing tools.
– Photo Editing With Photoshop
Photoshop is one of the most versatile photo editing platforms around. Once you know what photos you want to edit, the options are limitless in this program.
You don’t need to do anything life-changing to edit images in Photoshop. Instead, there are a ton of useful exposure and color adjustment layers that make editing photos easy. I prefer many the color and exposure adjustments in Photoshop compared to other editing software simply because of their extra precision. With the added features of certain tools, I find each edit can be taken one step further than in other programs.
On the other hand, you can completely change an image with Photoshop. It’s easy to add in other images, apply overlays, or remove anything from your photo. If you want to get into creating composite images, then there’s no better program for the job. If you can imagine it, you can create it with the help of Photoshop.
And that’s not an exaggeration.
– Advantages To Photoshop

The big advantage to Photoshop is that it has such a wide array of tools and adjustment options. So much so that you might not even use them all. The program’s beauty is that it gets used completely differently depending on the type of creator who’s using it. For example, a graphic designer will use different tools than a photographer or a digital artist. However, its capabilities are so vast that it can satisfy the creative needs of any artistic endeavor.
As a photographer, I would argue there is no better tool for removing objects or enhancing photos. Some of the adjustment layers found in Photoshop offer more specific options than other editing programs. Likewise, the object removal tools are second to none. With 4 main ones to choose from, it’s a rare occasion that you can’t remove something from an image.
Ultimately, Photoshop is a must-have tool if you’re serious about editing images like a true professional.
– Downsides To Photoshop
The one big downside to Photoshop is that it’s intimidating and hard to learn. Rather than having an intuitive and well-labeled interface, the learning curve is much steeper for beginners. Learning how to build a workflow in the program can take some time, and it will feel like every tool is another task to learn. That’s why so many photo editors run back to their other editing programs with their tails tucked between their legs after using Photoshop. It’s big, overwhelming, and vast.
With that said, anything worthwhile in life takes some time and effort. Photoshop is no different. By spending the time to learn the tools and layout of this program, you’ll reap the rewards of being a more capable photo editor than some other photographers.
How Much Does Photoshop Cost?
Just like Lightroom, Photoshop is part of the Adobe Creative Cloud subscription model. There are a few different packages to get Photoshop with, but it costs $20.99/month as a standalone software.
Now, I think that’s a little steep to pay for any editing program. So I wouldn’t recommend getting Photoshop by itself.
Instead, it’s far more cost-effective to get something like the Photography Plan that provides both Lightroom and Photoshop together for just $9.99/month. This is the plan I currently use, and I find it the most reasonable of the Creative Cloud offers.
To learn more about the Photography Plan, click here.
How To Save 60% On Lightroom And Photoshop
Who doesn’t love saving some extra money where they can? I know I sure do. So here’s something awesome that Adobe offers for both teachers and students.
You can get 60% off the entire Creative Cloud Suite if you’re enrolled in school or are a teacher. Since I know many of you reading this are in University or have day jobs as a school teacher, definitely, make sure to take advantage of this!
To learn more about who qualifies for this discount and additional info about this offer, click here.
3. Skylum Luminar 4
![]()
Luminar 4 sets itself apart with a unique set of AI-powered tools that make photo editing easier than ever, especially for beginners. Rather than dealing with complicated adjustments, tools, and varying layers, Luminar makes complicated processes easy by confining them to a single slider.
For example, skin smoothing and blemish removal was something that typically took you a decent amount of time to do in Photoshop. There were a lot of layers, different tools, and a ton of steps to remember. With Luminar’s AI technology, they streamline the process and let you create the same adjustments via a slider. No extra steps to remember or tools to use. Just one slider, and you’re done.
This AI technology is an incredible feature that isn’t really seen in many other editing programs on the market. To see these powerful adjustments in action, I’d definitely suggest downloading the free trial of Luminar.
– Organization
Luminar is comparable to Lightroom in terms of how it organizes your images. It takes the same folder structure from your computer and applies it to the program. If you want to get more specific with your organizing methods, you can create additional folders and move around existing ones within the program.
It feels very intuitive to organize and cull through the images you want to work with. After selecting some of your favorites, you can quickly begin editing the ones you want by switching between the Libray and Edit modules.
One handy feature within Luminar is the ability to create albums to further organize your photos. Similar to a catalog in Lightroom, albums contain a particular set of images of your choosing. You can either directly import photos to your Luminar album or add previously imported images to them later on. That way, it’s easy to keep all your photos further segmented by specific categories.
– Photo Editing With Luminar 4
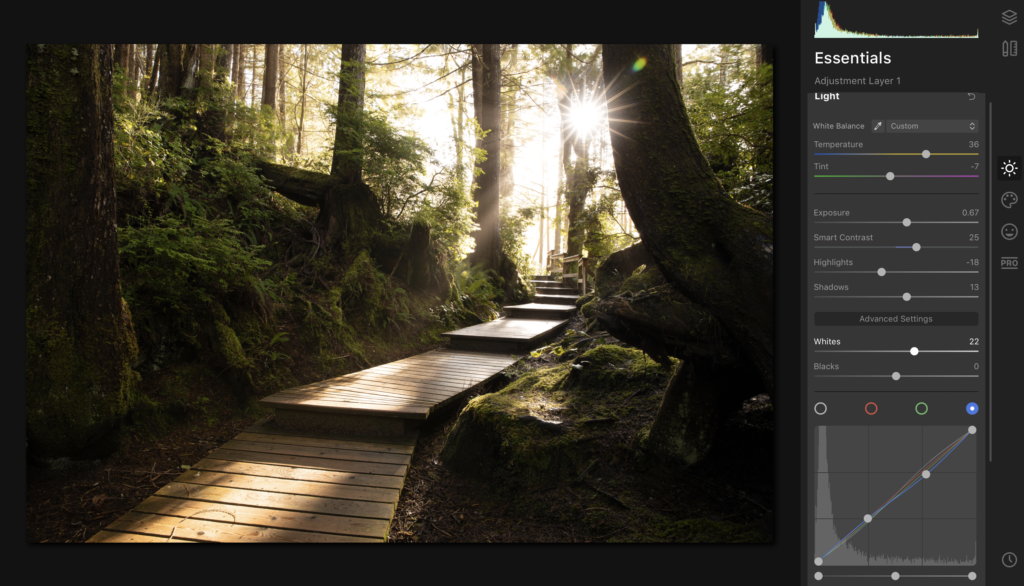
Editing in Luminar is extremely easy… almost too easy. Rather than dealing with a large array of tools and individual adjustments, Luminar streamlines the process with AI-technology. These AI tools read your photo and allow you to make more advanced adjustments with less work. By reducing typically complicated tasks to the work of a slider or two, it’s incredible how quickly you can edit your images.
Things like full-on sky replacements, skin retouching, body reshaping, or compositing can all be done in less time than ever before.
Beyond the AI enhancements this program offers, it also contains all the regular tools you’d hope to see in professional editing software. Things like adjustment brushes, radial filters, and gradient filters. One cool feature Luminar adds is the integration of dual-sided gradient filters. Rather than the typical one-sided adjustment, the gradient filter in Luminar can have specific adjustments for your photo on both sides of the gradient.
That way, you can get more precise adjustments without as much effort!
– Advantages To Luminar 4

As I’ve mentioned so far, the big advantage of Luminar is how complicated tasks are simplified. If you’re a beginner photo editor, you can make more pro-level adjustments without the same level of expertise and skill that was previously required. It’s truly amazing how many doors AI editing tools open for you.
To make things even better, Luminar isn’t a subscription-based model like the Adobe Creative Cloud. Instead, you can buy Luminar 4 outright for a one time deal. Currently, you can get Luminar 4 for $89, for life. No monthly fees, no subscription, just pure photo editing goodness.
If you’re a hobbyist photographer, spending monthly on editing software might not make sense to you. Luckily Luminar 4 provides all the tools you need without having to spend a ton of money.
– Disadvantages To Luminar
If you’re used to other editing software or have only used Adobe products up to this point, the initial workflow of Luminar might feel awkward and clunky. The tools are laid out in a slightly different manner, and you do have to work with layers to edit non-destructively.
However, just like learning any program, these bumps in the road get smoothed out with time and practice in the program.
How Much Does Luminar 4 Cost?
Luminar 4 can be bought outright for just $89. However, various upgrade packages include HDR editing programs, sky replacement templates, and more for an extra fee. Only the base model comes in at this price.
To learn more or purchase Luminar 4, click here.
Save $10 Off Luminar Today
Bet you almost thought there weren’t any savings to be had for Luminar, hey? Well, think again!
You can get $10 off Luminar 4 and other Skylum products by using code BRNWILLS at checkout. This not only saves you money but helps provide a little kick-back to help support this website, at no extra cost to you!
So Which Program Is Best For Beginner Photo Editors?
I use all three of these programs regularly. Each one provides a unique set of advantages that balance out the weaknesses of others. With all three, I’m armed with a powerful photo editing suite that allows me to create anything! Since Luminar 4 can be integrated into Lightroom, it’s seamless to edit a photo between multiple programs.
With that said, you might not be in the same boat as me. Perhaps you’re just getting into editing or aren’t sure if you’ll ever make money from your photography. In that case, here’s a simpler way to look at it.
For a general-purpose and well-rounded editing suite, the Photography Plan with Lightroom and Photoshop is your best bet. Between these two programs, you get some of the industry-leading editing tools, and it’s all relatively straightforward to learn. Whether you want to make basic color adjustments to your photos or full-scale photo manipulations, these programs have you covered.
However, you might not like the idea of a monthly subscription. In that case, Luminar 4 is definitely your best bet. This program has nearly everything Lightroom has, with a few extra twists to make it stand apart. Since it offers more streamlined features with AI technology, this program is a dream for learning photo editing.
I use all three together because Luminar speeds up a lot of processes that I would typically use Photoshop for. However, Photoshop still holds it’s value with my graphic design and photo manipulation needs.
So those are my top 3 photo editor recommendations for beginners; which one are you going to go with?
Get Adobe Photoshop And Lightroom In The Photography Plan (Best Value)
Get Luminar 4 Here (Best For Beginners)
Happy Editing!
– Brendan 🙂