
How To Organize Photos On Your Computer
Every month you take hundreds (if not thousands) of new photos but have no proper way of organizing them on your computer. Like most of us, you likely take your pictures, upload them to your computer, but then aren’t sure what to do with them from there. You make a half-decent effort at putting the photos in a dedicated folder but then forget where it went just a few months later. Learning how to organize photos on your computer can be a challenge, but it doesn’t have to be. By implementing a photo filing system, you can quickly organize and sort your pictures with ease.
The best ways to organize photos on your computer is:
- Organizing your pictures by the year they were taken.
- Label each image folder according to the event or location.
- Add keywords to your pictures to make them easier to locate.
- Store your images on an external hard drive.
- Backup your photos to a separate drive or cloud storage to keep things safe.
With the right folder structure and file organizing methods, creating a good photo filing system on your computer is easy. Let’s dive into the different ways to organize digital pictures and finally take control of your files.
What’s The Best Way To Organize Photos?
There are two different methods you can choose for organizing photos. The one you choose ultimately depends on whether or not you want to spend money. Most photo organization software will at least cost you a few dollars. However, they make life easy and allow you to sort through thousands of photos at a time, making them well worth the money.
On the other hand, you can still organize pictures directly on your computer with a better filing system. As long as you stay on top of creating new folders and naming your files, this can also be an effective method.
Let’s go over each option to help you decide which method to choose.
– Photo Organization Software
A photo organizing software is something that lets you import, sort, cull, rate, and even edit your pictures all in one place. Most photo editing programs allow you to do just that, making them an extremely valuable tool. One of my favorite programs for this is Adobe Lightroom.
Lightroom lets you organize pictures in an extremely efficient manner with the help of simple folder structures and rating systems. Within Lightroom, you can organize photos by catalogs, parent folders, and subfolders. These folders can match the ones on your computer, or you can create a unique filing system within the program.
If you’re unfamiliar with what each of those terms means, let’s break them down:
- Catalog – Imagine a catalog as a different photo album to store your images. For example, you could create a catalog to hold all your vacation pictures while having another for your family photos. Depending on the catalog you’re viewing, you’ll only see the photos you’ve imported into that specific catalog.
- Parent Folders – Just like on your computer, a folder, or parent folder, holds photos with a common theme. A typical example of this would be a folder called “2020” containing all the pictures you took within that year.
- Subfolders – A subfolder is a folder found within a parent folder. These are used to further organize your pictures based on dates or themes. For example, you might have a subfolder within the 2020 folder called “Hawaii vacation,” “Christmas,” or “Golden Ears Hike.” These folders help to further sort your images.
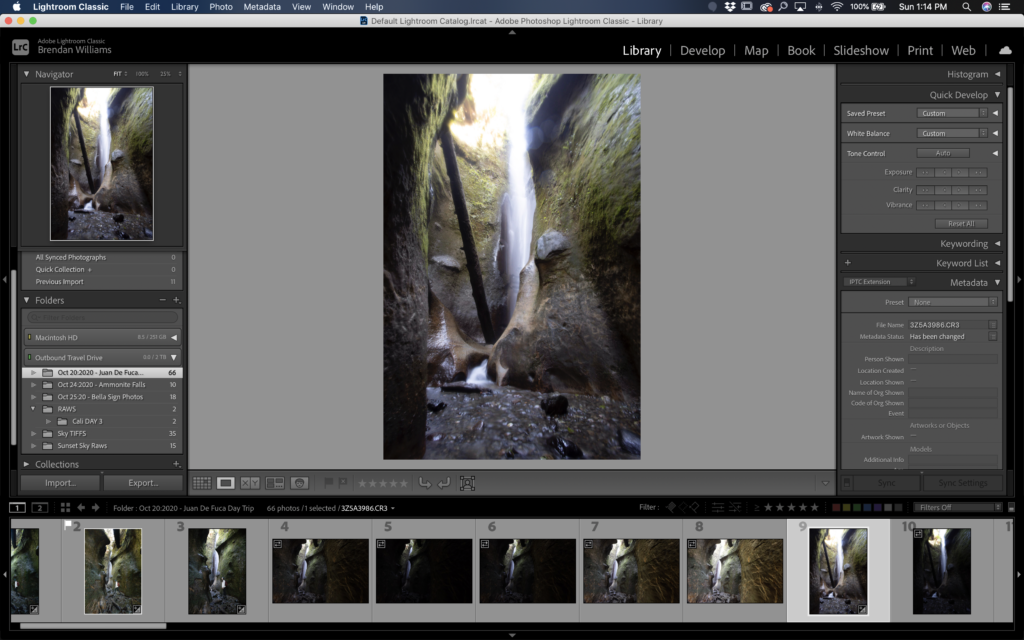
Now here’s where the advantage to a photo editing software like Lightroom comes in. After importing and organizing pictures into certain folders, you can then sort the images individually using a rating system.
In Lightroom, you can add star ratings, flag pictures, or even reject images based on what you want to do with them. You can add different star ratings to pick your favorite pictures, add flags to the photos you want to keep and reject all the photos you want to delete. Since you can quickly view all of your images in one place, this process only takes a few minutes.

Going through all those same steps on your computer would be far more time-consuming. That’s why the big advantage to a photo organizing software or photo editor is you can sort and organize pictures in less time.
– Directly On Your Computer
You don’t need to use organization software to have organized pictures. Instead, you can use a better filing system directly on your computer. This all comes down to the way you create and name folders.
When creating folders, it’s important to be as specific as you can. That way, in a few months from now, you’ll still remember where everything is located once you’ve forgotten where you moved things. This all starts by placing any similar images together into one mass folder.
For example, this could be the year they were taken, the place you took them, or what they were for (ex. client or personal images).
With all your pictures spread into a few broad folders, it’s time to break it down further. Now organize your photos by specific months, locations, or jobs that you were shooting. Anything that can help further identify and group your photos.
From there, you can get even more specific with folders for specific days; however, that’s not always necessary. I’ve found this strategy useful with working on client projects over multiple days. Rather than throwing all the pictures into one folder, I’ll organize everything by specific days or locations to make life easier. That way, I know exactly where the photos are located from every moment of the shoot.
Even if you aren’t shooting professionally, this same reasoning can be applied to you. For example, if you were in Mexico for a week, you could organize your pictures by day 1, day 2, day 3, and so on. Alternatively, you could sort the pictures by the specific destinations you visited throughout the trip.
The more specific you can be when organizing photos on your computer, the better. This all starts with using the right folder structure.
The Best Folder Structure For Photos
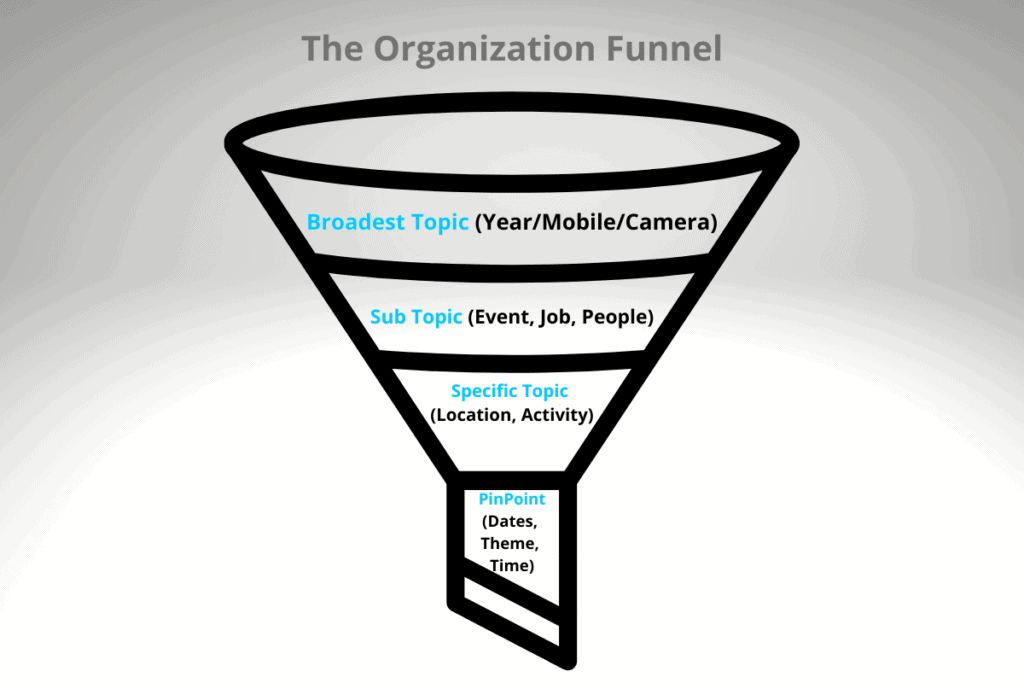
Folder structure is everything when it comes to organizing photos on your computer. Without the right filing system, it’s hard to figure out where everything goes, and even harder to find it later on. The best way to think about folder structures is like a funnel for your files. At the top of the funnel, you have the general overarching topic of the images. Something like the year the images were taken is the best example of this.

Moving down the funnel, you start to narrow down the topics within that particular year. You could break it up by the season, the location, whether it was a personal or client shoot, and so on—something to further categorize the pictures on your computer.
From there, you break down the folder structure even further. Let’s say your folders are currently 2020 > December; the next best way to sort your pictures is by location or activity. Something like “Family Christmas” or “Skiing” are perfect examples. Now you know the year the photo was taken, the month it happened, and the activity you were doing.
Now it’s up to you how specific you want to get, but it can continue on from here. The idea here is to funnel your search from the broadest topic down to the most specific. As each folder gets more specific, you’ll have an easy time figuring out where everything is stored later on.
– Should You Use Dates When Organize Photos?
The reason you shouldn’t use specific dates to organize your pictures is for two reasons. The first being that you simply won’t remember. Unless it’s a special event or a birthday, it’s unlikely that you’ll remember what day you visited that one waterfall. Instead, it’s much easier to search for a folder called “Cascade Falls – Waterfall Adventure” since it perfectly describes the photos it contains.
The second reason is that most cameras will have the date and time embedded in the metadata of the photo. In layman’s terms, that means your computer will already know when the picture was taken based on the time stamp. That way, if you really wanted to find a picture based on its date, you could simply search for it on the computer.
I used to use dates when I first attempted to organize pictures on my computer but quickly switched to location-based folder names. It’s so much easier when done this way.
– Example Folder Structure
So now that you understand the idea of building a folder structure let’s go through a real example on the computer.
Looking at my image documents, I have everything is broken up by the year they were taken. This is the top of the funnel and the broadest piece of categorization.
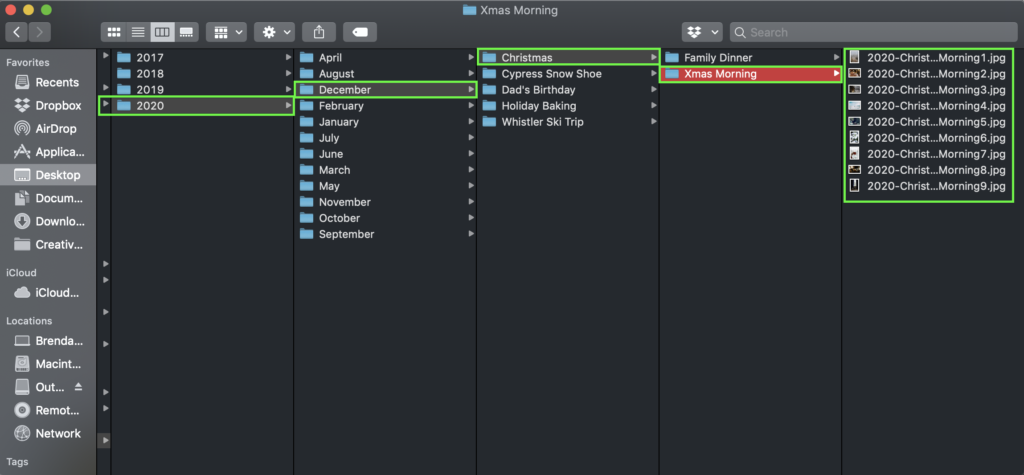
Going into the year folder, I have each group of photos divided into the season they were taken. I find that the general season something was taken in is easier to remember than a specific month. Again, you can choose something that makes sense to you, but just make sure you’re moving further down the “organization funnel.”
Within each month, I have all my photos broken up by events or locations. If I took photos on a certain hike, I’ve created a folder named after that hike. For an event such as a birthday, I label the folder accordingly as well.
Inside these folders are all of the related images to that specific event or activity.
For categories that have a lot more images, I break down the folder structure even further. For example, the “Rockies Road Trip” folder has thousands of images. Rather than lumping them all into one spot, I organized them by the day I took them on the trip. Day 1 for the first day, Day 2 for the second, and so on. This makes life easy when organizing your photos, but it also is convenient for importing as well!
With this folder structure, you can find very specific images based on the year, time of year, location, and exact day if necessary. Whether I’m trying to find a photo one week or one year from now, this way of organizing photos on the computer makes my life easy. Going through your images and sorting them with a similar structure will make a world of difference as your go-to photo filing system.
Where To Store All Your Pictures
While organizing your pictures, figuring out the proper folder structure is half the battle. You also need to consider where you’re storing your photos. It’s not necessarily the best idea to keep all your pictures stored on a single computer, which is why something like an external hard drive or cloud storage becomes useful.
The problem with saving photos directly to your computer is that it slows down your computer while also running the risk of losing your files. Over the years, you’ll end up with thousands of pictures saved on a hard drive. With so much space taken up, your computer will inevitably run slower and won’t perform basic tasks like it used to. Then once it comes time to upgrading computers, you have to go through the painstaking process of moving all the pictures somewhere else.
If you have an external hard drive or cloud storage, that wouldn’t be a problem.
The same thing goes for the security of your files. It’s not uncommon for a computer to stop working or have an error that shuts it down. If you can’t access your computer, you also can’t access the photos saved to it. By saving your photos to an external location, you completely avoid this problem.
When it comes to external storage for photos, there are two options. An external hard drive or cloud storage. Both have their pros and cons, but it’s ultimately up to you to decide which one best suits your needs.
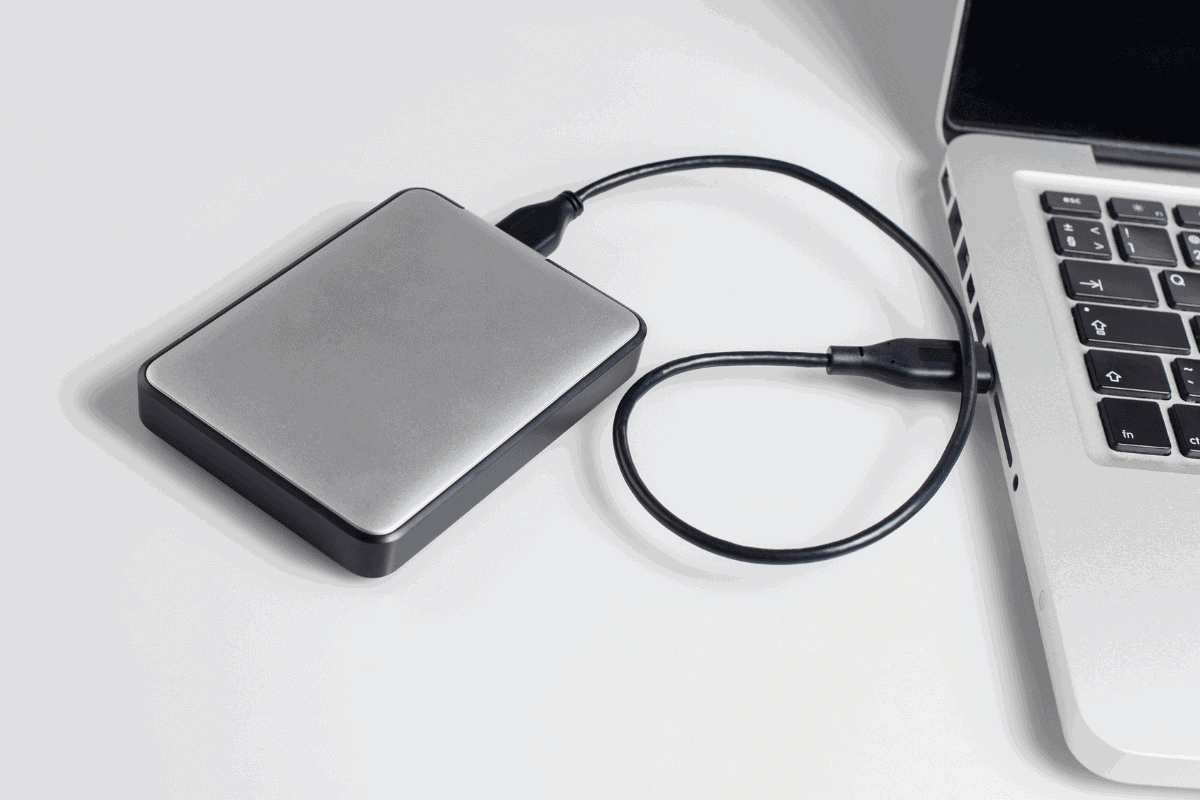
– External Hard Drive (SSD vs. HDD)
An external hard drive is a device that lets you save files in a separate location from your computer. The big advantage to these is they can be moved around and used between multiple computers. Therefore, you could access all the same photos from your desktop, laptop, and even your neighbor’s computer.
Since they’re so versatile and you can take them anywhere, they’re a perfect solution to store and organize your photos with. Rather than bogging down your computer with hundreds of gigabytes of photos, the hard drive can take the burden off your computer.
There are two different types of hard drives, known as SSD’s (Solid State Drives) and HDDs (Hard Disk Drives). An SSD has no moving parts inside, making them more robust and have faster loading speeds. The downside to them is that with advanced technology comes a significantly higher price tag.
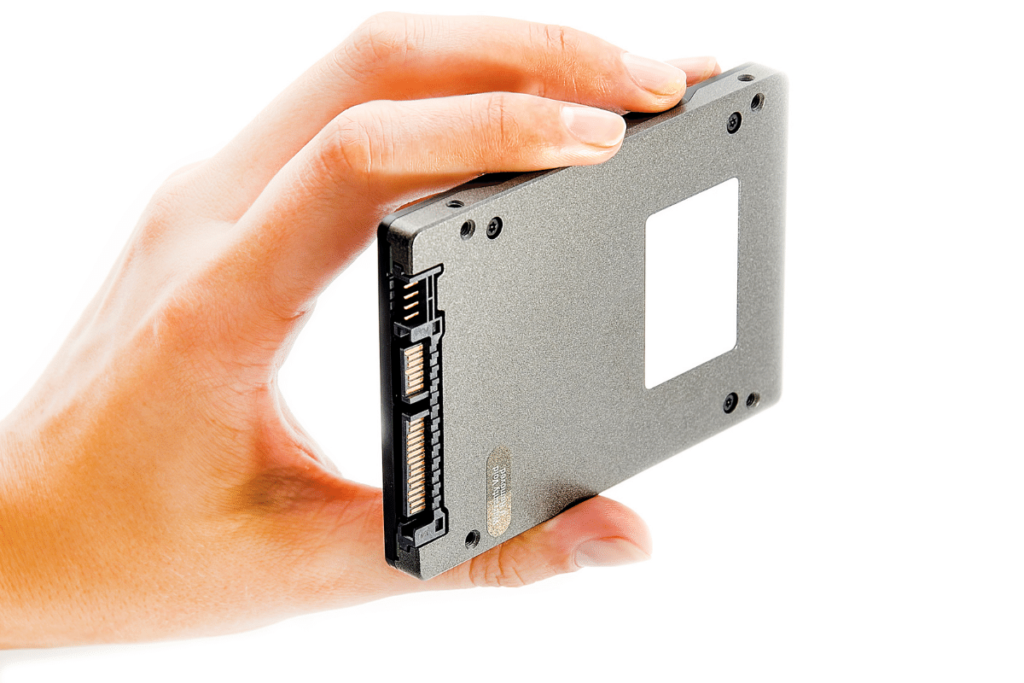
As for HDD drives, these save your files to a physical disk spinning inside the drive. These external hard drives are far more affordable but are more prone to failure if bumped around.

If you’re looking for a permanent at-home storage solution, an HDD drive will be more than enough. Since it likely won’t move from your desk very often, there’s not much risk of it not working from being in a backpack.
On the other hand, if you want a hard drive to take traveling and not have to worry about it getting bumped around, an SSD is a better idea.
Two hard drives I personally use and love are the Western Digital HDD drives and the Lacie Rugged SSD’s.
– Cloud Storage
Rather than carrying around a physical hard drive to store photos on, cloud storage can be an easier solution. With this method, you can upload photos directly to an online platform and save your photos online. That way, you can access all your pictures across multiple devices just by logging into your account.


There are a variety of cloud storage platforms available such as Google Photos or Dropbox, but they all do mostly the same thing. You upload files directly to their website, they store your images on a server, and now you’re ready to go.
The advantage of a cloud storage system is you don’t have to worry about filling up too much space or losing your hard drive. If you need more space, you can purchase more, and you can never lose your files since it’s all online. Best of all, having your files online makes it easy to quickly share photos with friends, family, or clients since you can send links directly to image folders.
With that said, cloud storage typically costs a monthly fee that can add up quickly if you’re looking for a long time storage solution. For example, you might be paying $15 a month for cloud storage when an external hard drive is just $150. Within 10 months, you’re already paying more for your storage than you would have with a regular hard drive. If the perks of being able to share photos easier aren’t important to you, then the price tag is something to consider.
Storing Mobile Photos

If you’re primarily needing to store mobile photos, using cloud storage is incredibly more convenient than an external hard drive. With cloud storage, you can just use an app to directly upload photos from your phone to the cloud. Otherwise, you have to do twice the work by first importing them to your computer, then moving the files to an external hard drive.
Just about any cloud storage system offers an app to integrate with your phone, but I personally use Dropbox for this.
To make sure you’re still using the same photo filing system as before, setting up the folder structure on your cloud should be done first on a computer. Then it will be an easy drag and drop process to upload your mobile photos to their designated location. If you have a lot of mobile photos to store, breaking up your folder structure into a mobile and camera photo organization funnel can be beneficial.
Backing Up Your Files

Once you’ve picked a storage method, you need to make sure your images are backed up. That means everything needs to be saved in two separate locations. When I say separate, I don’t mean two different folders. To properly back up all your pictures, you need them saved in two different physical locations.
This could be an external hard drive and cloud storage or two external hard drives. Whatever you prefer, just make sure to have two. That way, if one of your devices fails and you lose access to your files, you have a backup option to avoid that catastrophe.
I use both external hard drives and cloud storage to back up my pictures. I start by importing my photos from my camera to the external drive, then move those images to my cloud storage. This way, I get the best of both worlds. I can access all my files on the external hard drive, whether I have wifi or not, and I can share and view all my images across multiple devices with ease via cloud storage.
There isn’t any clear advantage to which way you go about backing up your files; just make sure they’re backed up. Otherwise, all the file organization in the world won’t matter when your storage device suddenly fails.
Is It Ok To Delete Old Photos?
Depending on how many photos you like to take, it’s shocking how fast they all add up. However, I’m willing to bet that you don’t actually like every single photo you have saved. Maybe your photo wasn’t in focus, your finger was in the shot, or there are multiple versions of the same photo. Rather than spending the time to store and organize these unwanted files, just delete them! There’s no shame in that.
Deleting old or unwanted photos is a good way to stay on top of your storage limits and reduce clutter. Just think, if you have several hundred photos that you don’t like, they take up the same amount of space as the photos you love. So why not get rid of the unwanted pictures and make more room for the good ones? Especially when using a physical hard drive, you will eventually run out of space!
If you aren’t using photo organizing software, it’s going to be a massive pain to sort through all those unwanted pictures. What would take you hours (or days) to do manually on your computer could be done in less than an hour in something like Adobe Lightroom.
The problem you might be facing when looking into Lightroom is that you don’t want to pay the monthly subscription. Especially if you don’t have an interest in learning how to edit photos, why are you paying a premium for such a program?
As an alternative, you can take advantage of a free software called Adobe Bridge. This program helps to quickly sort and organize photos on your computer. From rating, tagging, and finding unwanted photos, it’s all possible with Bridge. All you need to do is make an account with Adobe, and you’ll be on your way. You can get access to Adobe Bridge here.
Organizing photos on your computer is like cleaning your house. You don’t want to do it, but when it’s done, it feels oh so good. With the right folder structure and photo filing system, the entire process won’t take you long to do. Especially when using a photo organizer like Lightroom or Bridge, you can fast track the whole process.
Happy organizing!
Brendan 🙂


