


Whether you’re running out of space or want to keep things organized, deleting photos from your catalog or your device is important. So, you need to know how to delete photos in Lightroom.
The process of deleting photos is simple. However, if you need to delete a large number of photos at once, there are some additional steps to make the process easier. Let’s go over some of these methods to help make deleting photos as painless as possible.
Method 1: Delete Photos in Lightroom Using The Rejected Rating
Step 1: Select An Image And Go To Set Flag > Rejected
First, you can set an unwanted image as a reject by pressing X on your keyboard. By turning Caps Lock on when you reject an image, Lightroom will automatically select the next image, so you don’t need to use the navigation keys. Alternatively, you can right-click on the image and choose Set Flag > Rejected.
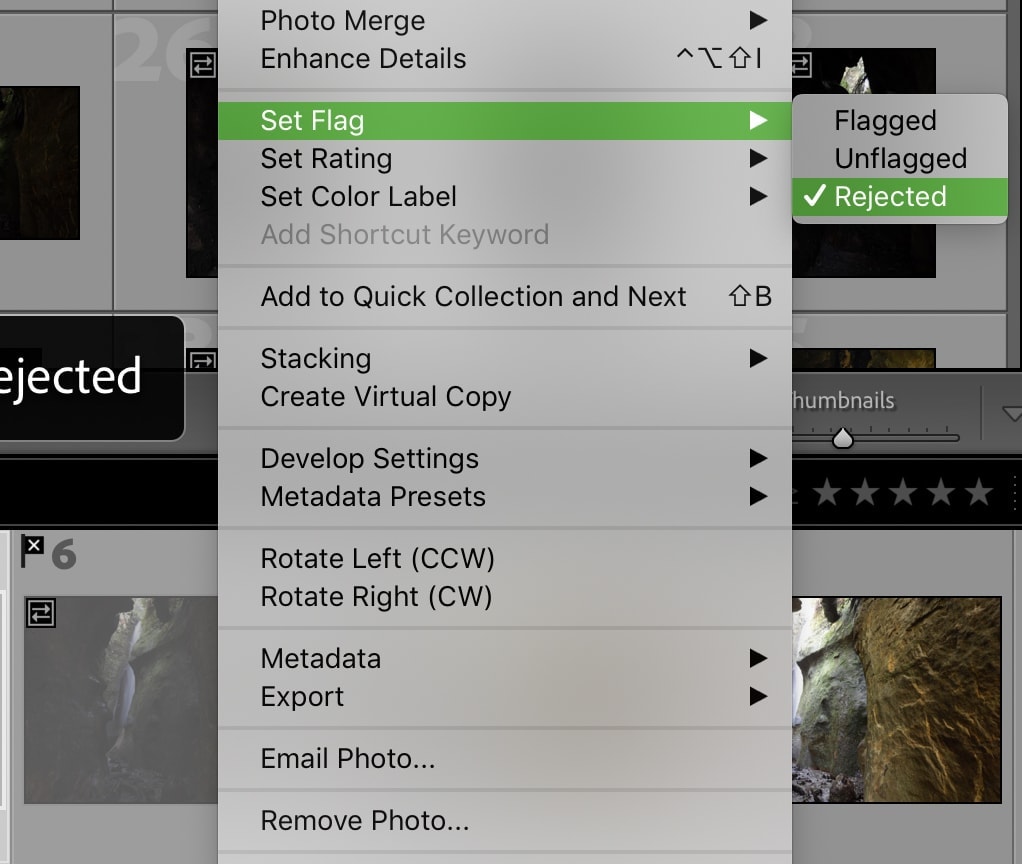
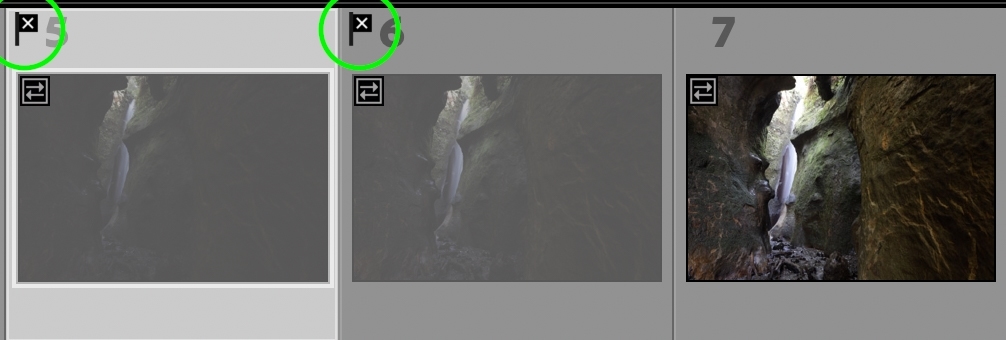
You’ll know your photo is rejected by the flag icon with the X inside of it in the top left corner. The photo will also become semi-opaque, making it easier to spot among other photos.
Step 2: Select The Reject Flag Icon At The Top Of The Workspace
After setting the photos you want to delete as rejects, it’s time to filter them. To view only your rejected photos, select Flagged as the Filter option, then click on the Reject Flag icon above your filmstrip. The Filter option will change to Custom Filter.
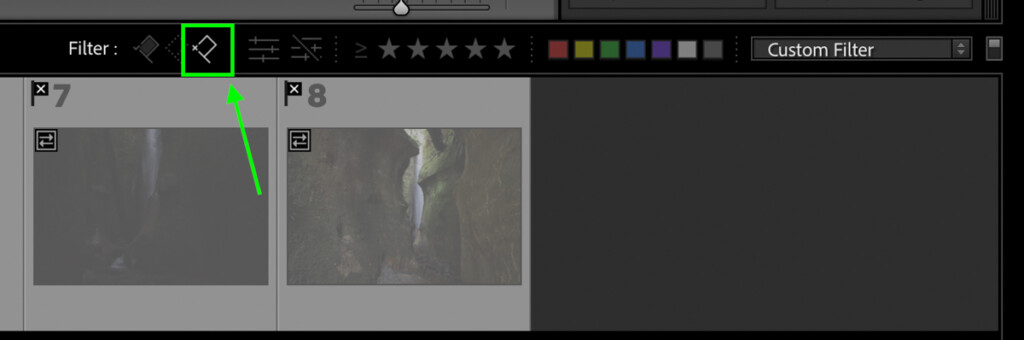
Now, all your images will be filtered so you can only see the rejected images. Go through them and double-check these are all images you want to delete. If you change your mind and want to keep a certain photo, click on it and press U to remove the flag on the image.
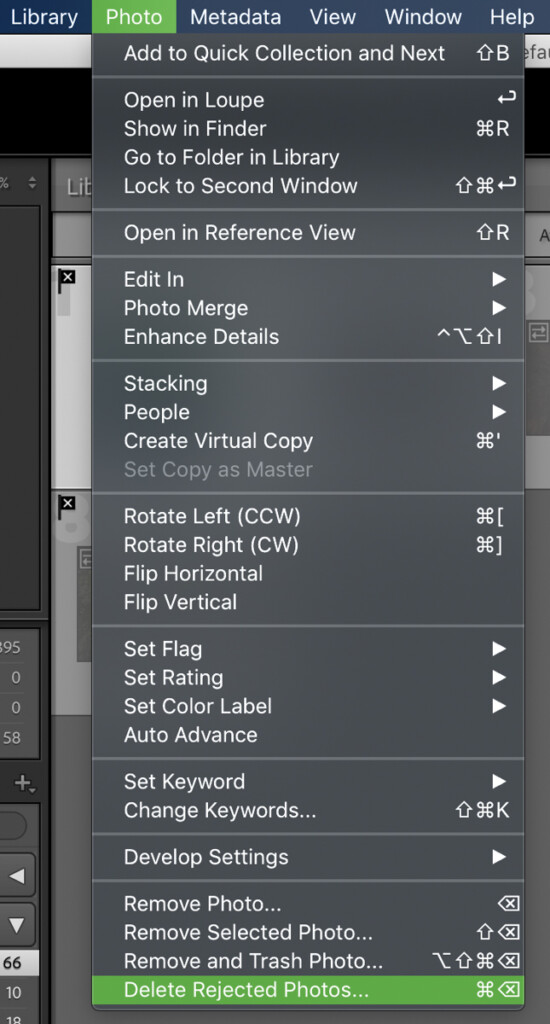
Step 3: Go To Photo > Delete Rejected To Delete The Images
With your images sorted as rejects, it’s time to delete them. Go up to Photo > Delete Rejected Photos. You can also use the shortcut Control + Delete (Win) or Command + Delete (Mac).
A dialogue box will appear asking whether you want to delete it from the disk or remove it from Lightroom.

If you choose to Delete from Disk, your photos will be removed from Lightroom and deleted from your hard drive. If you want to permanently delete a photo, this is the option to choose.
On the other hand, Remove from Lightroom will only delete the rejected pictures from your Lightroom catalog. They will still be saved and remain untouched on your hard drive. This option is better if you still want the photo saved to your computer. You can also use the shortcut Alt + Delete (Win) or Option + Delete (Mac) to access this option.
Method 2: Delete Photos From Lightroom By Manually Selecting Images
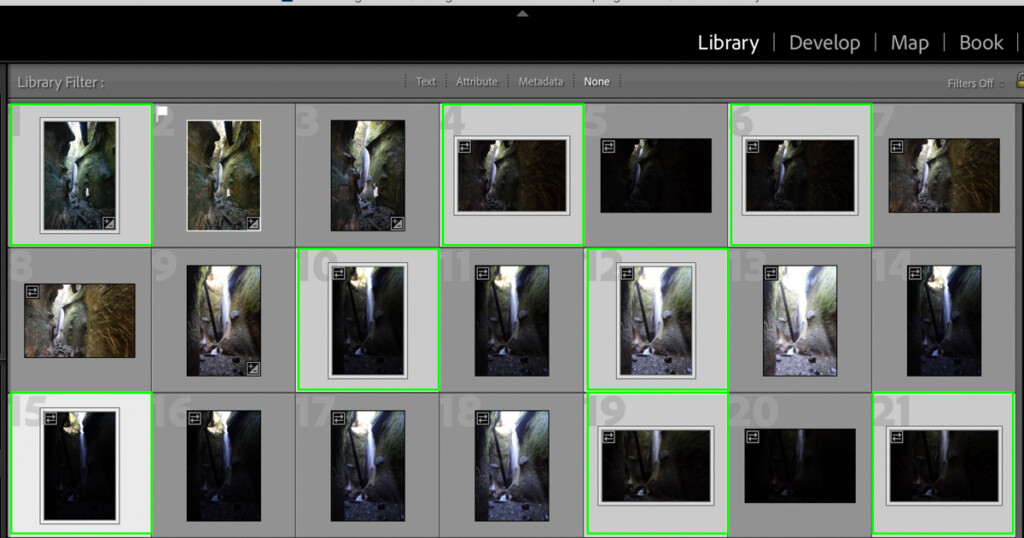
Step 1: Hold Control/Command And Select The Images
This is most easily done in the Library Module, where you can see all of your photos in one place. However, you can also use your filmstrip to select photos to delete as well.
As I shared in a previous post on how to select multiple photos in Lightroom, you can hold Control (Win) or Command (Mac) and click on images to select them. This way, you can select a random series of images with ease.
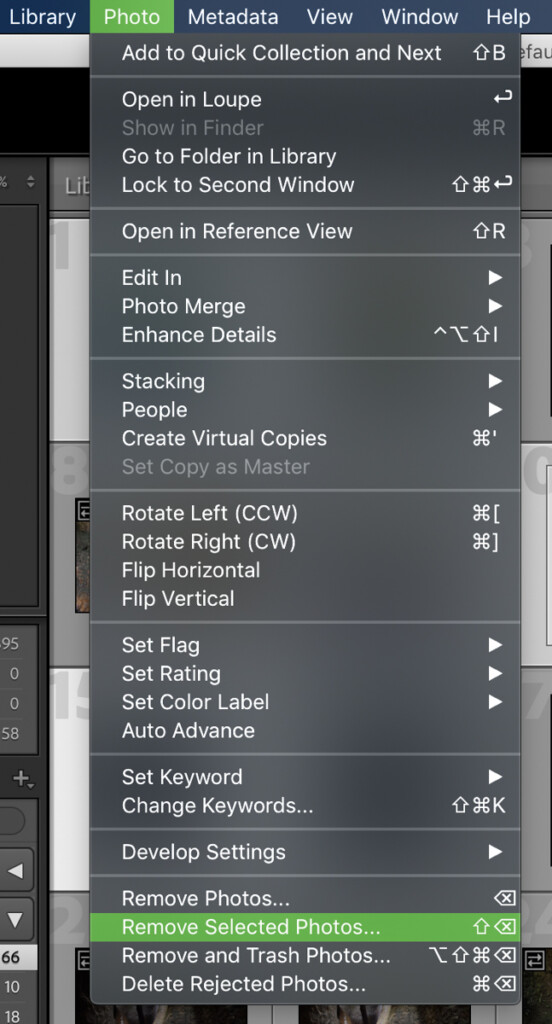
Step 2: Go To Photo > Remove Selected Photos
After you’ve selected the photos you want to delete, go to Photo > Remove Selected Photos. If you select one image, you can also simply press Delete. However, if you selected multiple images use the shortcut Shift + Delete.
Step 3: Select Delete From Disk Or Remove From Lightroom
Once again, you’ll be faced with the option to delete from disk or just remove from Lightroom. Select your desired option, and your selected photos will be deleted from Lightroom.
How To Delete Folders From Your Lightroom Catalog
Rather than deleting all the photos within a folder, you can delete the folder itself to get rid of it in the Folders panel. Luckily, it’s extremely easy to do. Just right-click on the folder you want to remove and select Remove.
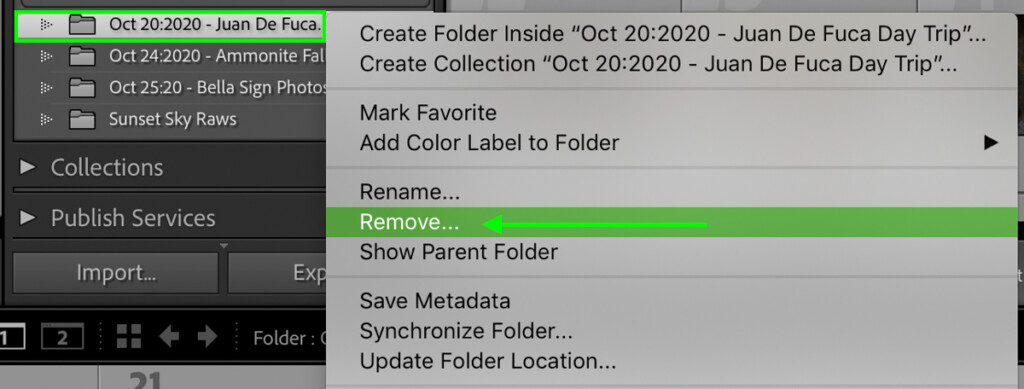
This will remove the folder from your Lightroom catalog but keep everything untouched on your hard drive. Deleting folders is useful to streamline certain Lightroom catalogs and eliminate any unused or missing folders.
Learning how to delete photos and folders from Lightroom is easy, and the steps are very straightforward. By staying on top of your files and deleting images frequently, you’ll keep every catalog and folder more organized. After all, better organization equals less stress and a more streamlined workflow.
Happy Editing!
– Brendan 🙂
