

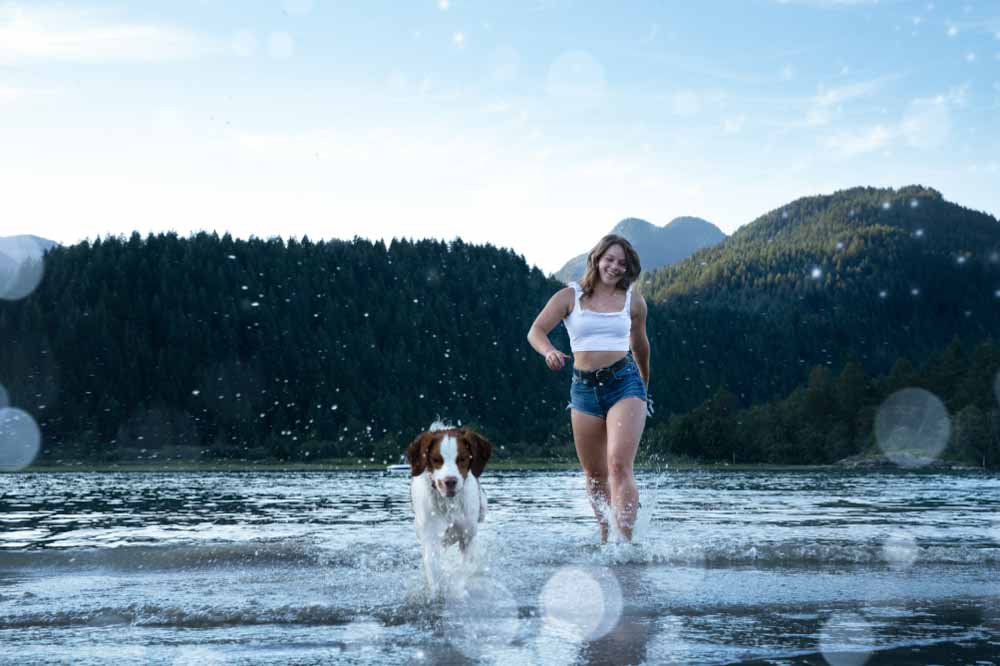
Preparing your images for print may require you to learn how to change the aspect ratio. In Photoshop, you can use the Crop Tool to resize your images to the exact specifications you need.
The aspect ratio allows you to adjust the image’s dimensions, which is helpful if you want to remove unwanted elements to focus on the focal point of your image or resize the image for a specific frame size.
So, let’s start by learning the ratio feature of the Crop Tool!
How To Change The Aspect Ratio In Photoshop
Step 1: Access The Crop Tool (C)
To start, simply select the Crop Tool from the Toolbar or press C.
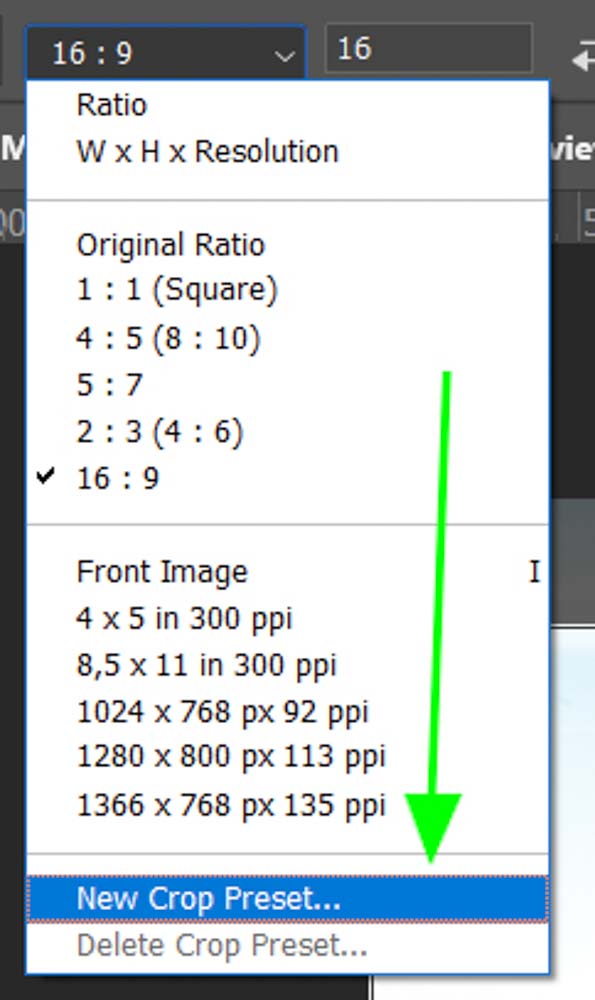
Once the crop tool has been selected, your previous settings used when using this tool will be applied. This will need to be changed to match the aspect ratio we want to use, which in this case is 16:9.

Step 2: Change The Crop Preset To “Ratio”
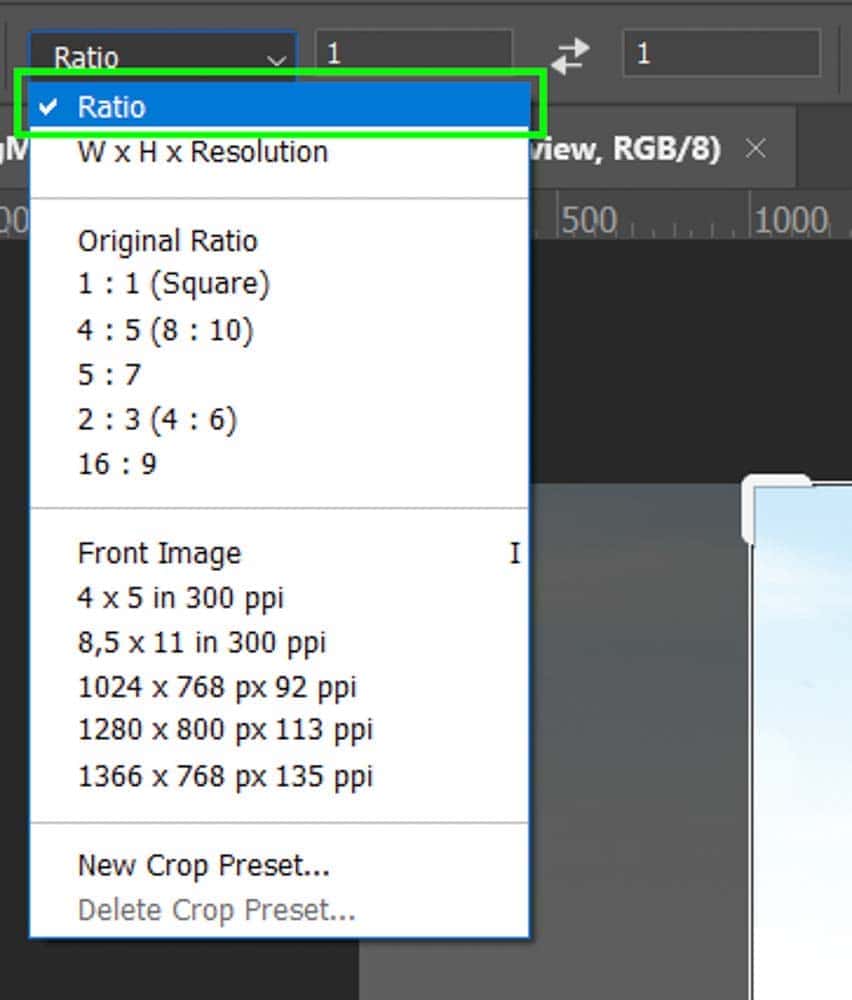
Next, select the drop-down menu next to the Crop Tool icon in the Options Bar.
Select Ratio at the top of the drop-down menu, as this will enable you to set your image to any aspect ratio.
Step 3: Type In Your Desired Ratio
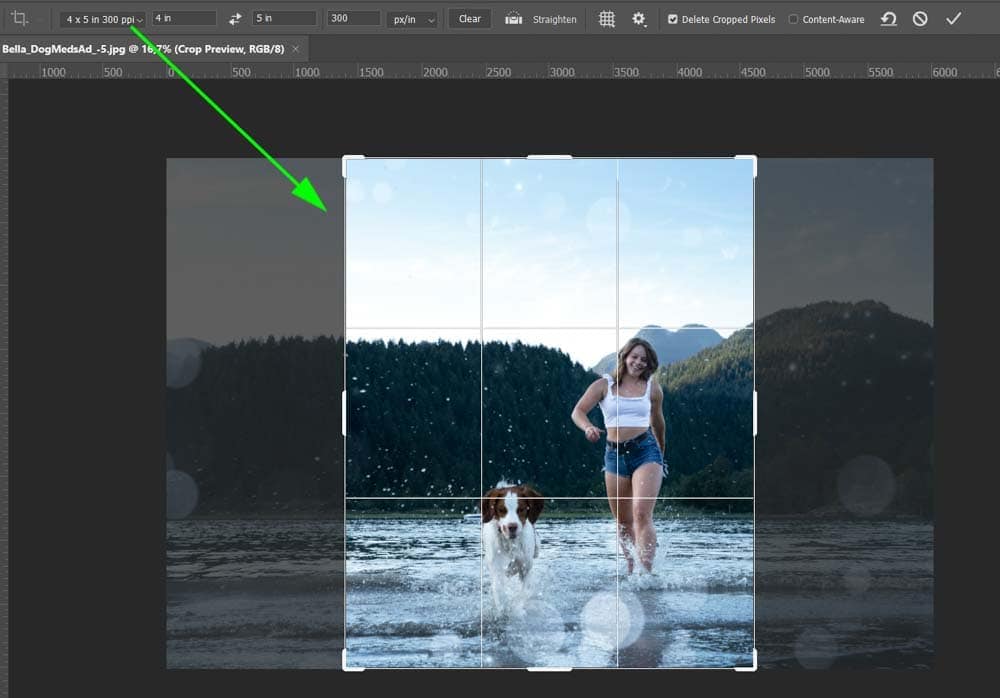
For our example, you will now type in 16 and 9 (or the ratio you want) to the two blocks to the right of the drop-down menu. Your image will now have the crop block based on your set ratio.

Step 4: Resize The Cropping Box (Optional)
You can move the crop box to keep the relevant parts of your image and crop the edges outside of the block. Simply use the navigation arrows on your keyboard to move the block around the image or pull the box inward to crop the photo more.

Step 5: Press Enter To Confirm The Crop
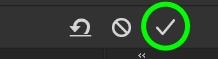
Once you are happy with the crop, click on the checkmark in the Options Bar or press Enter to confirm the crop.
You now have an updated aspect ratio and cropped image.

How To Save An Aspect Ratio As A Crop Preset
If you have a specific aspect ratio you want to use for multiple images, you can save your chosen aspect ratio as a preset. This will enable you to easily select this aspect ratio from the drop-down menu.
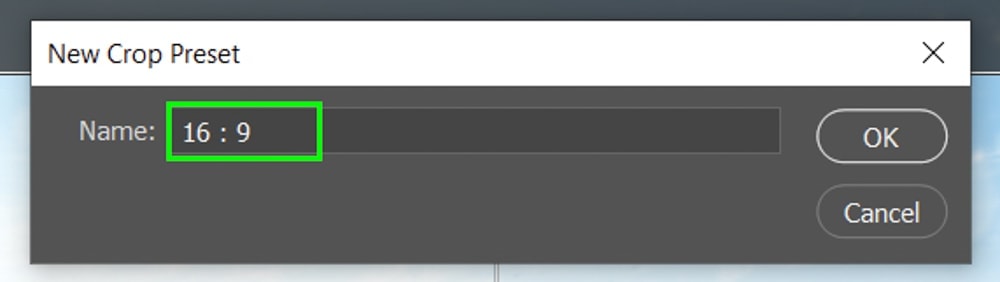
Start by following the steps to change the aspect ratio, and once you have entered your chosen aspect ratio into the blocks, select the drop-down menu again and choose the New Crop Preset option.
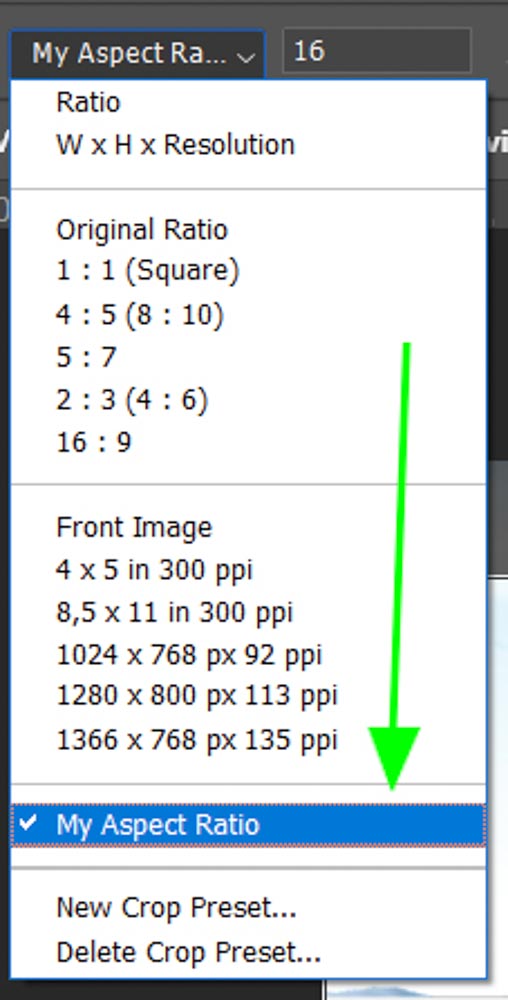
A box will appear where you can enter a name for your new preset. In this case, I have chosen My Aspect Ratio.
Once you enter a name and click OK, the new preset will appear in the drop-down list for you to quickly access it when needed.
Can You Change The Aspect Ratio Without Cropping?
Changing the aspect ratio may crop out parts of the image you wish to keep. If you want to avoid cropping elements out of your image, there are two tricks you can use to manipulate the image. Unfortunately, one method will lead to some distortion, so it may not look aesthetically pleasing if you try to save too much of the image.
The first method is done by reducing the image size to fit inside the new aspect ratio before slightly stretching the sides of the image to reach the aspect ratio.
To stretch the image, make sure the Delete Cropped Pixels box is unticked after choosing your ratio, and press Enter or the checkmark in the Options Bar to finish the crop.

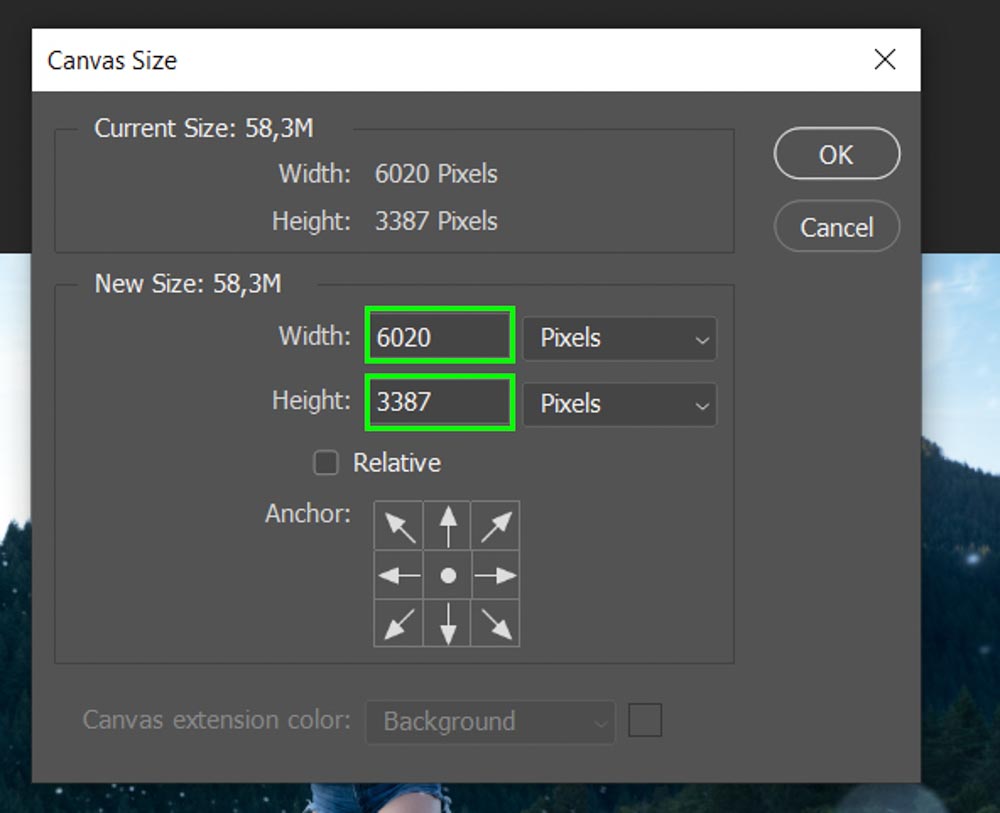
Next, go to Image > Canvas Size or press Control + Alt + C (Win) or Command + Option + C (Mac).
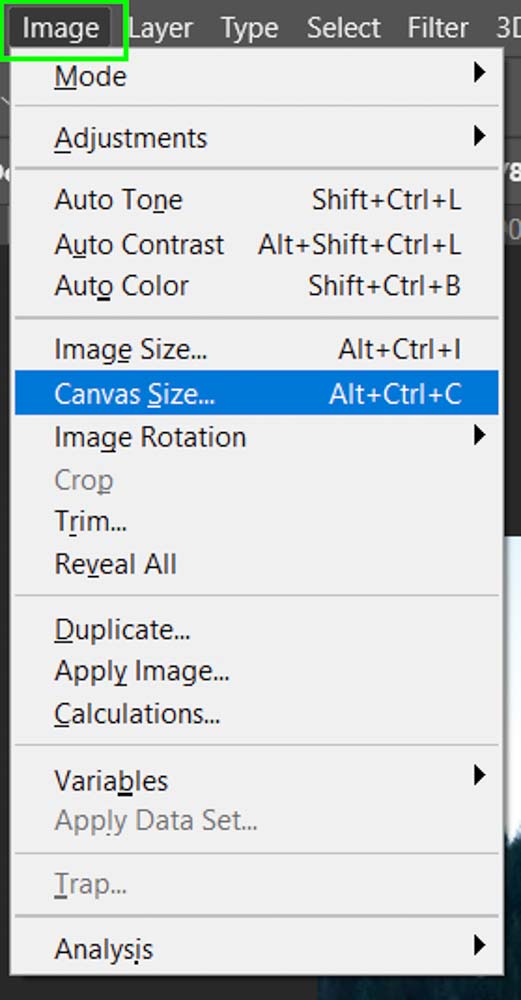
Increase the canvas size in the width and height boxes, but be sure to keep them in multiples of the aspect ratio you have chosen. The width should be related to the first number of the aspect ratio, and the height is the second number.
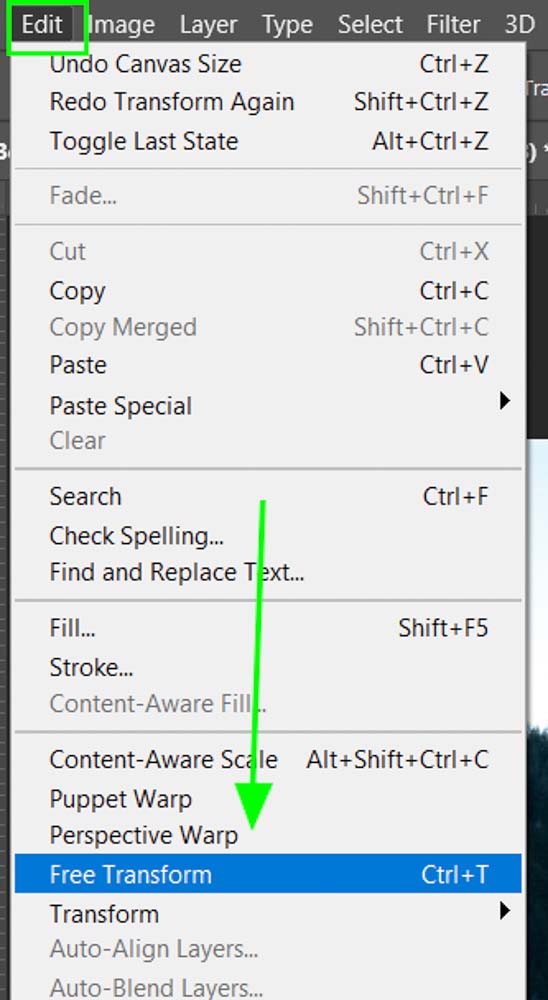
Once the canvas size has increased, go to Edit > Free Transform or use the shortcut Control + T (Win) or Command + T (Mac).
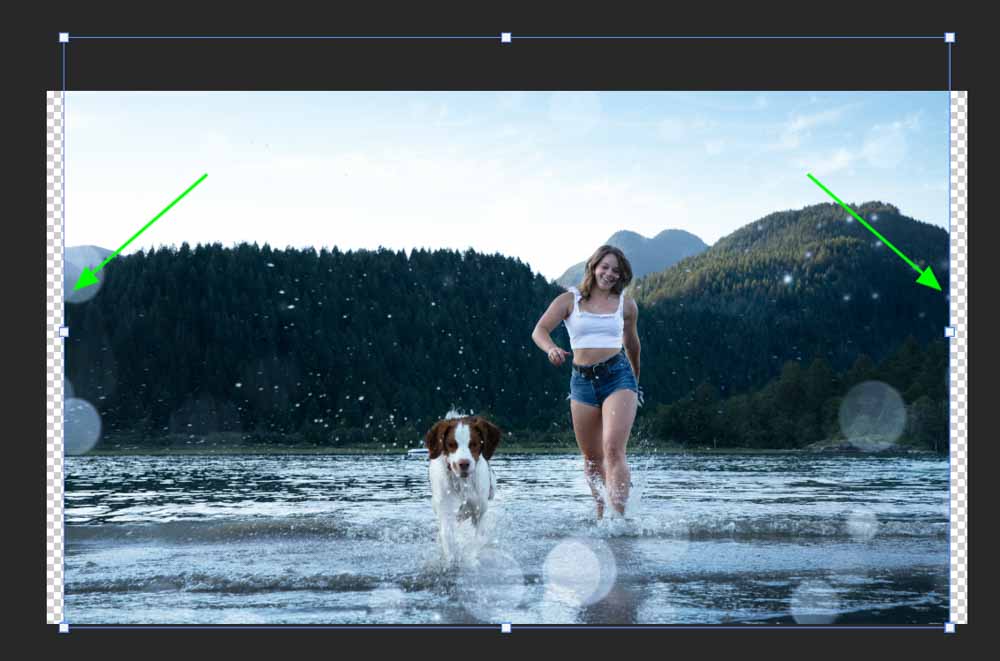
Then, simply drag the sides of the image to the end of the canvas. It will stretch your image slightly, so be aware of the distortion.
If you prefer not to stretch the image, increase the canvas size in line with your chosen aspect ratio before decreasing the image size to fit your canvas. Then, simply create a white background around the image.
Following these steps enables you to easily crop and resize your images to the correct dimensions for any frame size. This means you won’t have to worry about printing photographs that don’t fit your frames anymore. Try out the extra tips to avoid losing too much of your image, but be careful not to distort it too much.
Now, this tutorial covered how to crop the entire canvas, but what if you want to only crop a single layer? Luckily, you can learn how here!
Happy Cropping!
