

How To Clean A Camera Lens Without A Cleaning Kit
As prepared as we like to think we are, there are times where you won’t have all your cleaning supplies to clean a dirty lens. So what can you do to clean a camera lens without a cleaning kit?
The best way to clean a camera lens without a cleaning kit is with your breath and a microfiber cloth. Lightly breathe onto the lens element to fog it up. The moisture from your breath works well to lift any dirt or oil from the glass. Next, take a microfiber cloth and gently wipe the lens in circular strokes. Take your time working from the center, outwards, to clean the lens.
Household Items You Can Use To Clean A Camera Lens
If you’re in a pinch and need to clean your camera lens without a cleaning kit, there are a few household items that will do the trick. Most of the items below are things you likely already have around your house, so it’s extremely cost-effective!
1. A Microfiber Cloth
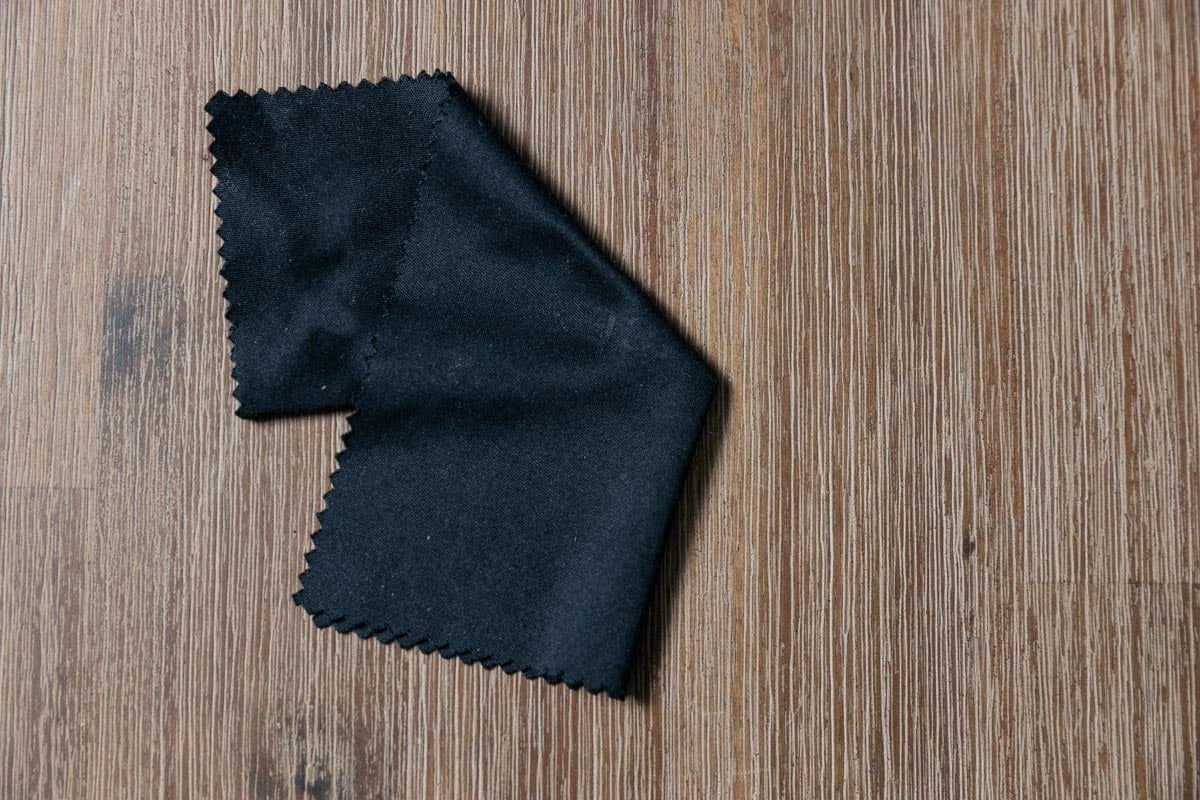
Microfiber cloths are used for a ton of different things besides lens care. Whether you have one to clean your eyeglasses, watch your watch collection, computer screen, or even dry your dishes! A microfiber cloth is a blend of extremely small fabric stands that are thinner than a strand of silk. It makes these cloths extremely porous, yet delicate and soft for cleaning with so many tiny fibers. In terms of camera lenses, a microfiber cloth will effectively wipe away any moisture while lifting up any dirt or oil.
A microfiber cloth works best when you have a finger smudge on the lens. With so many fine strands of fabric, it does a great job to break up and lift these hard to clean oil spots.
2. A Turkey Baster
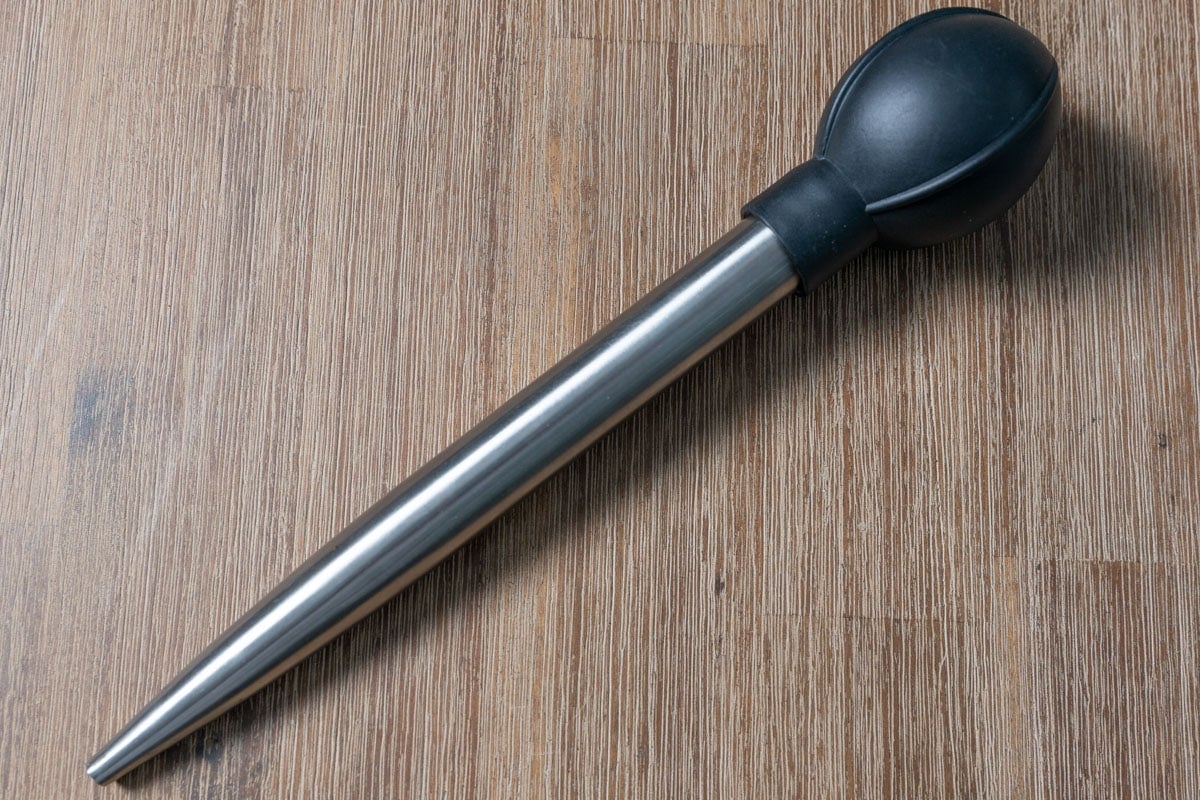
Like I mentioned in my other post, sharing how to clean a camera lens, blowing away any dirt or debris from your lens is an important first step. This is because small amounts of dust particles can scratch the lens coating when it’s rubbed around. To make sure all of these are gone before you clean the lens, you need to blow away any big debris first. Typically you would use a dedicated lens puffer, but a turkey baster will do the trick as well.
A turkey baster has a large rubber ball at the top that can be squeezed to blow air out its nozzle. Although it won’t have as powerful an air blast, it does work well to blow away those initial dust particles. This was actually my go-to puffer method before I decided to buy a real lens puffer.
If you already have the tool to solve the problem, why buy another tool, am I right?
A turkey baster is one of my favorite ways to clean a camera lens without a cleaning kit because it does nearly as good a job as a puffer!
3. Eyeglasses cleaner

If you need an effective way to lift up the toughest smudges and dirt spots, you’ll need to use a proper lens cleaner. Now I’m willing to bet that someone in your house owns glasses, and where there are eyeglasses, there is also lens cleaner! Like photography lens cleaner, eyeglass cleaner is a basic alcohol solution that breaks up grime on your lens. It’s totally safe to use on your camera and does an incredible job to clean.
When you use an alcohol-based lens cleaner, you don’t need to use a lot on your lens. One or two sprays is enough to get the job done. As tempting as it is, you don’t need to douse the lens in cleaner to get the job done.
Rather than spraying the cleaner directly onto the lens, try spraying it onto a microfiber cloth first. By using a damp microfiber cloth, you won’t have as bad of streaking to deal with, and you’ll get a cleaner lens in less time.
4. Your Breath
For this article’s sake, I’m lumping your respiratory system into the same category as household items. I mean, we all have one! If you don’t have a cleaning solution, using your breath is an extremely easy way to clean a camera lens without a cleaning kit. The reason this works is that when you exhale onto the lens, it builds up condensation. This condensation breaks up the dirt and grime on your lens, making it easy to wipe away with a microfiber cloth.
As archaic as this technique might sound, this is a super basic trick used by photographers of all levels. There have been more times than I can count when I had to use my breath to clean my own lens. Especially when you’re traveling or hiking, you don’t always have the perfect lens cleaning kit with you at all times.
But you do always have your lungs!
How To Clean A Camera Lens With Household Items
With all of your household lens cleaning items in check, let’s discuss the step-by-step cleaning process.
Step 1: Blow Away Any Dust With A Turkey Baster
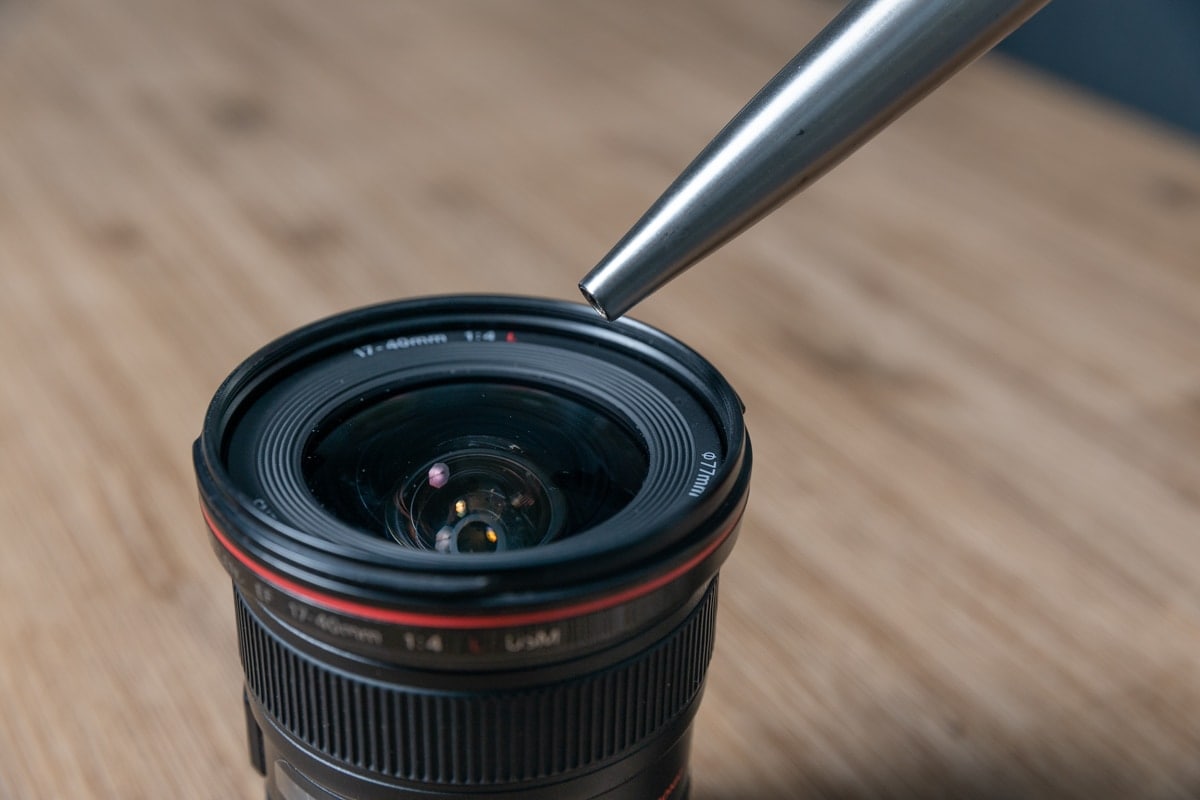
Before you touch the actual lens, make sure it’s clean of any larger dust particles. With a turkey baster, point the nozzle to the camera lens without actually touching it. Squeeze the baster a few times to blow air on the lens and blast away any notable debris.
Now you might be tempted to skip this step and try using your mouth to blow away dust instead. The reason your mouth doesn’t work is that it’s really easy to get a few drops of saliva on the lens. Your saliva will end up leaving more streaks on your lens after you clean it and cause you more work later on.
Make life easy for yourself and stick with the turkey baster.
Step 2: Use A Cleaning Solution Or Your Breath
Before you wipe the lens, you need something to lift up the grime and oil. As mentioned above, the best way to do this is with an alcohol-based cleaning solution or your breath. Using a proper cleaning solution may lift any hard to clean spots faster than your breath, but both will do the job.
If you use a cleaning solution, take your microfiber cloth and spray it one or two times with the solution. You want to make the cloth slightly damp, but not dripping wet.
If you go for the breath option, gently exhale onto your lens element to fog up the glass. You may need to do this a few times during the cleaning process!
Step 3: Wipe Using A Microfiber Cloth
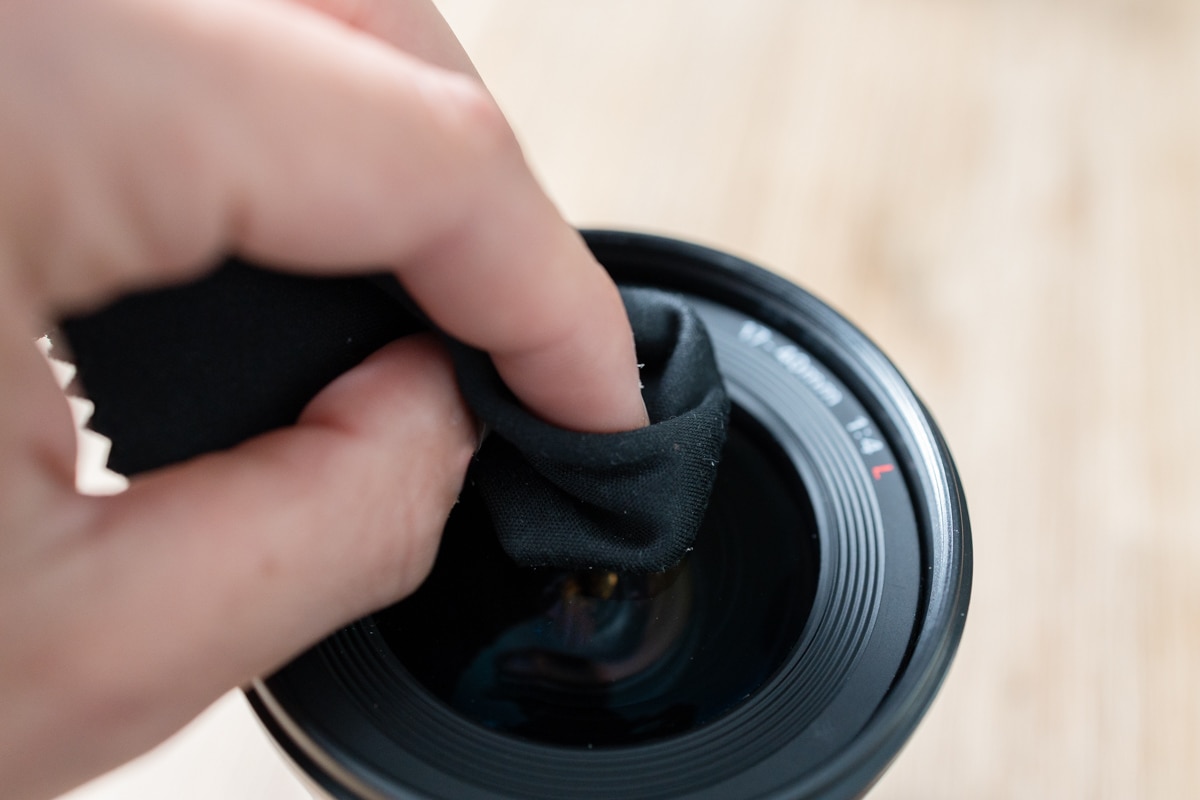
Now wipe your lens in a circular motion starting from the middle. The idea here is to do gradual, small wipes working outwards from the center. This is the best way to clean any trouble areas and thoroughly cover the whole lens. If you were to use broader strokes, you’d end up with more lens streaking that just creates more work to clean.
When you’re wiping the lens, you want to press the cloth firmly against the glass. Enough to feel like you’re wiping things away but not so much that you feel like the hulk. With a firm and consistent wipe, any oil spots will quickly disappear.
Do You Need A Cleaning Kit For Lens Care?
Now that you’ve seen an effective way to clean a camera lens with household items, it begs one question. Do you really need a cleaning kit at all?
While you’re shooting out on location, you don’t always need to be packed to the brim with cleaning supplies. Plus, you likely don’t have the time for a thorough clean while you’re on the go. Using these tricks to clean a lens without a cleaning kit is ideal for getting rid of grime in less time
With that said, a proper cleaning kit does have its advantages. With an actual puffer, lens wipes, and lens cloths, you can get a deeper clean of all your camera gear. Especially when cleaning your filters and lenses after a long shoot, a proper cleaning kit can be more effective. Ultimately it’s up to you to decide which method you prefer using. The most important part is that your lens is clean, and it doesn’t affect your photos!
Conclusion
So that’s how to clean a camera lens without a cleaning kit, only using household items. With these tips, you don’t need to run to the store to find the right supplies. Instead, you can find everything you need for spotless lenses right at home! It’s useful to strike a balance between these methods and those used when cleaning with a dedicated cleaning kit. If you need to clean a bunch of your camera gear at once, it might be better to use actual lens cleaning supplies. If you just need to quickly buff out an oil smudge while your shooting, this post’s techniques will likely serve you better.
– Brendan 🙂
