


Whether you’re sharing your images online or with a client, knowing how to create a watermark in Canva will limit the unlicensed use of your creative work.
Here, you will learn how to make a standard text watermark as well as how to add your own logo as a watermark to your images.
How To Create A Watermark In Canva
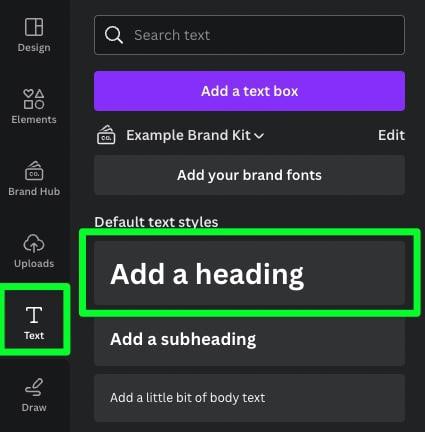
Step 1: Add Some Text To A Blank Canvas
First, add a text block to a separate blank document. You can add this text block by selecting Text in the left-side menu bar and then clicking the size of your text block under Default Text Styles.
With your text block on the canvas, double-click inside the block, then type out your message. You can change the font in Canva to create a bold watermark. You should also resize your text as needed using the corner handles.

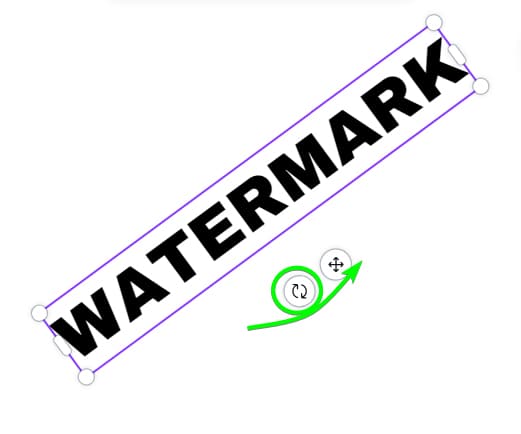
Step 2: Rotate Your Watermark (Optional)
There are many ways to present your watermark; a common practice is to rotate it so it fits diagonally across the entire image. To rotate your watermark, select it, then use the Rotate Button until your text is tilted to your desired amount.
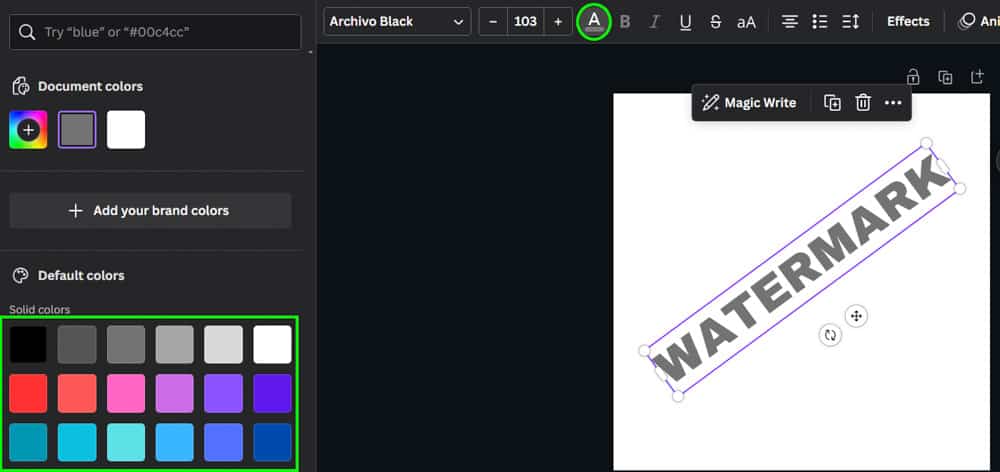
Step 3: Change The Color Of Your Watermark
Changing the color of your watermark will help determine how visible it is on your image. To change the color of your watermark, first, click it to select it. Then, click the Text Color Picker above the canvas. Choose a dark color in the Side Panel if you want your watermark to be prominent, or choose a lighter color if you want your watermark to be more subtle.
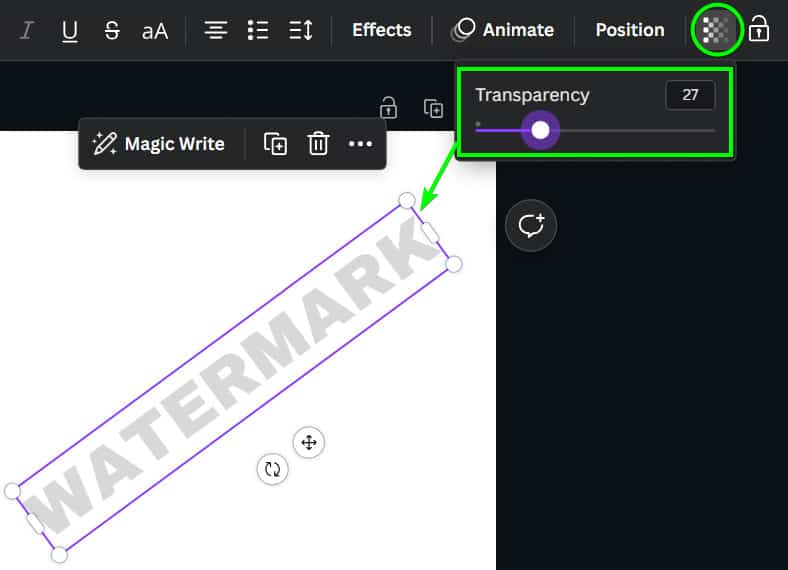
Step 4: Adjust The Transparency
To change your watermark’s transparency, click on your watermark to select it. Then, click the Transparency button above the canvas. You can now drag the Transparency Slider until you have the visibility you want for your watermark.
Step 5: Export Your Watermark To Your Computer
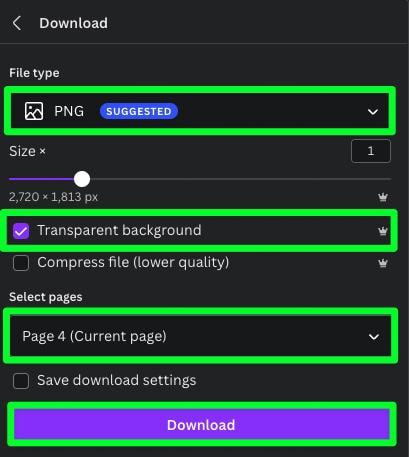
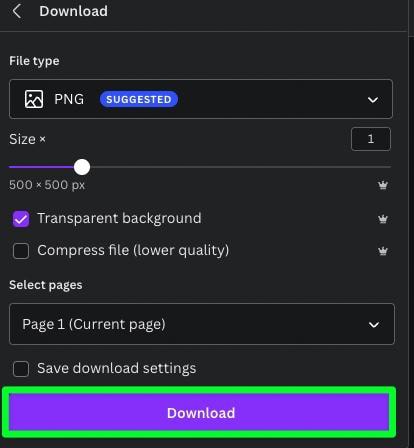
Your watermark is complete and needs to be downloaded to your hard drive so you can place it over your image. To start, click the Share button in the top right corner of the screen. Then, in the submenu that pops up, click Download.
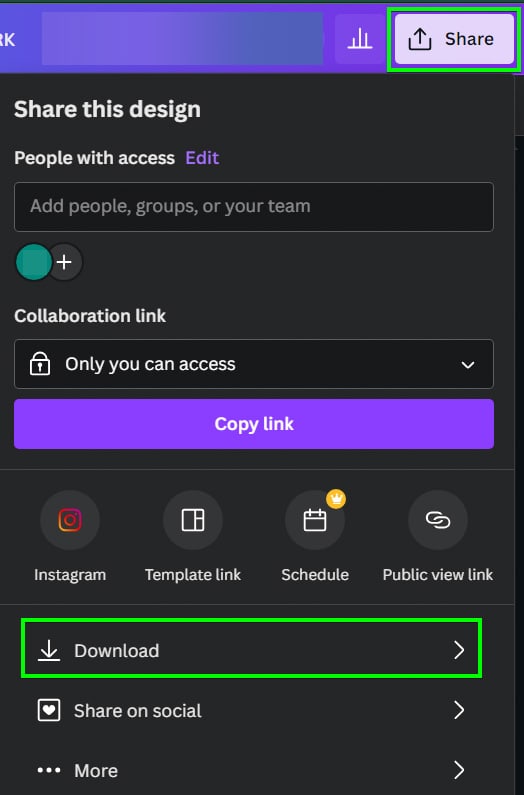
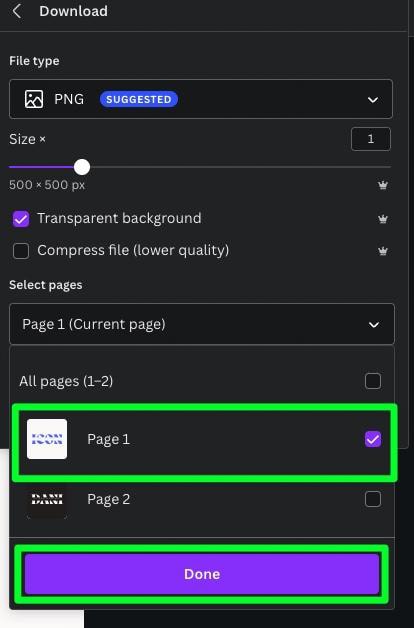
In the next submenu, ensure that:
- PNG is selected under File Type.
- Transparent Background is ticked on.
- Your current page is selected under Select Pages.
- When you’re ready, click Download.
The watermark you just created can be used for other projects outside the one you’re working on, so feel free to save it in a folder so you can easily access it later.
Step 6: Add The Watermark To Your Image
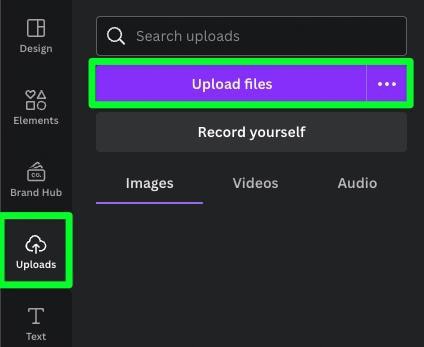
Before you can add your watermark to your image, you must first upload it to Canva. To do this, select Uploads, then click Upload Files at the top of the Side Panel. You’ll be directed to search for the watermark file on your hard drive and then upload it to Canva.
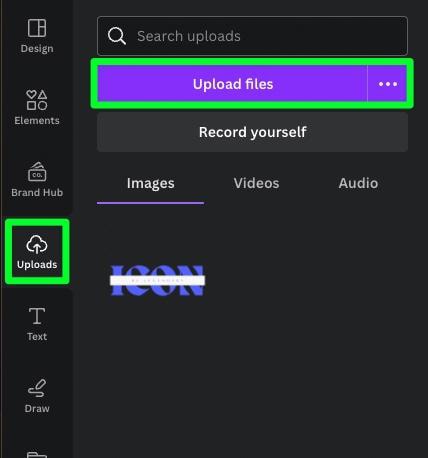
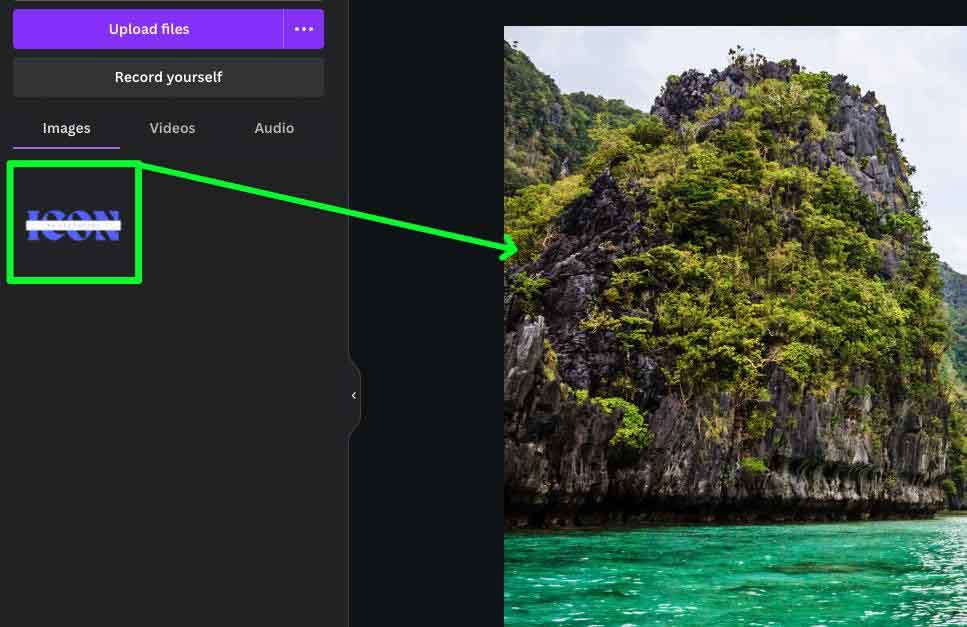
Once your watermark is uploaded, drag it from the Side Panel to the canvas with your image on.
Step 7: Adjust The Size Of The Watermark
Finally, to fit your watermark to your photo, first line it up to one of the corners of the page, then drag the opposite side corner handle toward the other corner of the canvas.

How To Turn Your Logo Into A Watermark In Canva
Step 1: Find And Edit A Logo Template (Optional)
You can create a logo from scratch, but using a pre-built logo template to start as your base is much easier. On the Canva homepage, search for “logo” in the search bar.

Click on the template that works best for your project. To edit any line of text in your logo template, double-click the text block first, then type in your message. Then, repeat this process for any other lines of text on your logo template.

Step 2: Change The Font And Color Of Your Text (Optional)
Select the text block you want to change, then click the Font Drop-Down Menu. You can also add more fonts to Canva if needed.
Adjusting the color of your text depends on how much you want your watermark to be visible on your image. You can also use a similar process to change image and element colors in Canva.

Step 3: Export Your Logo To Your Computer
Export the logo in the same manner as the first method. Click the Share button in the top right corner of the screen. Then, click Download in the submenu that pops up. In the options that pop down, ensure PNG is selected in the File Type menu, and that Transparent Background is enabled.
Some logo templates come with multiple pages, so under the Select Pages drop-down menu, select the page with your logo. When ready, click Done.
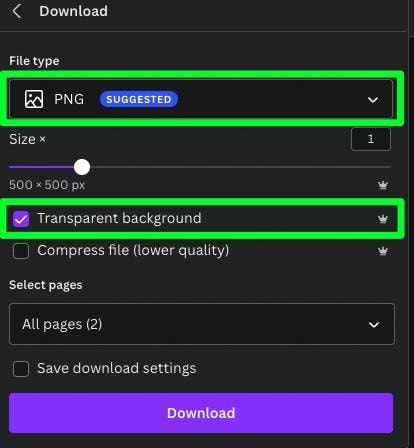
Then, click Download.
Step 4: Upload Your Logo To Canva
To add your logo as a watermark to your photo, you must upload it back into Canva. To do so, click the Uploads tab, then click Upload Files at the top of the Side Panel.
After clicking Upload Files, you’ll be directed to find your logo file on your hard drive. Once you do, you’ll find your logo in the Uploads Panel under Images.

Step 5: Add Your Logo To Your Image
Now that your logo is uploaded to Canva, you can finally add it to the image that you have added to Canva. You can add the logo to your image by dragging it from the Side Panel onto the canvas.
Once your logo is on the canvas, you can move it where you want your watermark. Also, you can use one of the corner handles to shrink or expand the logo.

Step 6: Adjust The Transparency Of The Logo
To make your logo a watermark, you need to make sure it’s just barely visible. To do this, you need to adjust the Transparency of the logo. First, click on the logo to select it, then click the Transparency button above the canvas. Adjust the Transparency Slider to the amount that works for your project.

You now have a logo added to your image. You can size it how you like and place it wherever you like.

No matter which option you choose, you can now just go to your Uploads folder in Canva to drag and drop your watermark templates whenever you need them in future projects.
Happy editing!
