Creating wavy text is an easy way to spice up your designs in Canva, but it can be confusing to make it happen. Luckily it’s quite easy to do with the help of the curve text effect!
There are two main ways to create wavy text in Canva. You can make a “wavy sentence” by connecting two pieces of text and using the curve slider. Or, you can re-upload your text into Canva as a PNG and use the liquify tool to create your wavy text effect. I will show you both ways to pull this off.
How To Create Wavy Text In Canva
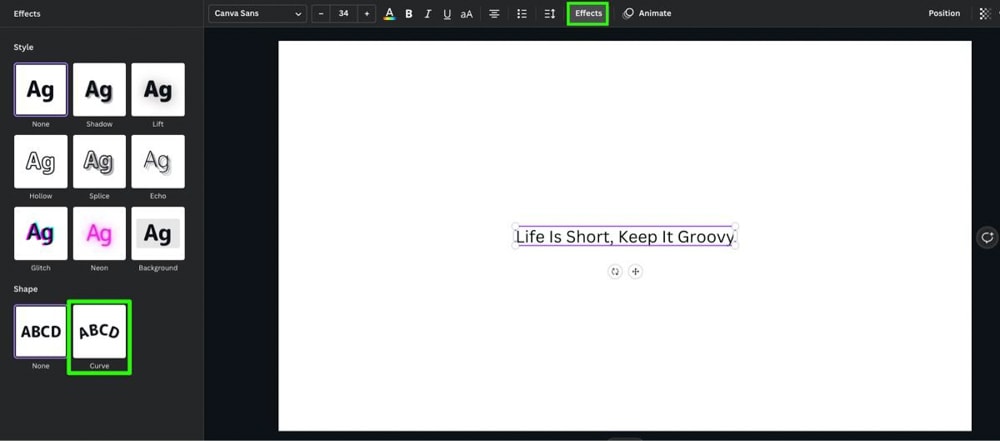
For the first method, you’ll learn how to use two different text blocks to form a wavy sentence. This method is best if you want the option to edit your text later in your design.
Step 1: Add A Text Block
To start, you first need to add a text block to your canvas.
You can easily add text to your canvas by clicking on Text in the left side menu and clicking on the big purple button labeled Add A Text Box. This will add a single text block to your canvas.
You can drop a text block in three different sizes by clicking on Add A Heading, Add A Subheading, and Add A Little Bit Of Body Text.
Once your text block is on your Canvas, you can double-click on it to add your custom text.
Step 2: Curve Your Text
To create a wavy text effect, select your text, then click on Effects.
In the available list of effects to choose from, click on the Curve effect at the bottom. This will bend your text into a half-circle.
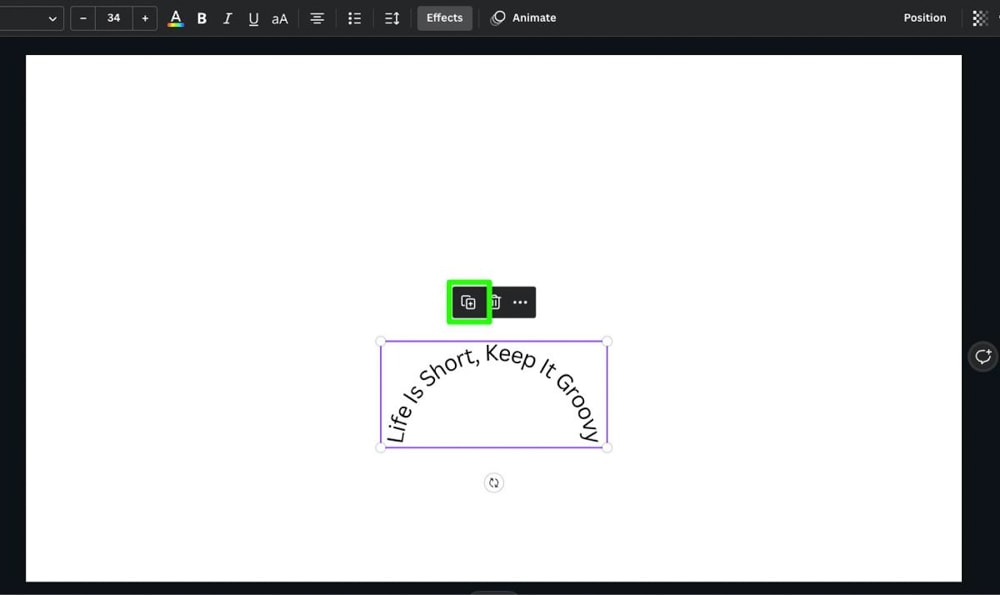
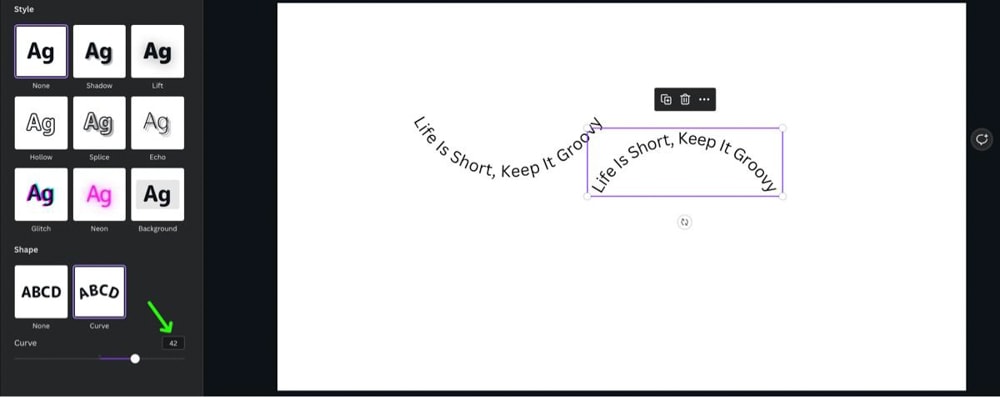
Step 3: Duplicate Your Curved Text
Click on your curved text to reveal the Mini Options Bar above it. Click the Duplicate button to create an exact duplication next to your original text.
Step 4: Adjust The Curves Of Both Pieces Of Text
Now it’s time to adjust the curves of both text blocks to mold your final wavy look.
Select your first text block and then click on Effects. You will find the Curve slider at the bottom of the panel. Adjust the slider back and forth until you find the perfect curve for your project.
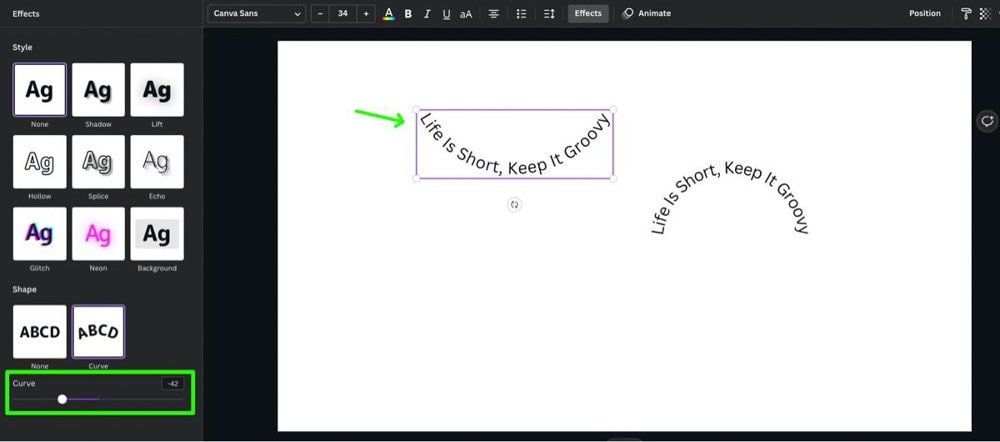
Take note of the number above the Curve Slider.
Select the other text block. Adjust the Curve Slider to the opposite number of the curve of your first text block. For example, if your first text block is -42, ensure the curve of the second text block is 42.
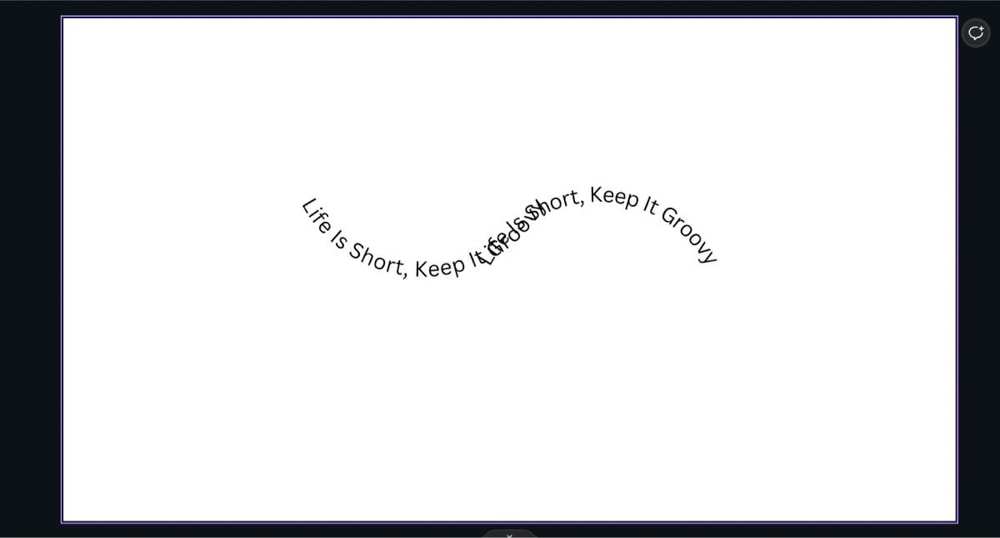
Step 5: Line Up Both Text Blocks
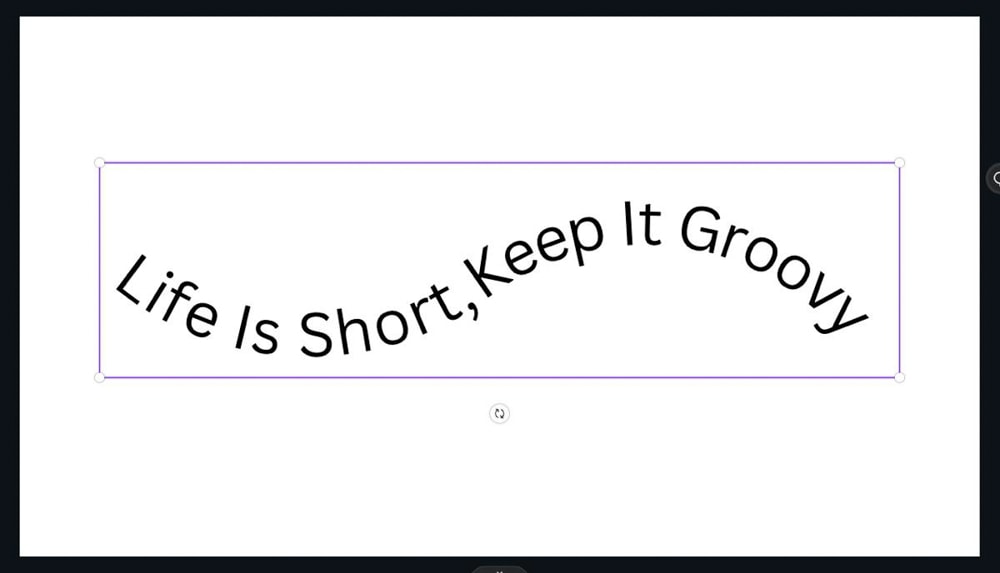
Place your second text block on top of the first one, lining them up to create the wavy look you need.
You will have overlapping text. You will fix this in the next step.
Step 6: Edit Both Text Blocks
Double-click on your first text block to edit its contents. Keep the first half of your text, and then delete the other half.
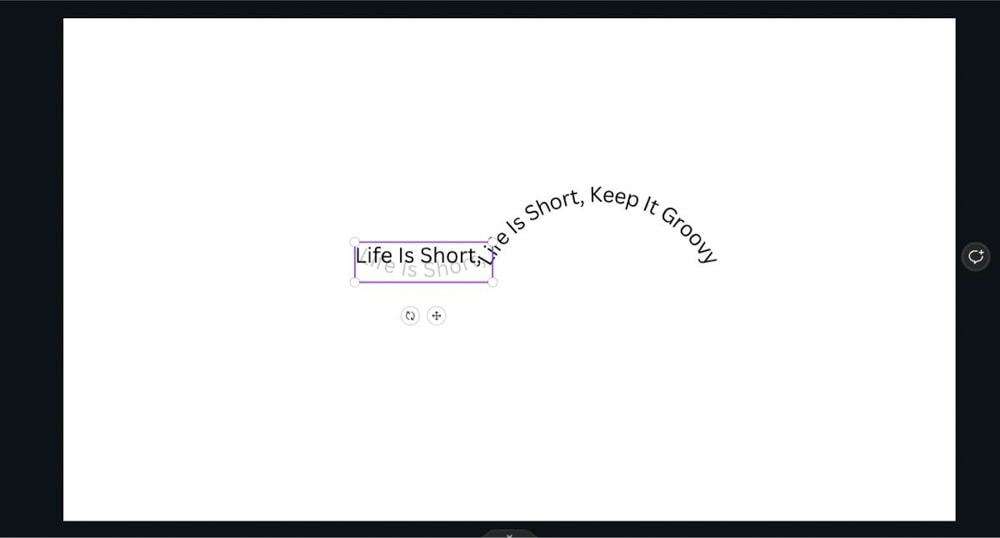
Do the same thing to your second text block, but delete the first half of the text this time.
You should now have the complete sentence split up into two text blocks.
Line them back up to see a rough draft of your wavy effect.
Step 7: Adjust The Curves Of Your Text
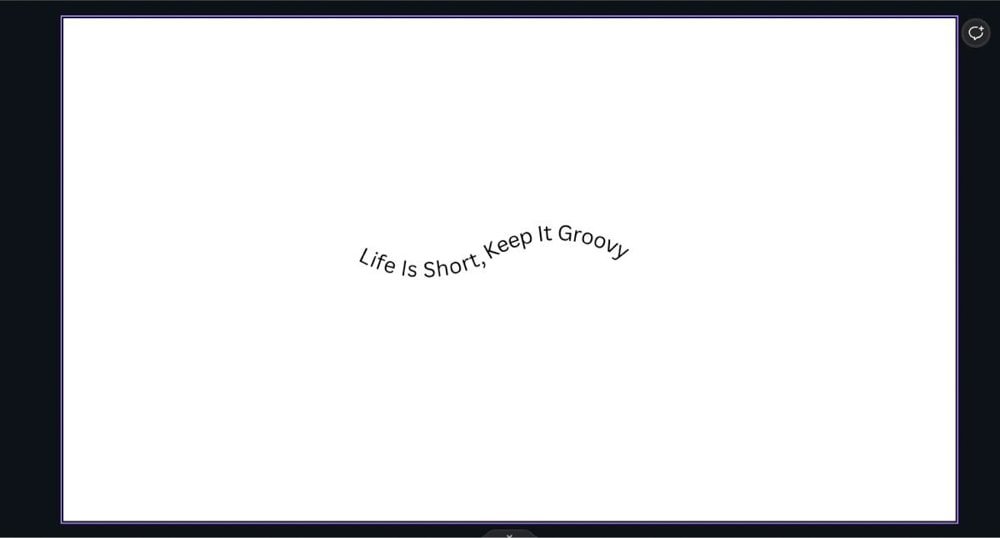
After deleting the unneeded text from the last step, you may have to make some adjustments to tweak the look of your curved text.
You can do this by selecting one of your text blocks, clicking Effects, then adjusting the Curve slider at the bottom of the Effects panel. Repeat the same process with the other text block as necessary.
You can further adjust the position of your curved text blocks by selecting the text block and using the Rotate button.
When lining up both text blocks again, remember that you can use the arrow keys to nudge each text block into place.
Step 8: Group Both Text Blocks Together
To make your wavy text easier to move around and edit, group the two text blocks into one text block.
To do this, select both text blocks by dragging your mouse over them.
In the right-hand corner of the screen, click on Group.
You will know if this works when you see a single purple bounding box around your text instead of two separate ones.
Step 9: Add Your Finishing Touches
With your text in its final wavy form, you can add finishing touches to your design. This will be different for every project, but here are some suggestions.
You can change the size of your wavy text by selecting it and then pulling one of the corner handles.
You can change the color of your text by selecting it, then clicking the Text Color button at the top. You can then choose the perfect color you need.
You can add one more effect (in addition to Curve) by selecting your text and clicking on the Effects button. A list of Effects will pop up, allowing you to add an effect from the list.
Finally, add a background to make your wavy text stand out.
How To Make Wavy Letters In Canva
Sometimes, you don’t need to make your entire sentence wavy, just one word or letter.
Achieving this effect in Canva requires a bit of a workaround, but it’s not too tricky once you get the hang of it.
Step 1: Add Your Text
The first step to creating wavy letters is to add text to your canvas. You can do this quickly by selecting the Text panel, then clicking on Add A Text Box or one of the heading sizes below it.
With the text block added, you can now double-click it and customize the wording.
Step 2: Adjust The Size Of Your Text
Before we get too far into the process, now is the time to change the size of your text.
Select your text block, then drag one of the corner handles to adjust the size.
Step 3: Change The Font Of The Text
If the default font doesn’t work for you, you can change the font to one of the many free fonts available on Canva.
Select your text, then click on the Font Menu in the Options Bar. Choose the best font for the job in the left-hand panel. These adjustments are necessary at this stage because you can’t edit the text after the next step.
Step 4: Download Your Text As A PNG
In order to pull this wavy letter look off in Canva, you must first create a PNG out of your text so you can edit the image later.
When you’re ready, click on the Share button in the top right corner and then click on Download.
When prompted, make sure to choose PNG under File Type. This is the best file type to work for what we’re trying to do.
A very important option to check on is the Transparent Background option. Clicking this option will ensure only the text and none of the background will come with it.
When you’re done, click on Download.
Step 5: Upload The PNG Back Into Canva
With the PNG downloaded to your computer, click on the Uploads tab in the side panel. Click on Upload Files and find the PNG you just created.
Once your PNG is loaded into Canva, click it or drag it over to a blank canvas.
Step 6: Liquify The PNG
Here is where the bulk of the effect comes from.
First, select your text, then click on Edit Image.
Scroll down the left side panel until you find Liquify. Click on Liquify, then confirm your choice by clicking Use when prompted.
Your text will automatically look wavy once you apply Liquify.
You have many Liquify options to choose from. For the best wavy letter look, click on Shake.
If you click on the Shake filter again, you will be presented with options for how you would like your effect to look. Play around with the options and see what works best for you.
Step 7: Change The Color Of Your Text
Since your text is now a PNG, you will have to use a filter to change its color.
Select your text, then click on Edit Image. Scroll down to about the halfway point to find Duotone. Click on See All to see all of your choices.
With all the Duotone options opened up, you can now choose the best one for your project.
Also, remember that you don’t have to be married to the filter’s colors.
Once you select your filter, click on it again to reveal its options. From there, you can change the colors to whatever you would like.
Step 8: Adjust The Size Of The PNG
Because your image is a PNG, you should take a different approach when adjusting its size.
First, select the PNG to reveal the bounding box and the side handles. Drag each side handle closer to the text to crop your PNG, eliminating all of the space around it.
With your PNG cropped, you can now adjust its size by dragging one of the corner handles.
Step 9: Add The Finishing Touches.
This step depends on the design you’re going for.
Now is the time to add any more text that you need for your project.
Finally, you can add a background to make your wavy text pop.
Ultimately it’s pretty simple to create both forms of wavy text in Canva, but it all depends on the style you prefer!