

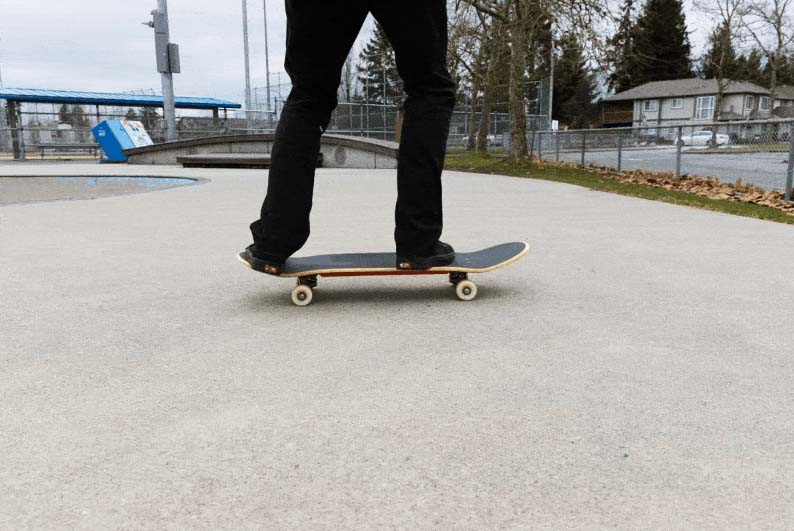
Most people think of Photoshop when editing and creating static images. However, you can edit a GIF in Photoshop, and the process is relatively easy, even for beginners. If you have a GIF you created or received from someone else, you can open it in Photoshop and quickly edit the layers that make up the GIF.
I will show you how to edit a GIF in Photoshop, including editing all the frames together, editing individual frames, changing the speed, and exporting the edited GIF. Even if you’ve never worked with a GIF, you can follow along easily.
How To Edit A GIF In Photoshop
Step 1: Go To File > Open To Open Your GIF
Click the Open button in the Start window, go to File > Open, or use the shortcut Control + O (Win) or Command + O (Mac).
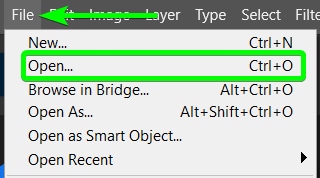
Locate the GIF file on your computer using Windows Explorer or Finder, select the file, and click Open.
Note: The file must be a GIF to open as editable layers. If the file isn’t visible when trying to open it, you may have an incorrectly saved GIF. Ensure the extension is .gif or re-save the file in the correct format before opening it in Photoshop.
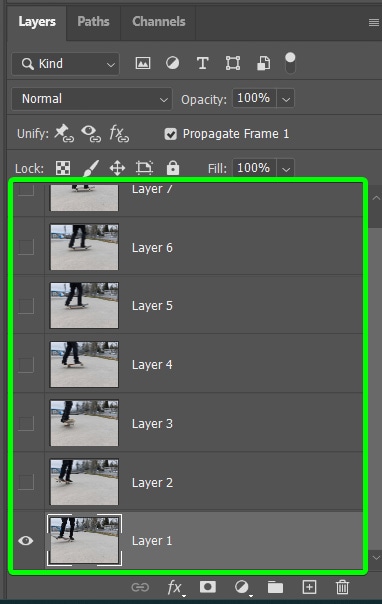
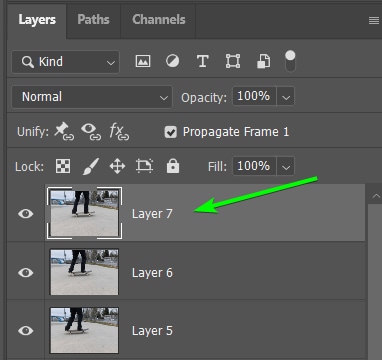
Once you open the file, the Layers Panel appears with several layers. These are the static images that make up the GIF. Before editing, open the Timeline Panel by going to Window > Timeline. This will enable you to see the frames and edit the GIF speed, which I explain further in the article. You will see the frames that create the GIF in the Timeline Panel at the bottom of the workspace.
Step 2: Edit All The GIF Frames By Adding Adjustment Layers
Once your GIF is open in Photoshop, you can edit all the frames simultaneously. Adding edits to a GIF is the same as modifying a static Photoshop file with layers. You can add as many adjustment layers as you’d like to the layer stack, and it will add the effects to all the layers/frames.
First, select the top layer in the layer stack so that the adjustment is added to the top of the pile. When the top layer is selected, add the adjustment layer by going to the Adjustments Panel and clicking the Curves option.

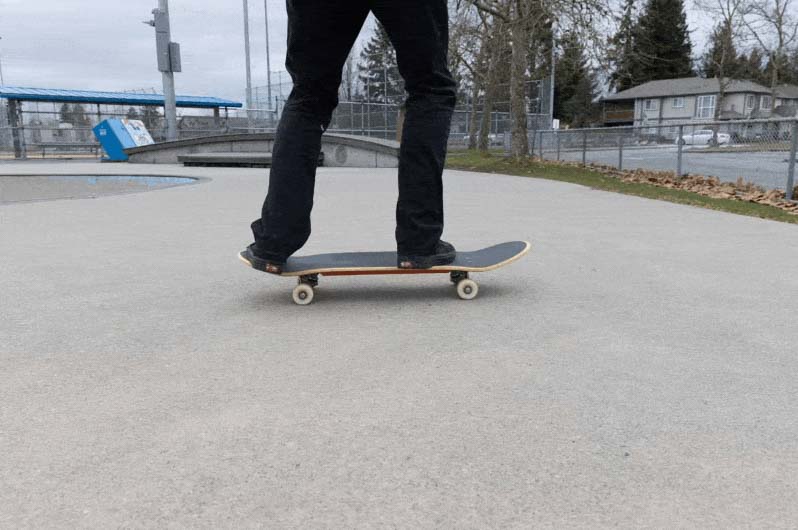
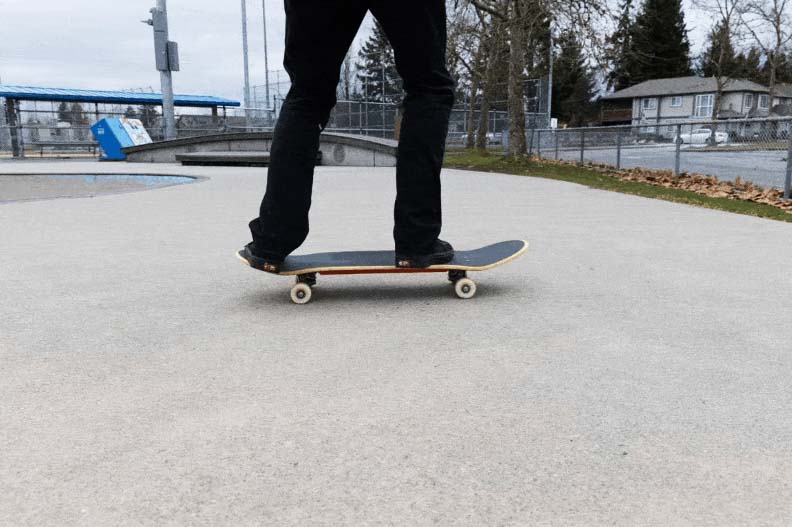
When you add the adjustment, the Properties Panel opens, where you can edit the adjustment layer. I will add contrast to the GIF by editing the Curves graph. You will see the changes made on the GIF layers. You can hide layers to see the effect applied to all the layers.
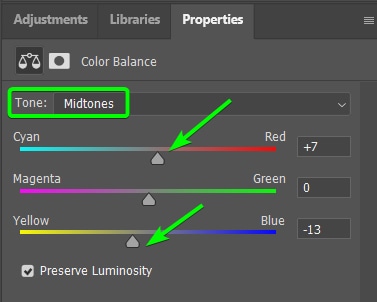
If you want to make more changes, you can add more adjustment layers to the GIF. Follow the same method as you did for the first one and keep adding the adjustment layers. In my case, I went to the Adjustments Panel and selected the Color Balance adjustment layer. I want the GIF to have a warmer feel, so I will increase the Reds and Yellows in the Midtones.
When you export the GIF, you will see that the effects are added to all the layers, so you have a GIF with warmer tones and more contrast than the original.
Step 3: Edit A Single Frame Of A GIF By Adding A Clipping Mask
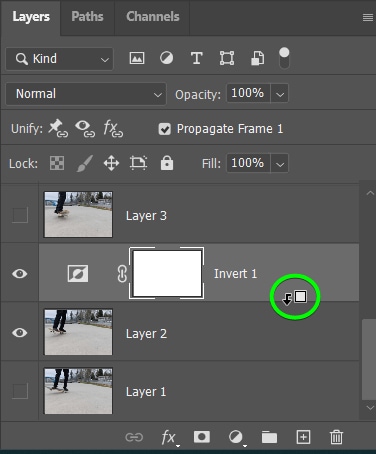
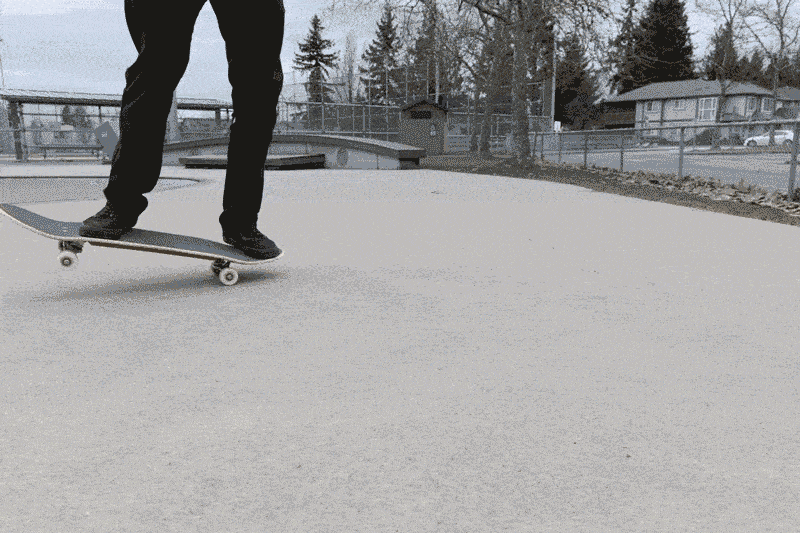
If you only want to edit a single frame of the GIF, you just need to add a clipping mask when you make the edit. Select the layer you want to add the edit by clicking on it. I want to add an effect to the second frame, so I select Layer 2. I want to create an inverted effect, so I select the Invert Adjustment Layer.
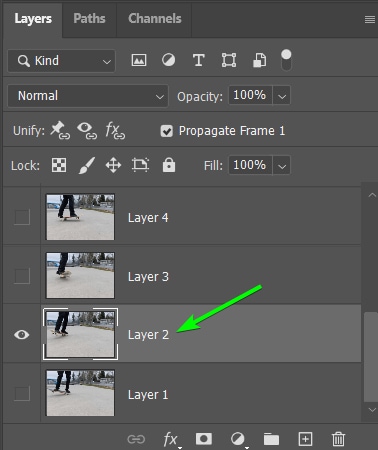

Once you add the effect, you will notice the edit is added to all the frames below the layer you initially selected. You can look at the Timeline Panel to see which frames were affected.
To ensure your edit only applies to one frame, ensure the new Adjustment layer is directly above the layer to which you want the edit added. Then, hold in Alt (Win) or Option (Mac) and hover your mouse between the adjustment layer and the frame layer until you see a downward arrow appear. Click to add the clipping mask.
Once the clipping mask is added, you will see the downward arrow icon next to the adjustment layer’s thumbnail. This shows that the edit only applies to the layer directly below it.
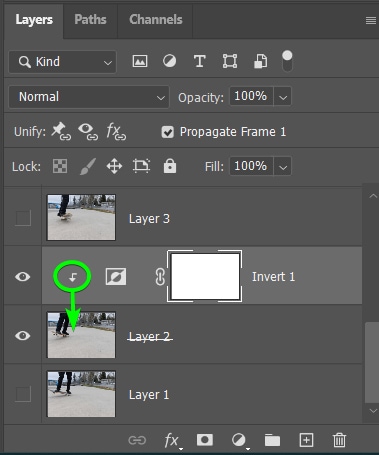
You can repeat this process on as many layers as you want. You can see the edits added to the individual frames in the Timeline Panel. If you export the GIF, you will only see the edits you added to the individual frame(s).
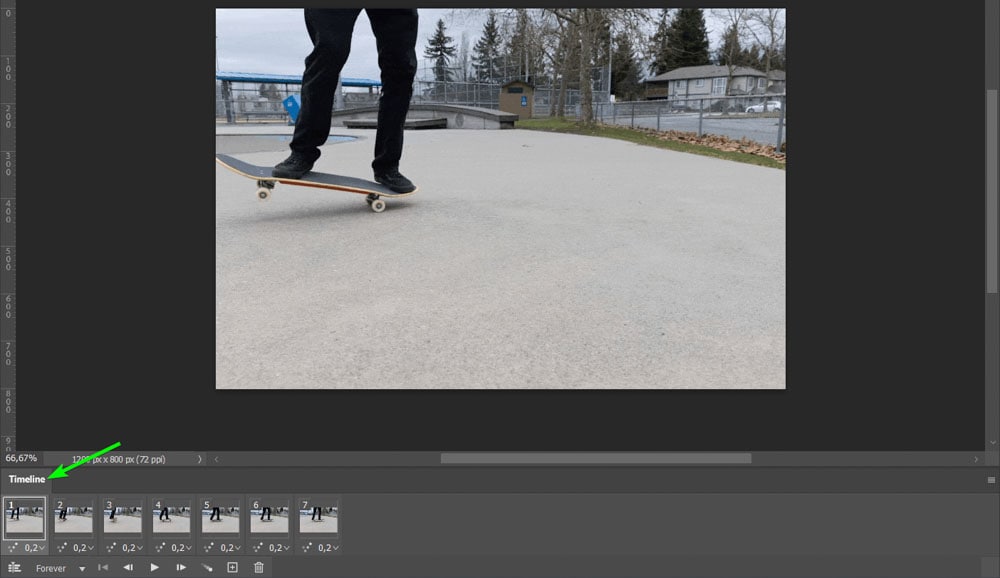
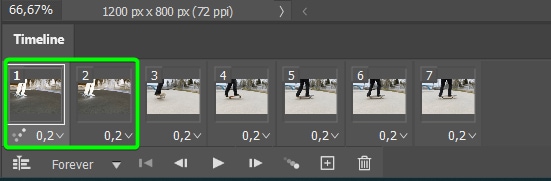
Step 4: Go To Window > Timeline To Edit GIF Speed Using The Timeline Panel
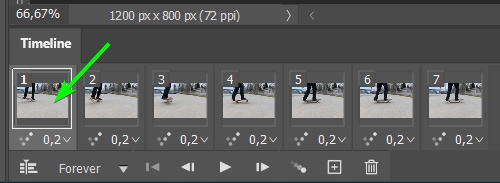
To edit the speed (also known as the frame rate or delay) you must ensure the Timeline Panel is open in your workspace. Open the Timeline Panel by going to Window > Timeline.
If you look underneath each frame in the Timeline Panel, you will see a number showing how long the frame will show before switching to the next frame. The time is shown in seconds, so currently, each frame will be visible for 0.2 seconds.
Note: The lower the frame rate numbers, the faster the GIF will be, while the higher the numbers, the slower the GIF will be.

To view how long each frame appears before switching to the next one, click the Play button in the Timeline Panel. The GIF will play in the workspace at the set speed.
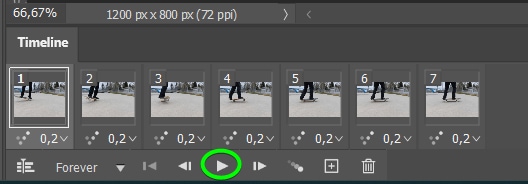
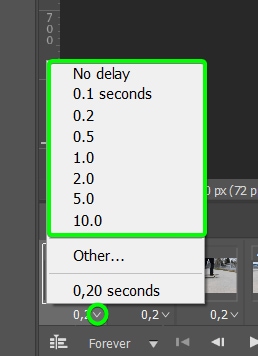
You can select the frame by clicking it to change the delay on a single frame. Selected frames are a lighter gray than the rest. Then, click the arrow next to the speed (currently 0.2) to select a new delay time from the options. You can choose from no delay, up to 10 seconds. If you want a custom time, click Other and type in your value.
Once you select a new frame rate time, click on it, and you will see the new time displayed under the frame without the other frames affected. This is the best technique if you want the frames to have different delays, so some are shown for longer than others.
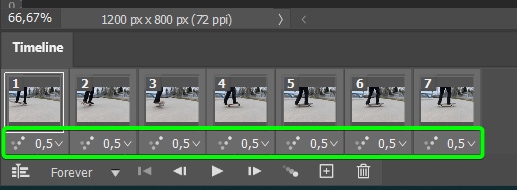
If you want all the frames to change at the same speed, select all the frames by clicking on the first frame, holding in Shift, and clicking on the last frame. Check that each frame is highlighted, indicating they are all selected. Then, click the arrow next to the time on the first frame and select the new frame rate you want to appear for every frame. You will see every frame change to the new time set.
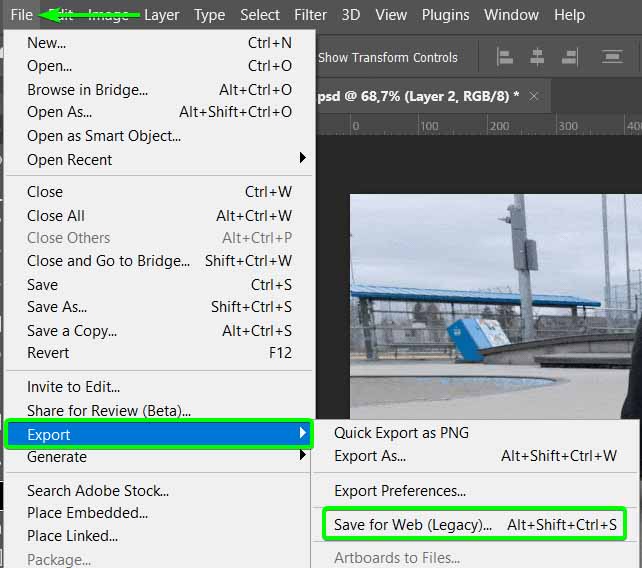
Step 5: Go To File > Export > Save For Web (Legacy) To Export The Edited GIF
To export the edited GIF, once you’re happy with it, go to File > Export > Save for Web (Legacy) or use the shortcut Shift + Control + Alt + S (Win) or Shift + Command + Option + S (Mac).
You will see the Save for Web panel appear. Choose a GIF preset from the Preset options at the top of the panel. Choosing a preset will automatically adjust the settings, so usually, you won’t need to edit the settings at all. You can choose between Dithered or presets with No Dither and between the color ranges; 128, 64, and 32.
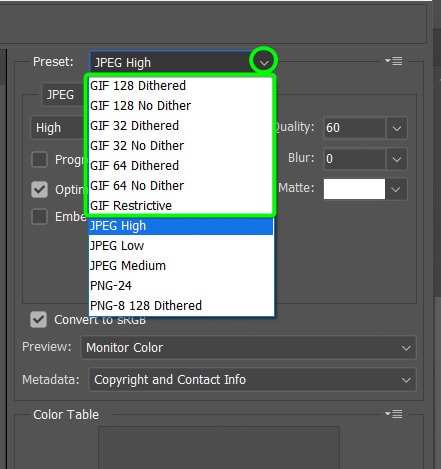
The dithered option uses available colors to add shading to the GIF, while the No dithered option chooses the closest color available. Ultimately, this means that dithered GIFs are of higher quality than GIFs with no dither, but the file size is generally much larger. The color range options determine how many colors will be shown in the final GIF. The more colors you include, the better the GIF’s quality, but the larger the file size.
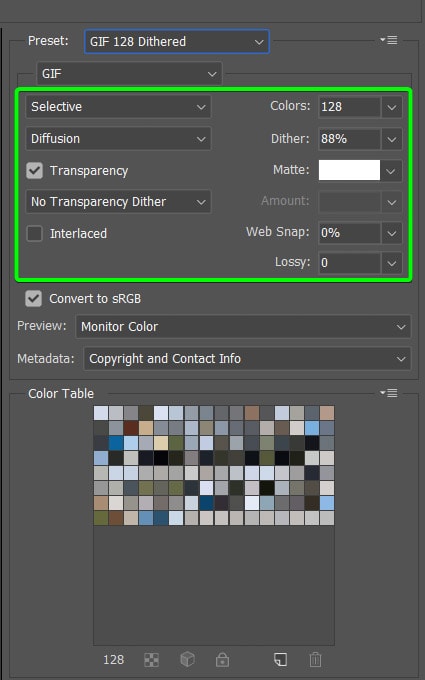
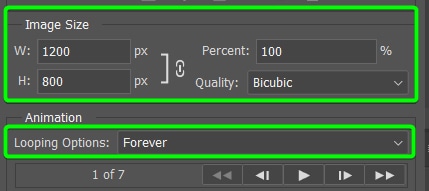
After selecting a preset, you can manually adjust the settings to customize them. You can also change the GIF dimensions, affecting the file size. You can reduce the file size without affecting the quality, but increasing the size too much will reduce the quality. You can also set how much the GIF loops.
Once you have adjusted the export settings, click Save, and you can choose a save location for your edited GIF.
